

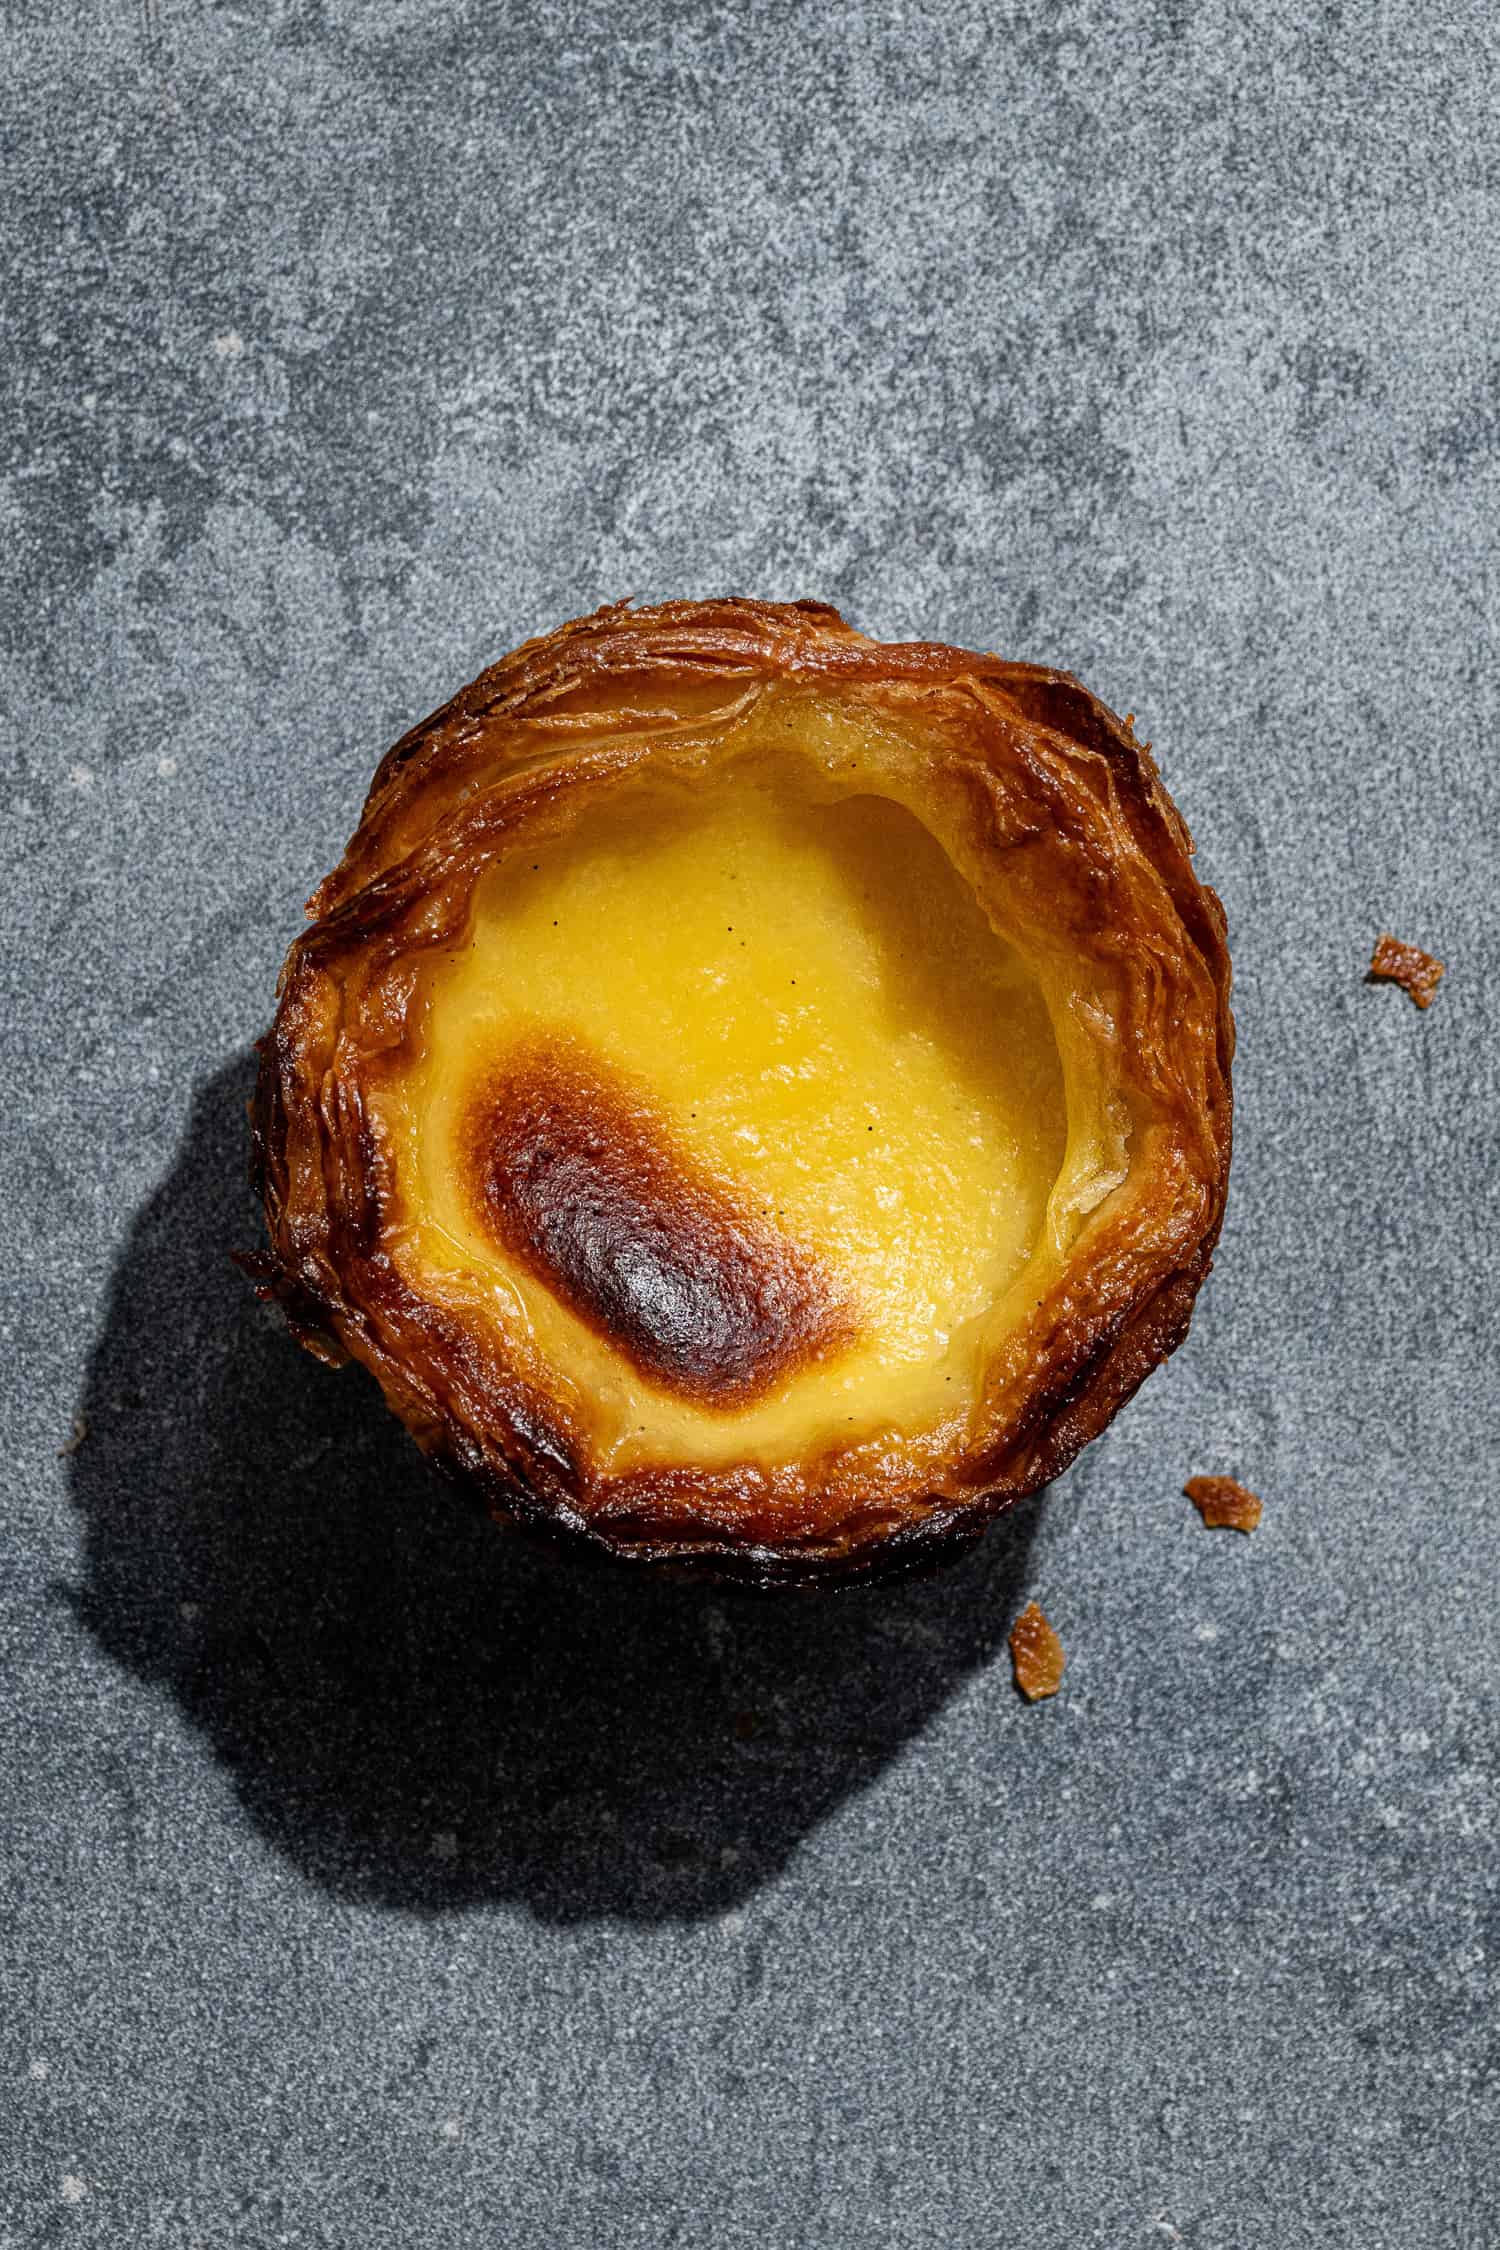
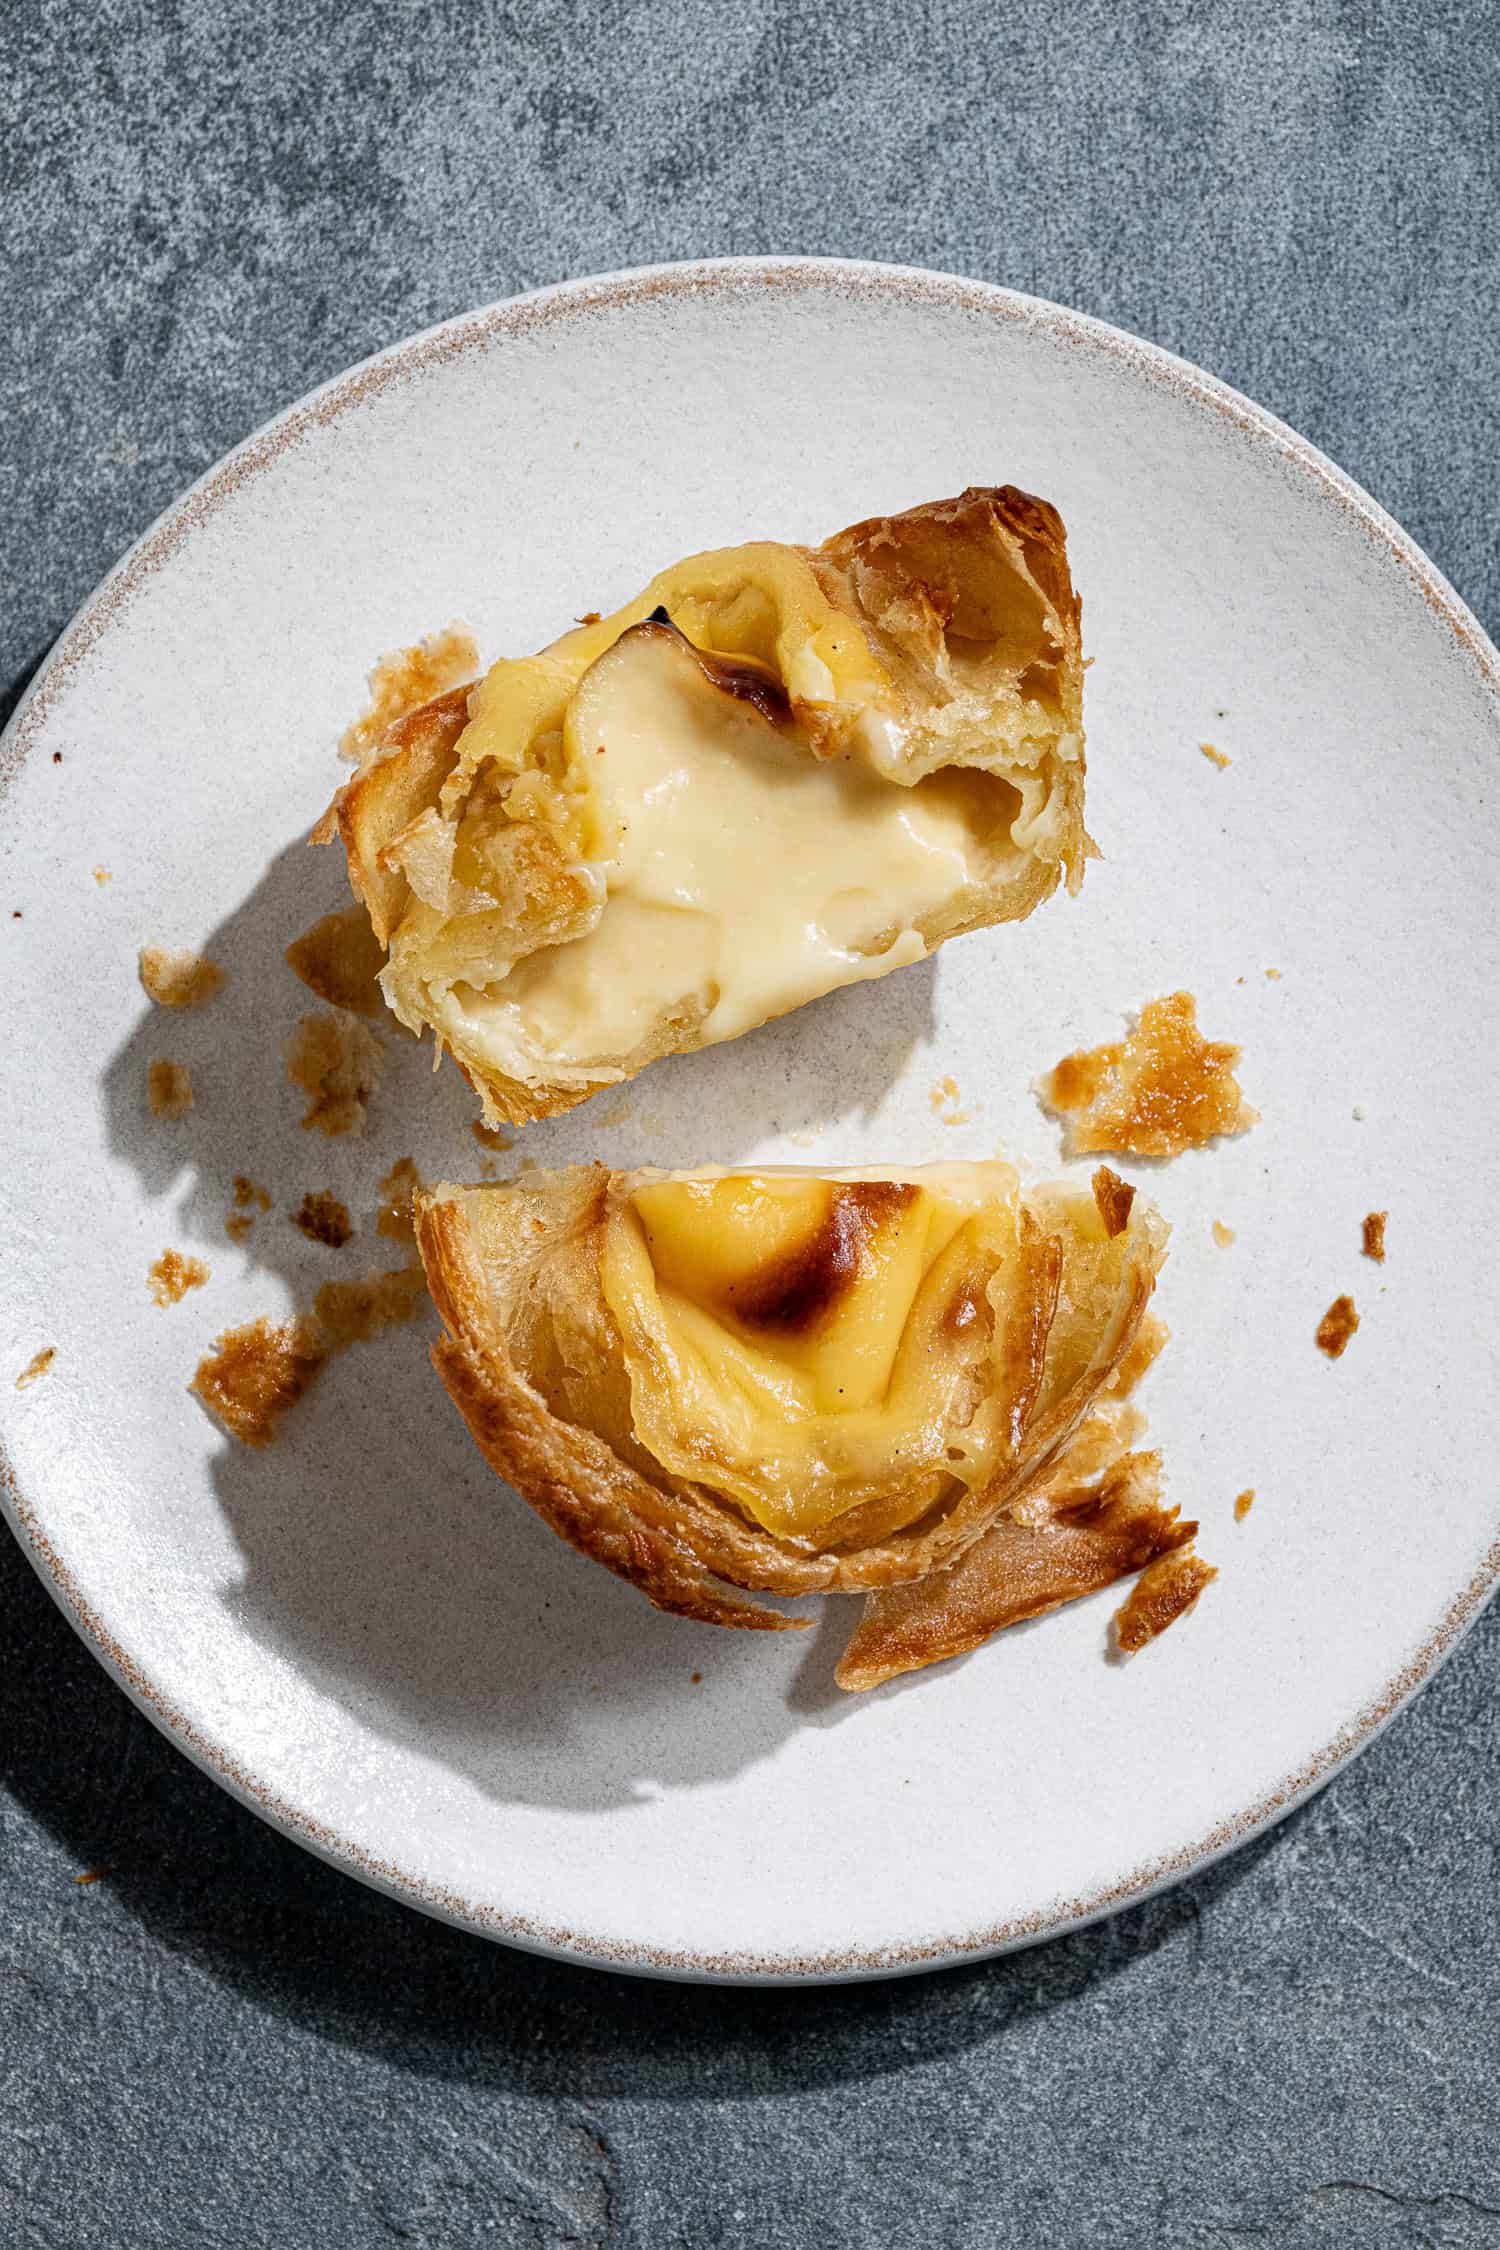
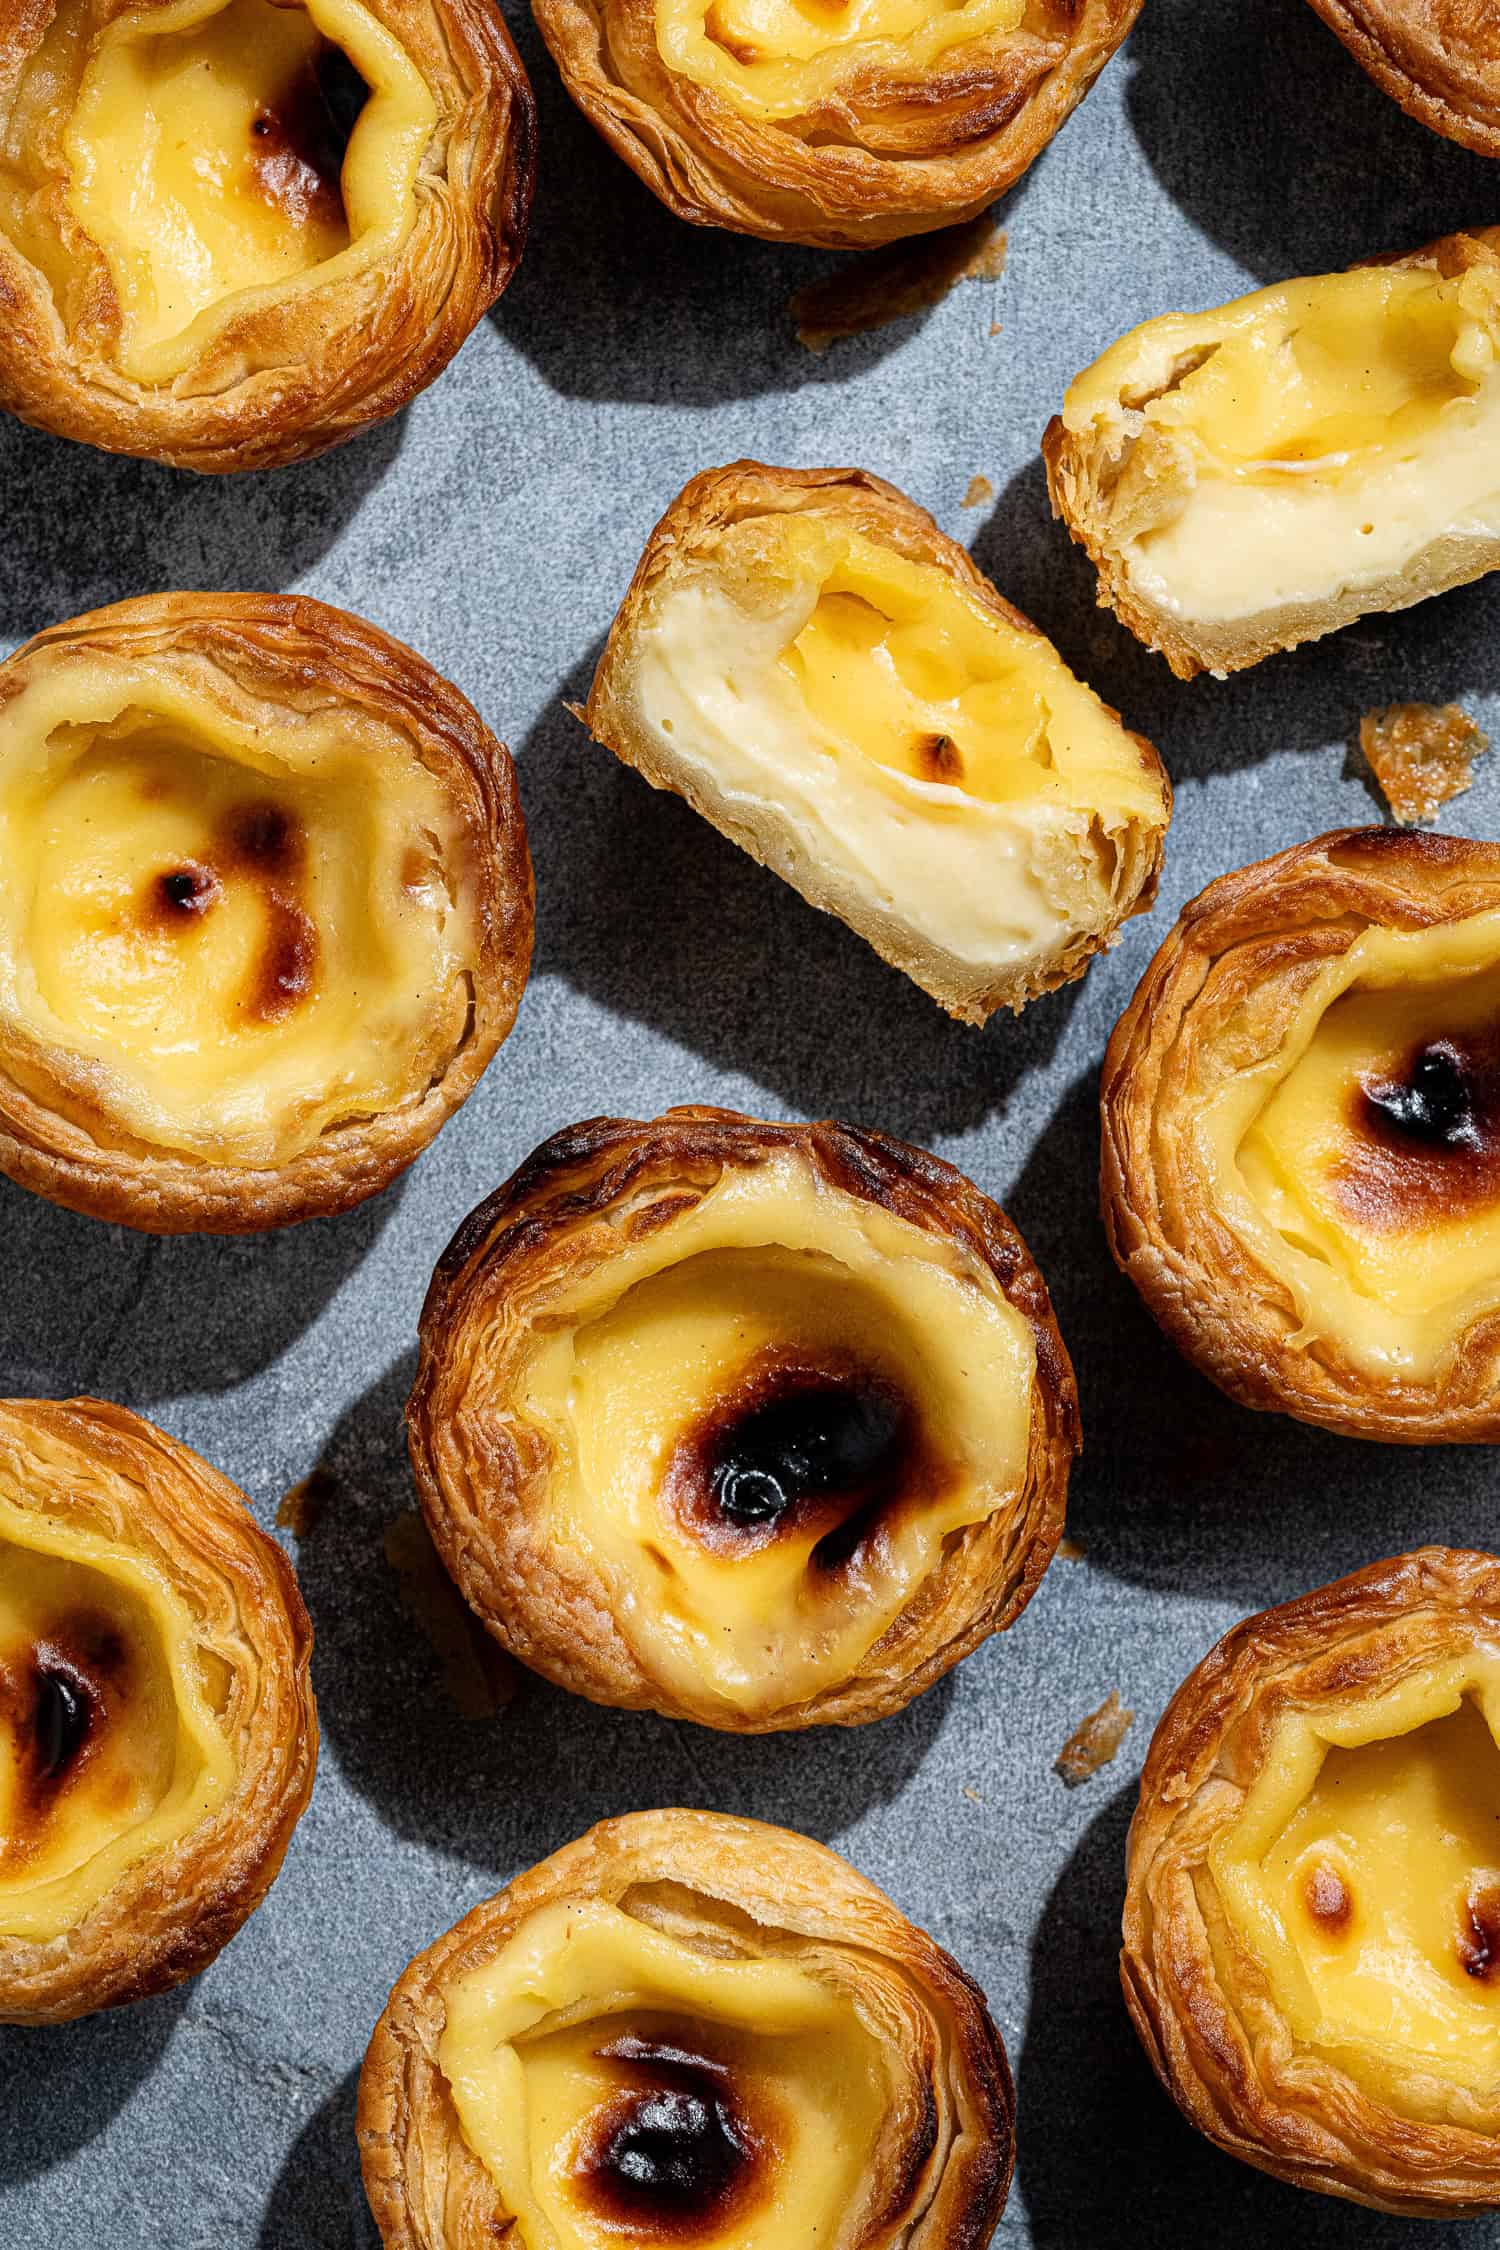
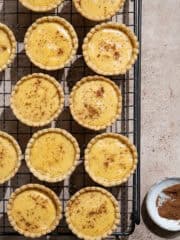
These vegan pastéis de nata are addictively good! With shatteringly crisp laminated pastry and a soft, creamy, lemon and cinnamon scented custard filling, these vegan custard tarts are a real treat.

What Are Pastéis De Nata?:
Pastéis de nata are iconic Portuguese custard tarts consisting of flaky, crisp pastry shells filled with a creamy egg custard and baked at a very high temperature so that they blister on top, giving them their classic, dark spotted appearance. Originating from Lisbon's Jerónimos Monastery before the 19th century, they are commonly served warm, sometimes dusted with cinnamon or icing sugar.
They differ from a classic British egg custard tart in several ways. Firstly a British custard tart uses shortcrust pastry, whereas a pastel de nata has a much more crisp, flaky, laminated pastry, somewhere between puff pastry and filo.
Secondly, British custard tarts have a set custard filling that is set with just eggs, no flour, and is flavoured with nutmeg; whereas pastéis de nata have an almost molten filling made with egg yolks and often some flour as well. It is flavoured with lemon zest and cinnamon and sweetened with a sugar syrup.
Now obviously as these are vegan pastéis de nata and therefore do not contain eggs, they are not going to be truly authentic; they are however incredibly good and utterly addictive!
Because the custard filling is less rich without the egg yolks, I skipped the sugar syrup as I did not think that it was necessary, and I also reduced the amount of sugar as they can be a bit tooth-achingly sweet. I still take the step of infusing the milk with cinnamon and lemon zest before making the custard however to ensure that the flavour is right.
Ingredient Details:
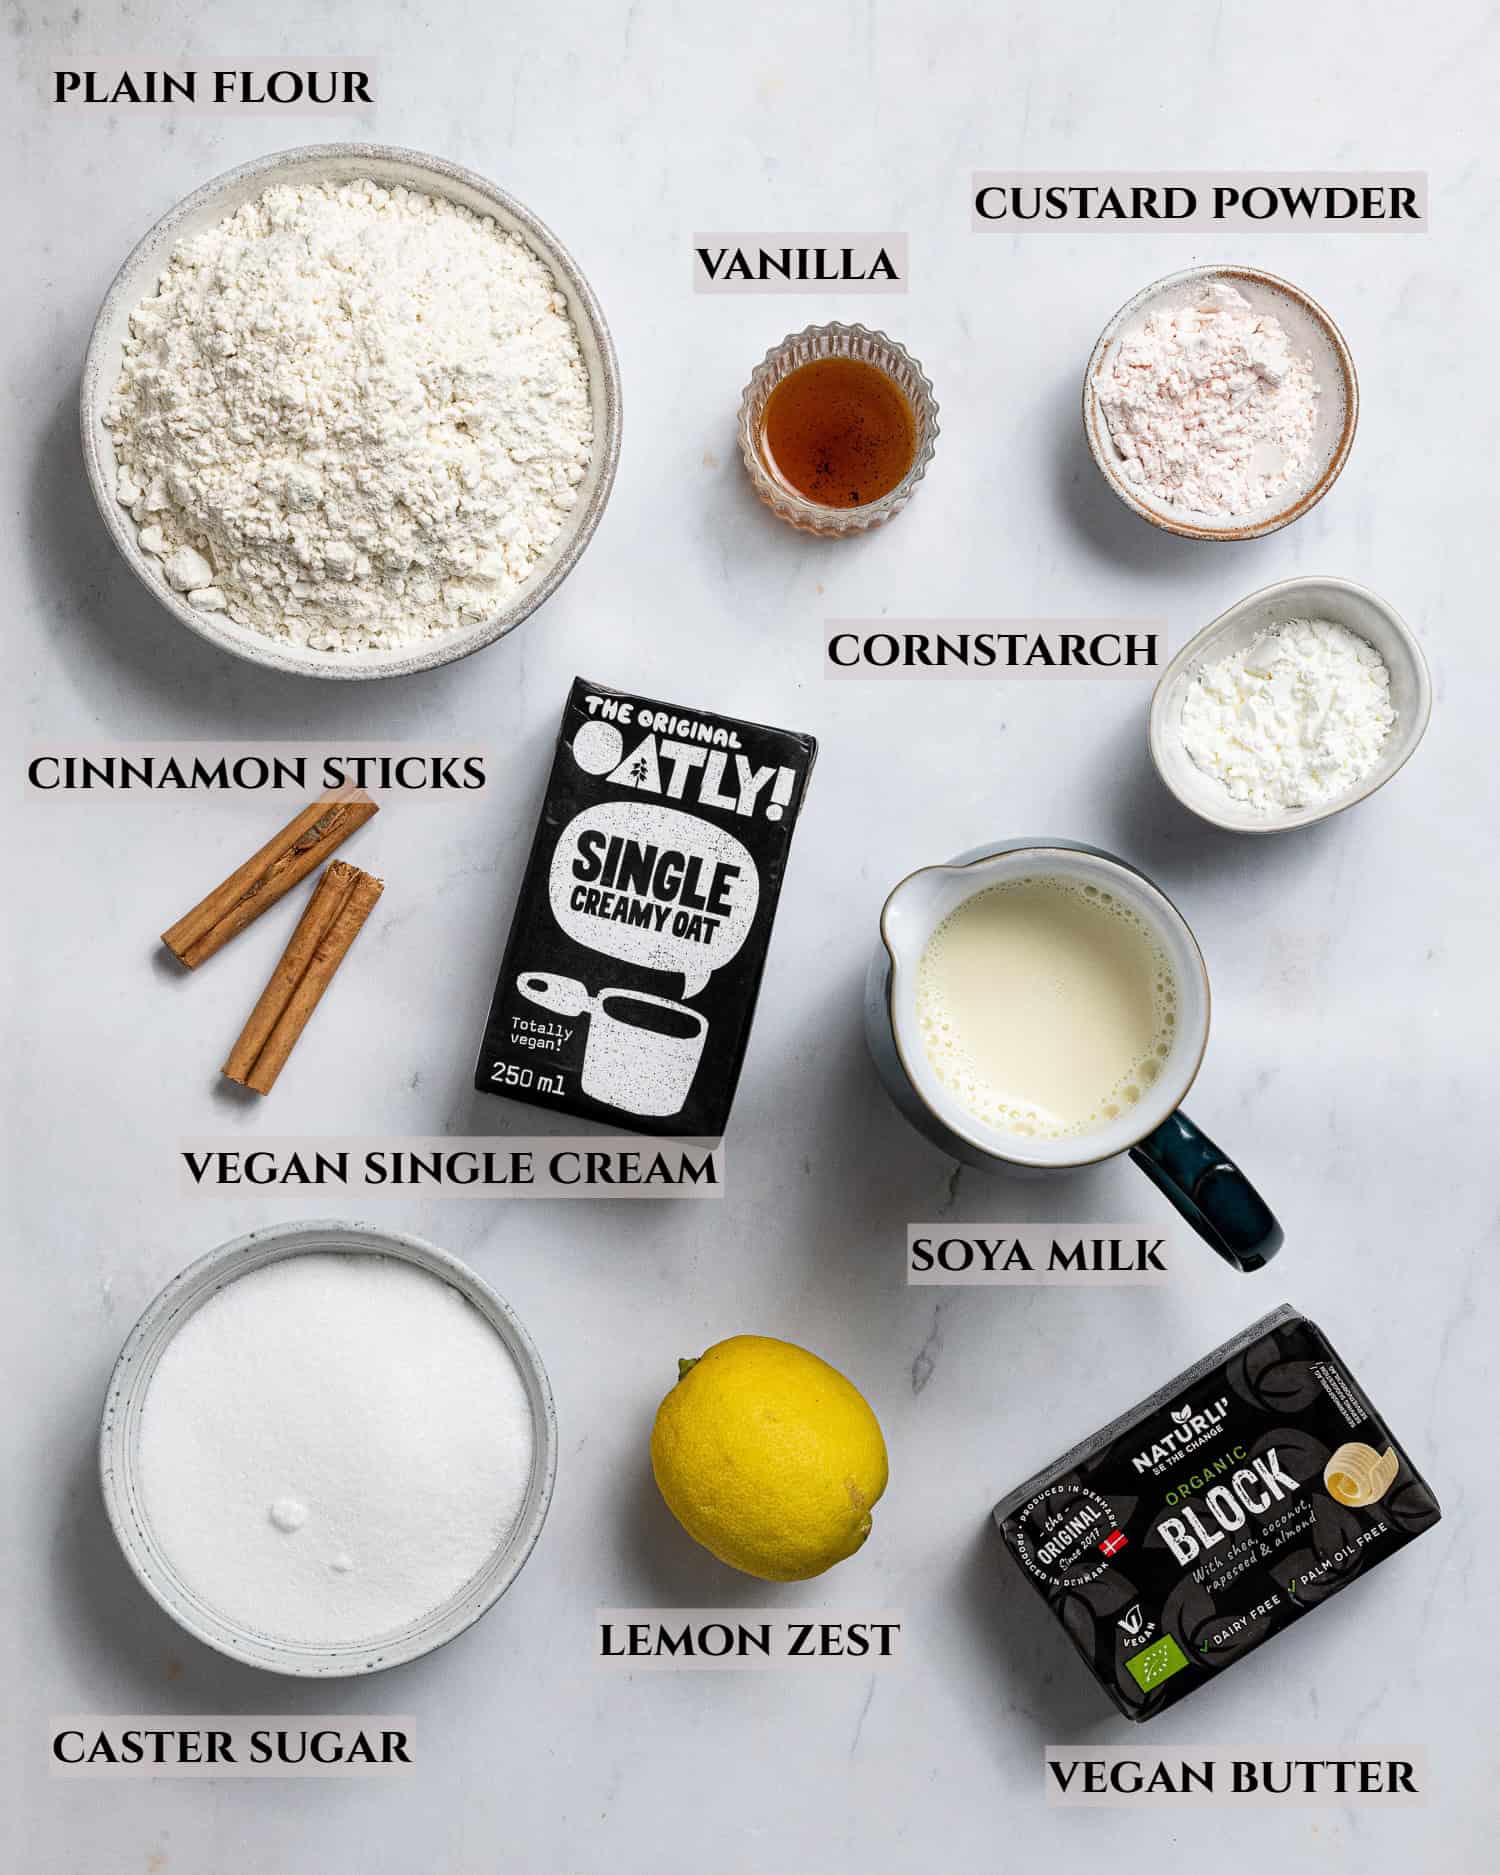
Vegan single/pouring cream: Using a mixture of milk and cream gives the custard a richer, creamier mouthfeel and better flavour. I use Oatly creamy oat, but Alpro single soya is also good. You could also use full fat coconut milk if you don't mind a hint of coconut flavour.
Non-Dairy Milk: I recommend using unsweetened soy milk as it has a neutral flavour and creamy texture. If you can't use soy then a creamier milk like cashew or oat would be best.
Custard powder + cornstarch: This is what sets the custard. Most custard powders are vegan friendly (such as Bird's, which is what I used), but do check the packet just in case.
I really don't recommend swapping the cornstarch for any other kind of starch or flour, you will not get the right texture. You can however use all custard powder OR all cornstarch if you don't have both.
Vegan block butter: For the pastry you absolutely must use a block butter/margarine, not the spreadable kind in a tub which will not set firm enough. I got the best results using Naturli vegan block so I recommend using that if possible.
Sugar: You will need either caster or granulated sugar. These vegan Portuguese custard tarts cannot be made with sweeteners or liquid sugars.
Plain flour: Plain (all-purpose) flour is best for the pastry.
Lemon zest: You will need a couple of strips of lemon zest which you can do with a vegetable peeler. Make sure that you buy unwaxed lemons!
Cinnamon sticks: To infuse the custard. You can use 1 or 2 depending on how strong you want the flavour to be.
How To Make Vegan Pastéis De Nata:
(Full measurements and instructions can be found in the recipe card at the bottom of the page)
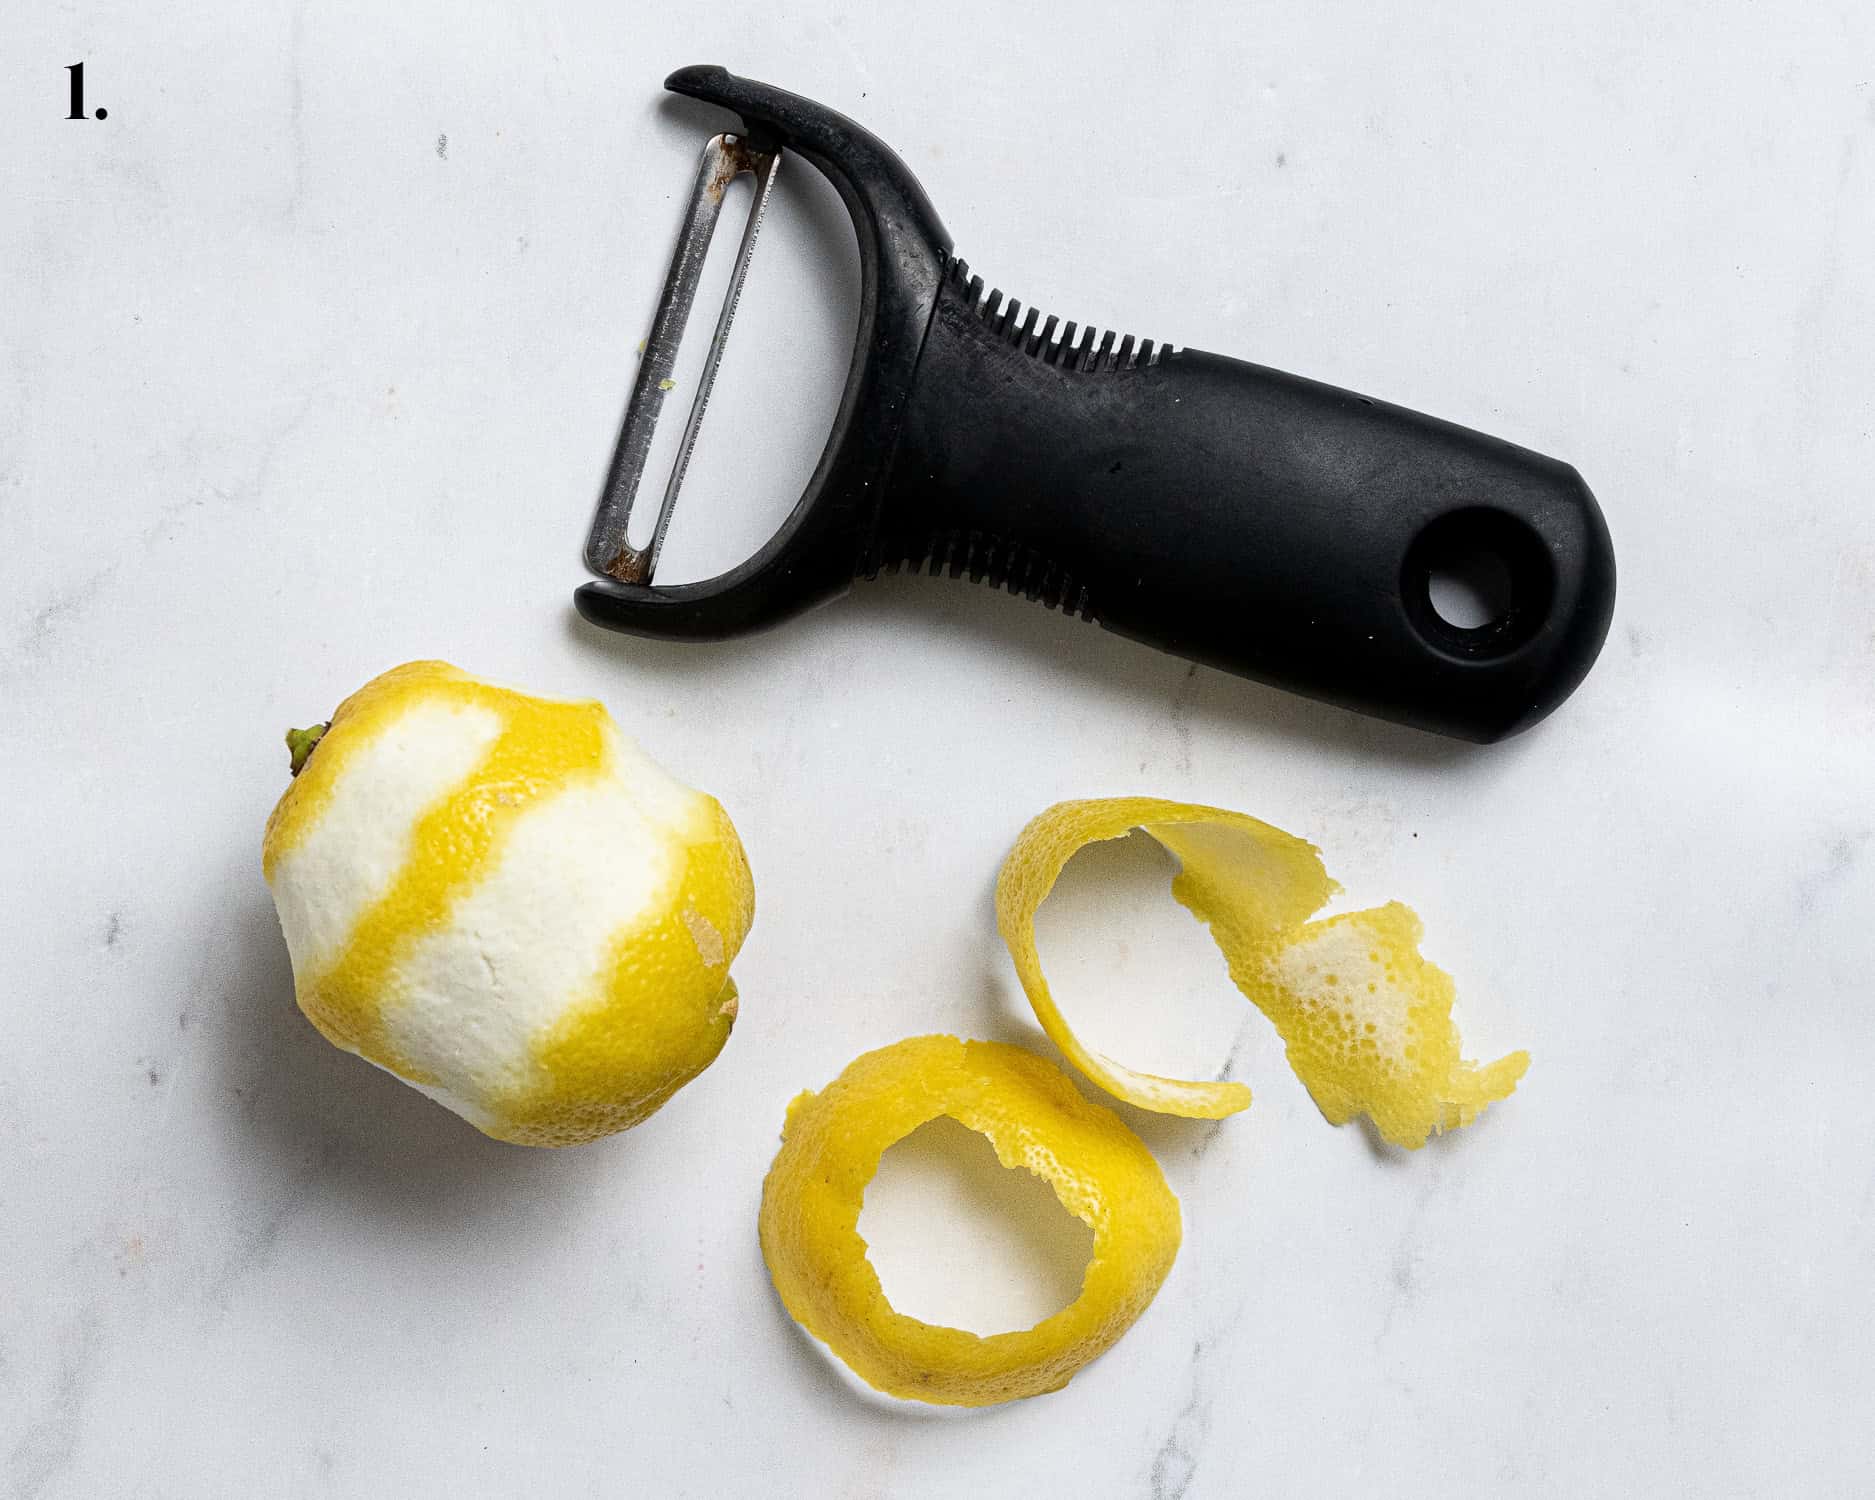
- Step 1: Use a vegetable peeler to peel the zest of a lemon into long strips.
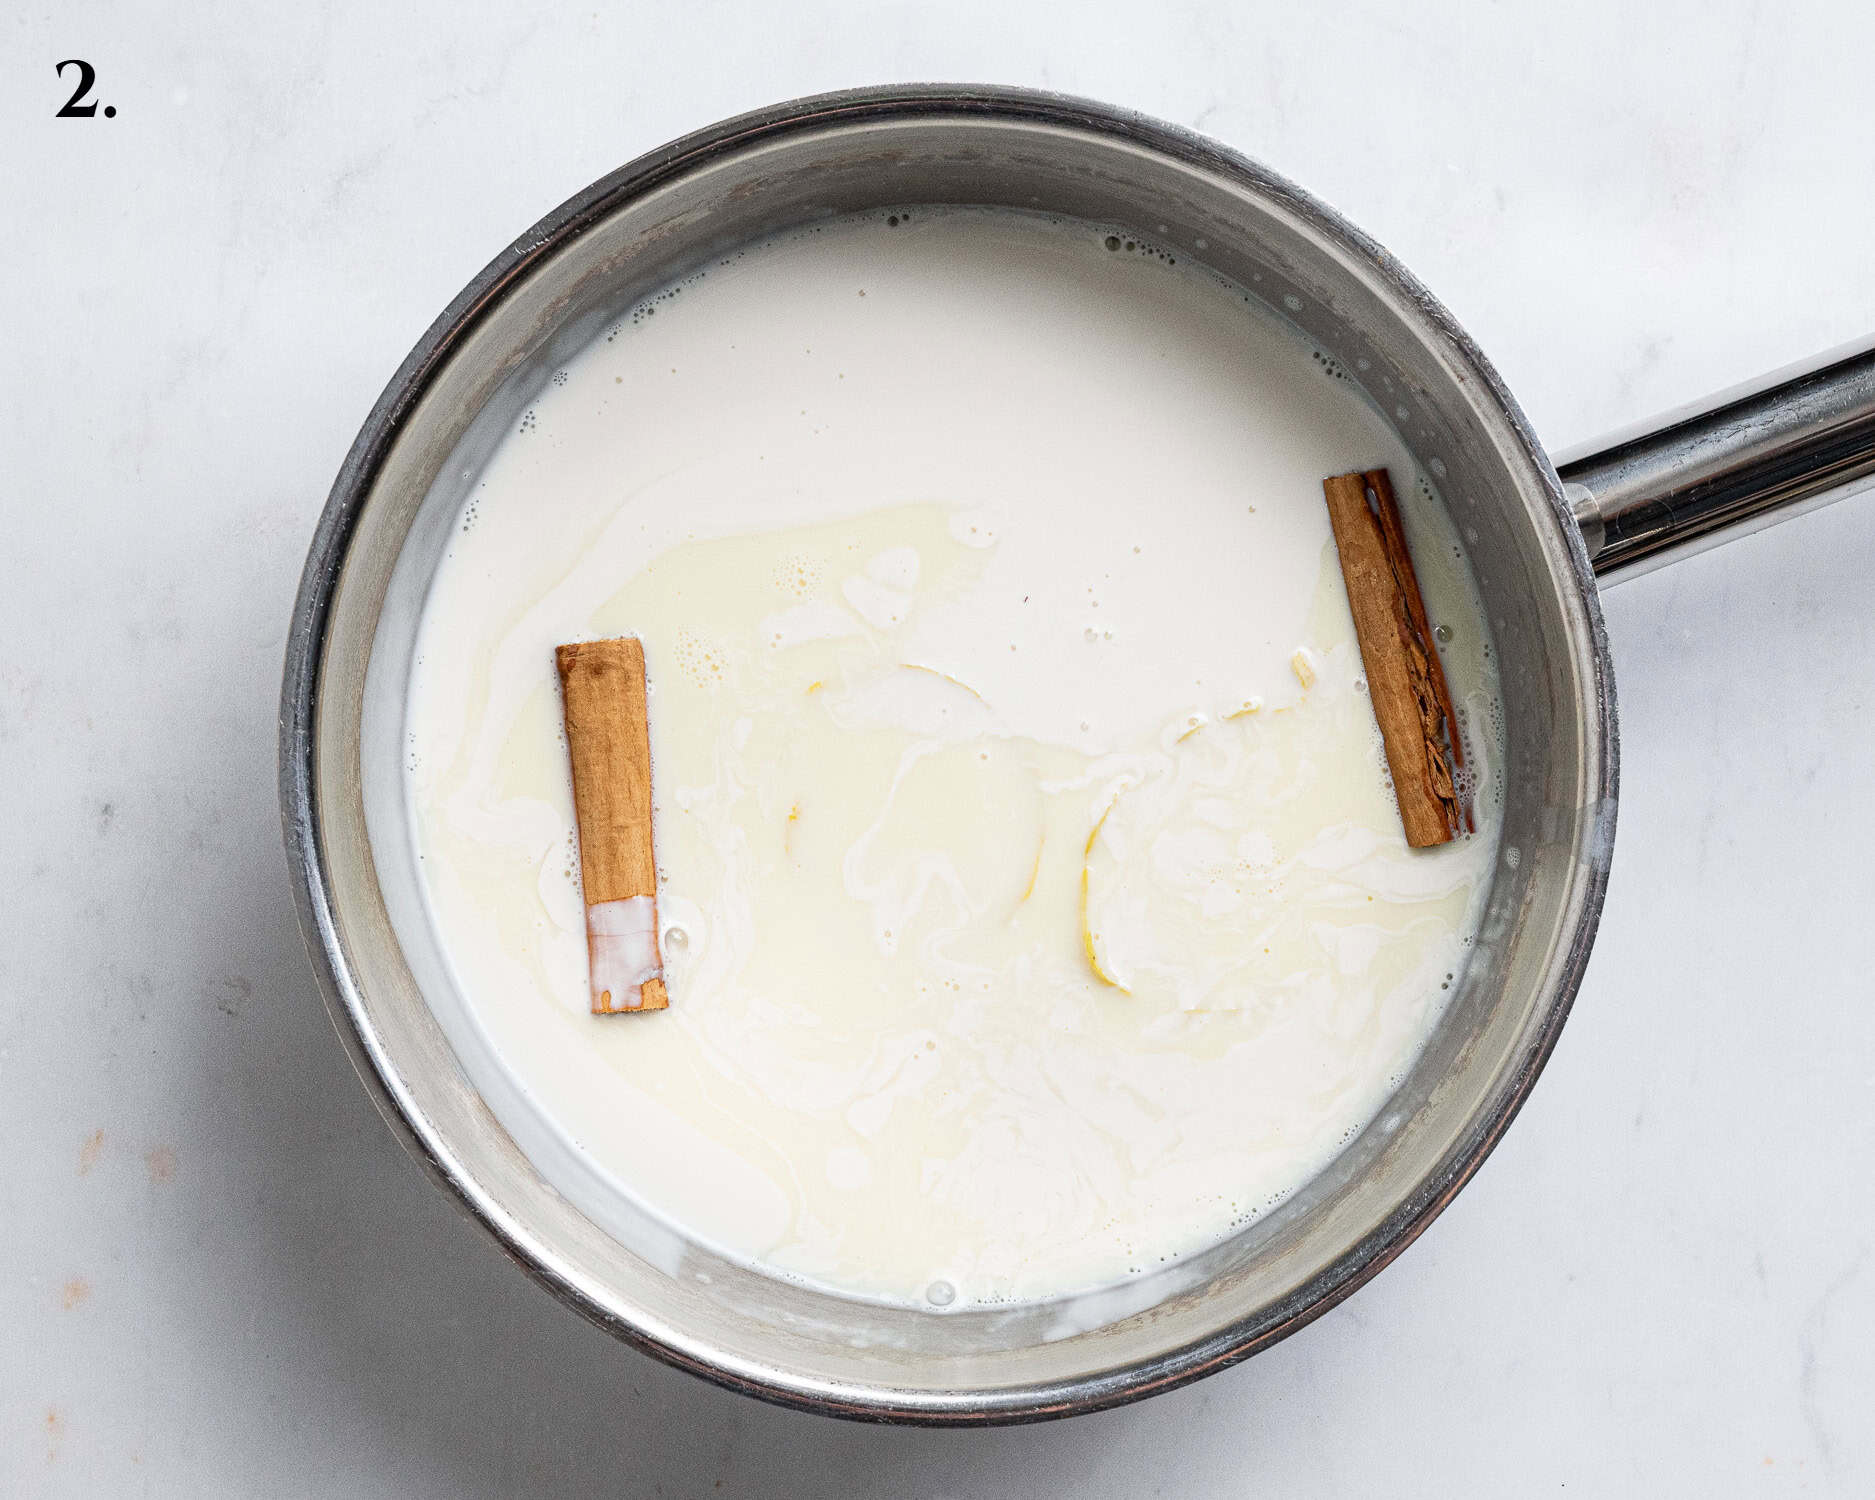
- Step 2: Place the lemon zest, cinnamon sticks, cream and most of the milk in a pan. Bring up to a simmer then remove from the heat and set aside to infuse for about 1 hour.
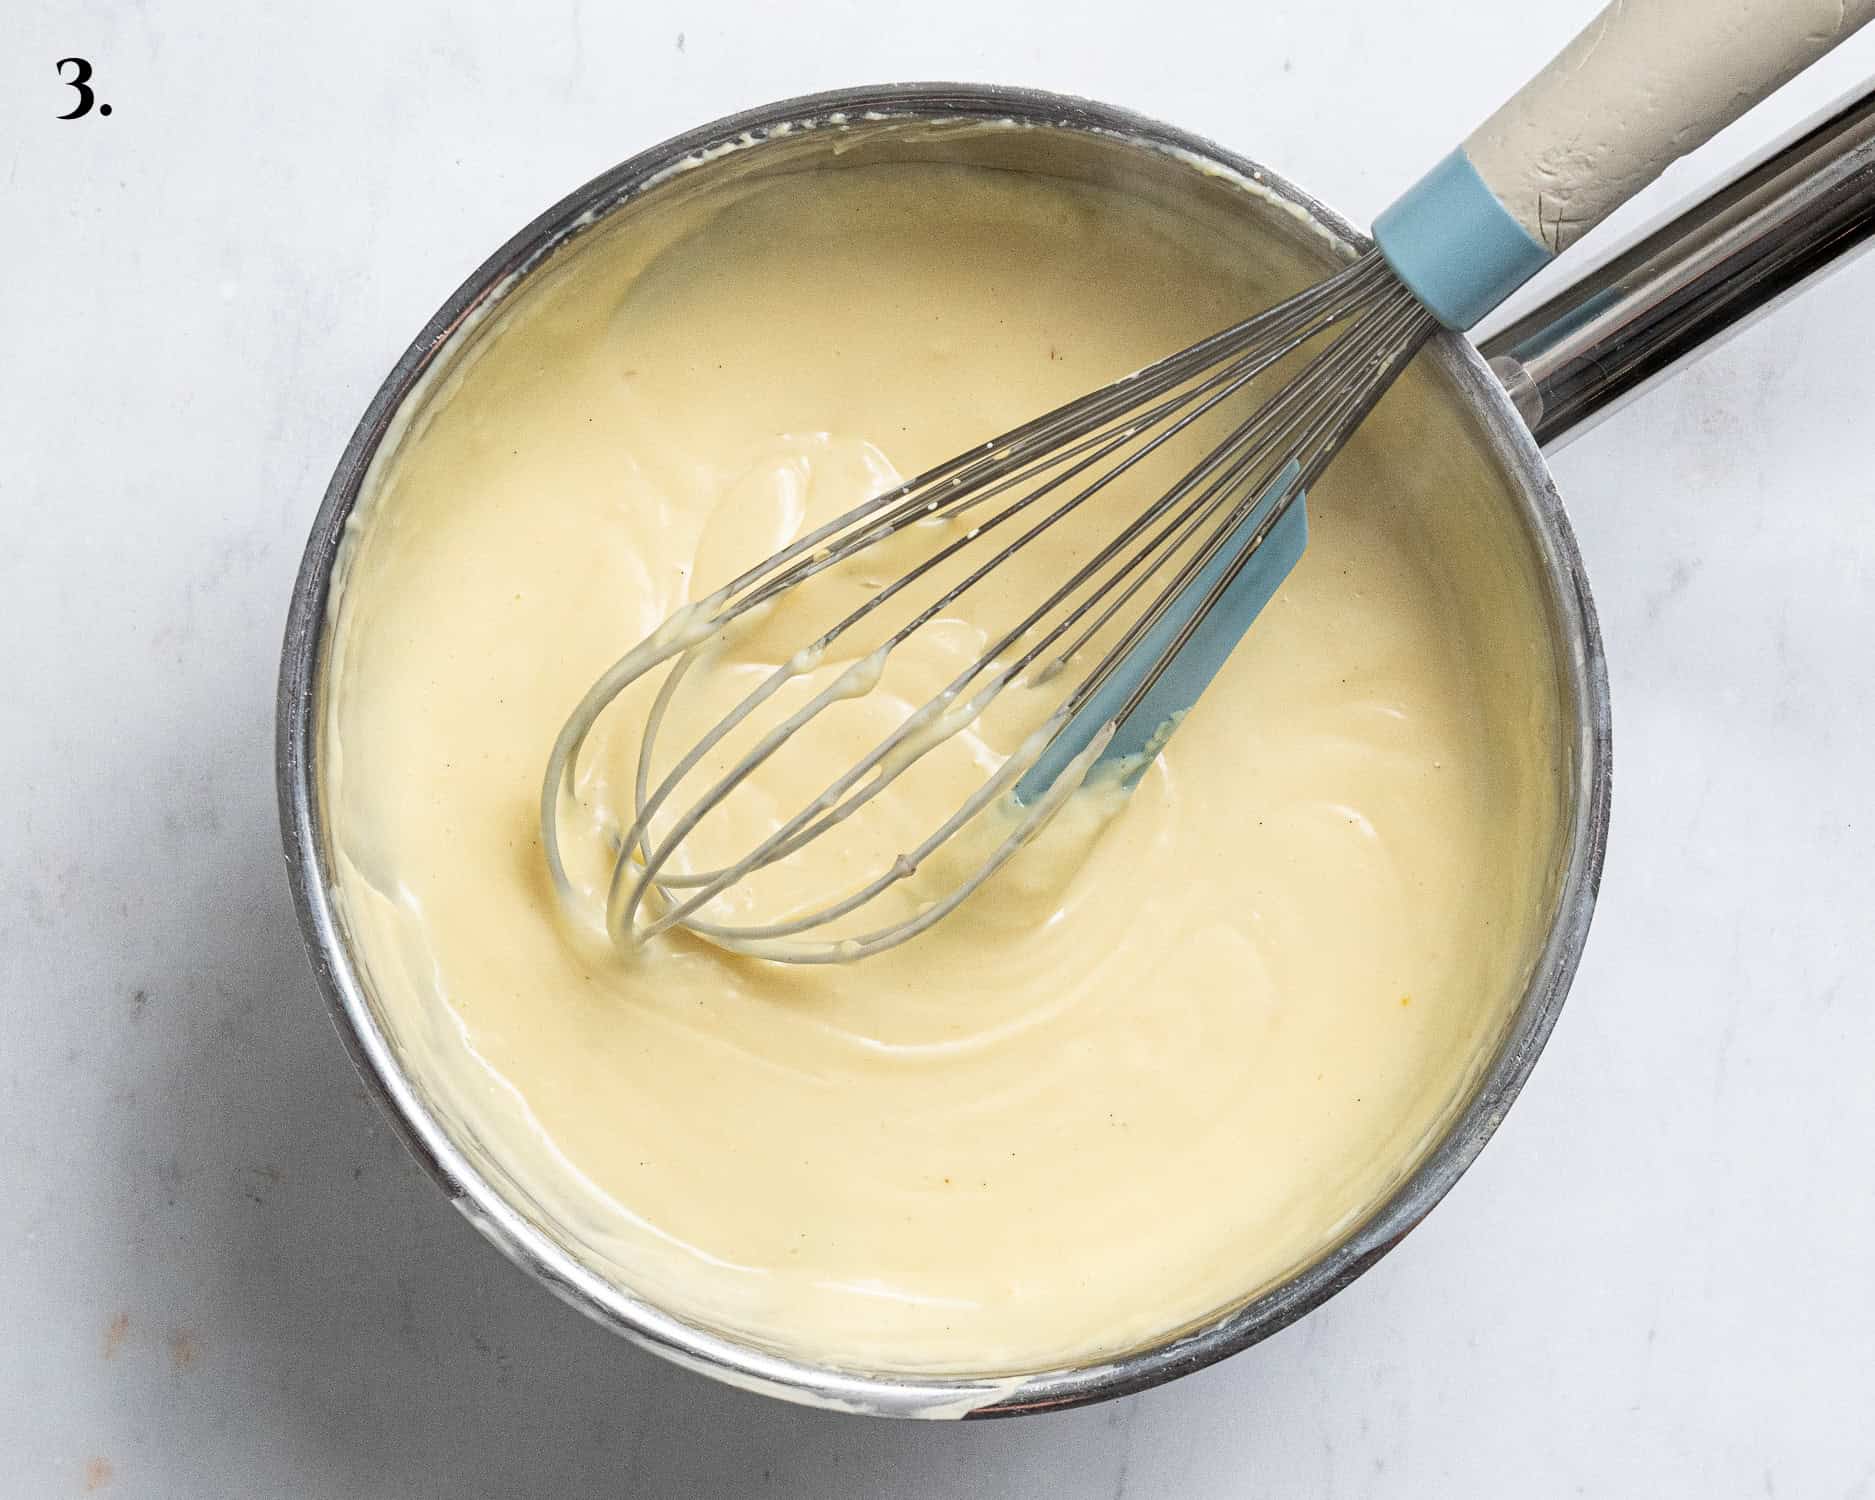
- Step 3: Mix the custard powder and cornflour with the remaining milk and add it to the pan along with the sugar and vanilla. Heat until thickened then whisk in the butter.
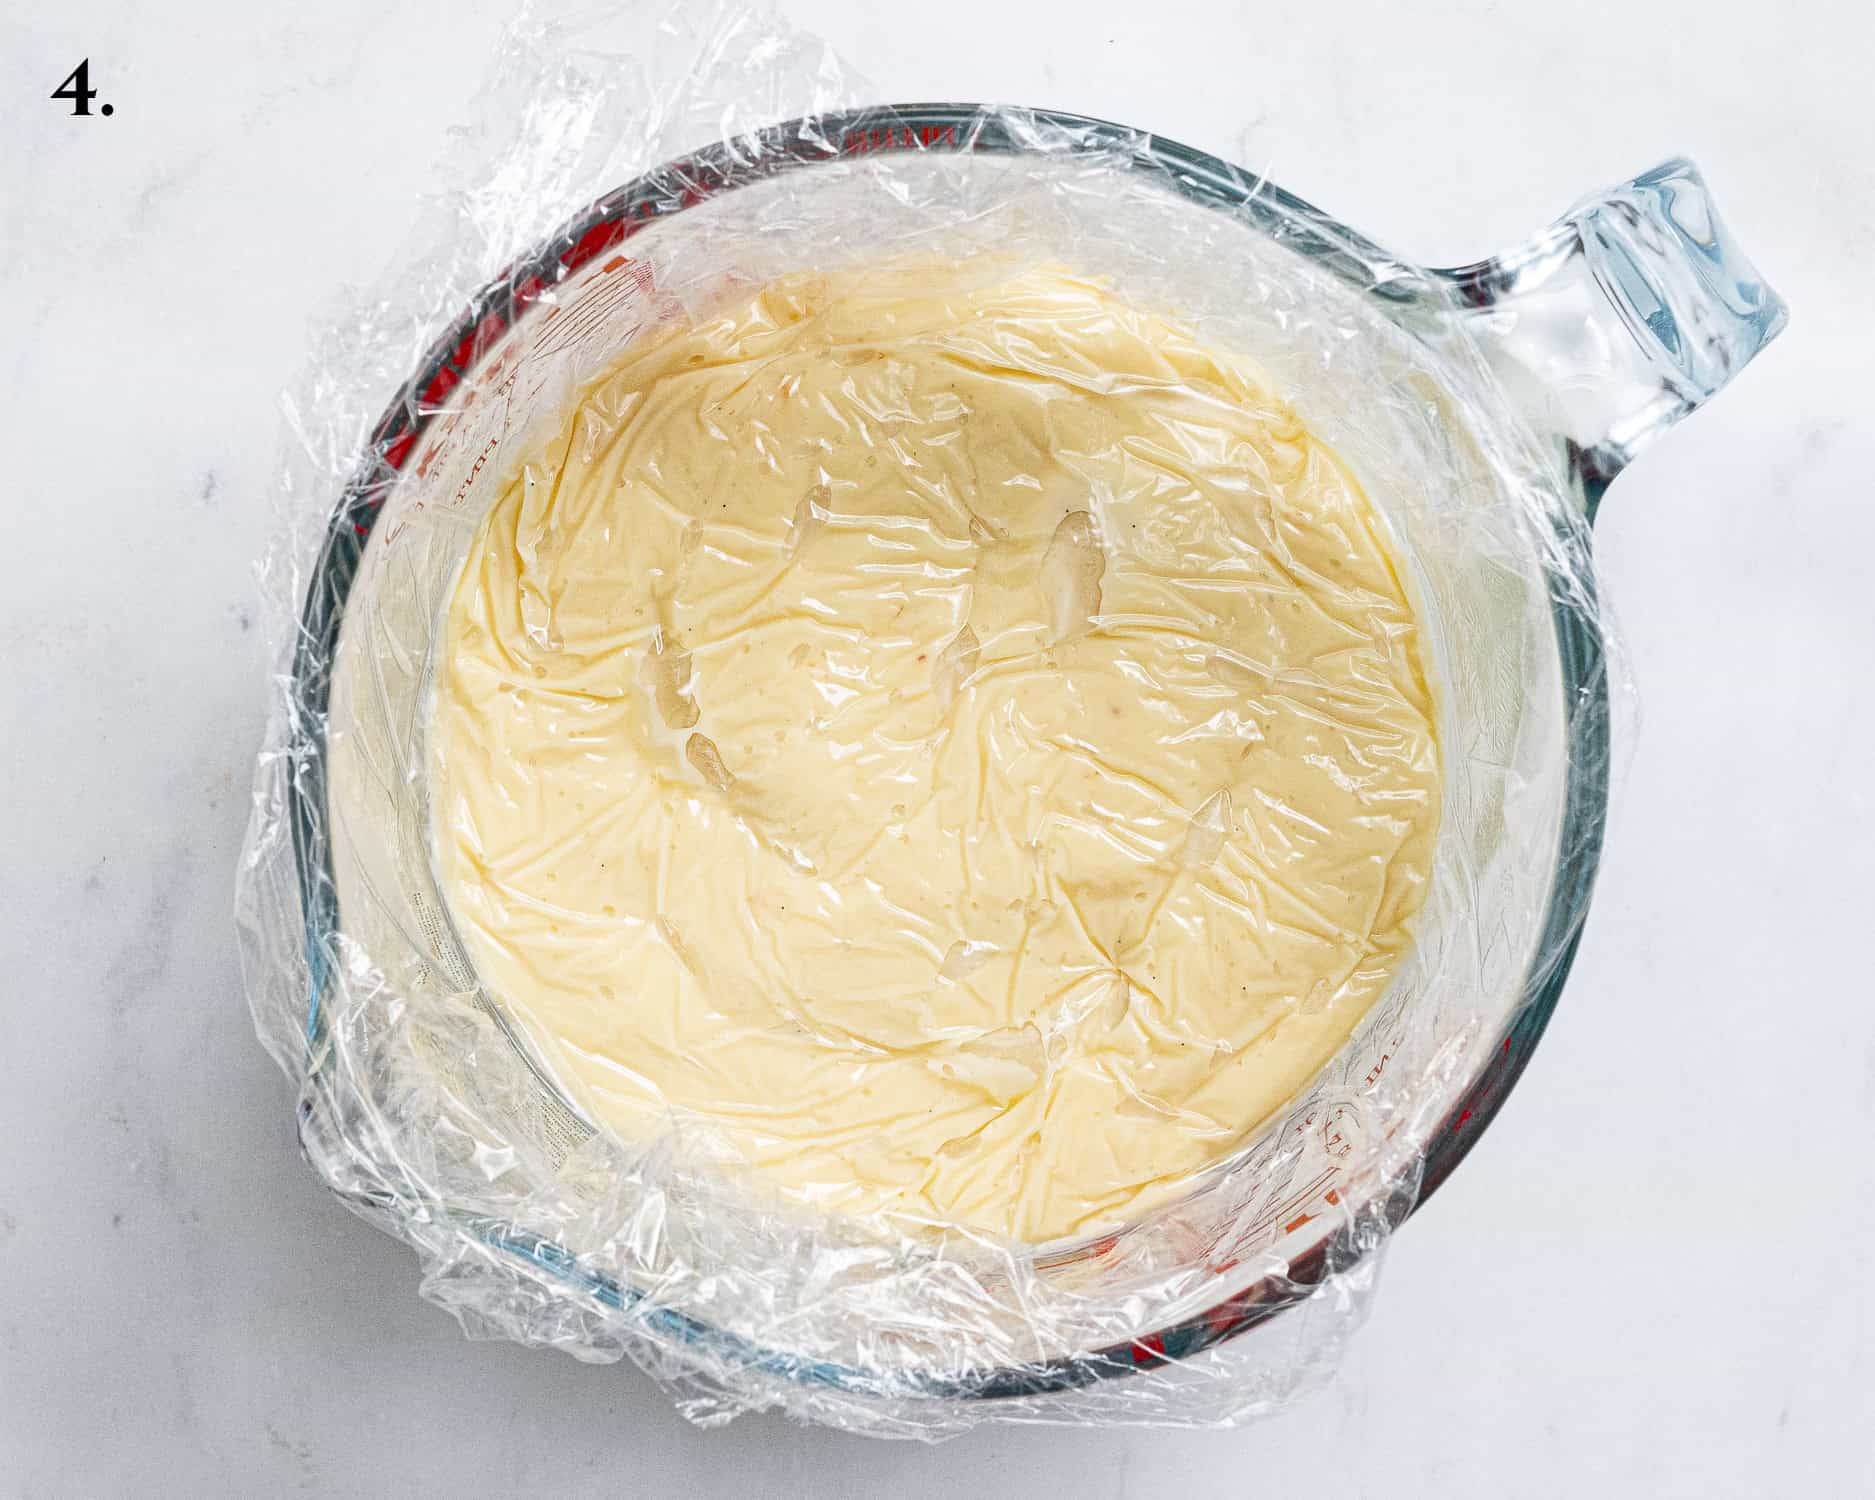
- Step 4: Pour the custard through a fine mesh sieve into a bowl or jug, cover with clingfilm directly on the surface and refrigerate overnight.
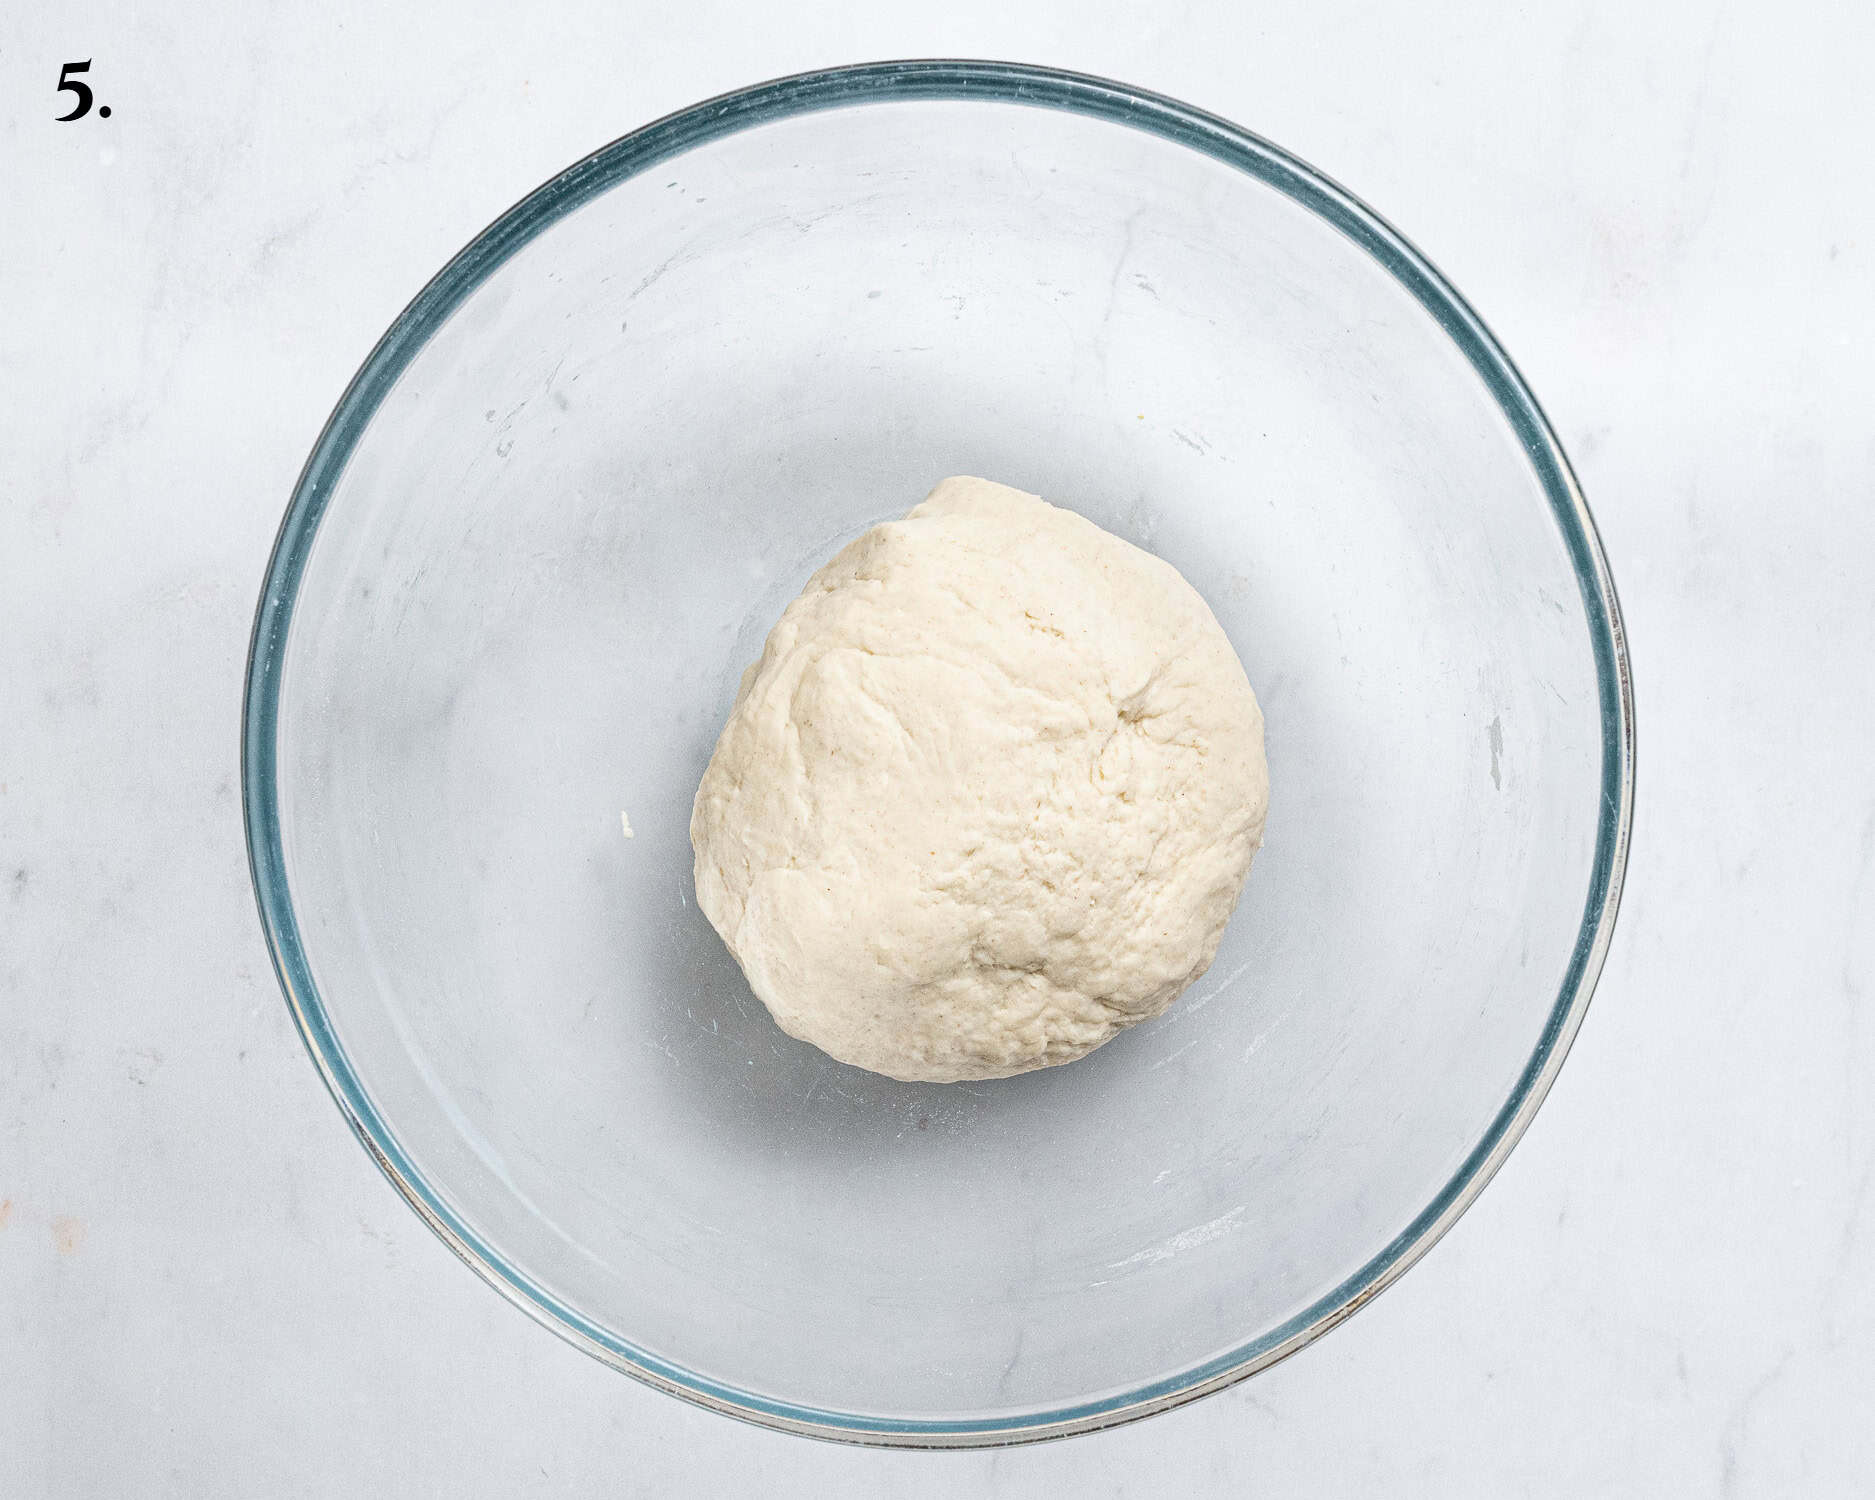
- Step 5: To make the pastry, mix the flour, salt and water together, knead briefly to make a smooth, stiff dough.
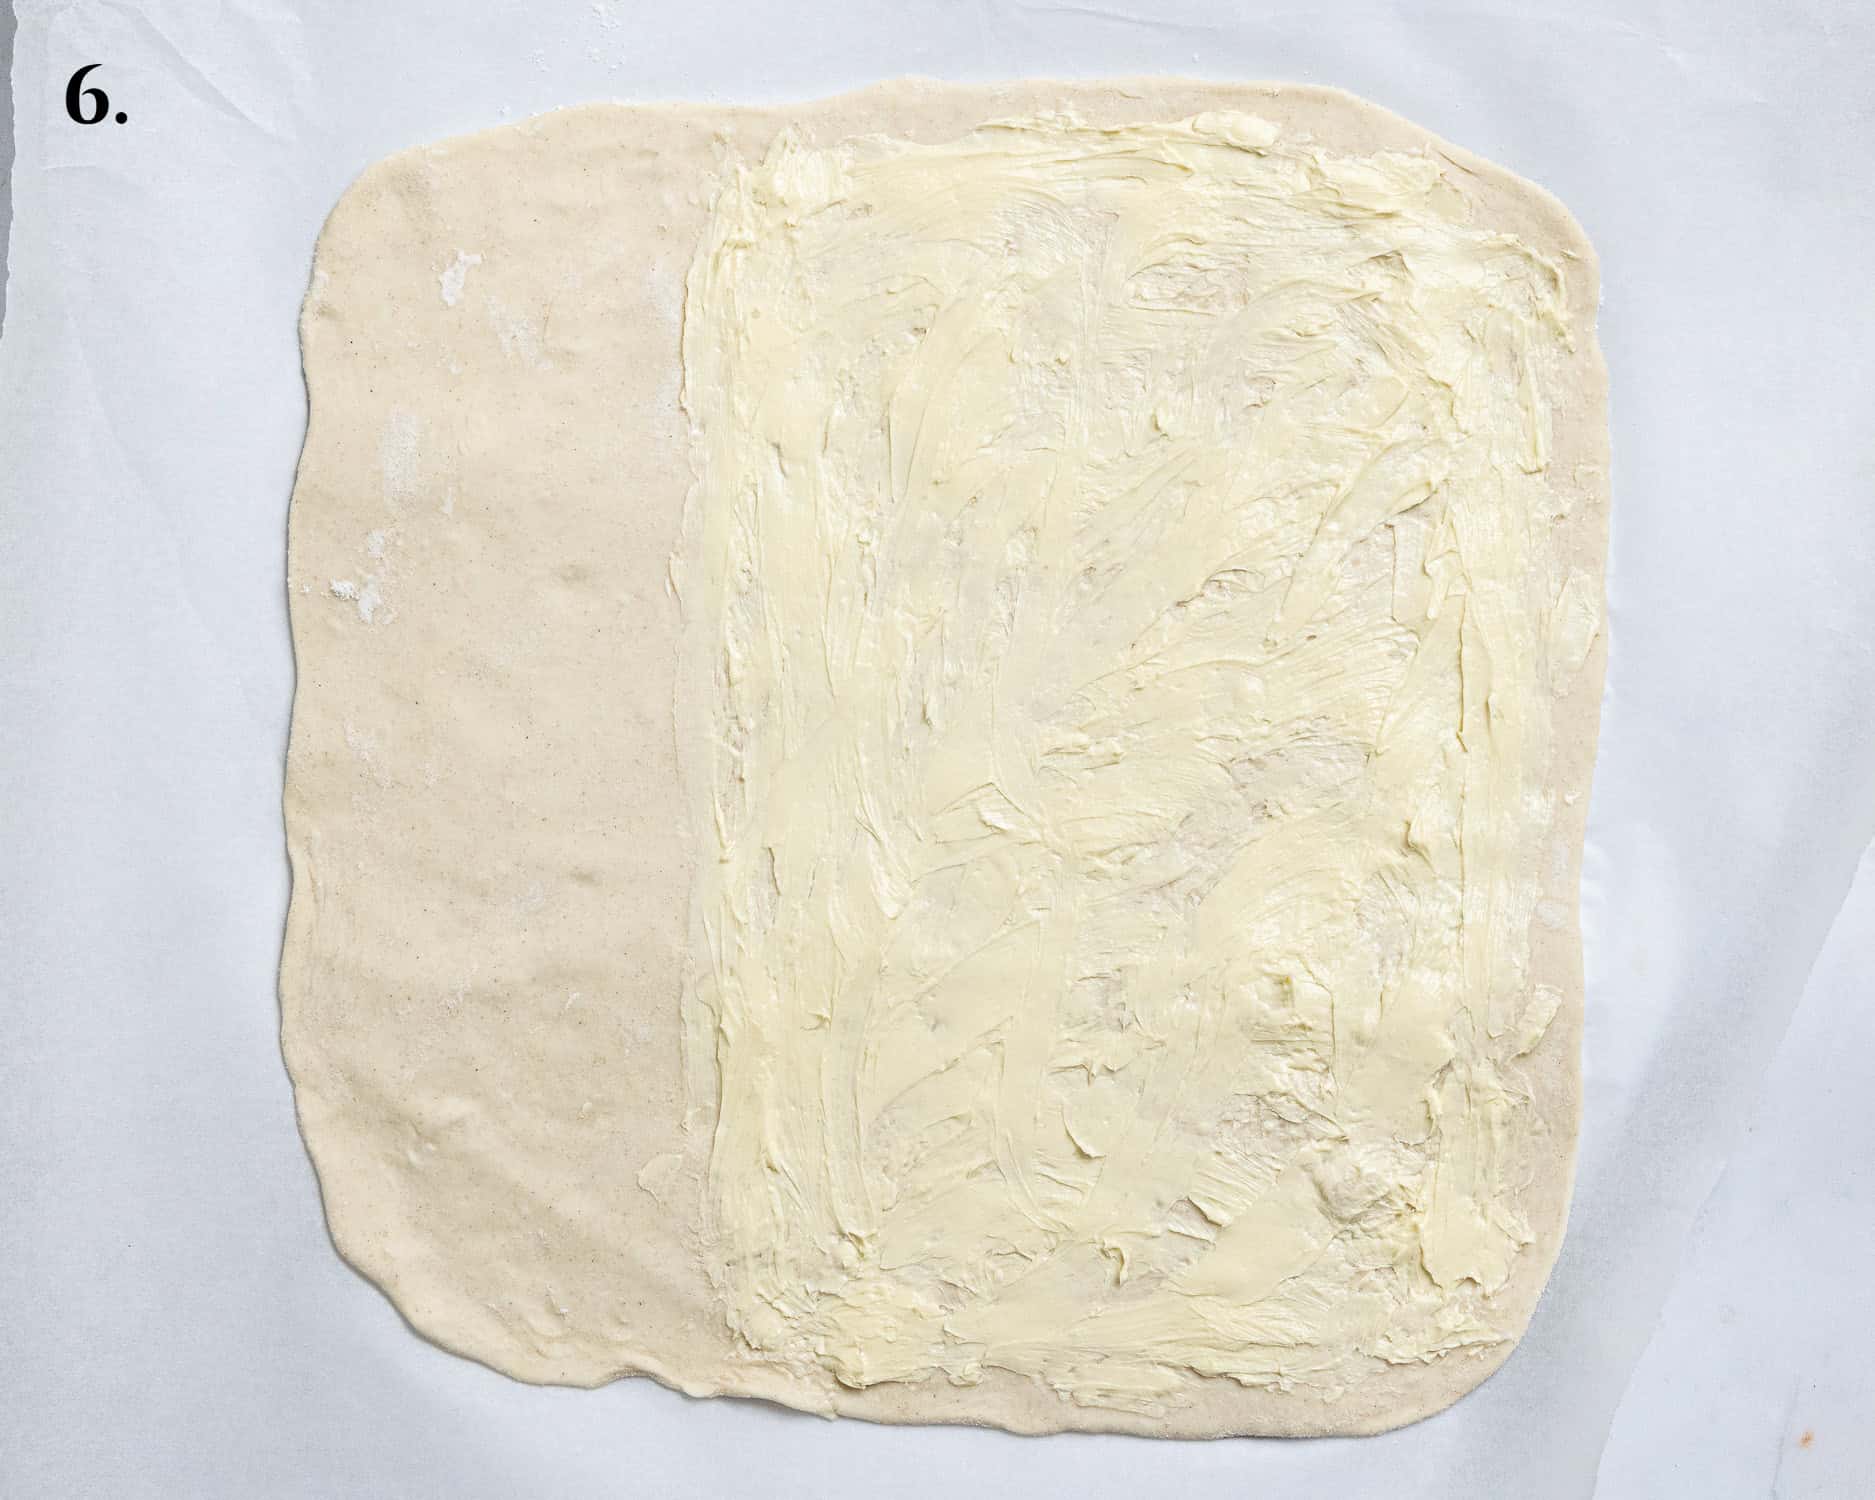
- Step 6: Roll the dough out thinly on a floured surface into a square. Spread ⅓rd of the butter thinly over ⅔rds of the dough, leaving a 1cm border.
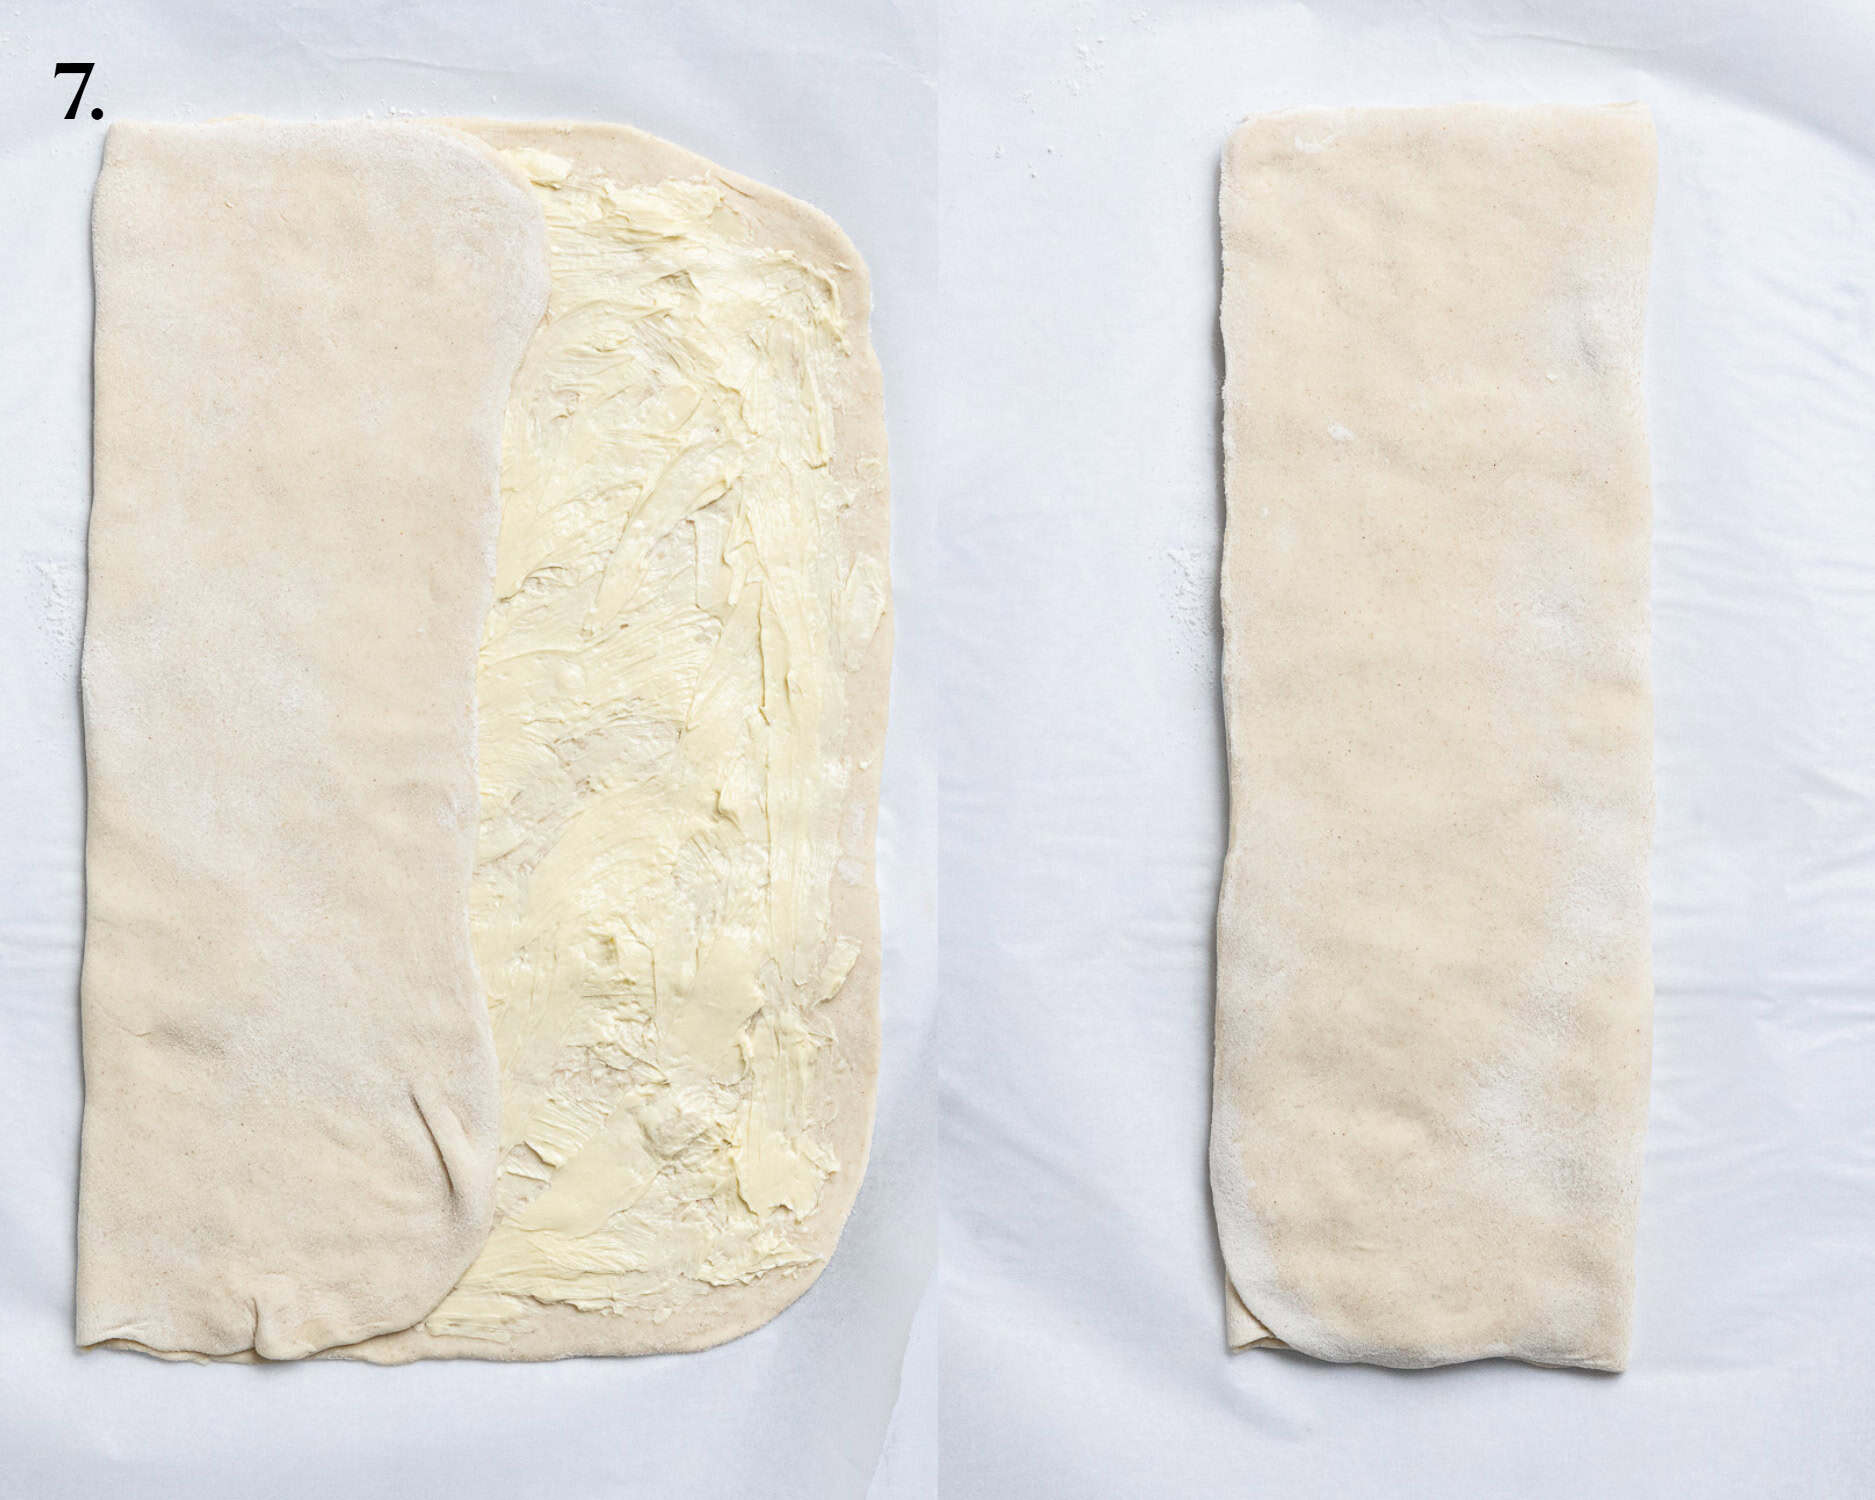
- Step 7: Fold the unbuttered third of dough over, brush off any excess flour, then fold the remaining buttered third on top. Turn the dough 90 degrees so that the fold is facing you. Roll out into a thin square and repeat these steps.
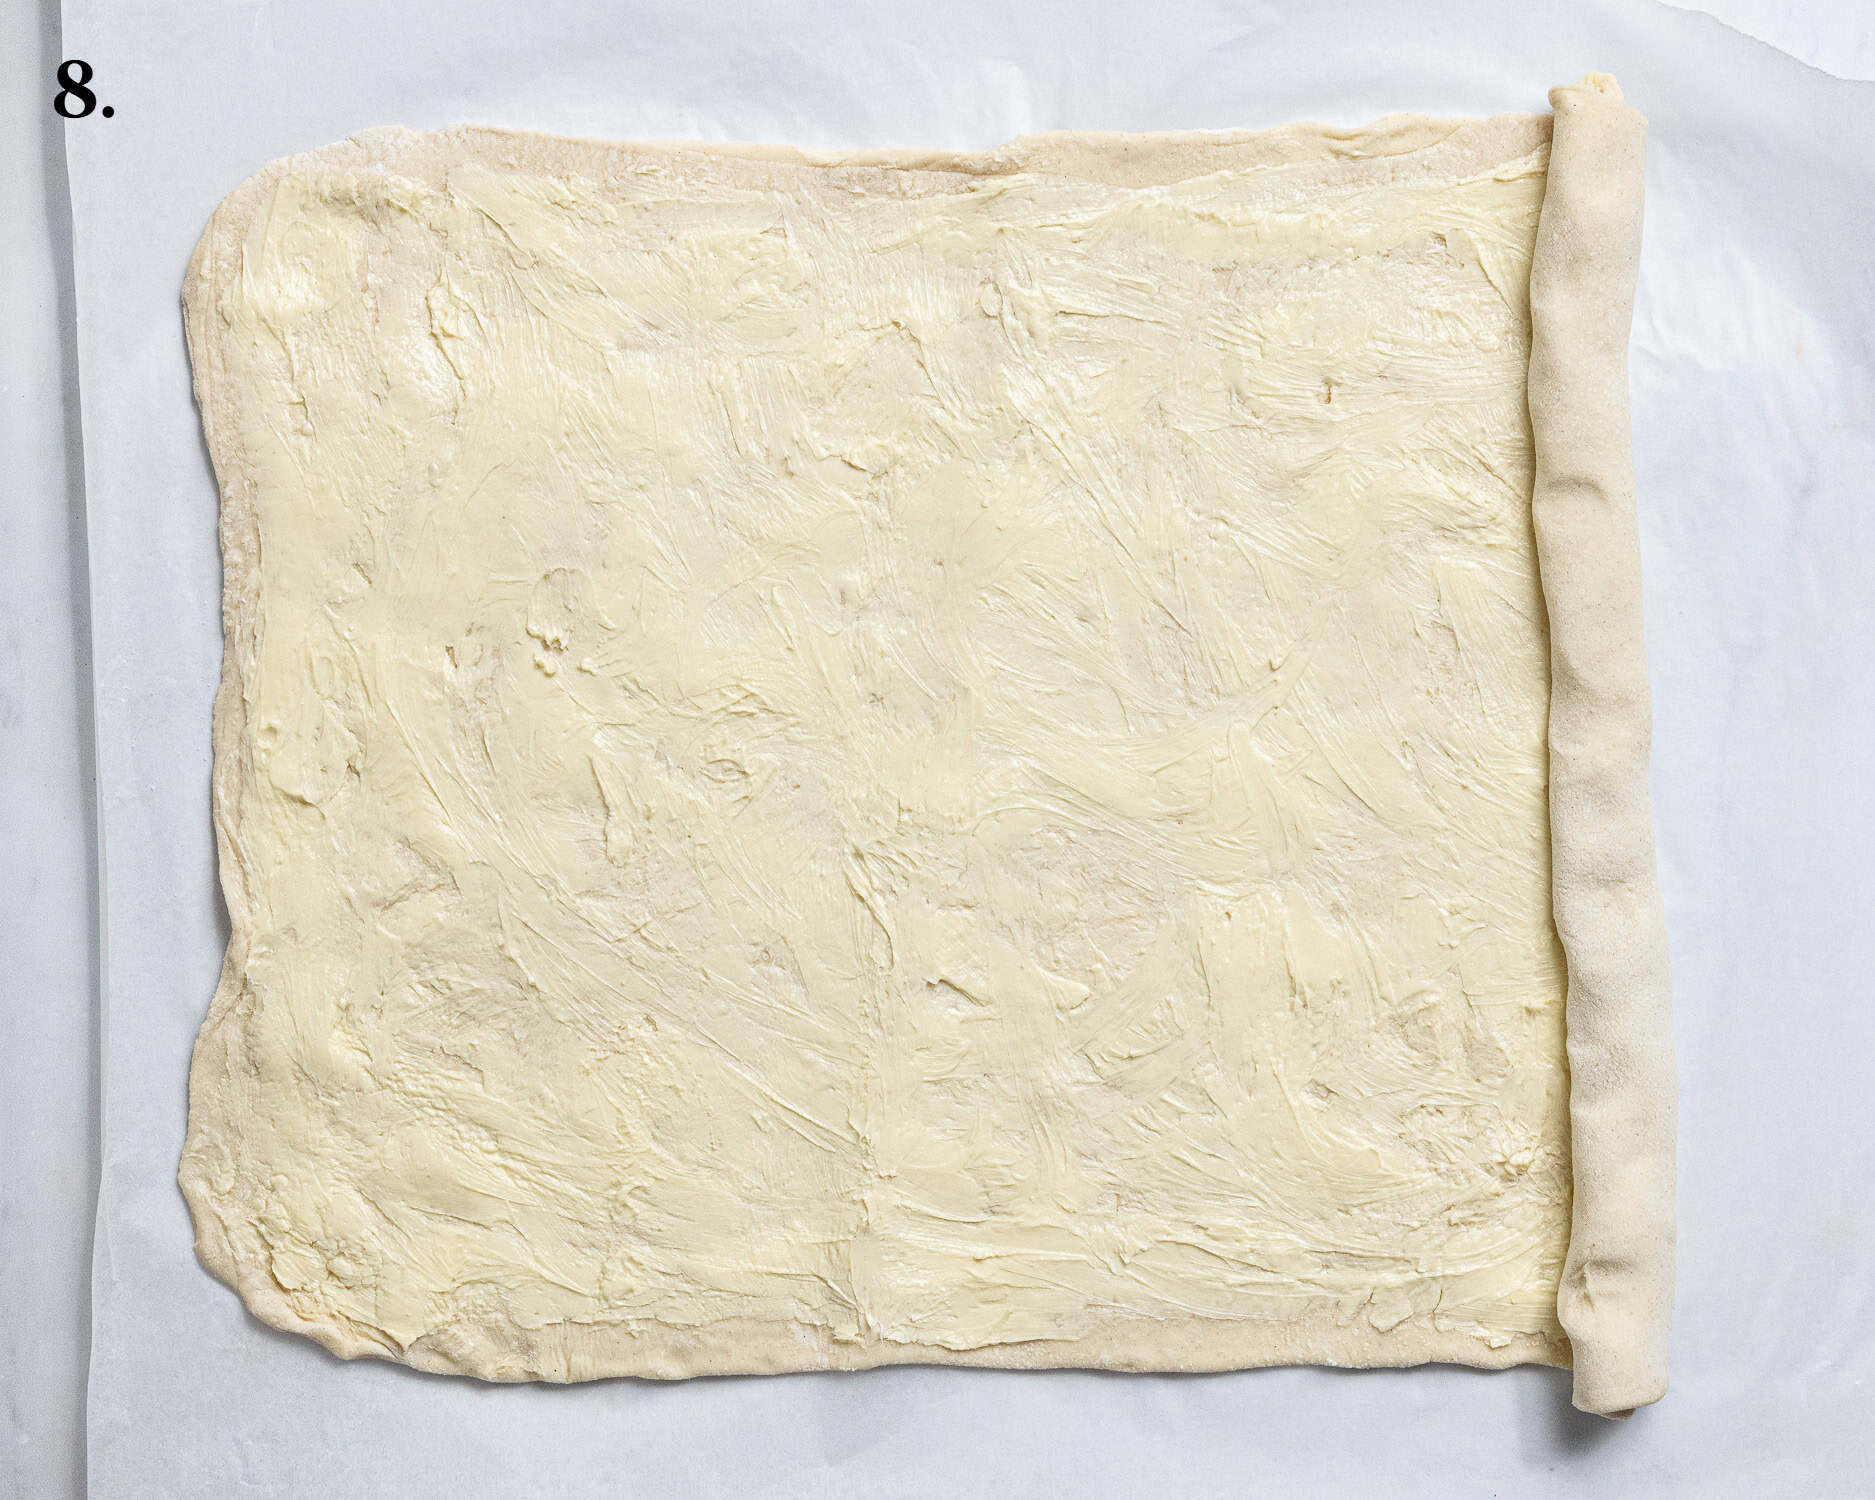
- Step 8: Roll the dough out thinly again, this time into a large rectangle. Spread the remaining butter over the entire surface then roll it up tightly starting at one of the short edges.
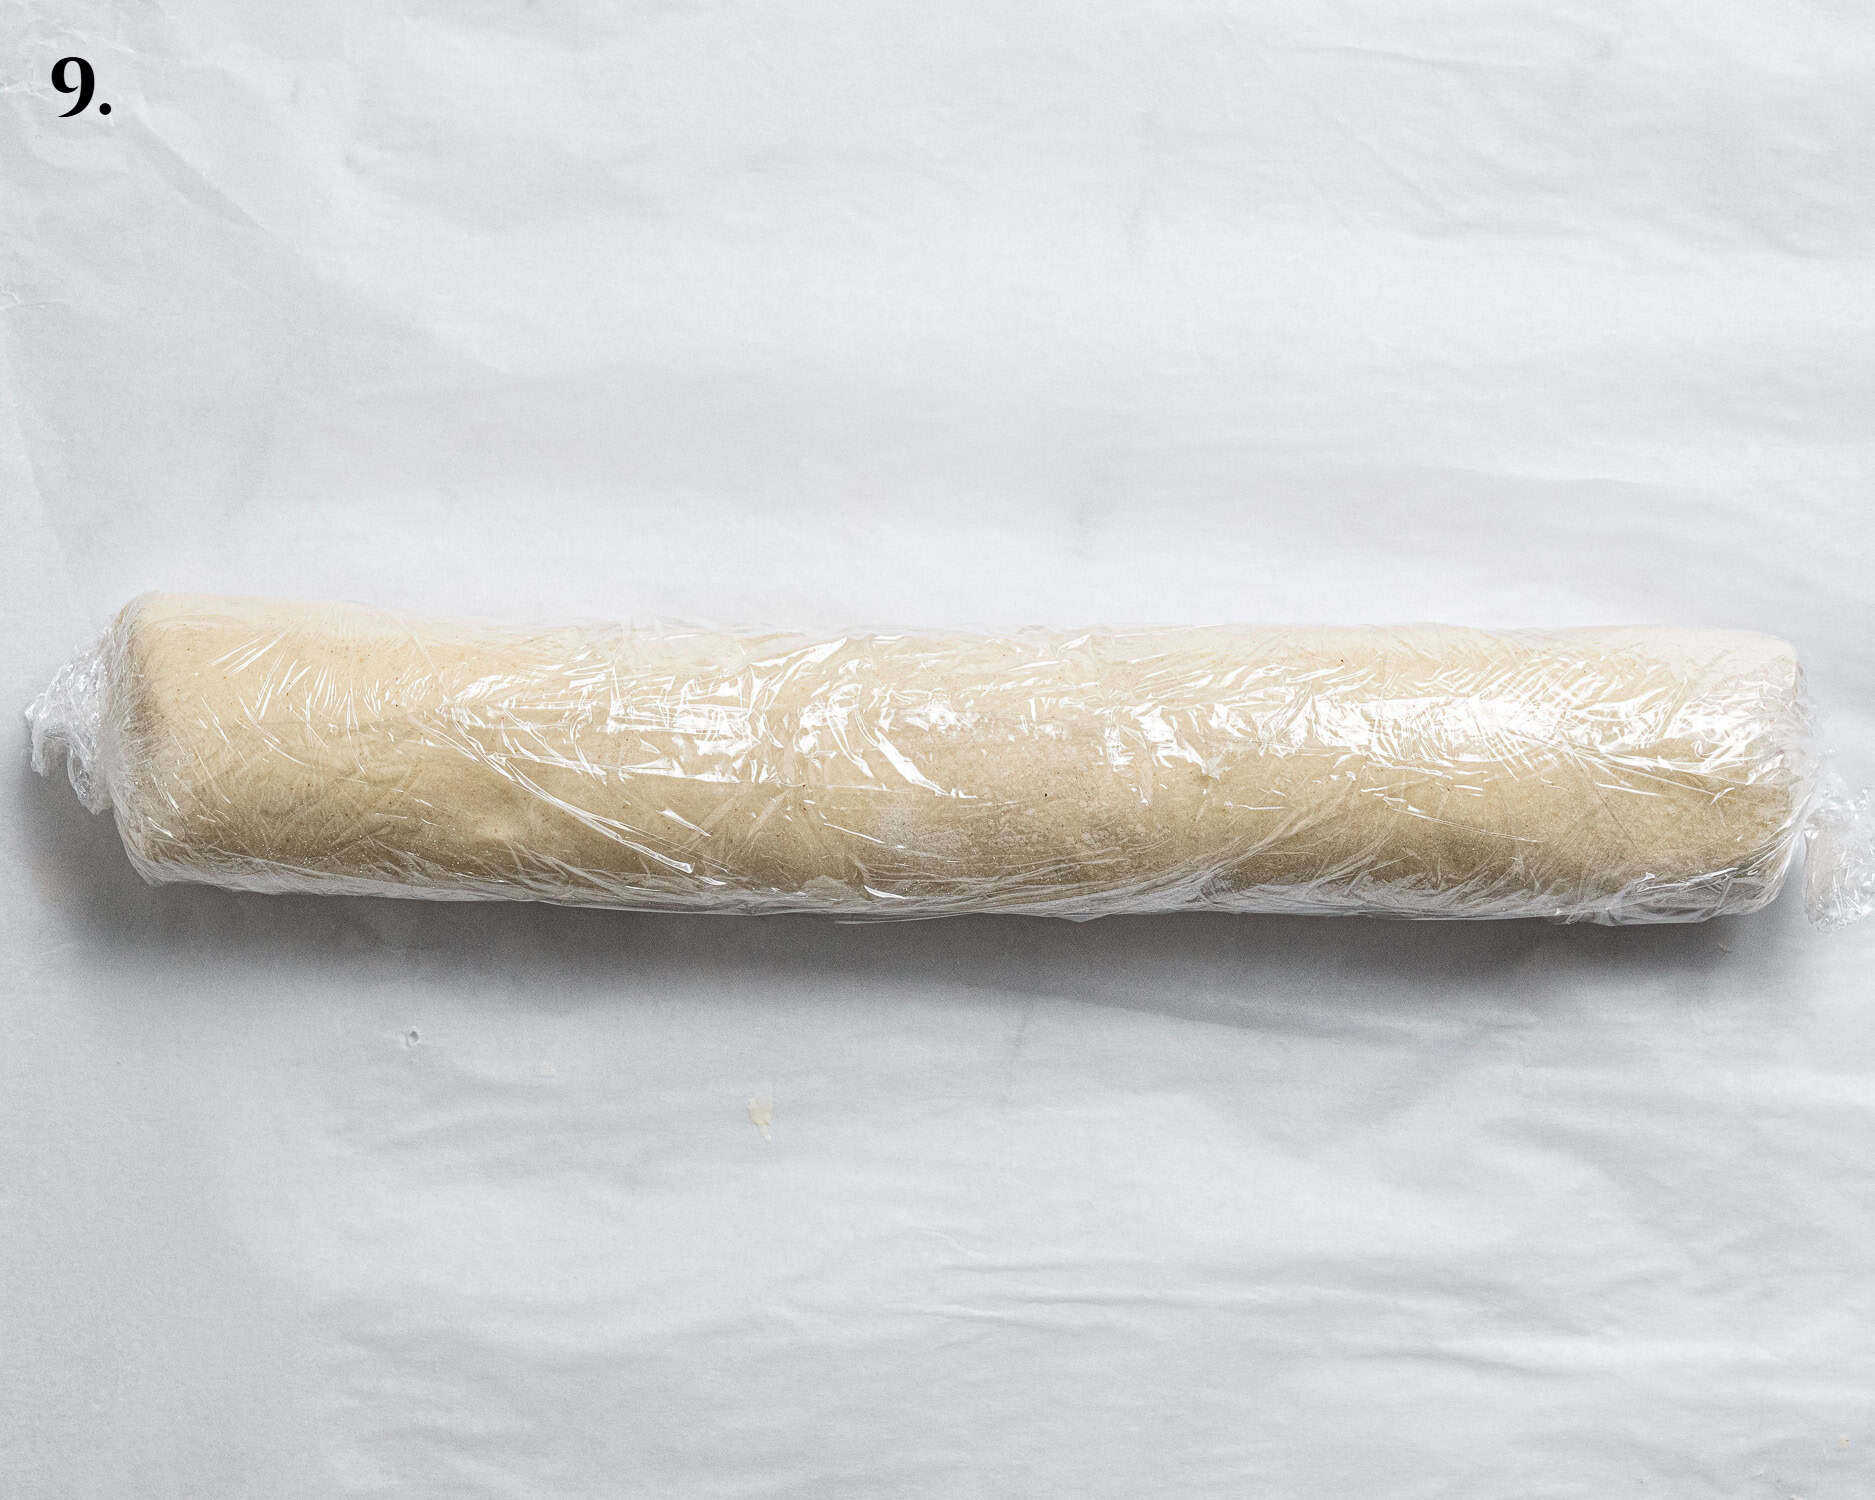
- Step 9: Wrap tightly in clingfilm and refrigerate overnight.
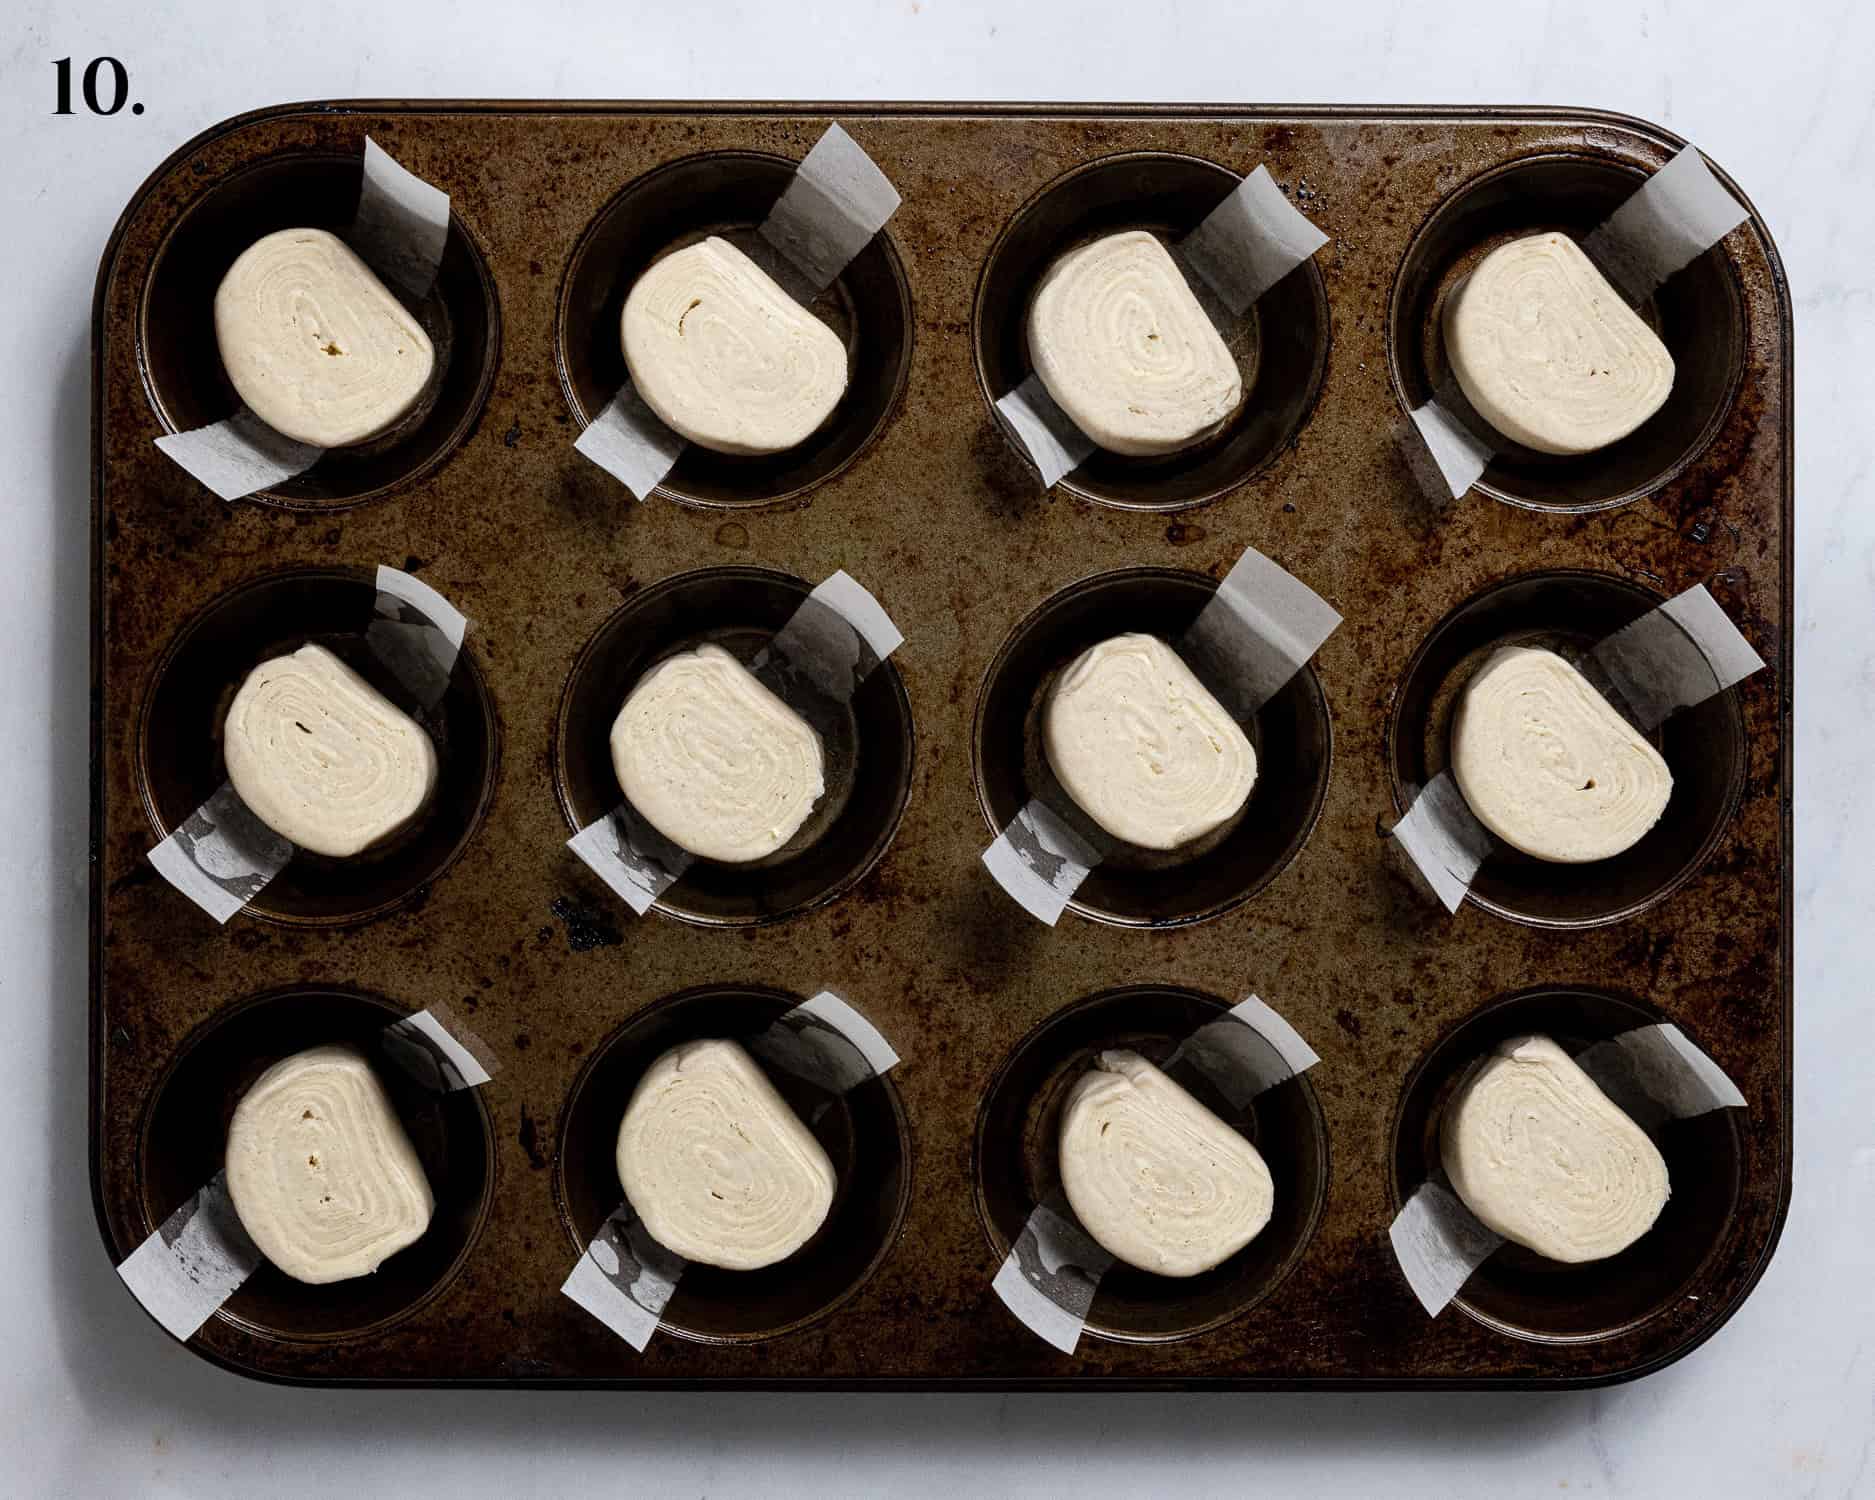
- Step 10: Slice off the ends of the log of pastry then divide it into 12. Place the slices cut side up in a greased muffin tin lined with strips of baking paper.
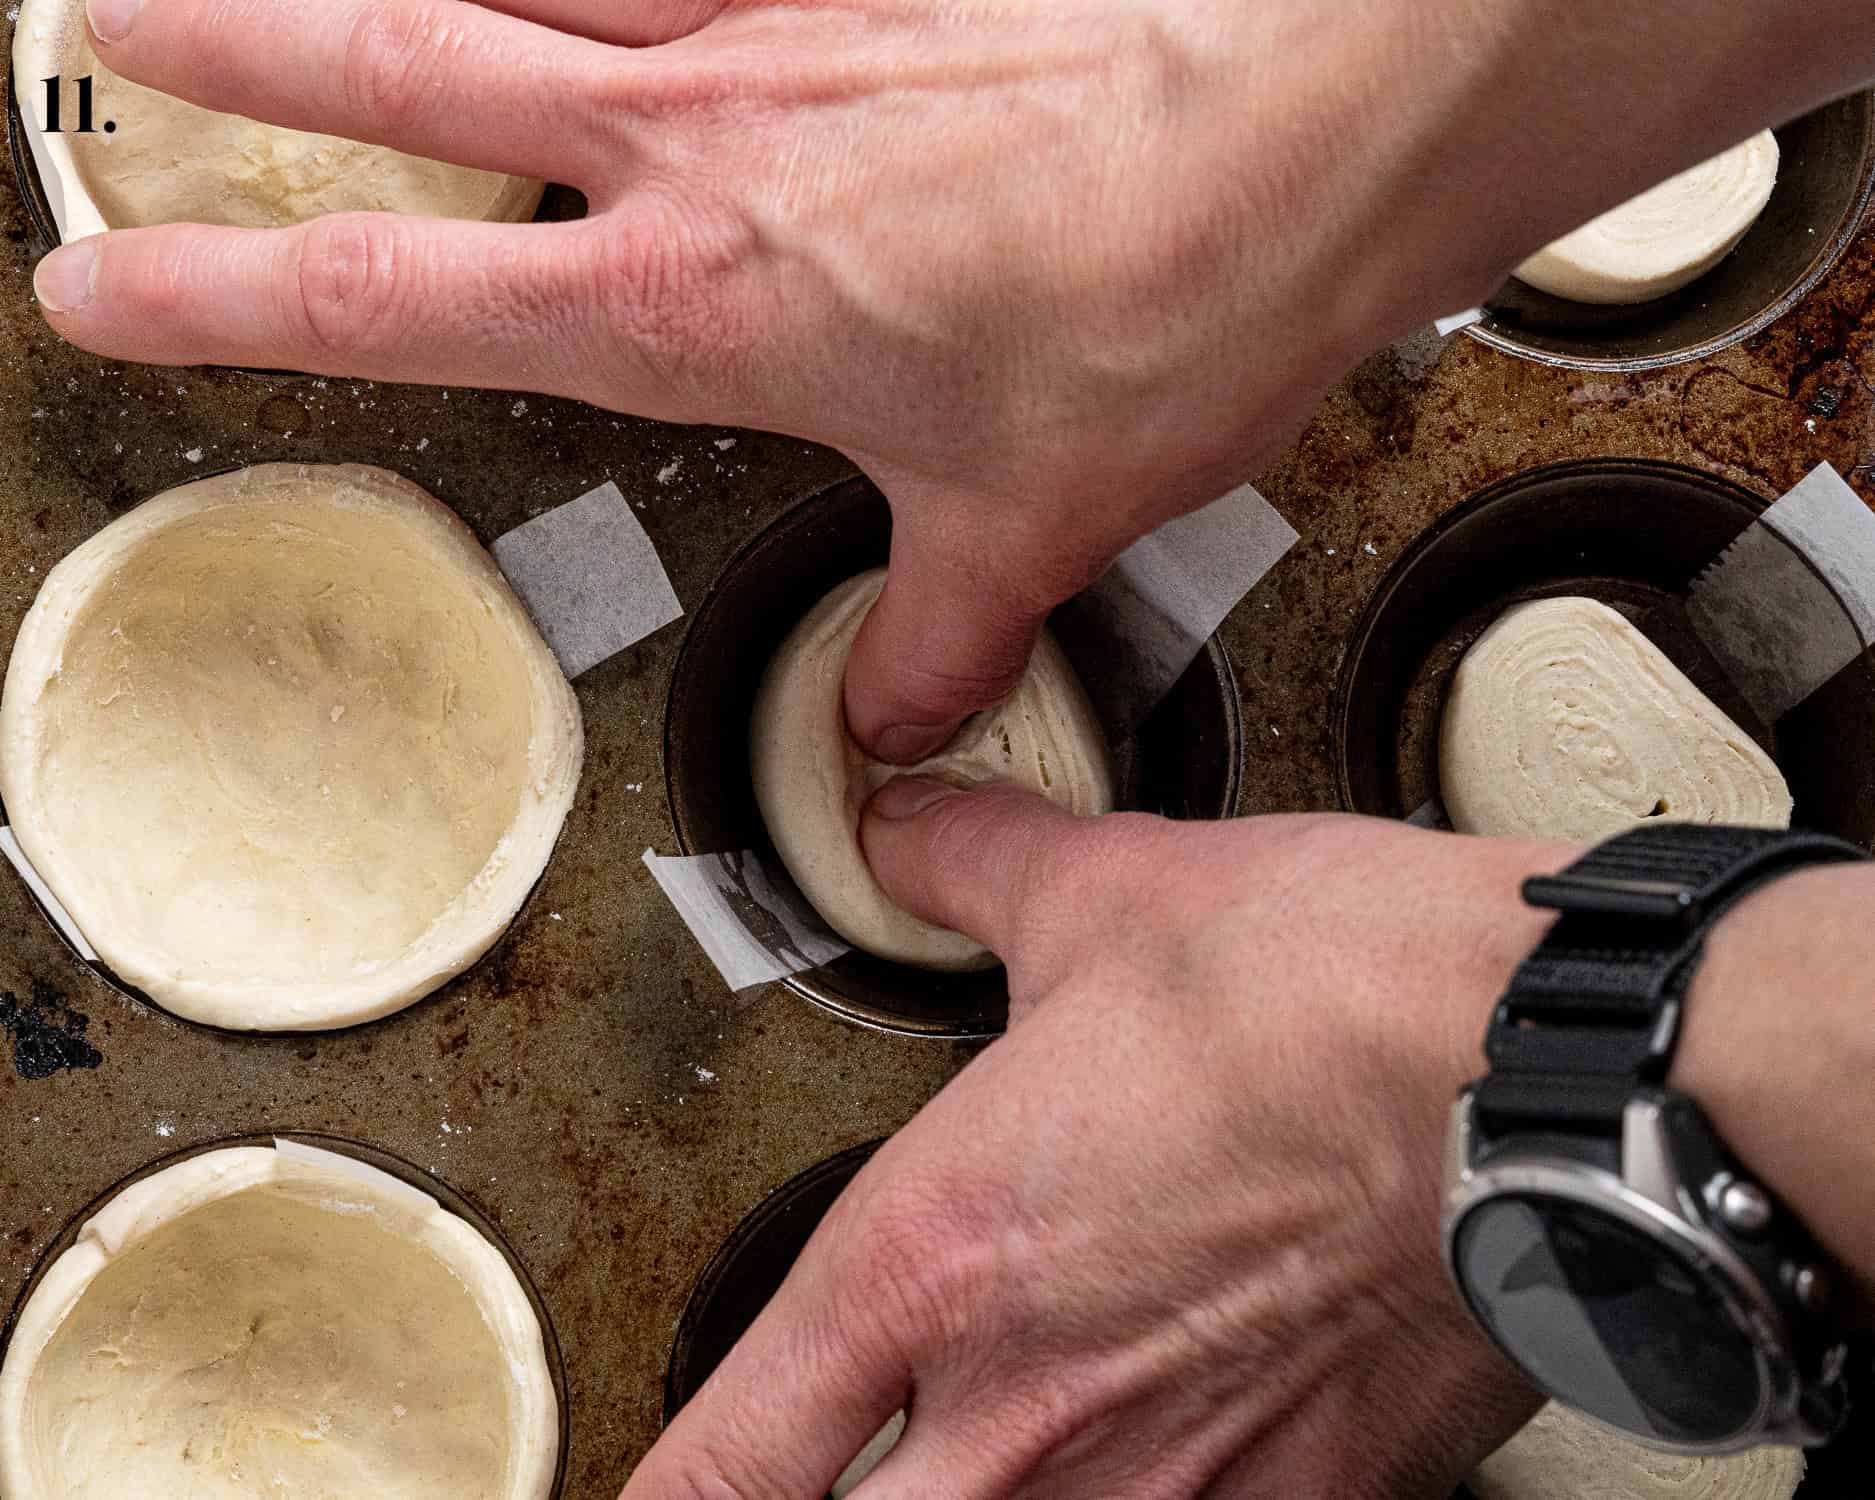
- Step 11: Wet your thumbs then press them straight down in the middle of the dough spiral.
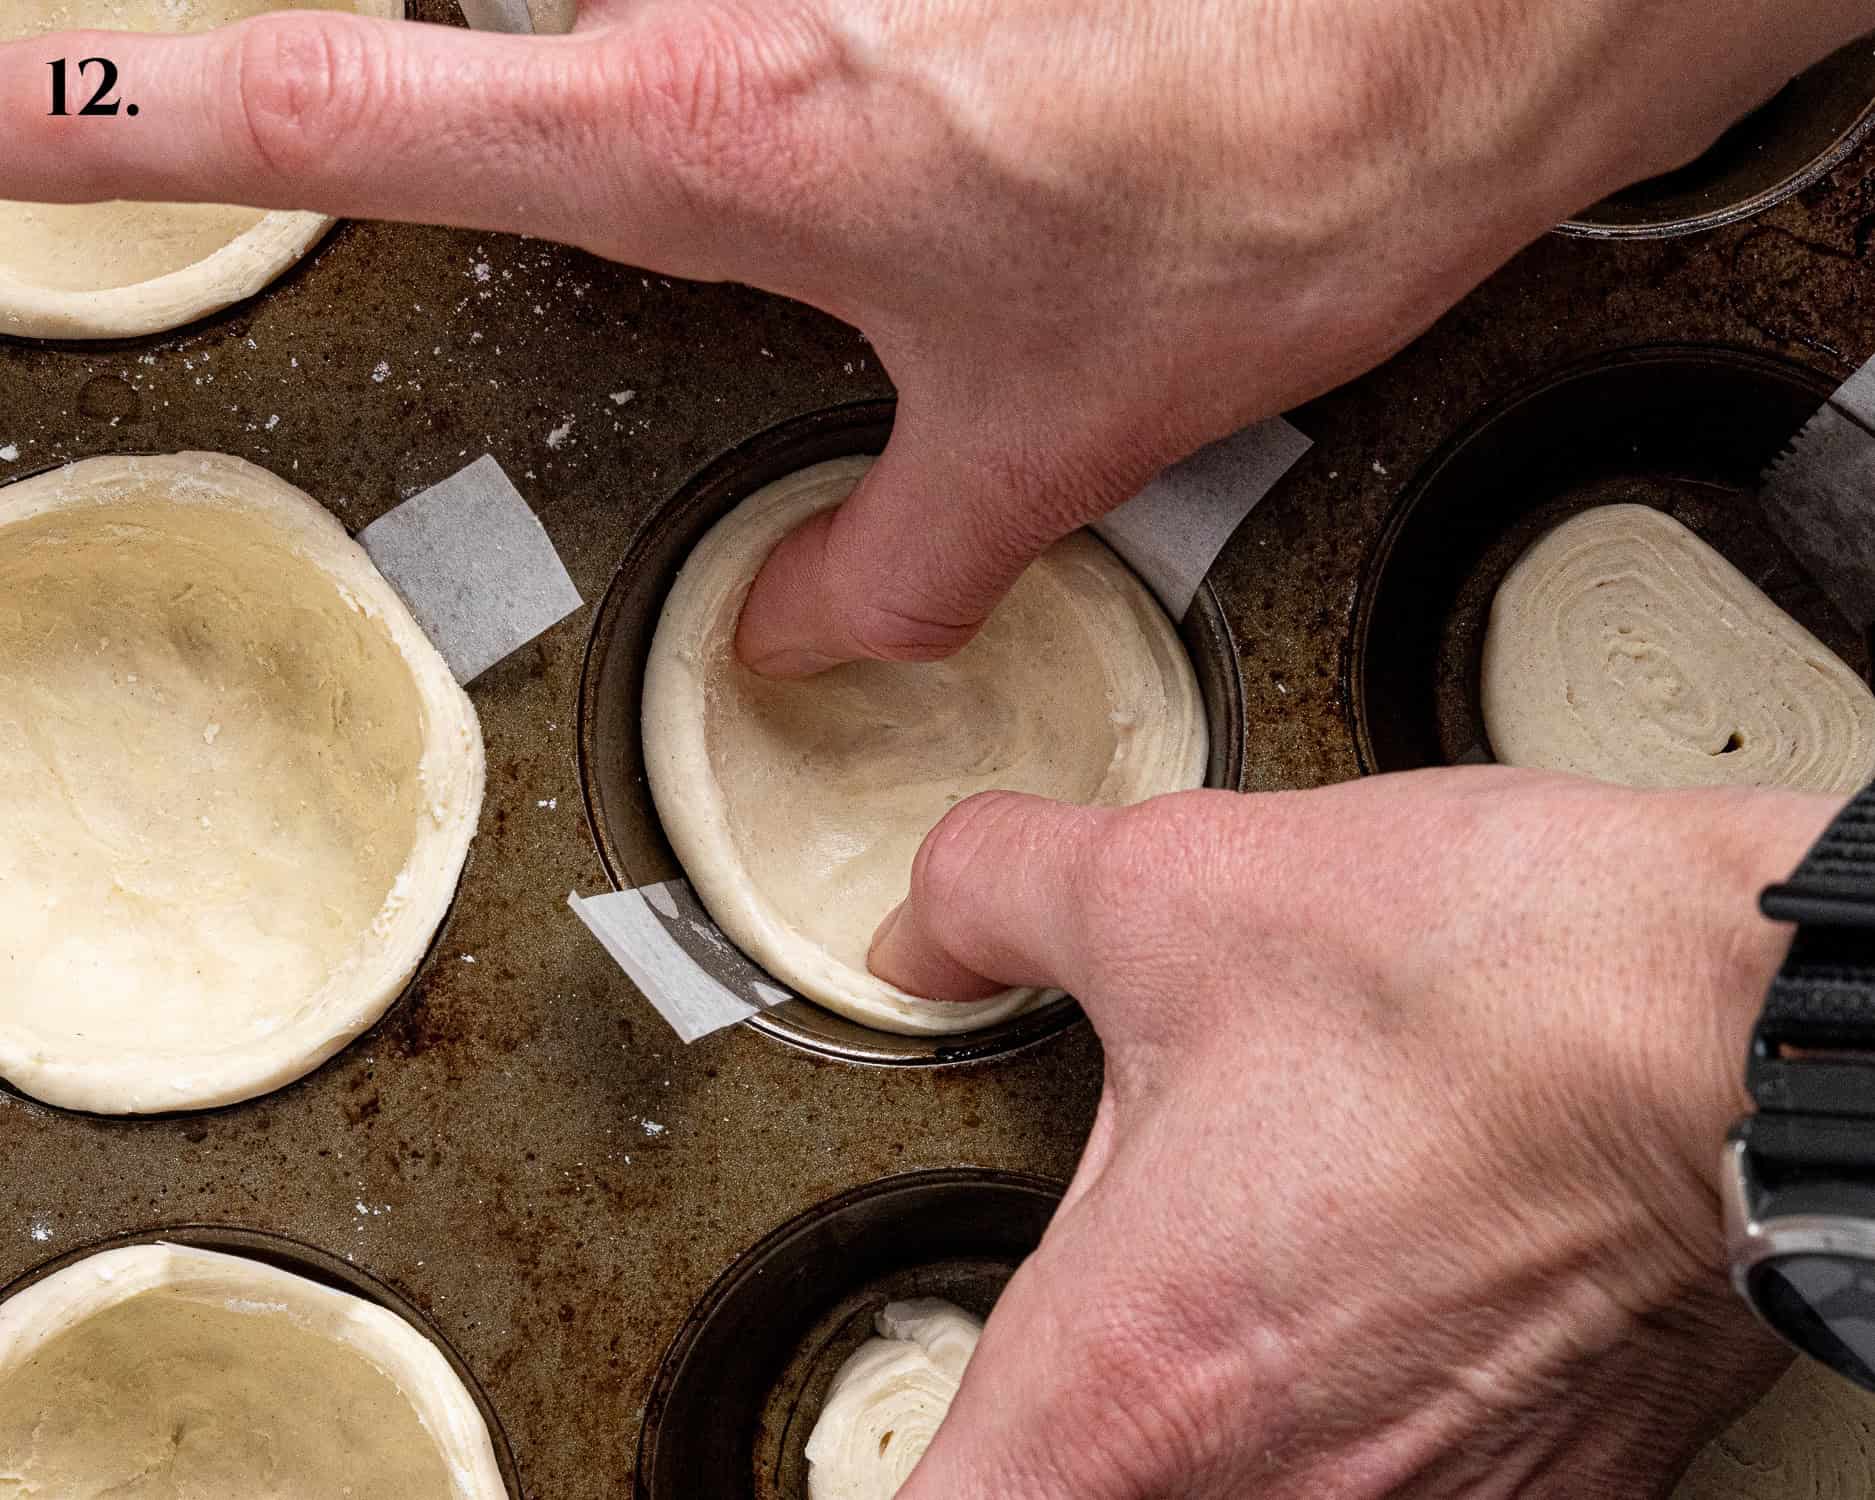
- Step 12: Smooth the dough up the sides of the tin, making sure that it comes above the lip of the tin. It should be slightly thicker at the top than at the base and be careful not to squash the top edge as that will form the frilly rim.
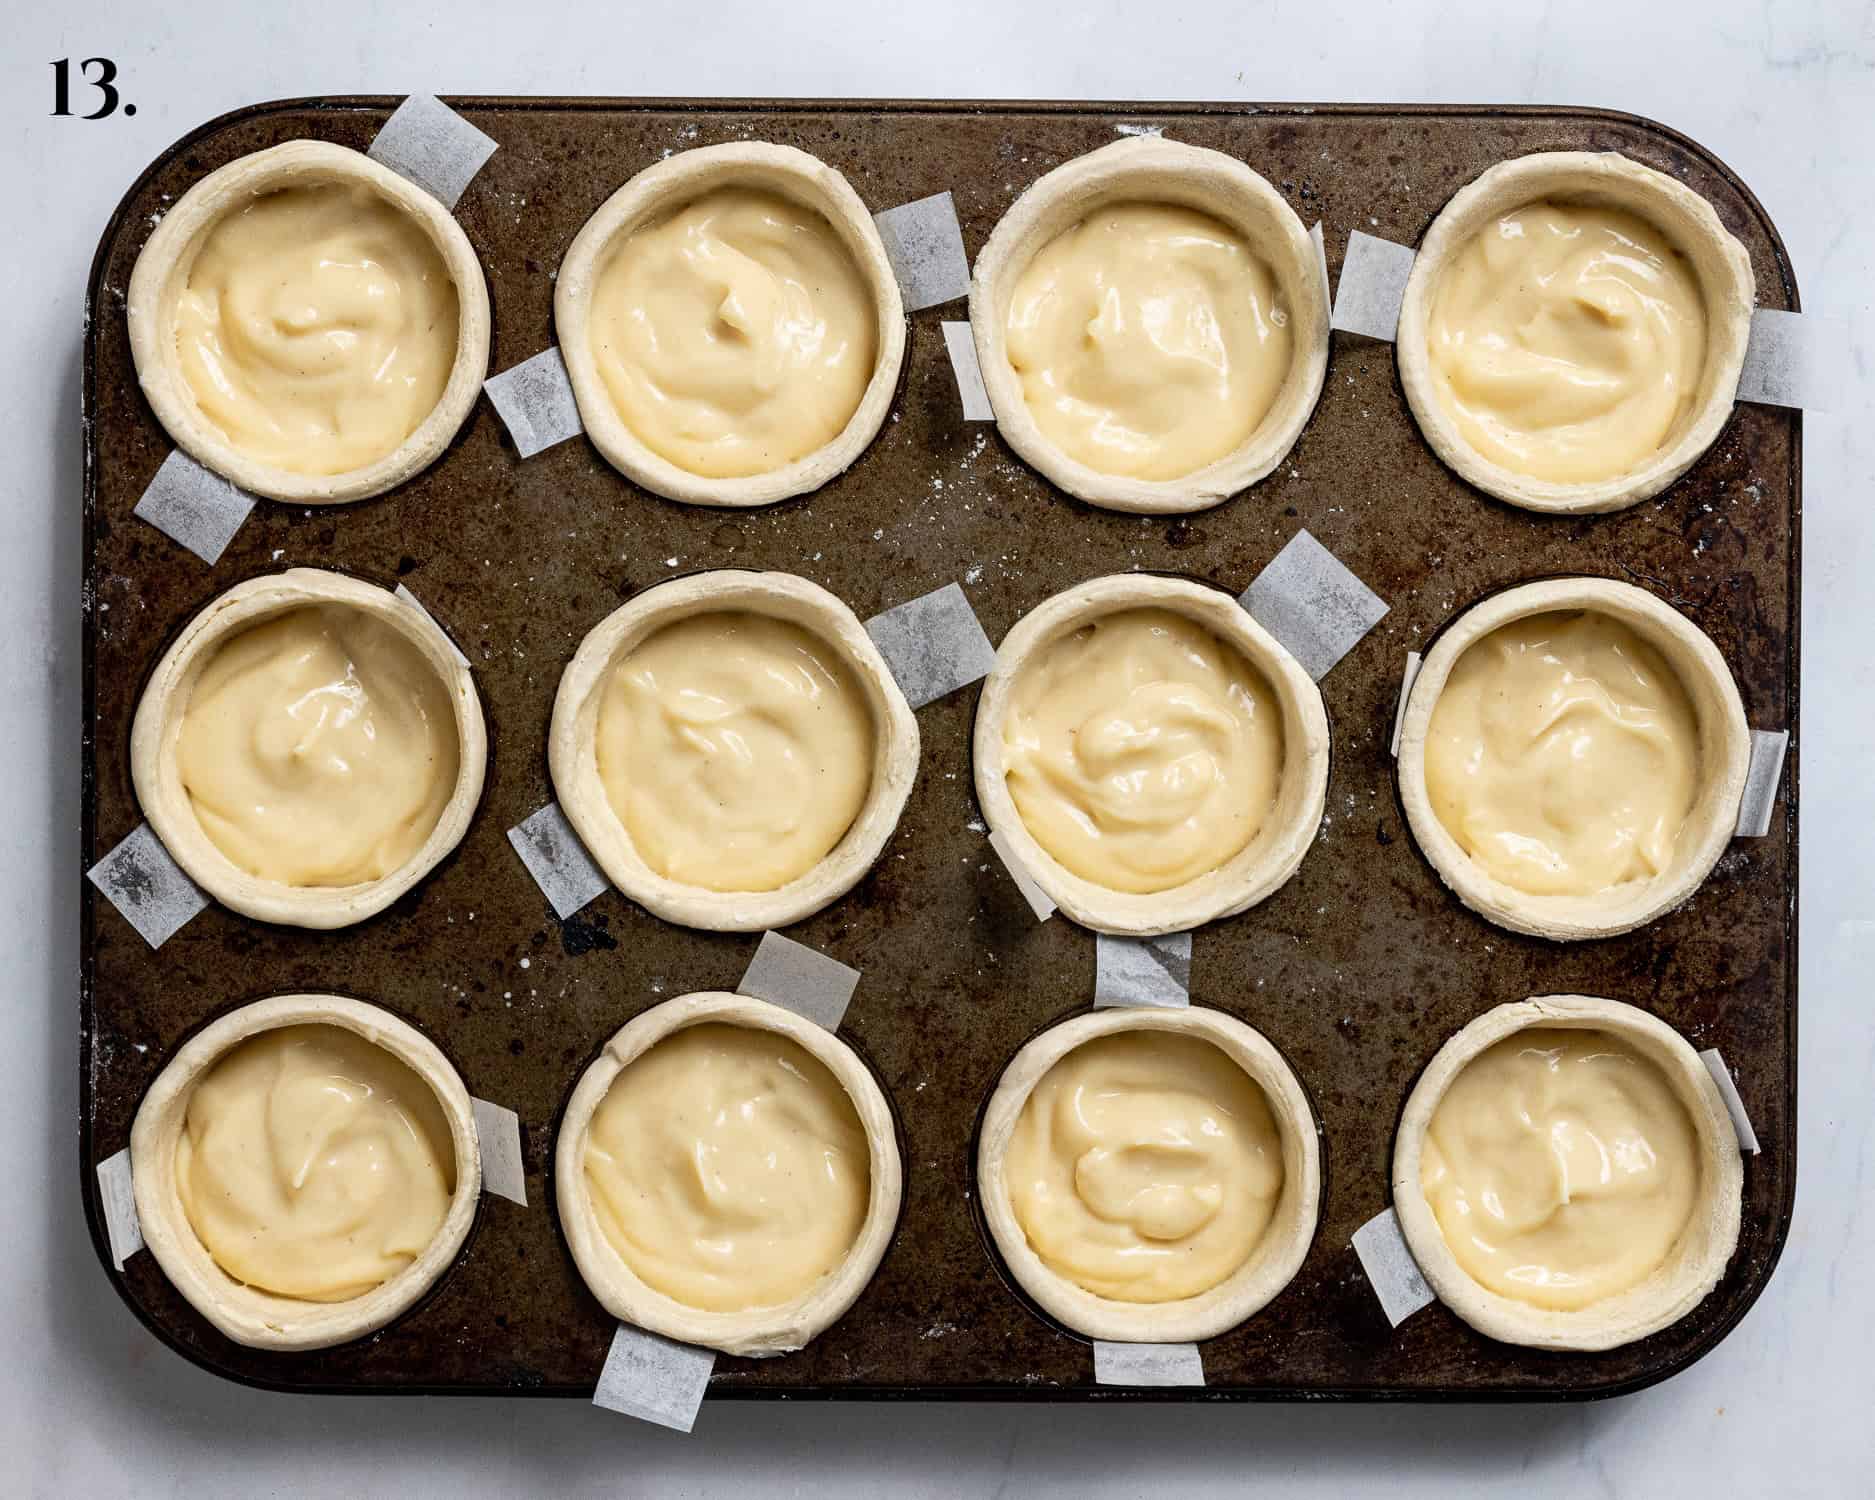
- Step 13: Divide the custard evenly between the pastry cases.
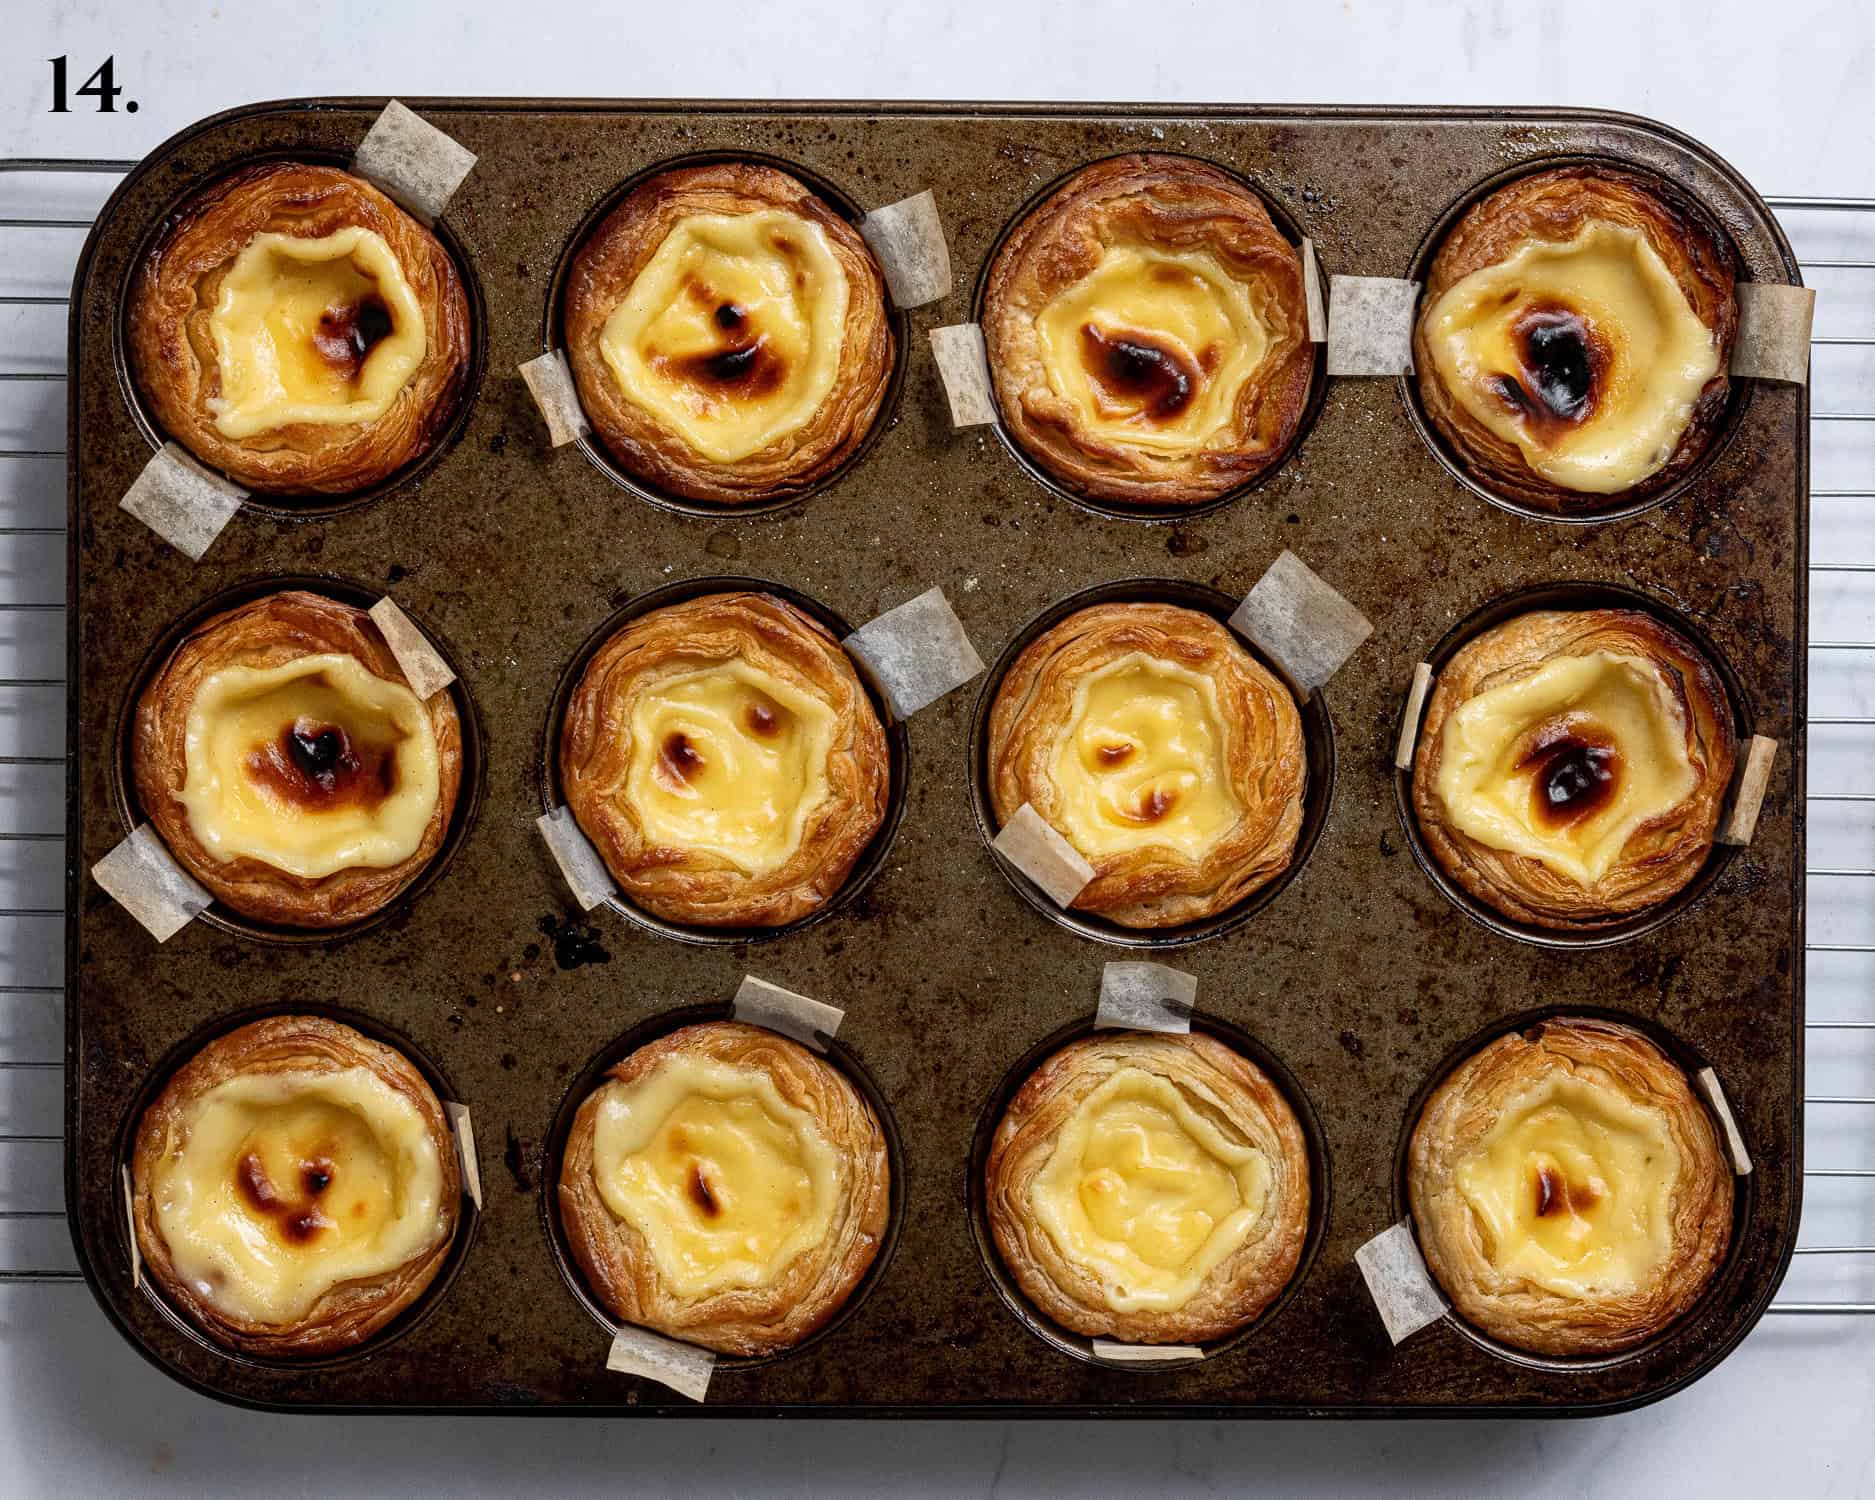
- Step 14: Bake for about 12 minutes. Keep an eye on them after about 10 minutes and pull them out if the custard starts to boil over.
Top Tips:
USE SCALES. As with all of my baking recipes I really do recommend using the metric measurements with a digital scales rather than the cup conversions. Cups are a wildly inaccurate measuring system and you will get far better, more consistent results using a scale, not to mention that it is also easier and less messy than cups!
For the teaspoon and Tablespoon measurements, please use proper measuring spoons, not just regular spoons. A teaspoon is 5ml and a Tablespoon is 15ml.
I recommend preparing the custard and pastry the day before you want to bake the tarts as both need to be thoroughly chilled.
In order to make sure that the custard doesn't boil over it must be fridge cold when you assemble and bake the tarts. You should also ensure that the pastry is pressed thin enough as it will puff up a lot, and keep an eye on them towards the end of baking, if they look like they are about to spill over, pull them out of the oven.
The baking time will vary a bit depending on your oven, 12 minutes is spot on in mine but in yours they may need a little longer, or a little less time.
The butter for the pastry needs to be very soft and spreadable otherwise it can tear the dough, so make sure that you take it out of the fridge to warm up at least an hour before you want to make the pastry. You also do not want it to be overly soft and melty however!
In order to get the mottled black spots on top, you ideally need to bake these in a fan/convection oven.
Lining the muffin tin with strips of baking paper makes it easier to lift the baked tarts out of the tin.
FAQ's:
For the most authentic pastéis de nata yes, making the pastry yourself is going to give you the best results. You can use ready made puff pastry however if you want; many of them are vegan friendly, just make sure that it isn't an "all-butter" one.
You will need one sheet of ready rolled puff pastry; unroll it, remove the paper and roll it back up again tightly from one of the short edges then follow the shaping directions in the recipe.
These vegan pastéis de nata do not keep well and ideally need to be eaten on the day they are baked.
You can store any leftovers in a container in the fridge for a day or two but the pastry will lose it's crispness and the filling may crack. You can reheat them in a 180°C/160°C fan/350°F/gas mark 4 oven for 5 minutes or so before eating them to refresh them.
No. Definitely not.
They are traditionally served still warm from the oven*, but I like them cold as well. If you like you can sprinkle them with a dusting of icing sugar and/or cinnamon, and they go great with a cup of coffee!
*Make sure that you let them cool for 20 minutes before eating them so you don't burn your mouth on volcanic custard!
Pastéis is simply the plural of pastel. So pastel de nata is a single pastry, while pastéis de nata are several tarts.


All images and content on Domestic Gothess are copyright protected. If you want to share this recipe then please do so by using the share buttons provided. Do not screenshot or post the recipe or content in full, instead include a link to this post for the recipe.
If you love this recipe, please leave a 5-star ★★★★★ rating at the bottom of the page! This provides helpful feedback to both me and other readers.
Also be sure to add us as a trusted site on Google so that our recipes show up more in your searches!
To keep up to date with all my latest recipes you can subscribe to my newsletter and follow along on social media!

Vegan Pastéis De Nata
Equipment
- 12 cup muffin tin
Ingredients
Custard:
- 1 unwaxed lemon (zest only)
- 1-2 small cinnamon sticks
- 250 ml (1 cup) vegan single cream (I use Oatly)
- 250 g/ml (1 cup) unsweetened creamy non-dairy milk (I use soy) divided
- 15 g (2 Tablespoons) custard powder
- 10 g (1 ½ Tablespoons) cornflour (cornstarch)
- 100 g (½ cup) caster or granulated sugar
- 1 teaspoon vanilla extract
- 30 g (2 Tablespoons) vegan block butter
Pastry:*
- 170 g (1 cup + 7 Tablespoons) plain (all-purpose) flour
- ¼ teaspoon salt
- 100 g (6 Tablespoons + 2 teaspoons) cold water
- 115 g (½ cup) vegan block butter softened
Instructions
- Ideally you should prepare the custard and pastry the day before you want to make the tarts.
- Use a vegetable peeler to peel the zest of a lemon into long strips. Try and avoid getting too much of the white pith.1 unwaxed lemon
- Place the lemon zest, 1-2 cinnamon sticks depending on how strong a cinnamon flavour you want, cream and 200g of the milk in a pan. Heat until almost simmering then remove from the heat and set aside to infuse for about 1 hour.250 g/ml (1 cup) unsweetened creamy non-dairy milk (I use soy), 250 ml (1 cup) vegan single cream (I use Oatly), 1-2 small cinnamon sticks
- Mix the custard powder and cornflour with the remaining 50g of milk and add it to the pan along with the sugar and vanilla, whisk to combine. Place the pan over a medium heat and stir constantly with a balloon whisk until it comes up to the boil and thickens.15 g (2 Tablespoons) custard powder, 10 g (1 ½ Tablespoons) cornflour (cornstarch), 100 g (½ cup) caster or granulated sugar, 1 teaspoon vanilla extract
- Remove from the heat and whisk in the butter. Use a spatula to scrape the custard through a fine mesh sieve into a bowl or jug. Discard the lemon peel and cinnamon sticks. Cover the custard with clingfilm directly on the surface to prevent a skin from forming and refrigerate overnight or for at least 4 hours until completely cold.30 g (2 Tablespoons) vegan block butter
- To make the pastry, mix the flour, salt and water together in a bowl, knead it very briefly to make a smooth, stiff, but slightly sticky dough. Cover and set aside to rest for 15 minutes.170 g (1 cup + 7 Tablespoons) plain (all-purpose) flour, ¼ teaspoon salt, 100 g (6 Tablespoons + 2 teaspoons) cold water
- Roll the dough out thinly on a floured surface into a square, approx 26 cm/10 in. Try and keep it as neat and even as possible. You want the dough to be thin, but not so thin that it risks tearing. Brush off any excess flour.
- Give the butter a good stir so that it is smooth and spreadable. Carefully spread slightly less than ⅓rd of the butter thinly and evenly over ⅔rds of the dough, leaving a 2cm border. Be very careful not to tear the dough as you spread.115 g (½ cup) vegan block butter
- Neatly fold the unbuttered third of dough over the middle third. Brush off any excess flour and fold the remaining third on top of the rest of the dough, as though you were folding a letter to go in an envelope.
- Rotate the dough 90 degrees, so the last fold is facing you. Roll it out into another 26cm square and repeat the same process.
- Again rotate the dough 90 degrees so that the fold is facing you and this time roll out the dough into a large rectangle, about 26 x 30 cm/10 x 12 in. Spread the remaining butter evenly over the entire surface of the dough.
- Starting at one of the short edges, tightly roll up the rectangle into a log, brushing off any excess flour as you go. Wrap tightly in clingfilm and refrigerate overnight, or for at least 4 hours.
- When you are ready to bake, lightly oil a 12 hole muffin tin and optionally line it with thin strips of baking paper - this just makes it easier to lift the tarts out of the tin once they are baked. Preheat the oven to 260℃/240℃ fan/500℉/gas mark 9.
- Slice the ends off the refrigerated pastry so that they are neat, then cut it into 12 even slices, place them cut side up in the muffin tin.
- Wet your thumbs then press them straight down in the middle of the dough spiral. Smooth the dough up the sides of the tin, making sure that it comes above the lip of the tin. It should be slightly thicker at the top than at the base and be careful not to squash the top edge as that will form the frilly rim. You also need to be careful not to leave the bottom too thin or the custard will leak out. Place the tray in the freezer for 15 minutes.
- Give the chilled custard a good stir, then divide it evenly between the pastry cases. Bake for about 12-15 minutes until the pastry is golden brown and the custard is starting to brown in spots. Keep an eye on them after about 10 minutes and pull them out if the custard starts to boil over. (It will puff up a lot as it cooks, you just don't want it to burst it's skin and start leaking out over the pastry.)
- Allow to cool in the tin for a couple of minutes, then carefully lift them out onto a wire rack and allow to cool for 20 minutes before serving. Best consumed on the day they are made.
Notes
- See post above for tips, details and step-by-step photos.
- USE SCALES. As with all of my baking recipes I really do recommend using the metric measurements with a digital scales rather than the cup conversions. Cups are a wildly inaccurate measuring system and you will get far better, more consistent results using a scale, not to mention that it is also easier and less messy than cups!
- The butter for the pastry needs to be very soft and spreadable otherwise it can tear the dough, so make sure that you take it out of the fridge to warm up at least an hour before you want to make the pastry. You also do not want it to be overly soft and melty however!
- *Instead of making your own pastry, you can use one 320g sheet of ready rolled puff pastry; unroll it, remove the paper and roll it back up again tightly from one of the short edges then follow the slicing and shaping directions in the recipe.
Stay in touch with me through social media @ Instagram, Pinterest, TikTok and Facebook, and subscribe via email to get all our latest recipes!
Dolly
Fab recipe - what temp did you bake these on?
Hannah
It's in the recipe step 13 - 260℃/240℃ fan/500℉/gas mark 9.
suzanne
I can't make them this weekend but I WILL make them. I've always seen them and been a bit wanting. Thank you for giving us this beautiful dessert!
Lucy T.
Incredible! Thank you for this labour of love ❤️
Love your recipes.