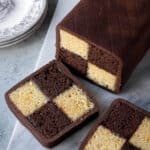
Chocolate Orange Battenberg Cake (Vegan)
Chocolate orange Battenberg cake - this delicious twist on the classic British cake is vegan, eggless and dairy free.
Servings 10 people
Ingredients
Cake:
- 275 g (2 ¼ cups) self raising flour
- 220 g (1 cup) caster (superfine) sugar
- 80 g (⅔ cup) ground almonds
- 1 teaspoon baking powder
- pinch salt
- 180 g (¾ cup) vegan block butter/margarine (I use Naturli Vegan Block or Flora plant butter) melted
- 200 ml (½ + ⅓ cup) unsweetened non-dairy milk (I use soy) room temperature
- 1 teaspoon vanilla extract
- 1 teaspoon orange extract
- finely grated zest of 1 large orange
- 25 g (2 ½ Tablespoons) cocoa powder
- 2 ½ Tablespoons boiling water
To Assemble:
- shredless marmalade
- 500 g (17 ½ oz) marzipan
- 25 g (2 ½ Tablespoons) cocoa powder (optional)
Instructions
- Preheat the oven to 180°C/160°C fan/350°F/gas mark 4. Grease a 20 cm/ 8 in square cake tin.
- Cut a piece of baking parchment about twice as wide as the tin - 20x40cm. Fold it in half widthways then push up the centre fold to make a pleat at least as high as the tin. Fold a piece of tin foil over several times into a thick piece the same width as the tin and height as the pleat. Place it inside the pleat and then use this to line the tin, making sure that the pleat runs down the centre, dividing the tin into two smaller ones. Leave a bit of parchment overhanging on either side of the tin to make it easier to remove the cakes from the tin later. If your tin isn't non-stick then you will also need to line the other two sides with strips of baking parchment. (See post above for step-by-step photos).
- Place the self-raising flour, caster sugar, ground almonds, baking powder and salt in a large bowl and whisk to combine.
- Add the melted butter, milk and vanilla extract and stir to form a smooth batter.
- Using a scale for accuracy, pour half of the batter into a separate bowl and stir in the orange zest and extract.
- In another bowl, mix together the cocoa powder and boiling water to form a paste. Add the other half of the batter and stir in the cocoa mixture.
- Scrape the chocolate batter into one half of the tin, and the orange batter into the other half. Spread them level then bake for 30-35 minutes until a skewer inserted into the centre comes out clean.
- Leave the cakes to cool in the tin for 20 minutes then carefully lift them out onto a wire rack using the overhanging sides and the centre pleat. It really helps to have a second person to help you do this as the cakes are delicate when warm. Peel off the parchment and leave them on the wire rack to cool completely.
- Once the cakes are completely cold, trim the tops of them to level if necessary, they should be exactly the same height.
- Place one cake on top of the other and trim the long edges to neaten them. If you want perfect squares then use a tape measure - the cakes should be twice as wide as they are high. Mine were 4cm high so I trimmed them to be 8cm wide.
- Slice the cakes in half lengthways so you have two long strips of each colour.
- Gently warm up about half a jar of marmalade until it is spreadable.
- Spread a thin layer of marmalade over the long side of one of the strips and stick a strip of the opposite colour to it.
- Spread a thin layer of marmalade over the top of both of those strips and stick the remaining strips on top, spreading more marmalade in between the two, to form a chequered pattern - chocolate above orange and orange above chocolate.
- If you want chocolate marzipan, sprinkle the cocoa powder over the marzipan and knead it in until it is fully combined. Add a drop of water as needed if it is too dry.
- Dust a surface with icing sugar or cocoa powder and roll out the marzipan into a rectangle about 20x40cm. Trim one of the short edges to neaten it.
- Spread the top of the cake with marmalade then place it, marmalade side down, against the trimmed short edge. Spread marmalade over the rest of the cake (except the short ends).
- Carefully roll the cake up in the marzipan so that it is fully encased.
- Trim the excess so that it overlaps about halfway across the cake. Brush it with a little bit of water and gently press it down to seal. Flip the cake so that the join is on the bottom.
- Use a sharp knife to slice a piece off either end to neaten the cake and reveal the pattern. If you like you can gently score lines on the top of the cake with a knife to make a crisscross pattern.
Notes
- See post above for tips, details and step-by-step photos.
- For the best results make sure that you follow the recipe closely. As always, I highly recommend using the gram measurements (with a digital scale), rather than the cup conversions. Cup measurements are simply not accurate enough for baking and I cannot guarantee the best results if you use them.
- To make sure that your cakes are exactly the same you should weigh the batter with a scale when you divide it in half. To do this I weigh the bowl before I add any of the ingredients and make a note of this number. Once you have finished making the batter, weigh the bowl again (this time with the batter in it). Take the weight of the full bowl and subtract the weight of the empty one, this gives you the weight of your batter. Divide that number in half and that tells you how much batter to weigh out into a separate bowl.
- The cakes should be completely cold before you cut them otherwise they will be difficult to slice and you might not be able to get them neat. If you like you can bake the cakes the day before assembling and store them in an airtight container overnight.