

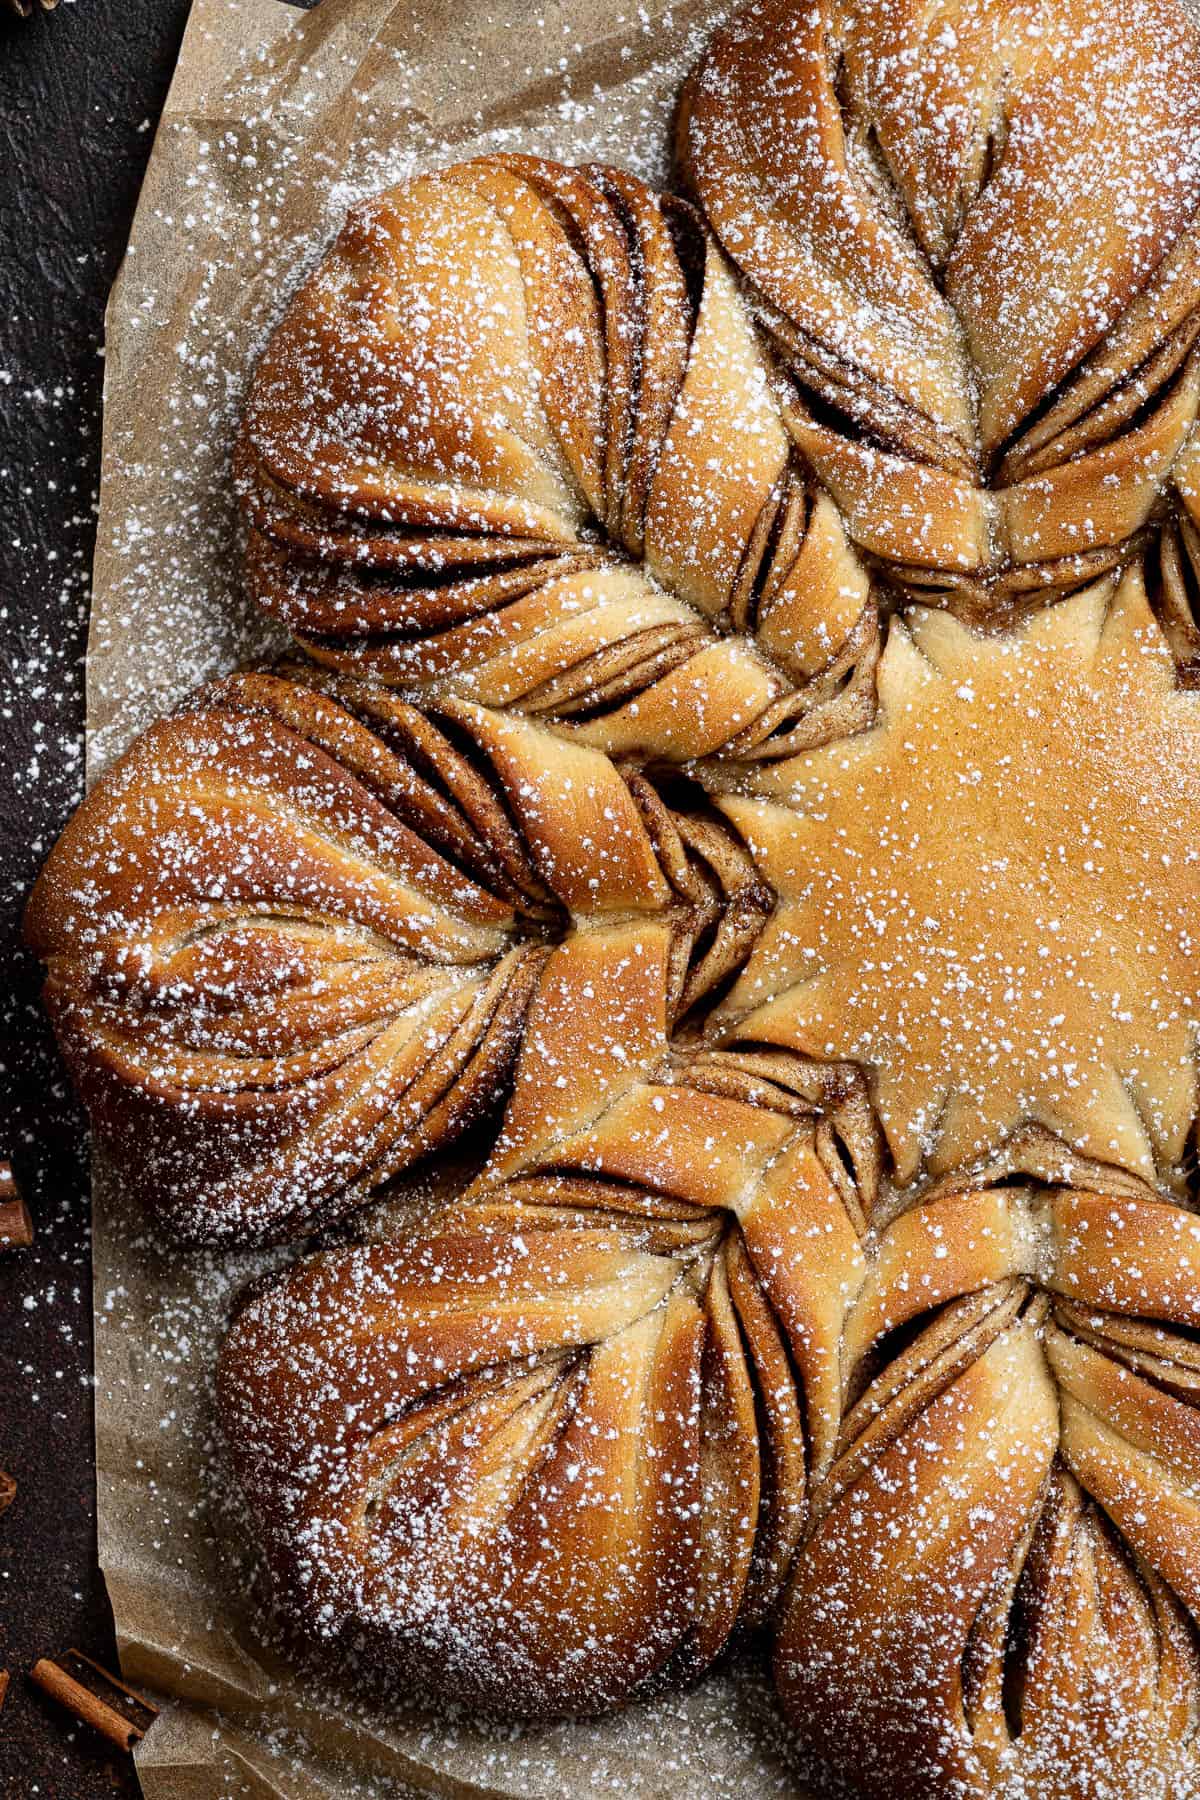
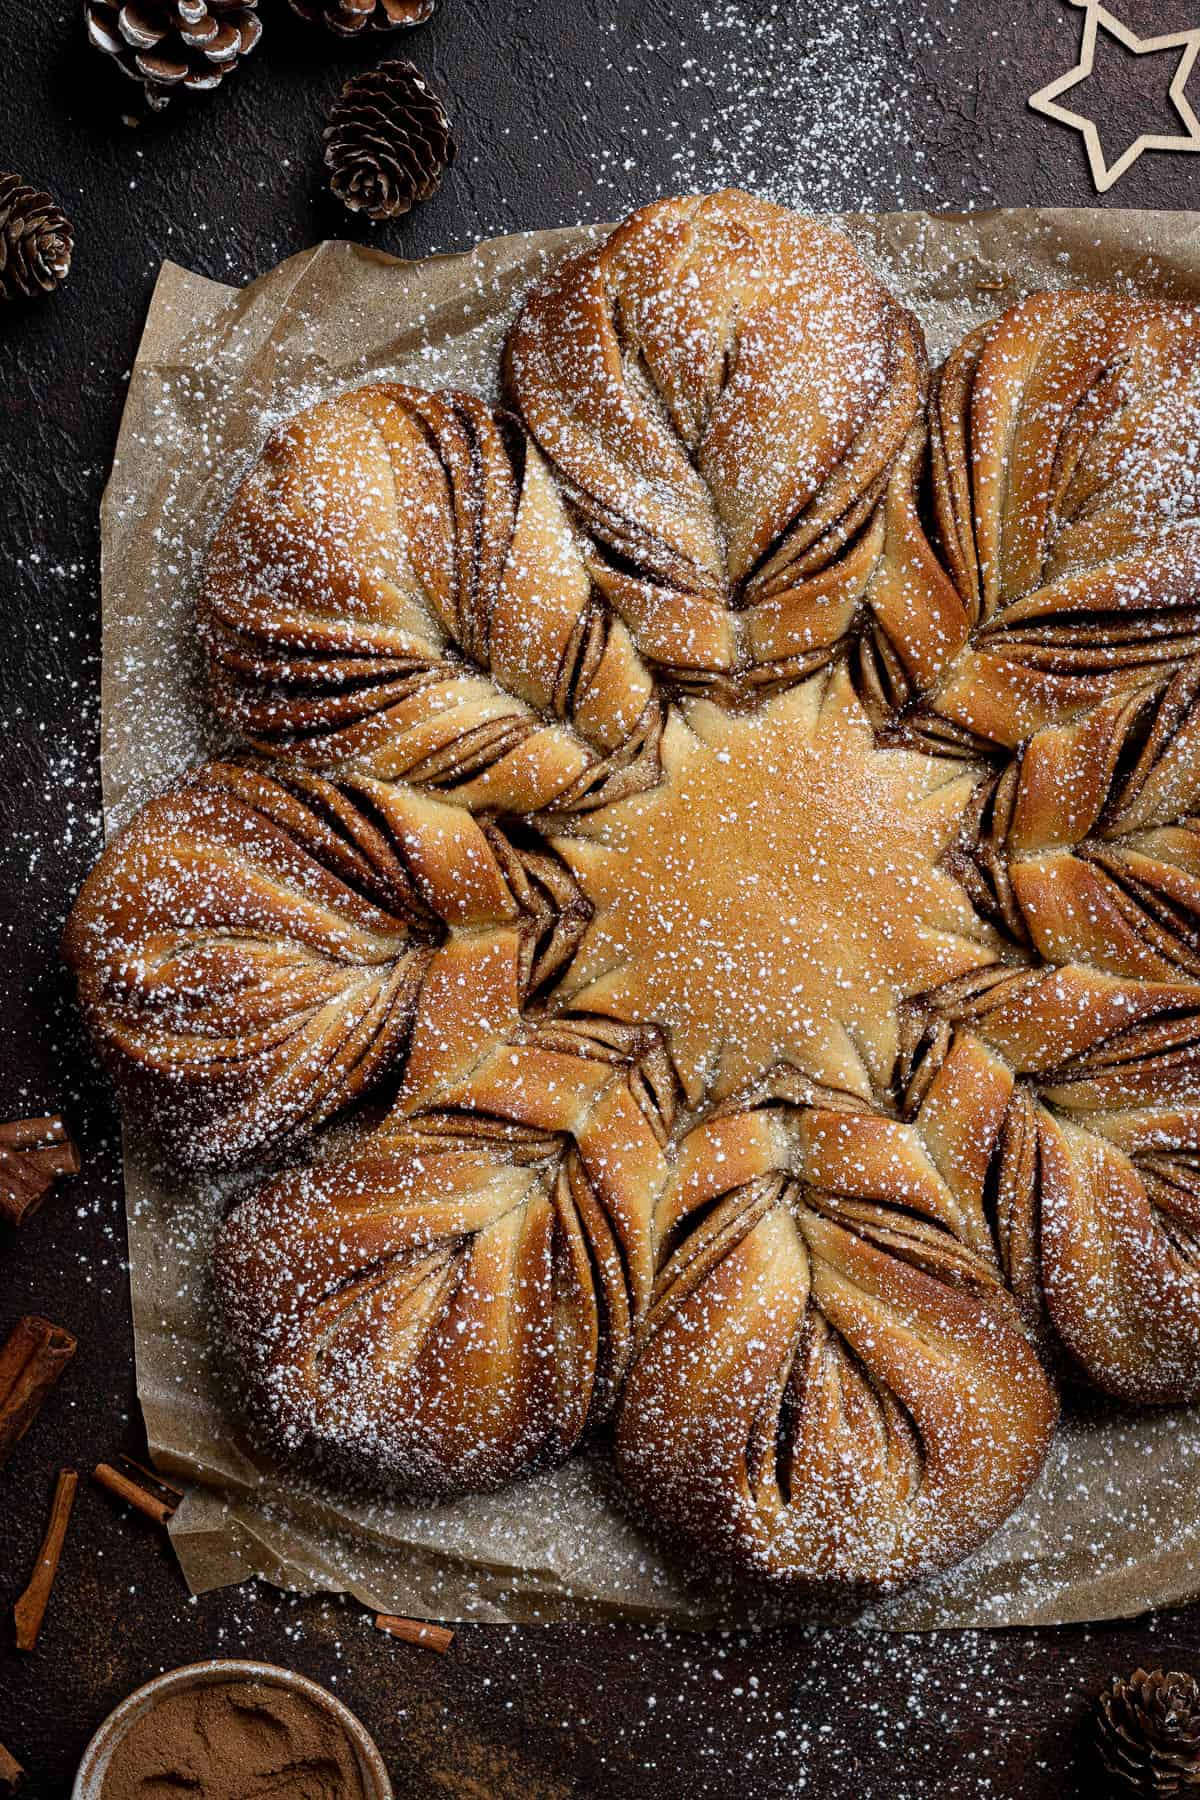
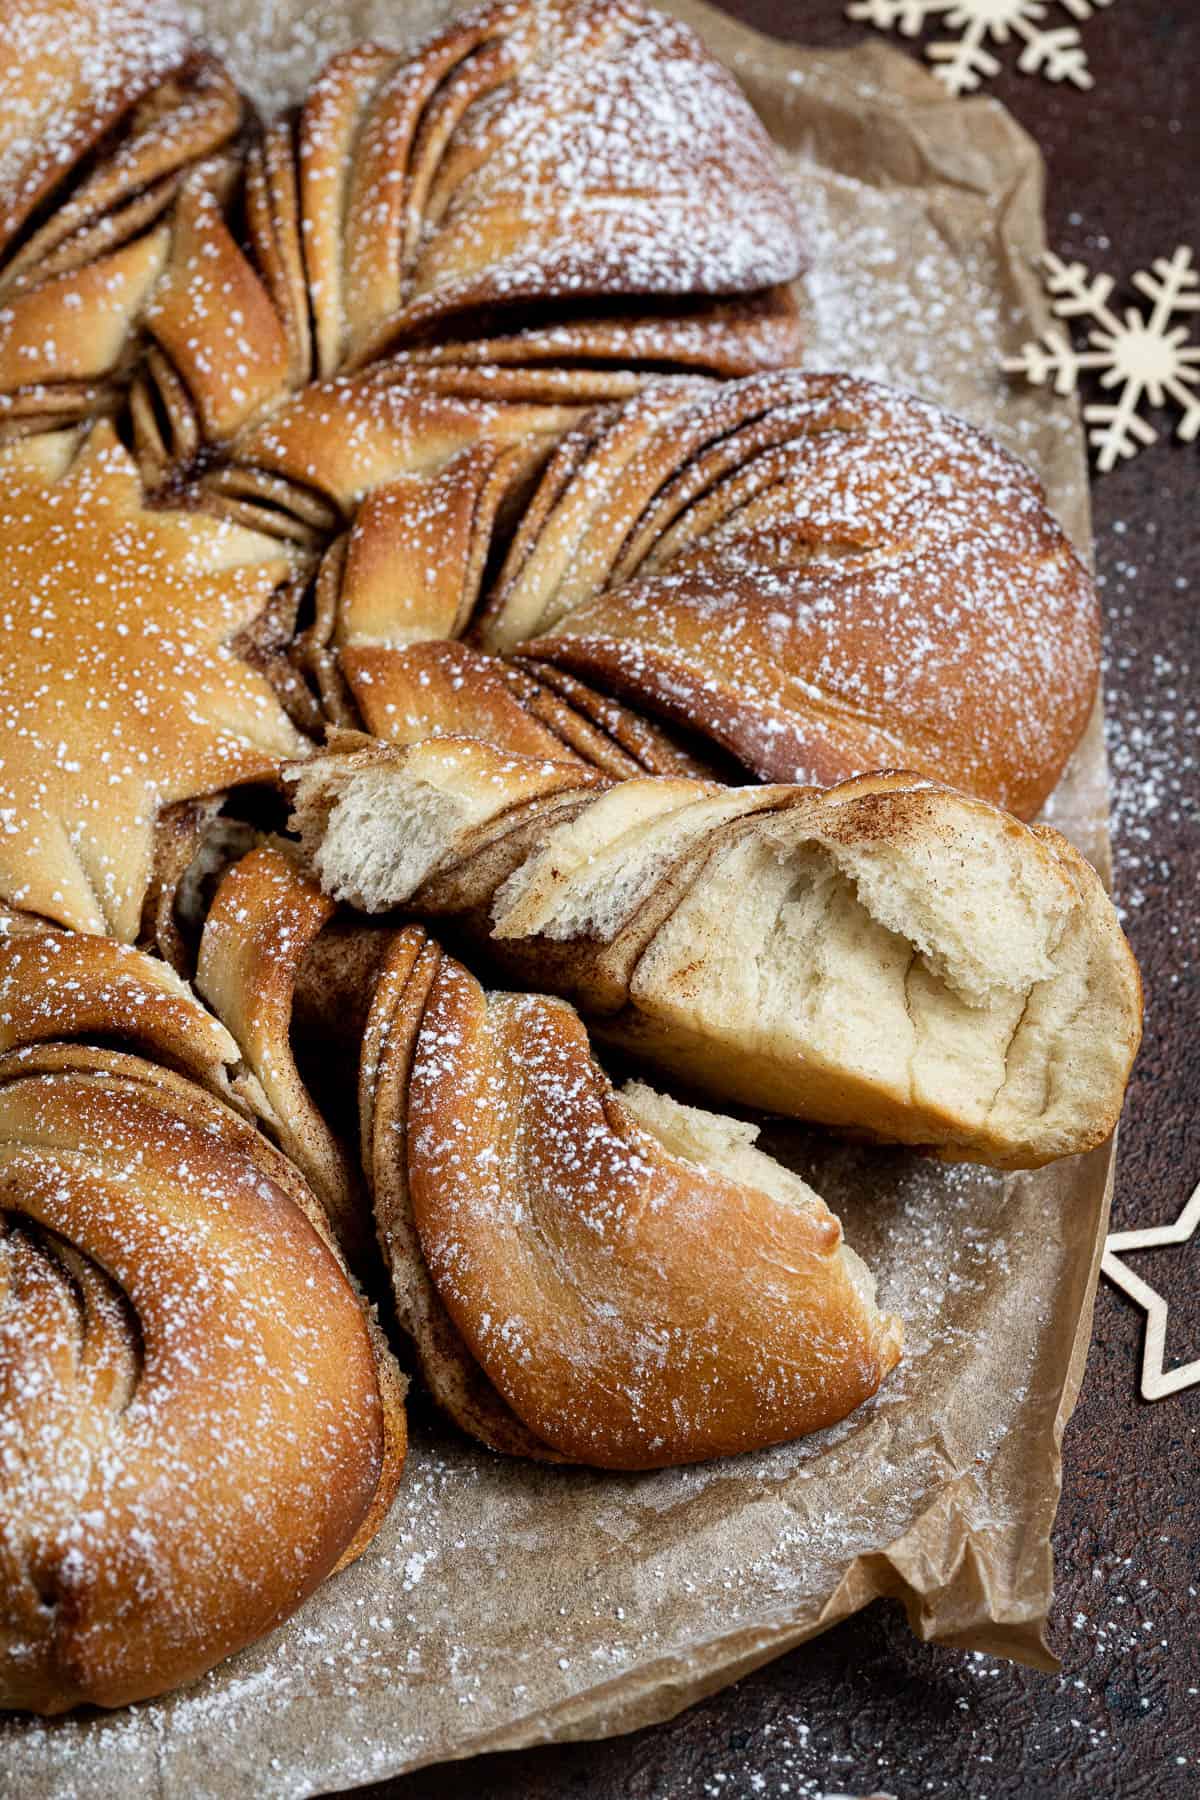
Vegan cinnamon star bread - this yeasted pull-apart star bread with buttery cinnamon sugar filling is a show-stopping take on cinnamon rolls. It would make a perfect festive breakfast, brunch or dessert.

Also known as snowflake bread, this vegan cinnamon star bread is far easier to make than it looks! Layers of soft, fluffy dough are filled with buttery cinnamon sugar and cut and twisted to form a beautiful star or snowflake shape.
With a dusting of snowy icing sugar, it would be a fantastic treat for Christmas, although it is equally as good at any time of year!
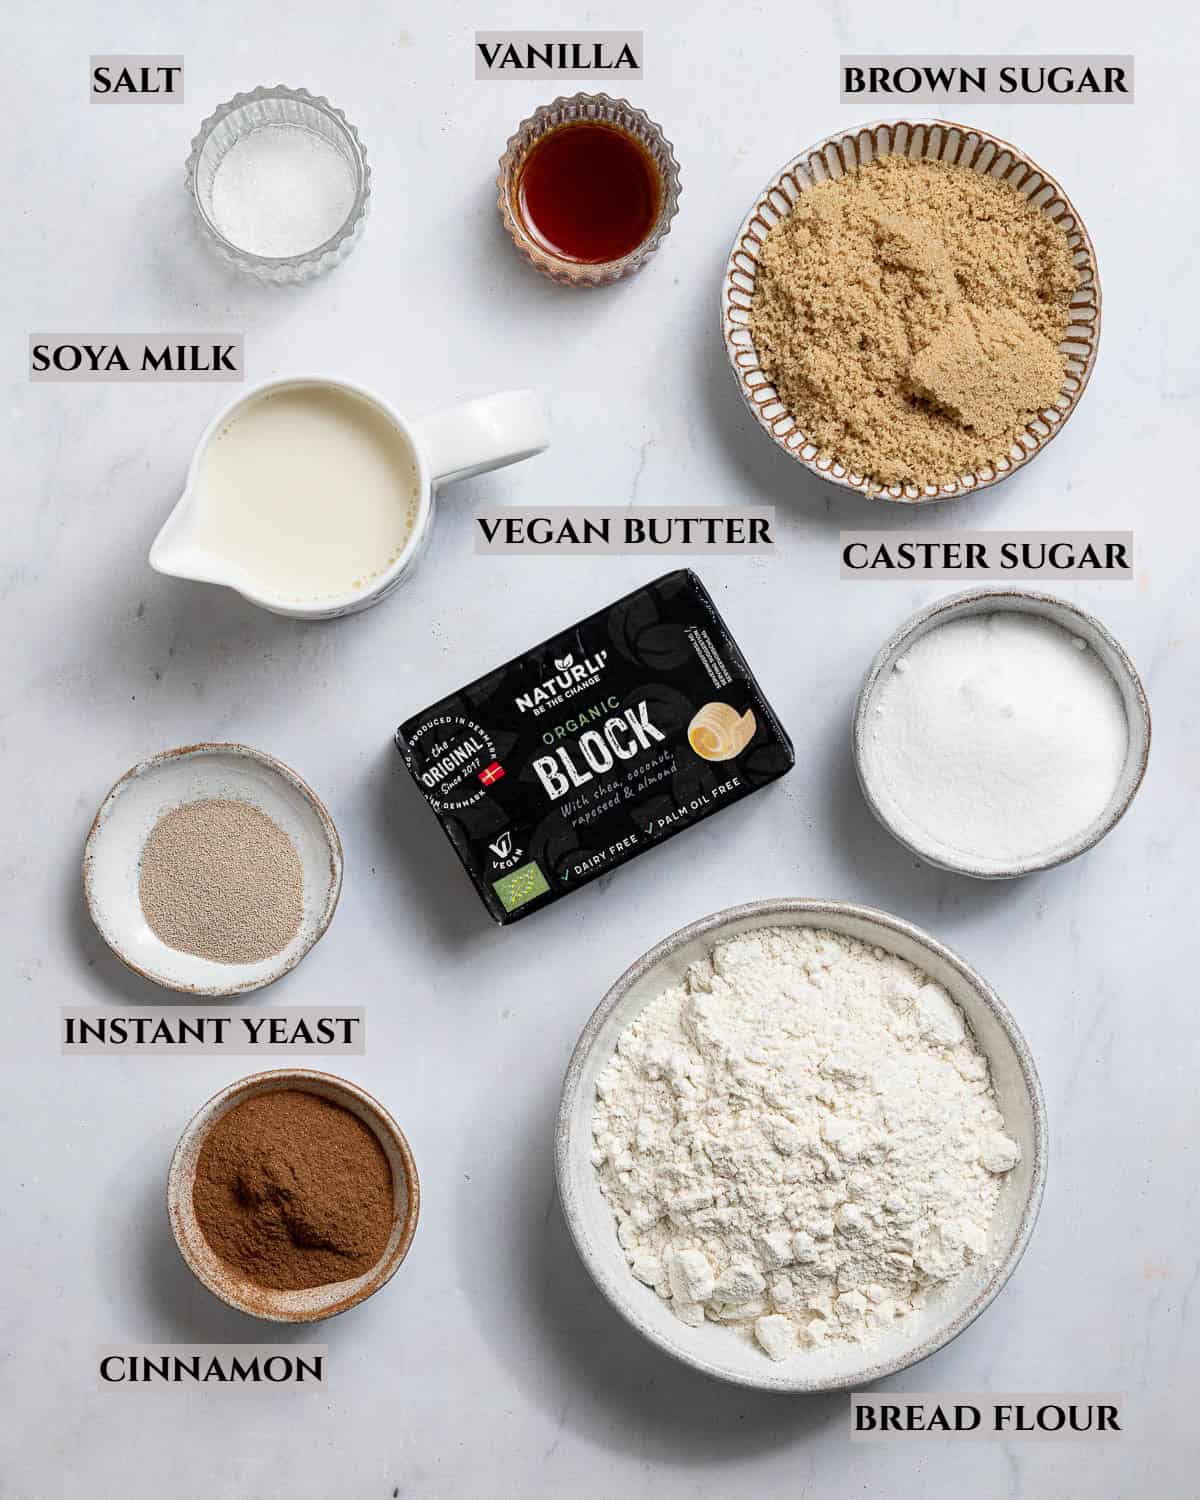
Ingredient Details:
Bread flour: White bread flour helps to give this vegan cinnamon star bread it's soft, fluffy, chewy texture. Plain (all-purpose) flour will also work though the texture isn’t quite the same. I don’t recommend using wholemeal flour as that will make the bread too dense.
Instant yeast: I always prefer to use instsant yeast when making bread as it can just be added straight to the flour and doesn’t need to be activated first.
Salt: You simply cannot make good bread without salt. Don’t omit it.
Non-dairy milk: Soy milk is always my favourite for baking as it has the highest protein content so most closely resembles dairy milk. Any variety of non-dairy milk will work however, but go for an unsweetened one if you can, and definitely soy milk if you have it.
Sugar: I use caster sugar in the dough and light brown soft sugar in the filling. The caster sugar can be swapped for granulated, and you can use dark, rather than light brown sugar if you want a stronger molasses flavour.
Vegan butter: A block style butter such as Flora plant butter or Naturli vegan block really is best. A spreadable one will work but your dough may be softer and therefore harder to work with.
Cinnamon: Obviously needed! You could also use pumpkin spice instead, or add in some extra spices such as ginger, nutmeg and cardamom.
How To Make Vegan Cinnamon Star Bread:
(Full measurements and instructions can be found in the recipe card at the bottom of the page)

- Step 1: To make the dough, mix the bread flour, yeast, salt and sugar in a large bowl. Add the milk and vanilla and mix to form a shaggy dough.
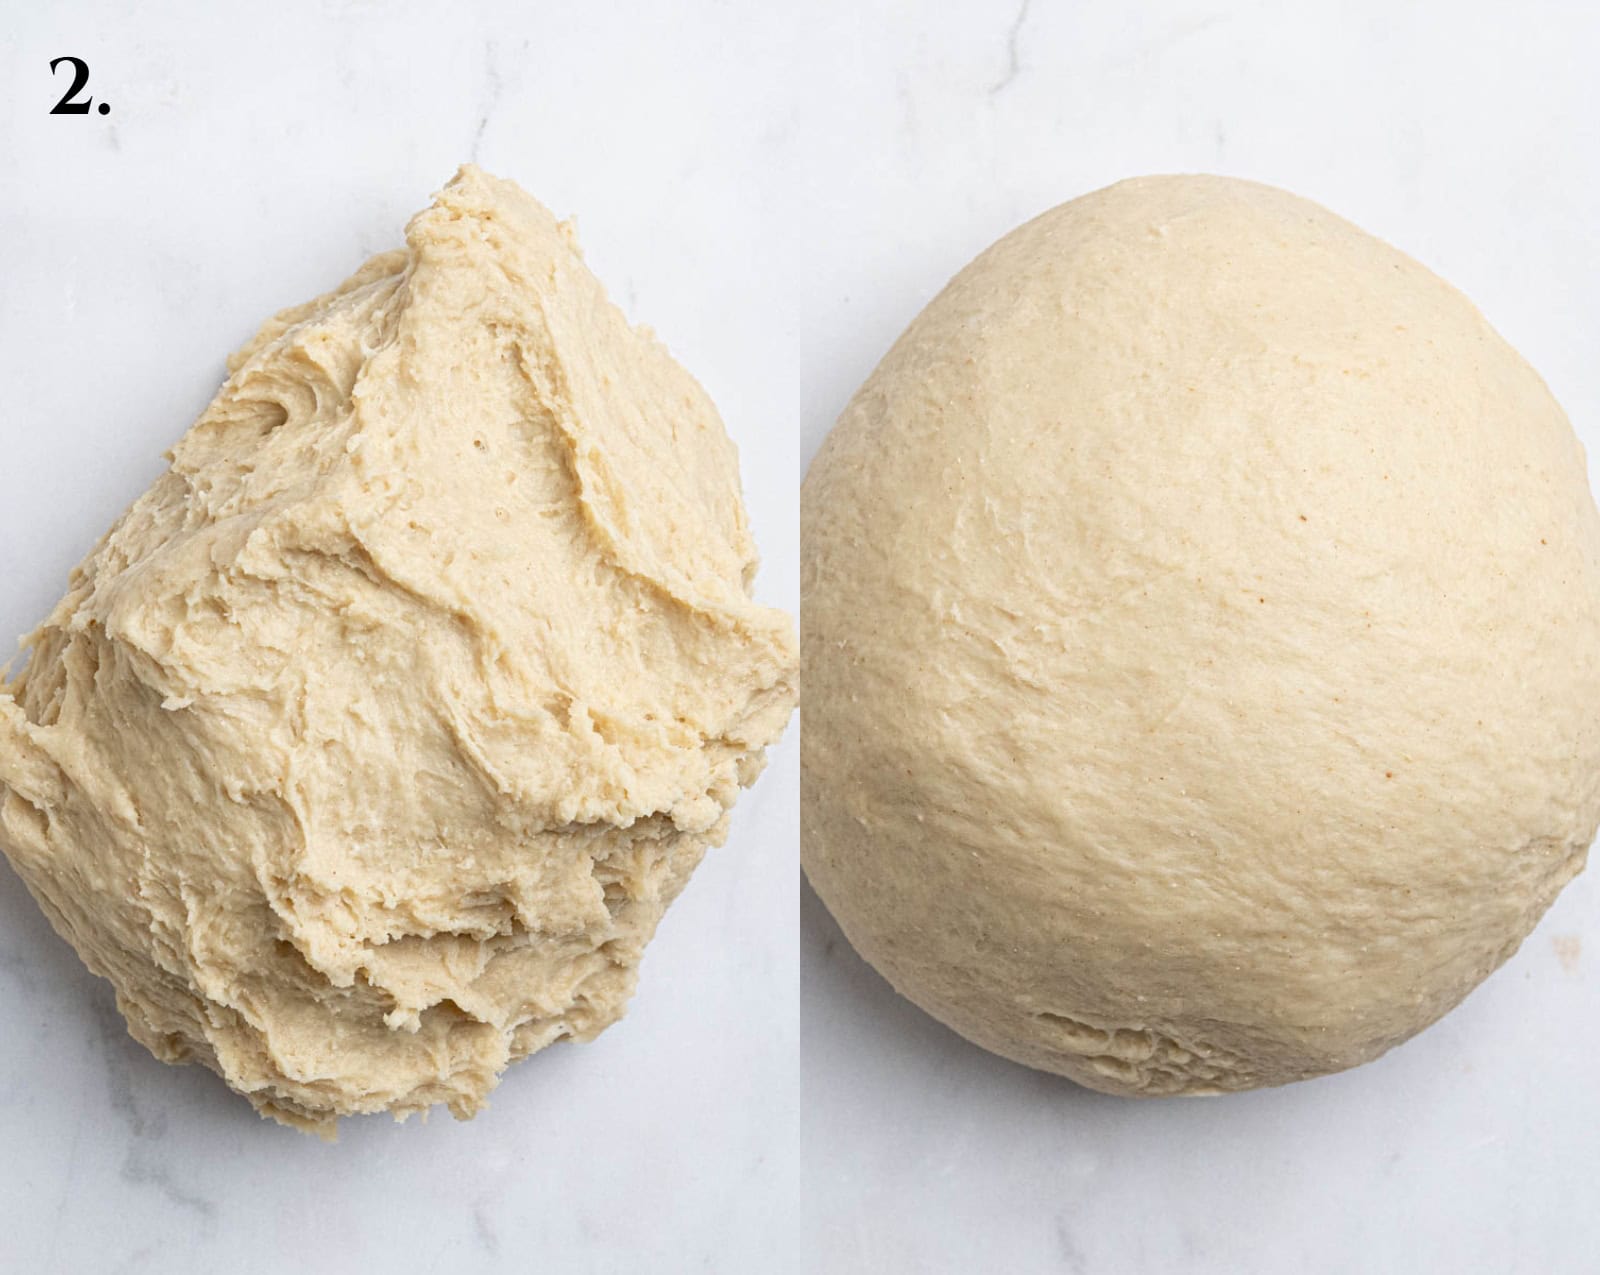
- Step 2: knead for 5-10 minutes until smooth and elastic.The dough will be sticky at first.
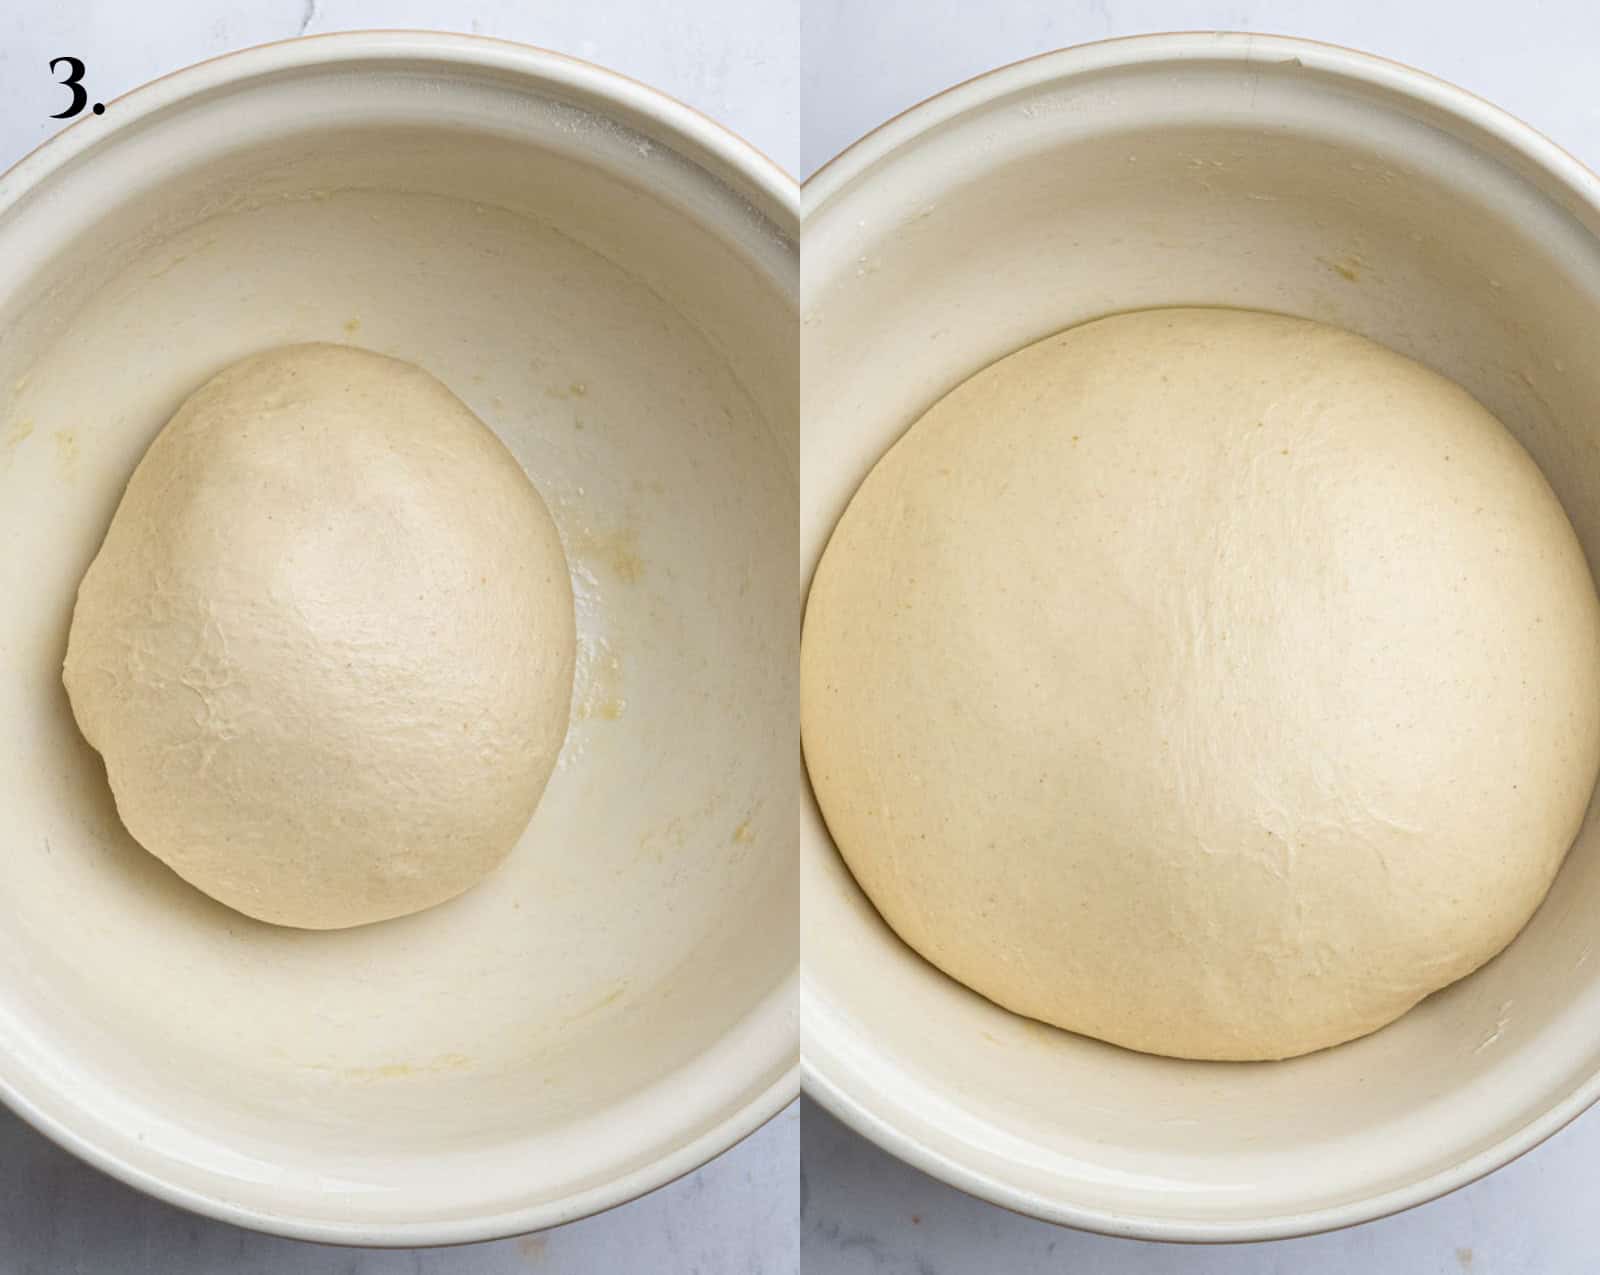
- Step 3: Knead in the butter then place in an oiled bowl, cover and let rise until doubled.
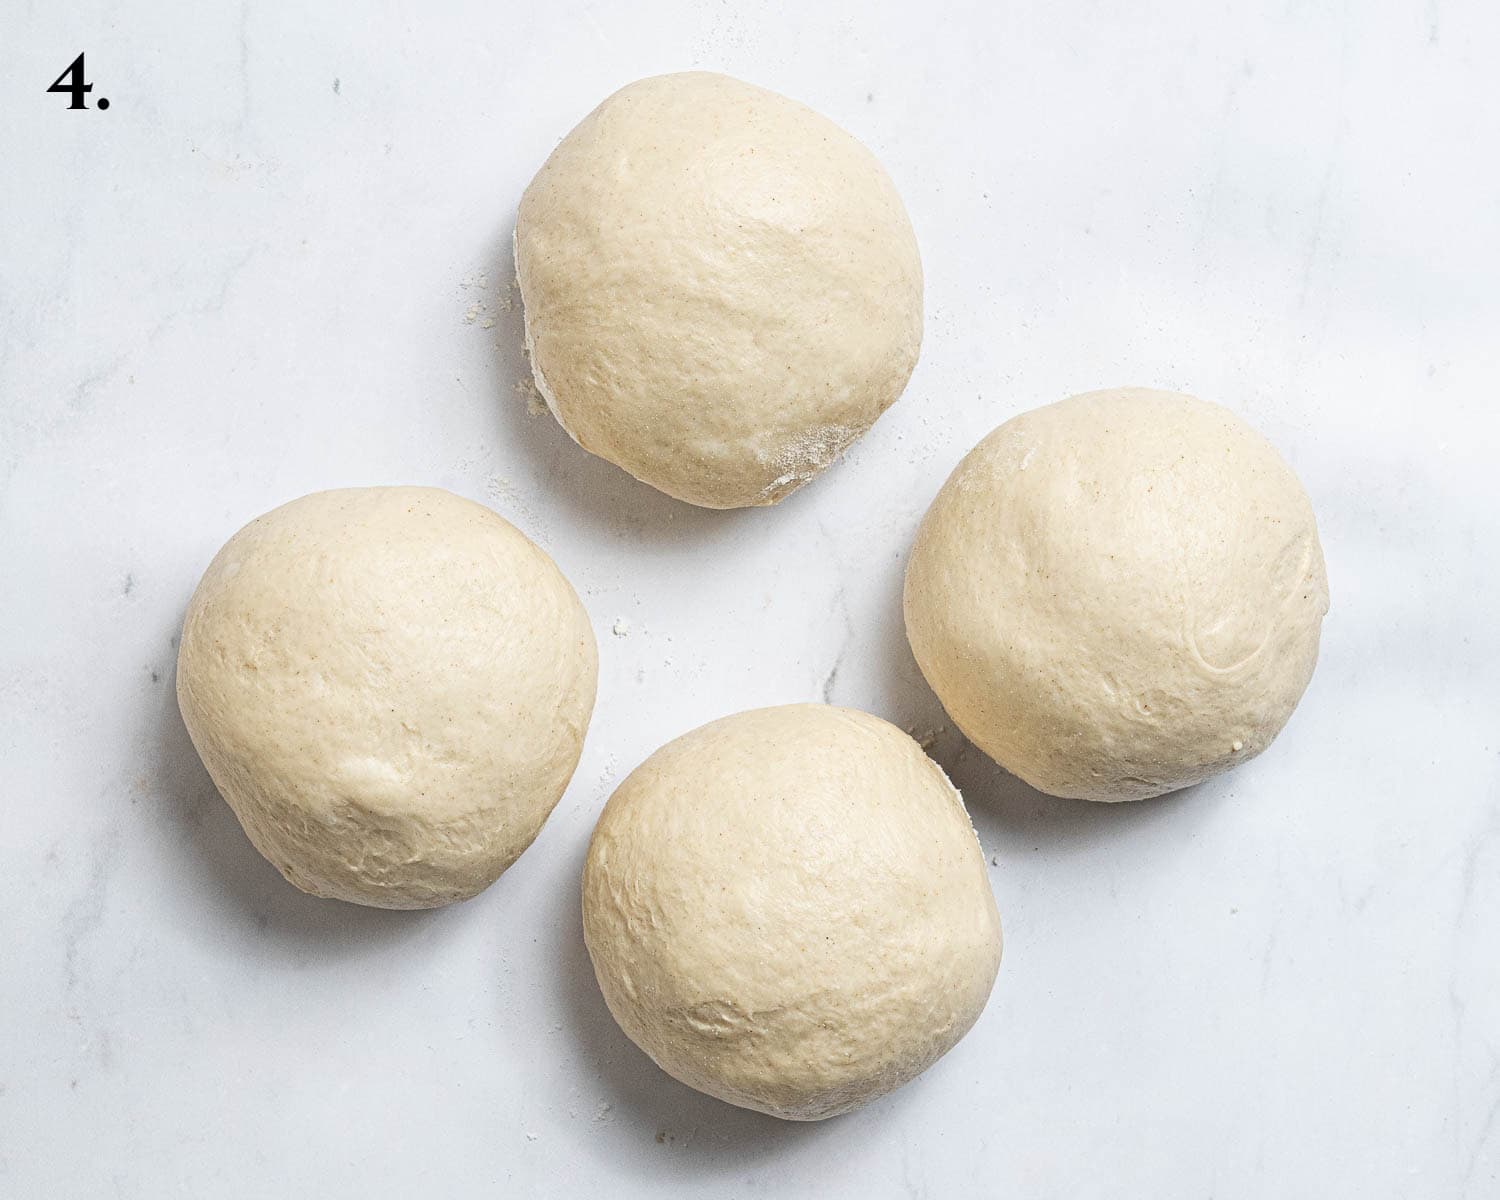
- Step 4: Punch down the risen dough, divide it into 4 even pieces and shape each one into a ball.
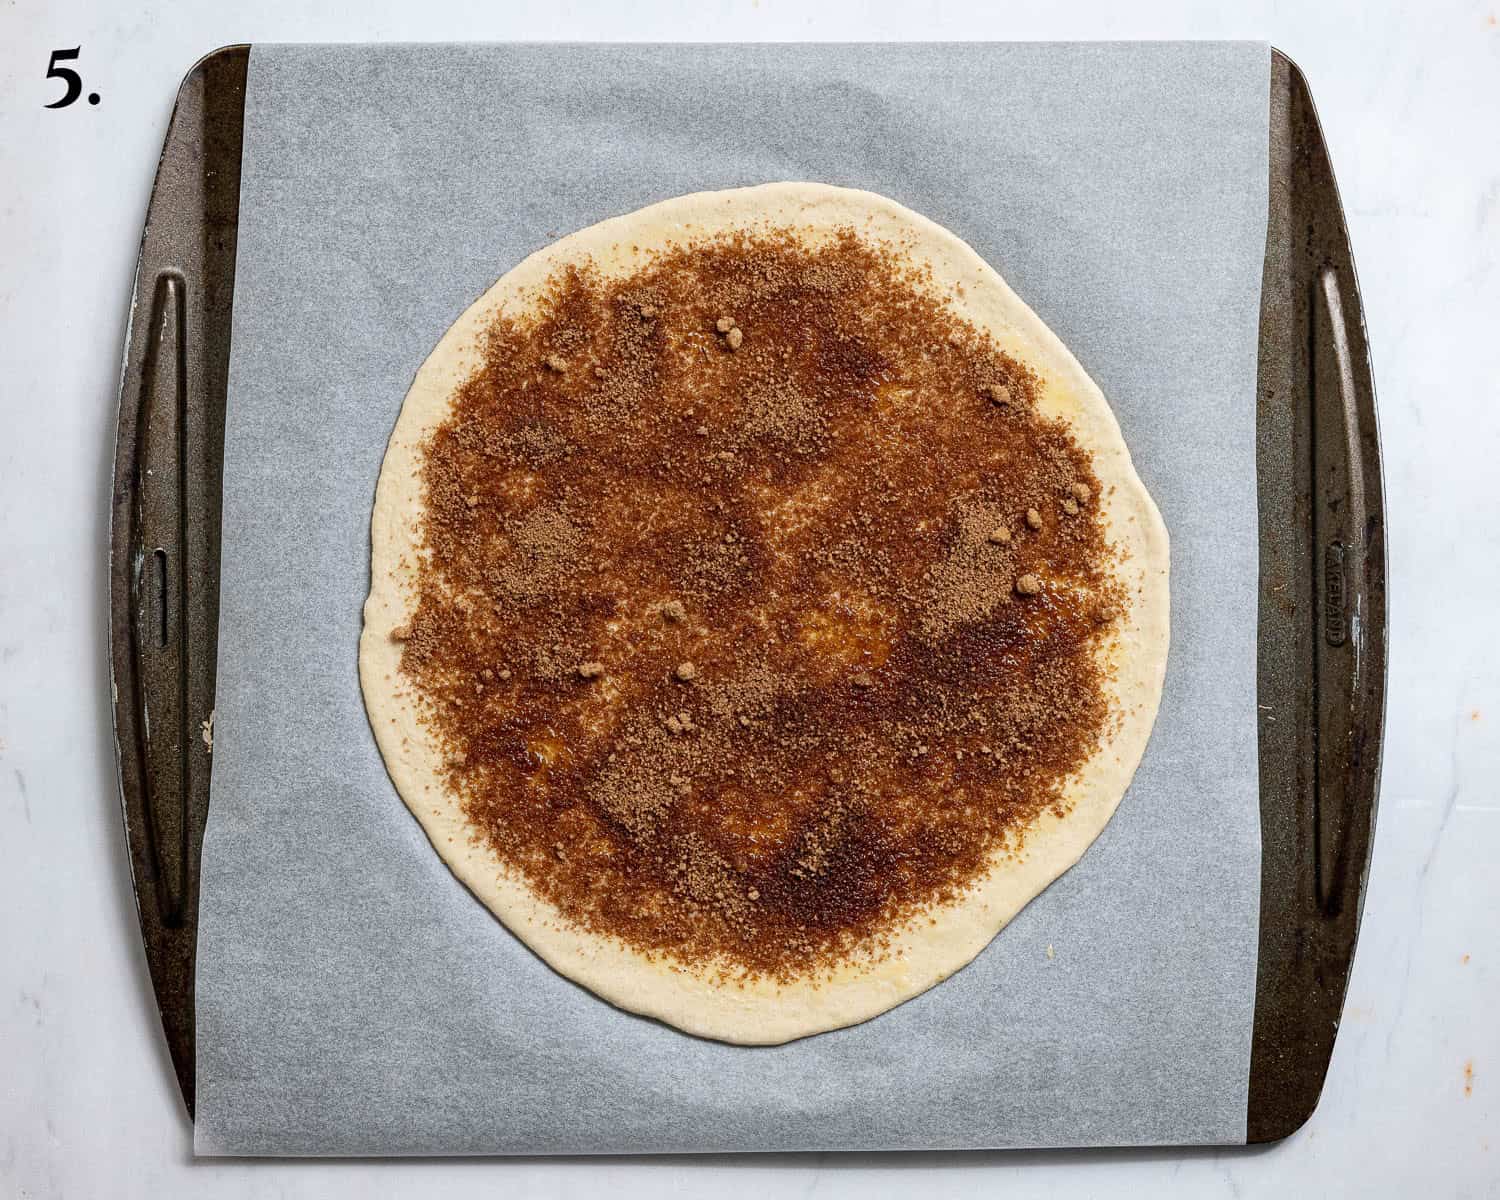
- Step 5: Roll one of the balls of dough out into a 25cm circle. Transfer it to a lined baking tray, brush with melted butter and sprinkle with cinnamon sugar.
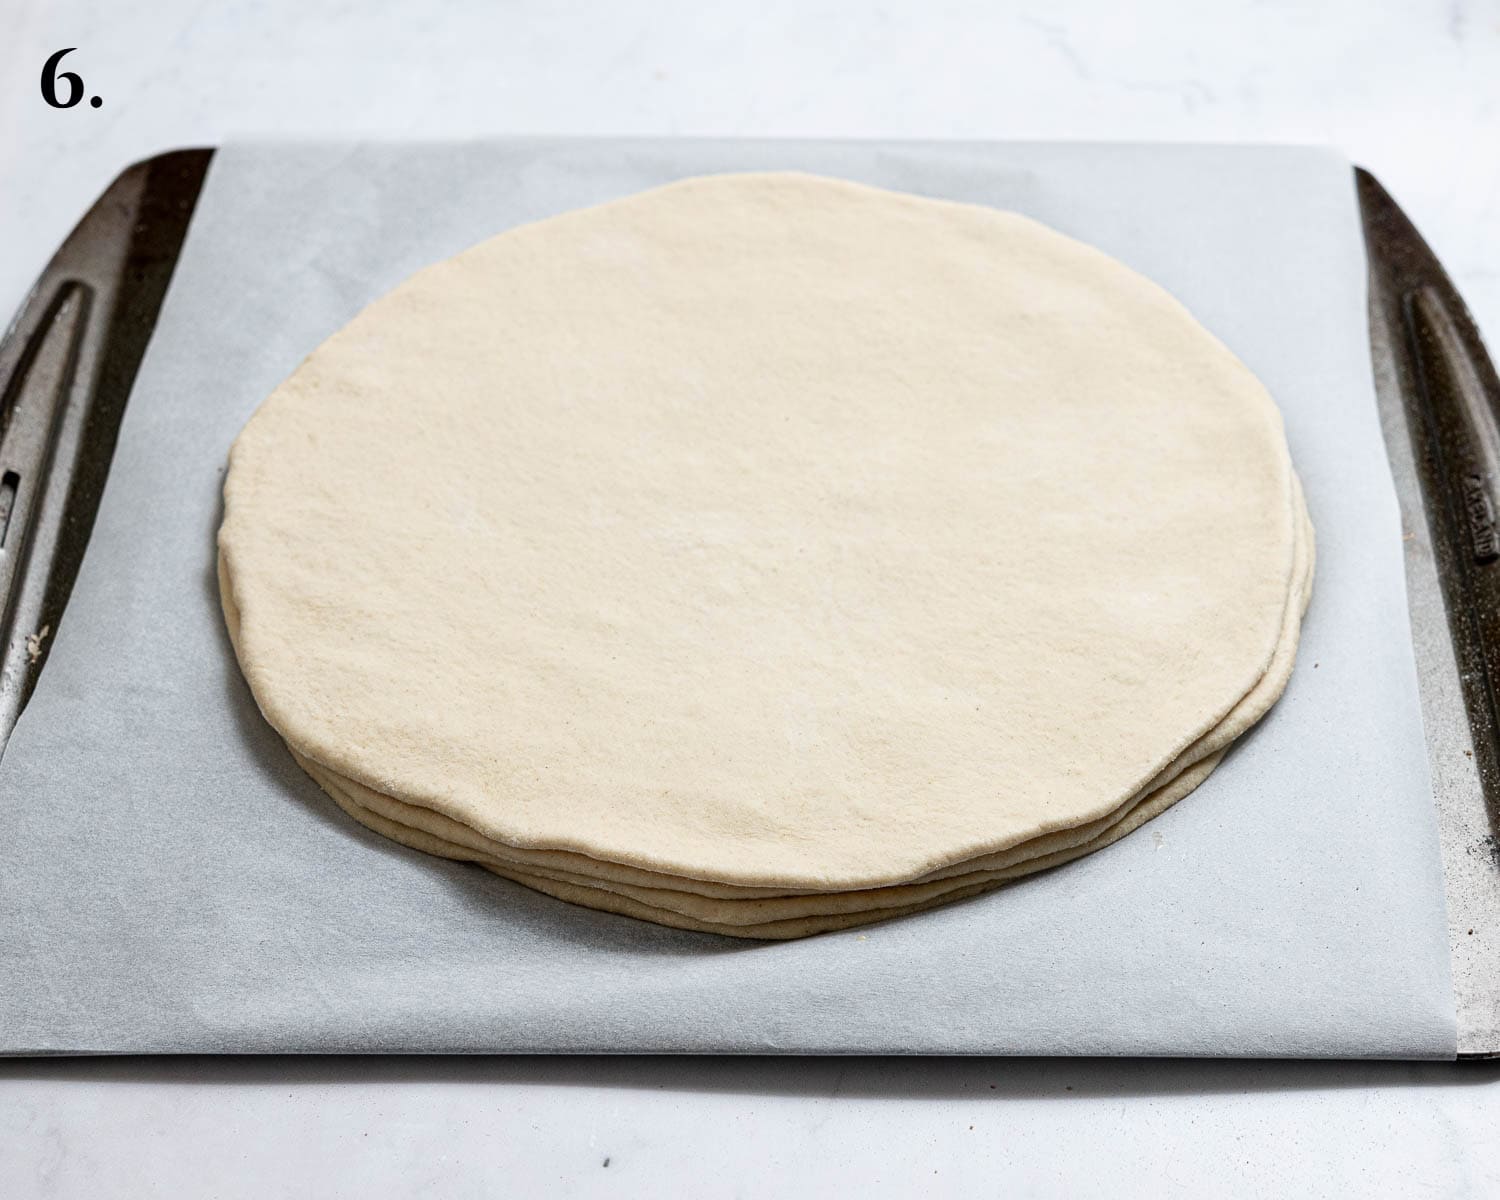
- Step 6: Roll out another circle of dough and place it on top of the first one, again top it with butter and cinnamon sugar. Repeat this until you have a stack of 4 layers of dough, 3 layers of cinnamon sugar.
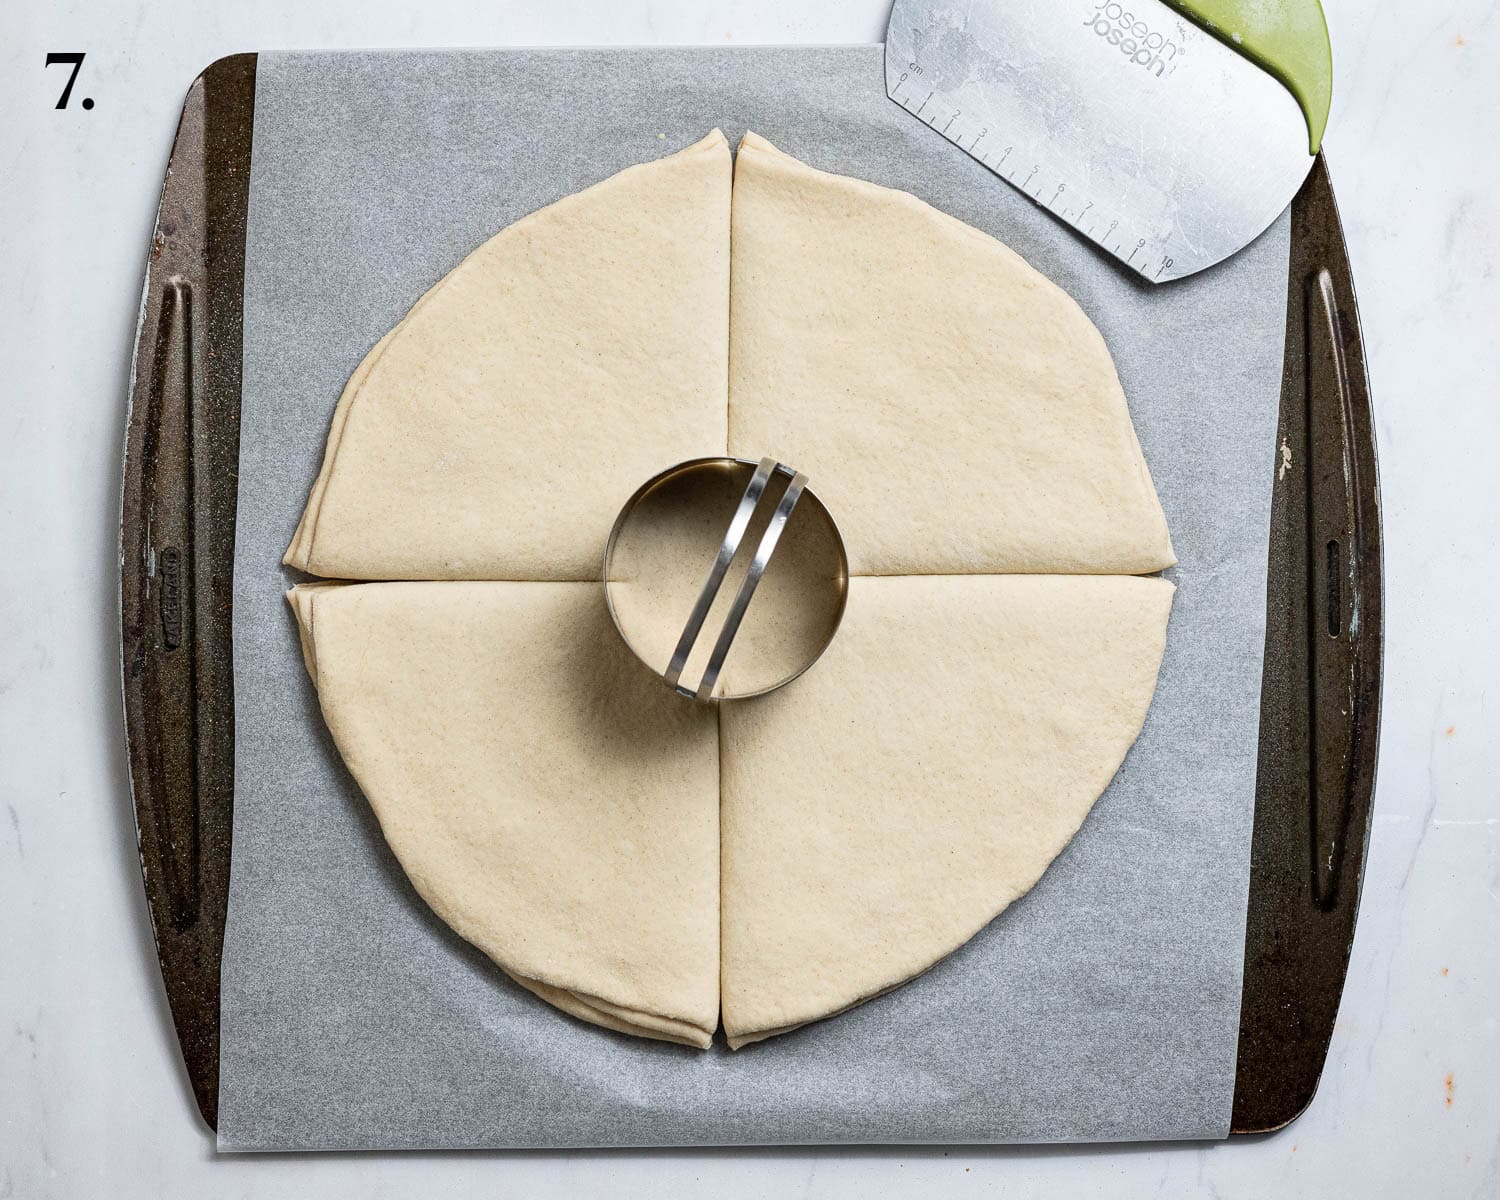
- Step 7: Place a 3 in round cookie cutter or ramekin in the centre of the dough. Using a dough cutter or very sharp knife, cut the circle into quarters starting at the edge of the dough and stopping at the edge of the cutter.
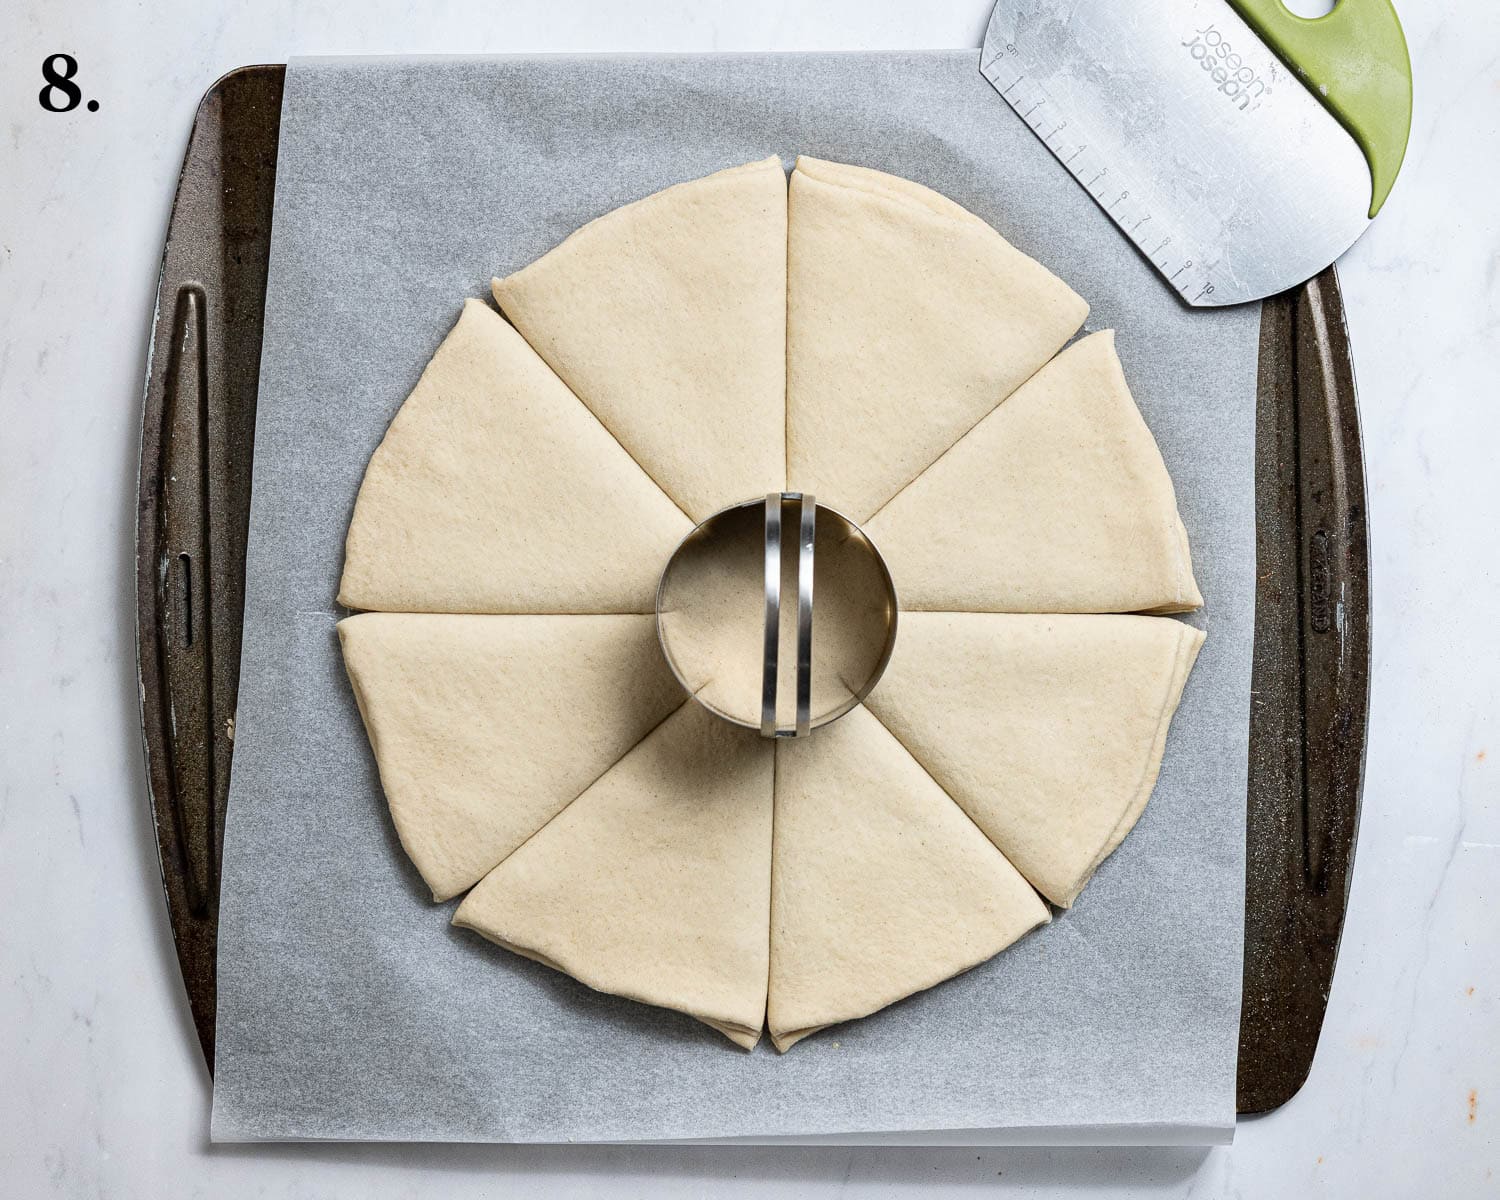
- Step 8: Cut each quarter in half to make 8 sections.
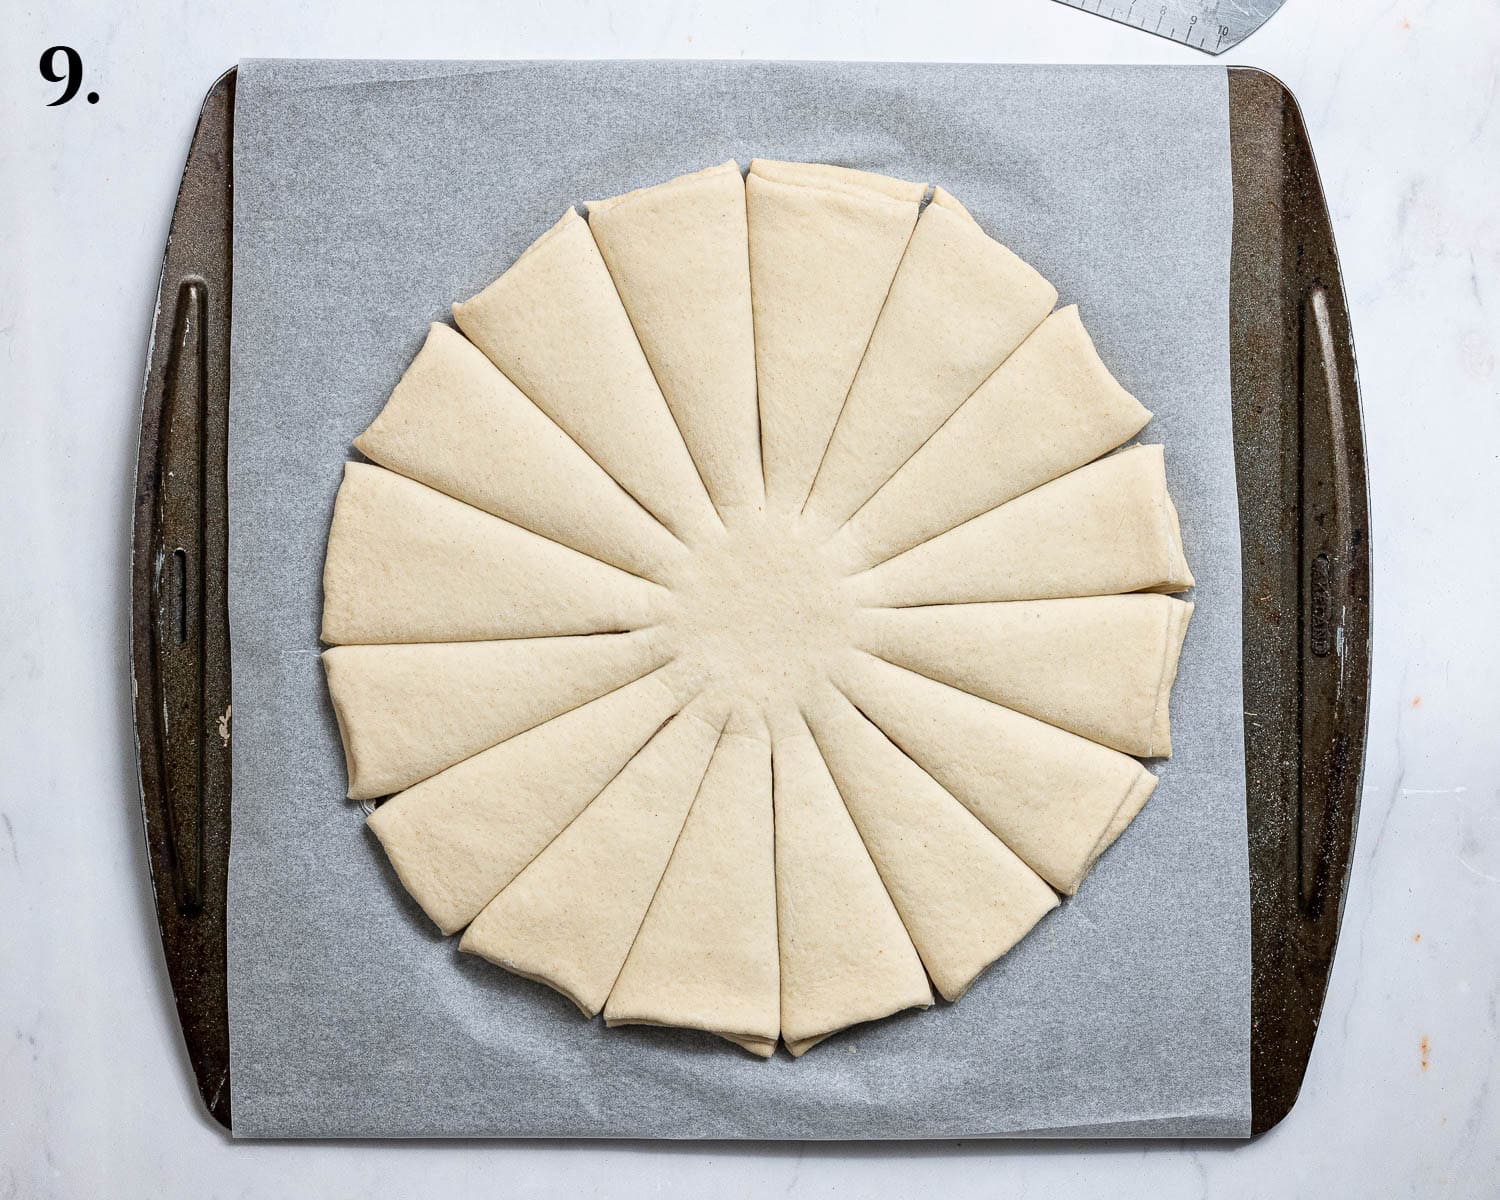
- Step 9: Cut each section in half again to end up with 16 sections.
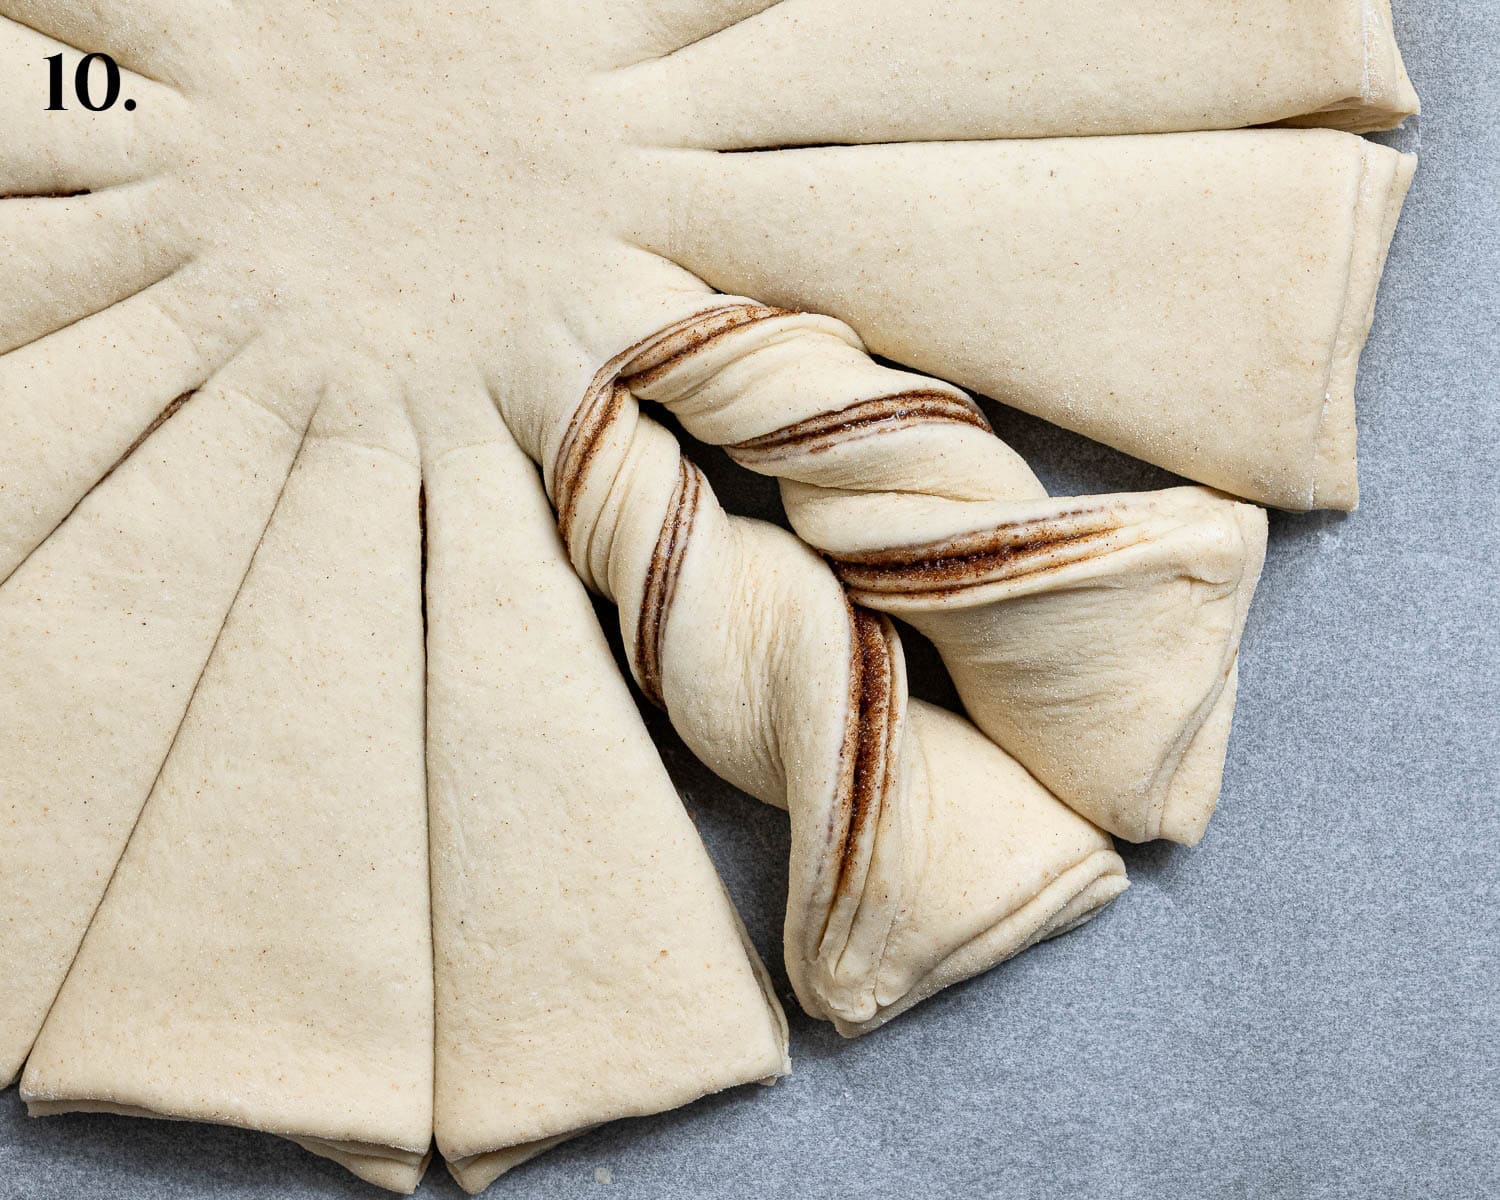
- Step 10: Pick up two adjacent dough strips, one in each hand, and twist them away from each other twice.
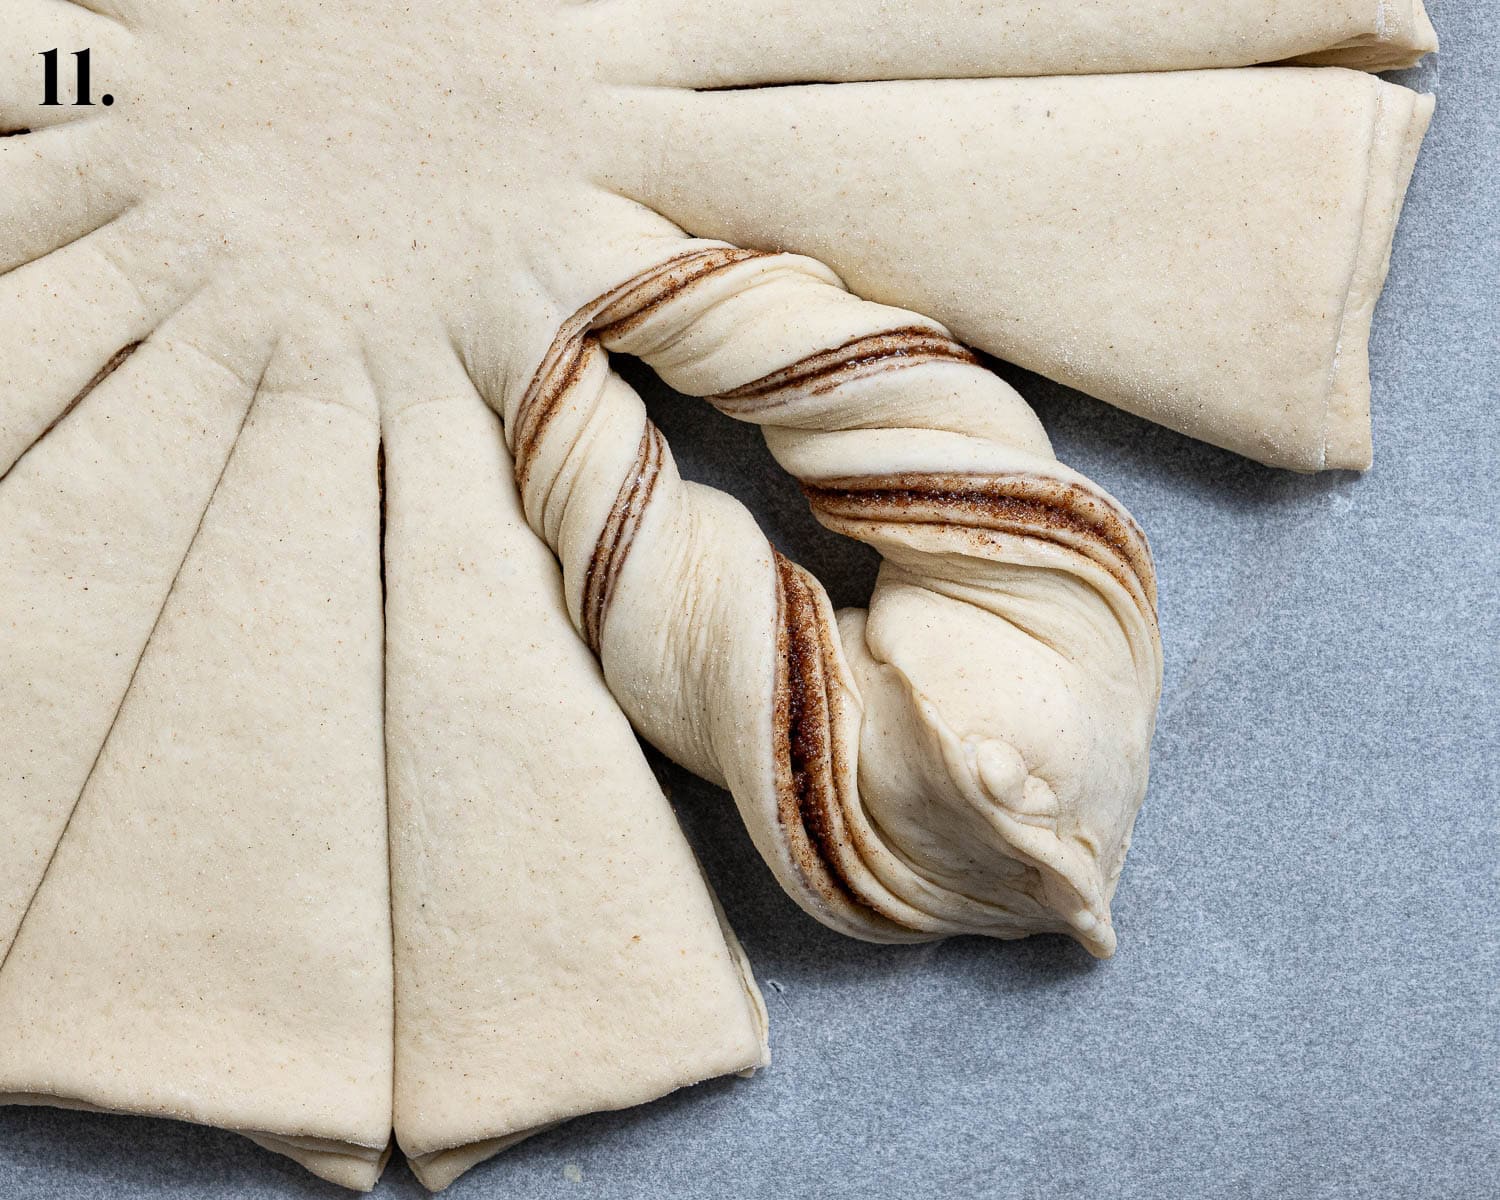
- Step 11: Do a third half twist so that the flat ends are facing each other, then pinch the ends together firmly into a point.
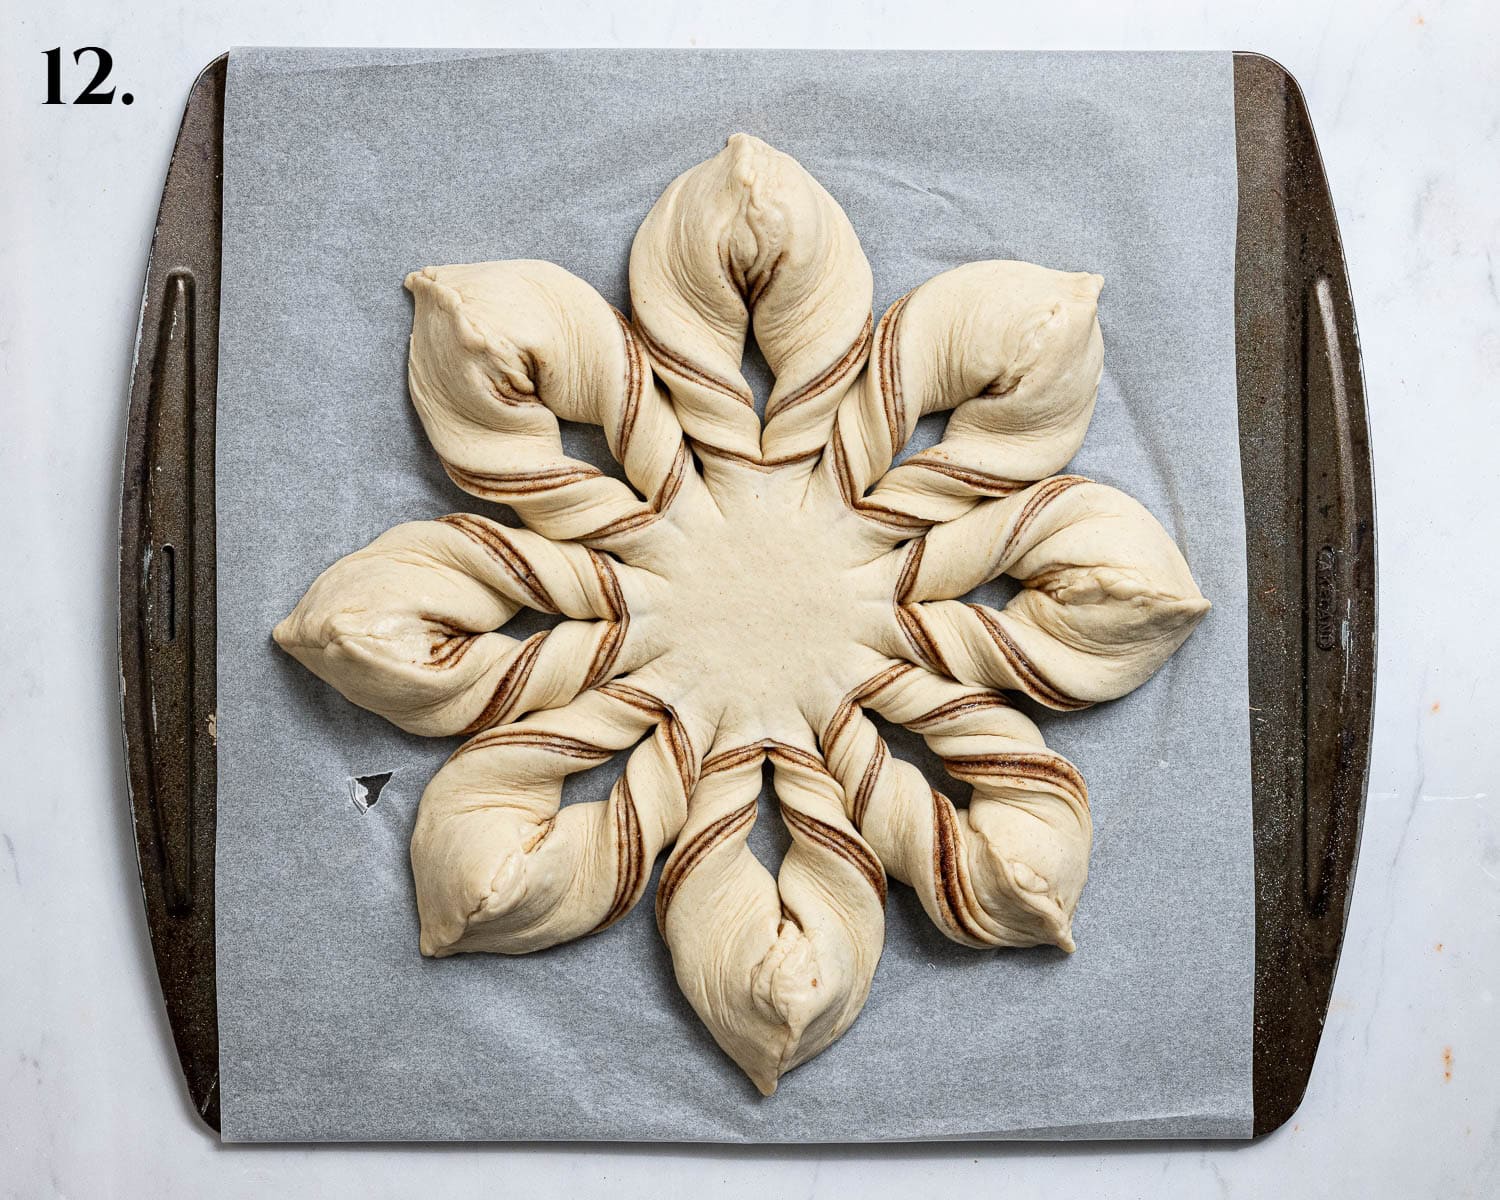
- Step 12: Repeat with the remaining strips of dough.
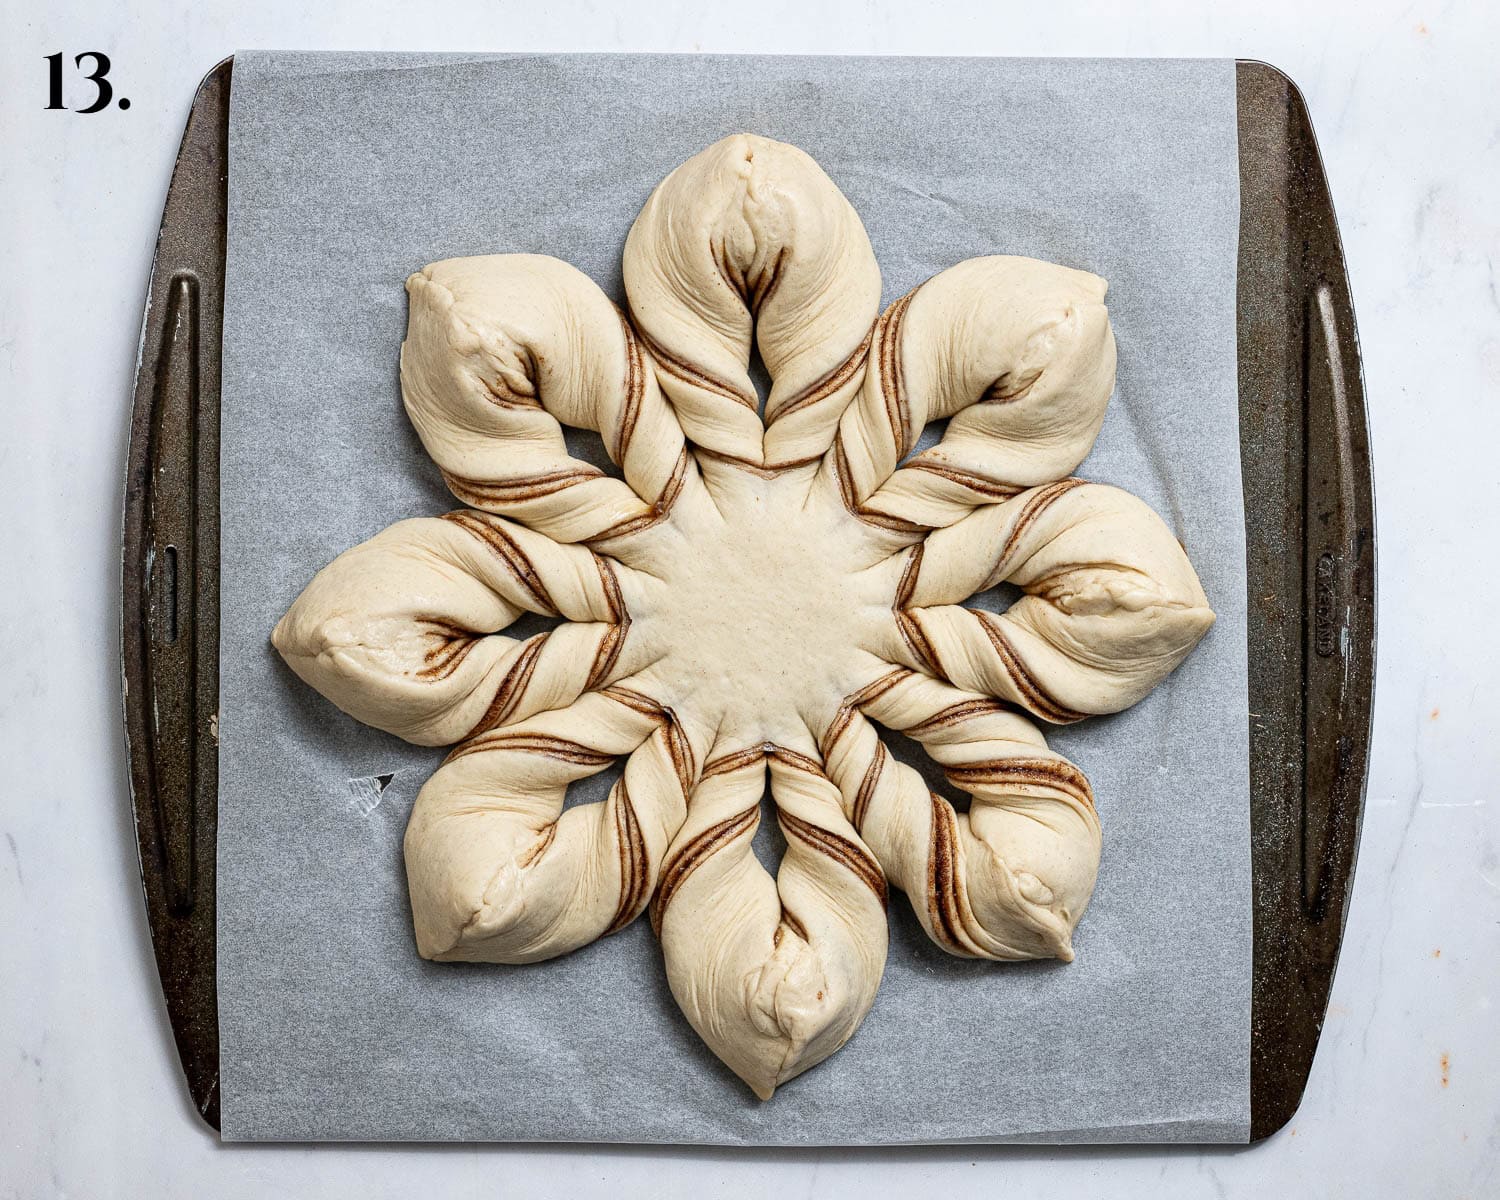
- Step 13: Loosely cover and set aside to rise until slightly puffy.
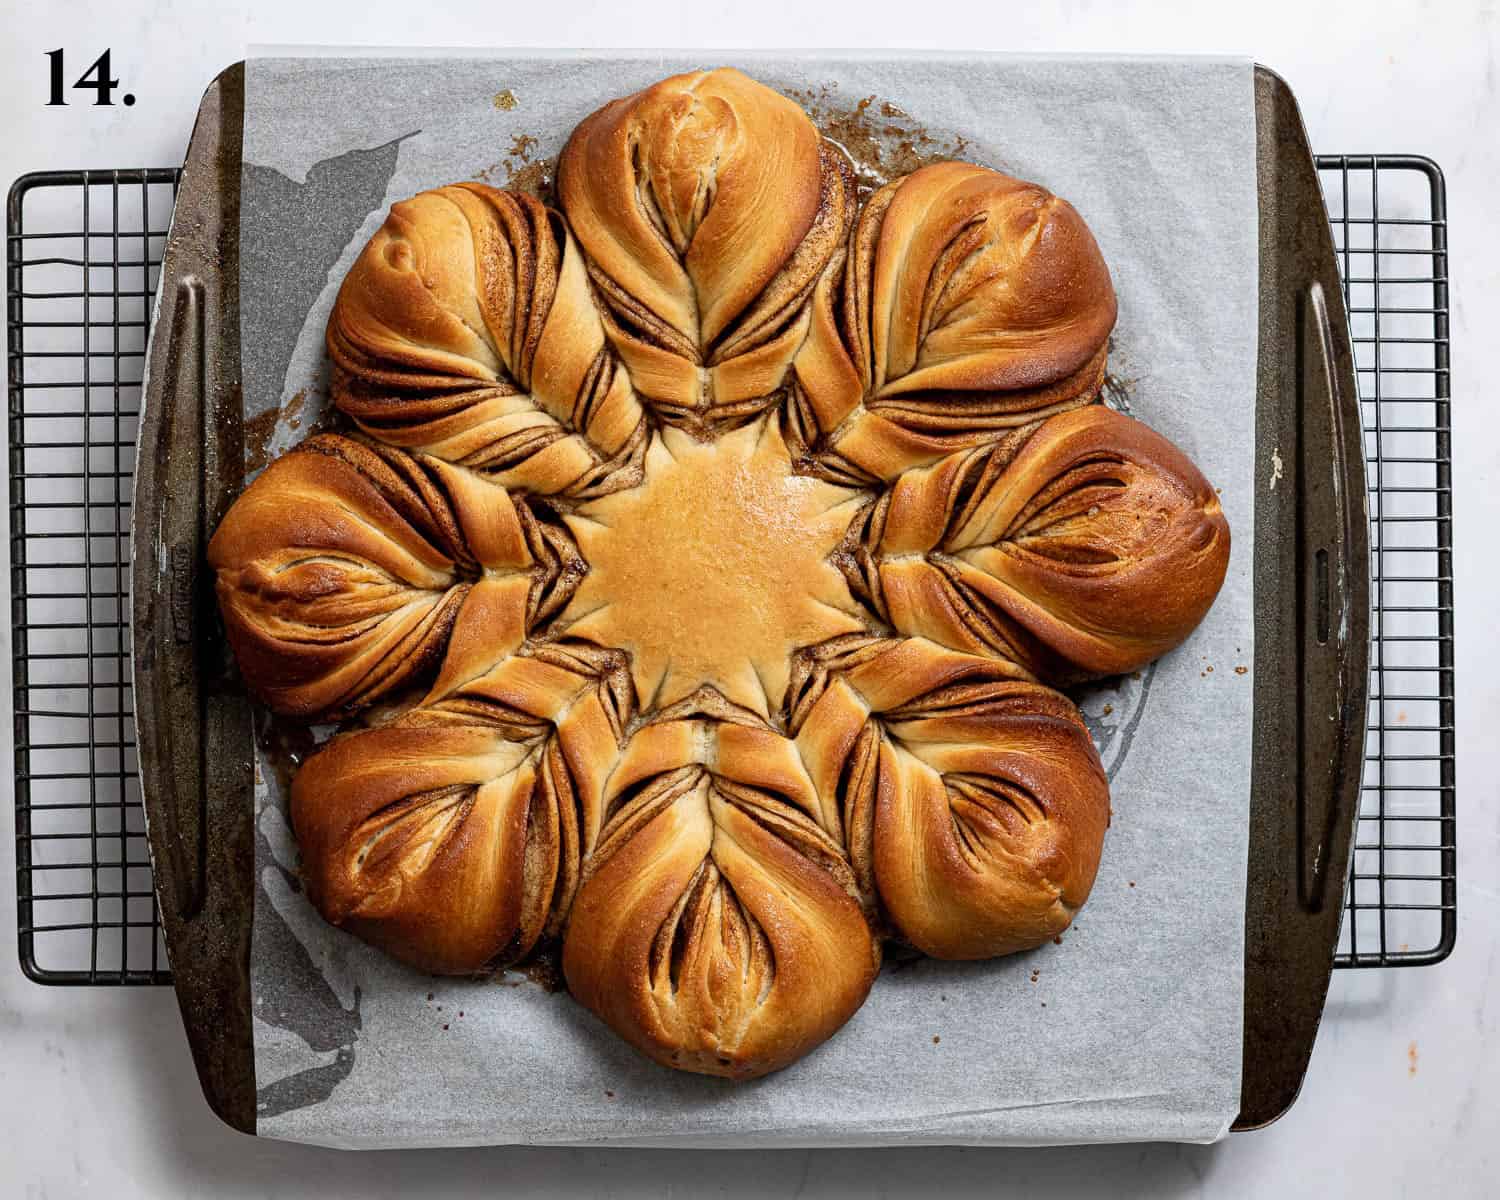
- Step 14: Brush with glaze and bake for 22-25 minutes.
Top Tips:
USE SCALES. As with all of my baking recipes I really do recommend using the metric measurements with a digital scales rather than the cup conversions. Cups are a wildly inaccurate measuring system and you will get far better, more consistent results using a scale, not to mention that it is also easier and less messy than cups!
Tablespoon and teaspoon measurements are for proper measuring spoons, NOT regular kitchen spoons. A Tablespoon is 15ml and a teaspoon is 5ml and they should be level, not heaped.
Try to roll the pieces of dough out into as even a circle as you can, and keep them all the same size. You can stretch the dough a little as you stack the layers to even them out, and trim off any overhanging bits.
Make sure that your yeast isn't out of date! Old yeast can lead to dough that doesn’t rise.
The rising time of the dough will vary depending on how warm it is; on hot days it will rise much faster than on cold ones.
If you want, you can give the dough it’s first rise overnight in the fridge rather than at room temperature. This breaks up the workload and gives the bread an even better flavour.
Assemble and shape the star bread on the lined baking sheet; once it is formed it would be impossible to move it without deforming it.
I find that the best tool for cutting the dough is a metal bench scraper, also known as a dough scraper or cutter; simply press it straight down through the dough. A pizza wheel or very sharp knife will also work.
Be careful not to let the star bread over-proove on it's second rise otherwise it may lose definition once it is baked. It just needs to rise for long enough to become slightly puffy; in a warm environment this could take as little as 20 minutes, or up to 45 if it is cold or you refrigerated the dough for it's first rise.
The best way to tell if a loaf of bread is cooked in the middle is to use a probe thermometer. It is impossible to give a one-size-fits-all baking time as ovens vary so much. The bread should be done when it reaches 90°C / 195°F.
FAQ's:
This vegan cinnamon star bread really is best eaten on the day it is baked, but it will keep for 2-3 days in an airtight container at cool room temperature. Warm it through in the microwave or a low oven to refresh it before serving.
I wouldn't necessarily recommend making and freezing the loaf in advance of serving it, but any leftovers can be frozen, well wrapped, for up to 3 months. Allow to defrost at room temperature then warm through to serve.
This is a soft, sticky dough so it is easiest made in a stand mixer. You absolutely can knead it by hand if you don't have one, just be prepared to get a bit messy.
When kneading, you shouldn't flour the surface as you will end up incorporating too much flour and making the dough too dry. Instead, if the dough is sticking too much, you can lightly oil the worksurface and your hands to help, or just be prepared to get a bit sticky!
A bench scraper is incredibly handy when kneading dough by hand to unstick the dough from the surface.
No, I’m afraid that you cannot use gluten free flour. Making gluten free bread is tricky and the entire recipe would need reworking. Gluten free baking is not my area of expertise so I cannot advise you. It is best to use a recipe that is designed to be gluten free rather than trying to adapt a non gluten free recipe.


Stay in touch with me through social media @ Instagram, Pinterest, TikTok and Facebook, and subscribe via email to get all our latest recipes!
All images and content on Domestic Gothess are copyright protected. If you want to share this recipe then please do so by using the share buttons provided. Do not screenshot or post the recipe or content in full, instead include a link to this post for the recipe.
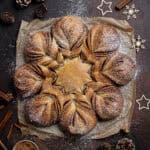
Vegan Cinnamon Star Bread
Ingredients
Dough:
- 400 g (3 ⅓ cups) white bread flour
- 8 g (2 ¼ teaspoons) instant/fast action yeast
- 45 g (¼ cup) caster or granulated sugar
- 1 teaspoon fine table salt
- 260 g (1 cup + 4 teaspoons) unsweetened non-dairy milk (I use soy) lukewarm
- 1 Tablespoon vanilla extract
- 60 g (¼ cup) vegan block butter softened
Filling:
- 80 g (6 ½ Tablespoons) light brown soft sugar
- 1 Tablespoon cinnamon
- 45 g (3 Tablespoons) vegan butter melted
Glaze:
- ½ Tablespoon non-dairy milk
- ½ Tablespoon maple syrup
- 1 teaspoon olive oil
Instructions
- To make the dough, place the bread flour in a large bowl or the bowl of a stand mixer fitted with a dough hook, add the yeast to one side and the salt and sugar to the other, stir to combine.400 g (3 ⅓ cups) white bread flour, 8 g (2 ¼ teaspoons) instant/fast action yeast, 45 g (¼ cup) caster or granulated sugar, 1 teaspoon fine table salt
- Add the lukewarm milk and the vanilla and mix to form a shaggy dough. Knead with the mixer or turn out onto an un-floured surface and knead for 5-10 minutes until smooth and elastic. The dough will be sticky at first but resist the temptation to add extra flour, it will become smooth after a minute or two of kneading (you may need to scrape it off the surface with a dough scraper).260 g (1 cup + 4 teaspoons) unsweetened non-dairy milk (I use soy), 1 Tablespoon vanilla extract
- Add the softened vegan butter. Continue to knead until the butter is fully incorporated and the dough is smooth and elastic. It may seem greasy and messy at first but keep kneading and I promise you the butter will all mix in and the dough will become smooth.60 g (¼ cup) vegan block butter
- Once the butter is fully incorporated the dough should look smooth and silky and it should pull away from the work surface or sides of the bowl cleanly. It should still be soft and slightly sticky however.
- Place the dough in a lightly oiled bowl, cover and set aside to rise in a warm spot until doubled in size, about 1-2 hours.
- Punch down the risen dough, divide it into 4 even pieces (use a scale) and shape each one into a neat ball. Cover and set aside to rest for 15 minutes.
- Meanwhile, mix together the brown sugar and the cinnamon. Line a large baking sheet with baking paper.80 g (6 ½ Tablespoons) light brown soft sugar, 1 Tablespoon cinnamon
- Roll one of the balls of dough out on a lightly floured surface into a 25cm/10 in circle. Try and keep it as circular as possible.
- Transfer the circle of dough to the lined baking sheet and brush it generously with ⅓rd of the melted butter then sprinkle with ⅓rd of the cinnamon sugar, leaving a 2cm border around the edge.45 g (3 Tablespoons) vegan butter
- Roll out another 25cm circle of dough and place it on top of the first one, add another coating of butter and cinnamon sugar (half of what is left of each).
- Repeat again with a third layer of dough and the remaining filling ingredients.
- Roll out the last piece of dough and place it on top.
- Place a 7 cm/3 inch round cookie cutter or ramekin in the center of the dough circle. Press down enough to leave a circular imprint. You can then remove the round marker. (you can leave it in place if you prefer).
- Use a bench scraper/dough cutter to cut the circle into quarters - press straight down through the dough to cut through and use the circular imprint in the middle as a stopping point. (You can also cut with a pizza wheel or sharp knife).
- Cut each quarter in half to create 8 sections, then cut each of these in half again so that you end up with 16 triangles connected at the centre.
- Pick up two adjacent dough strips, one in each hand, and twist them away from each other twice. Do a third half twist so that the flat ends are facing each other, then pinch the ends together firmly into a point.
- Repeat with the remaining strips of dough; you should end up with an 8 pointed star.
- Loosely cover with plastic wrap or a tea towel and let rise until puffy, about 20 to 45 minutes depending on the temperature. You don't want to let it double in size, just become slightly puffy. If you poke it with a finger it should spring back slowly and maybe leave a small indentation, if it springs back quickly and fills in completely then it needs a little longer.
- Meanwhile, preheat the oven to 180°C/160°C fan/350°F/gas mark 4. Mix together the milk, maple syrup and oil to make the glaze.½ Tablespoon non-dairy milk, ½ Tablespoon maple syrup, 1 teaspoon olive oil
- Gently brush the dough with the glaze and bake for 22-25 minutes until nicely browned and the temperature in the centre registers at least 90°C/194°F on a probe thermometer.
- Allow to cool on the tray for 15 minutes before dusting with icing sugar and serving warm.
Notes
- See post above for tips, details and step-by-step photos. If you have a question about the recipe I may have already answered it above!
- As with all of my baking recipes I really do recommend using the metric measurements with a digital scale rather than the cup conversions. Cups are a wildly inaccurate measuring system and you will get far better, more consistent results using a scale, not to mention that it is also easier and less messy than cups!
- Tablespoon and teaspoon measurements are for proper measuring spoons, NOT regular kitchen spoons. A Tablespoon is 15ml and a teaspoon is 5ml and they should be level, not heaped.
- If you want, you can give the dough it’s first rise overnight in the fridge rather than at room temperature. This breaks up the workload and gives the bread an even better flavour.
If you tried this recipe let me know how it went! Rate it, leave a comment or tag @domestic_gothess on Instagram and hashtag it #domesticgothess

Baker
I’ve made this bread following the recipe exactly and another way with swapping the cinnamon sugar with chocolate hazelnut spread and both are amazing!! Thank you for sharing the recipe!!
Kat
Amazing recipe, followed step by step and the result was spectacular!
Rosa
I followed the recipe exactly, and it came out great, both in looks and taste!