

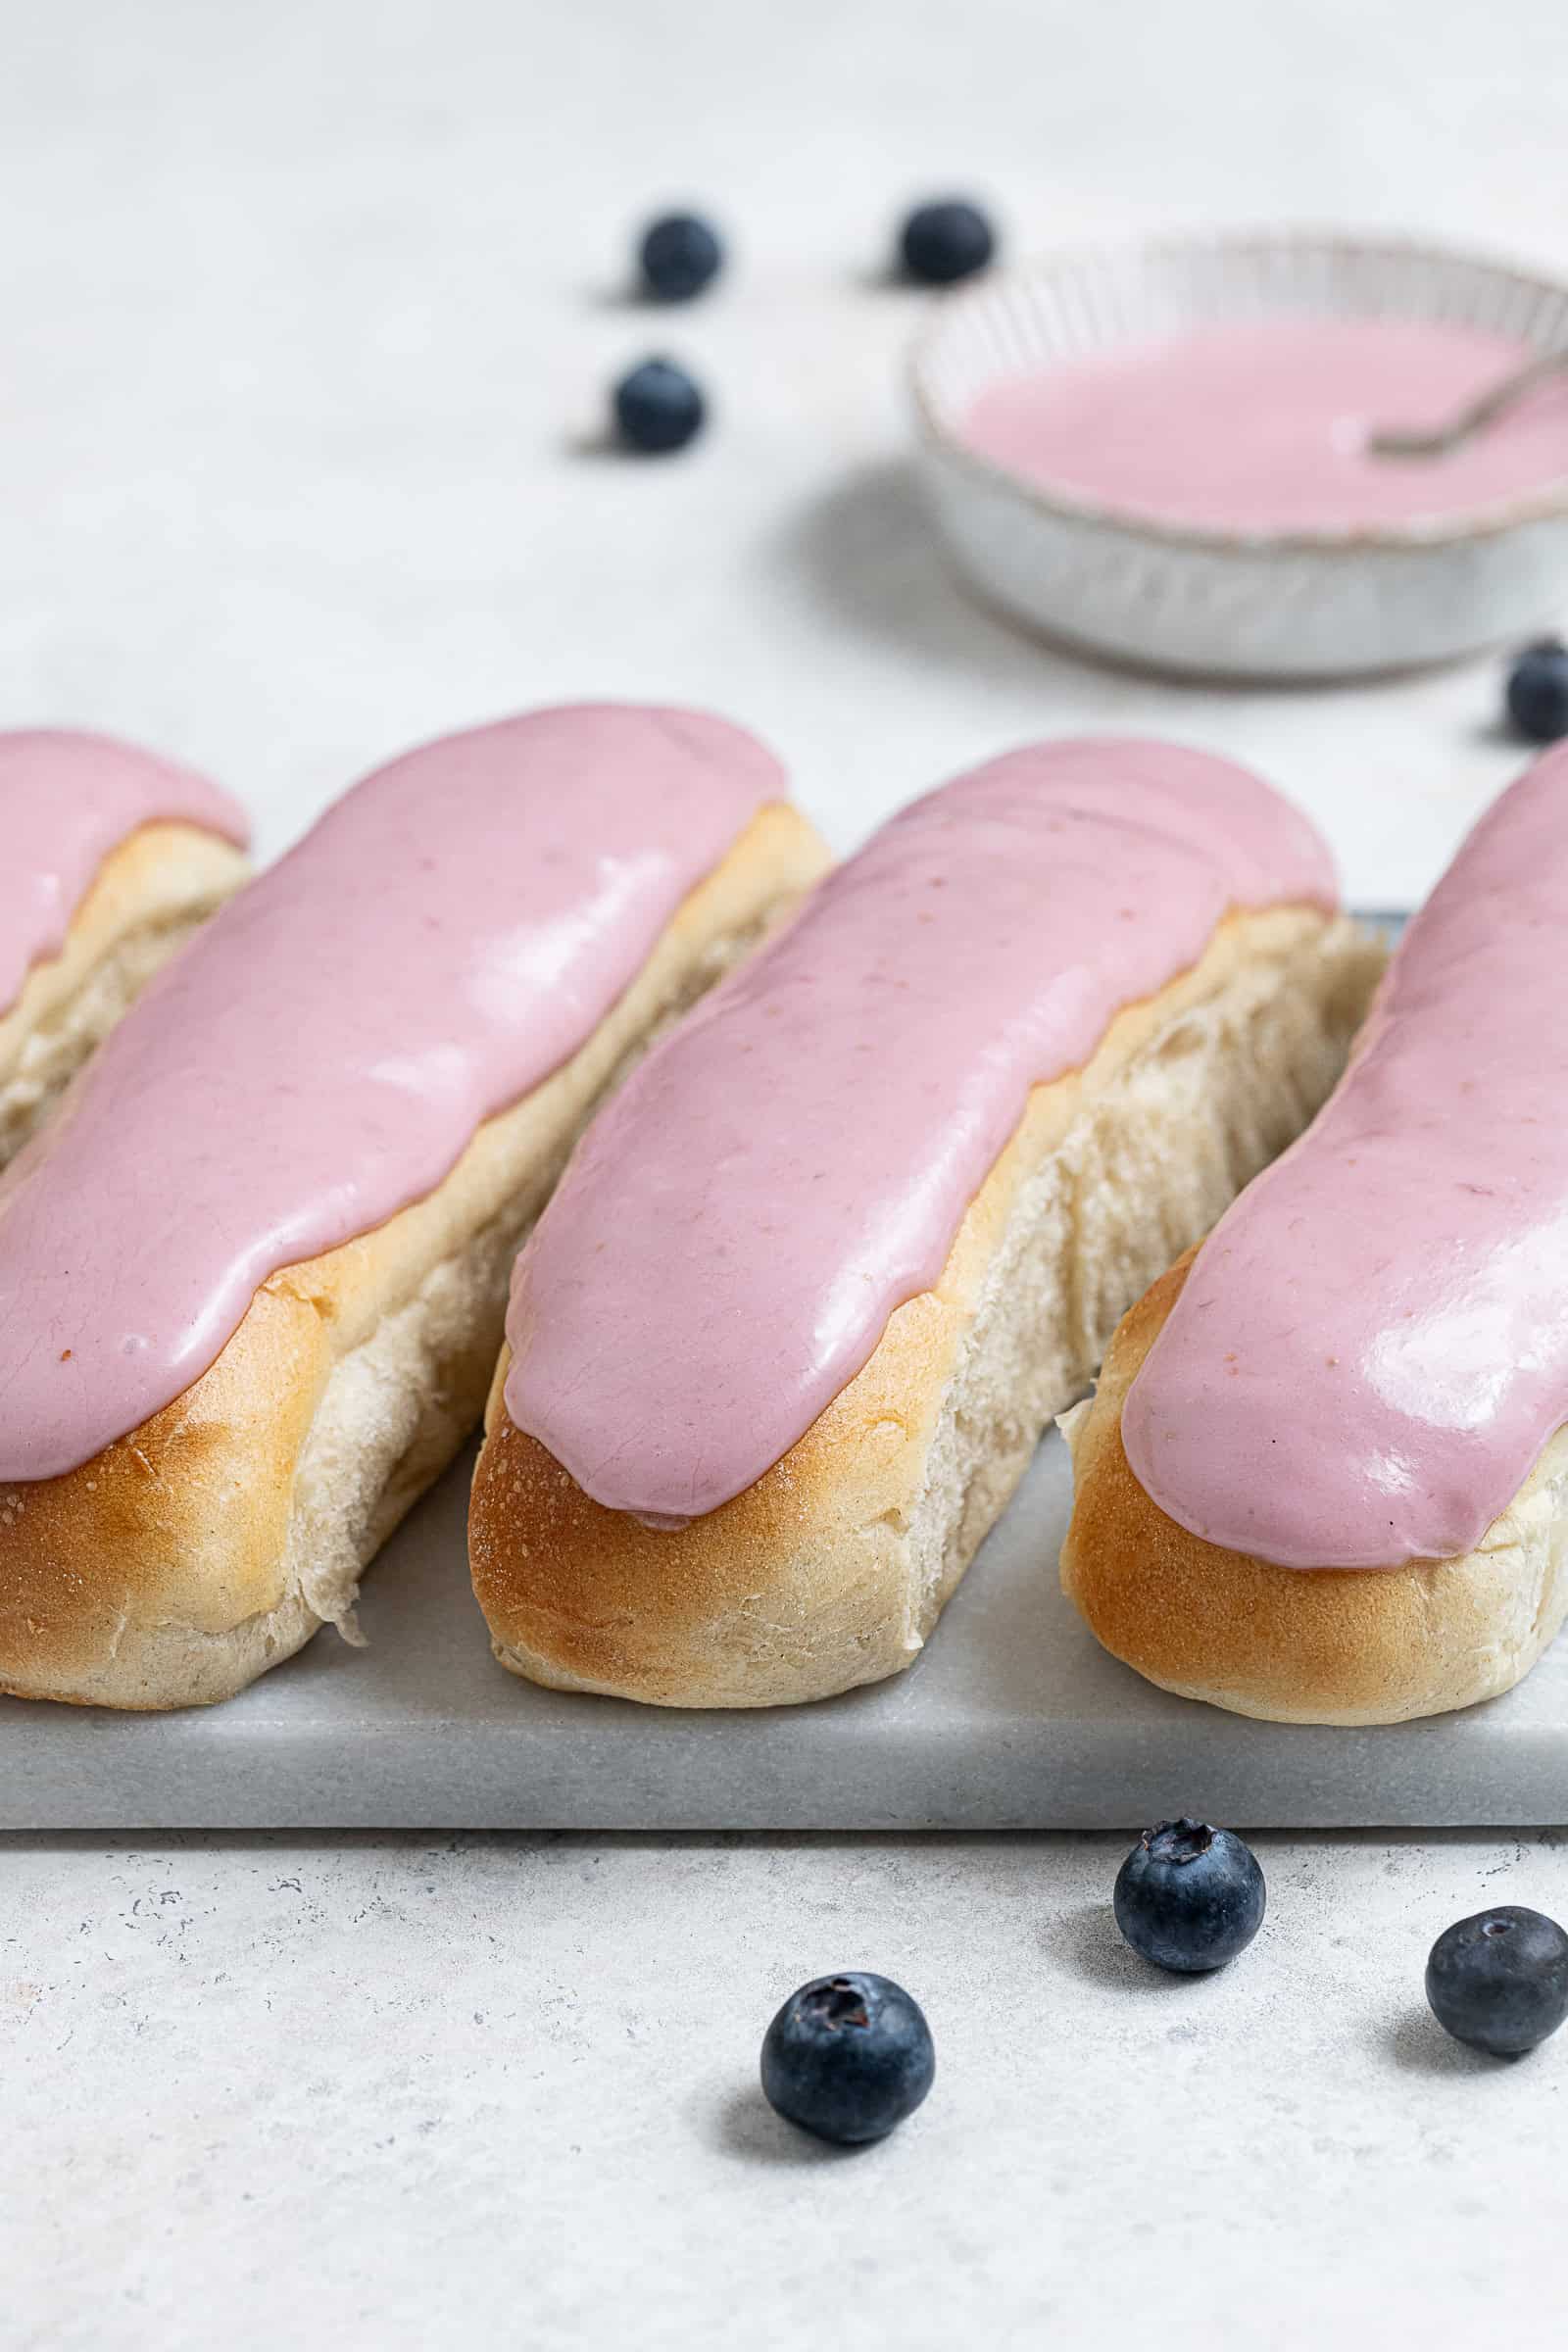
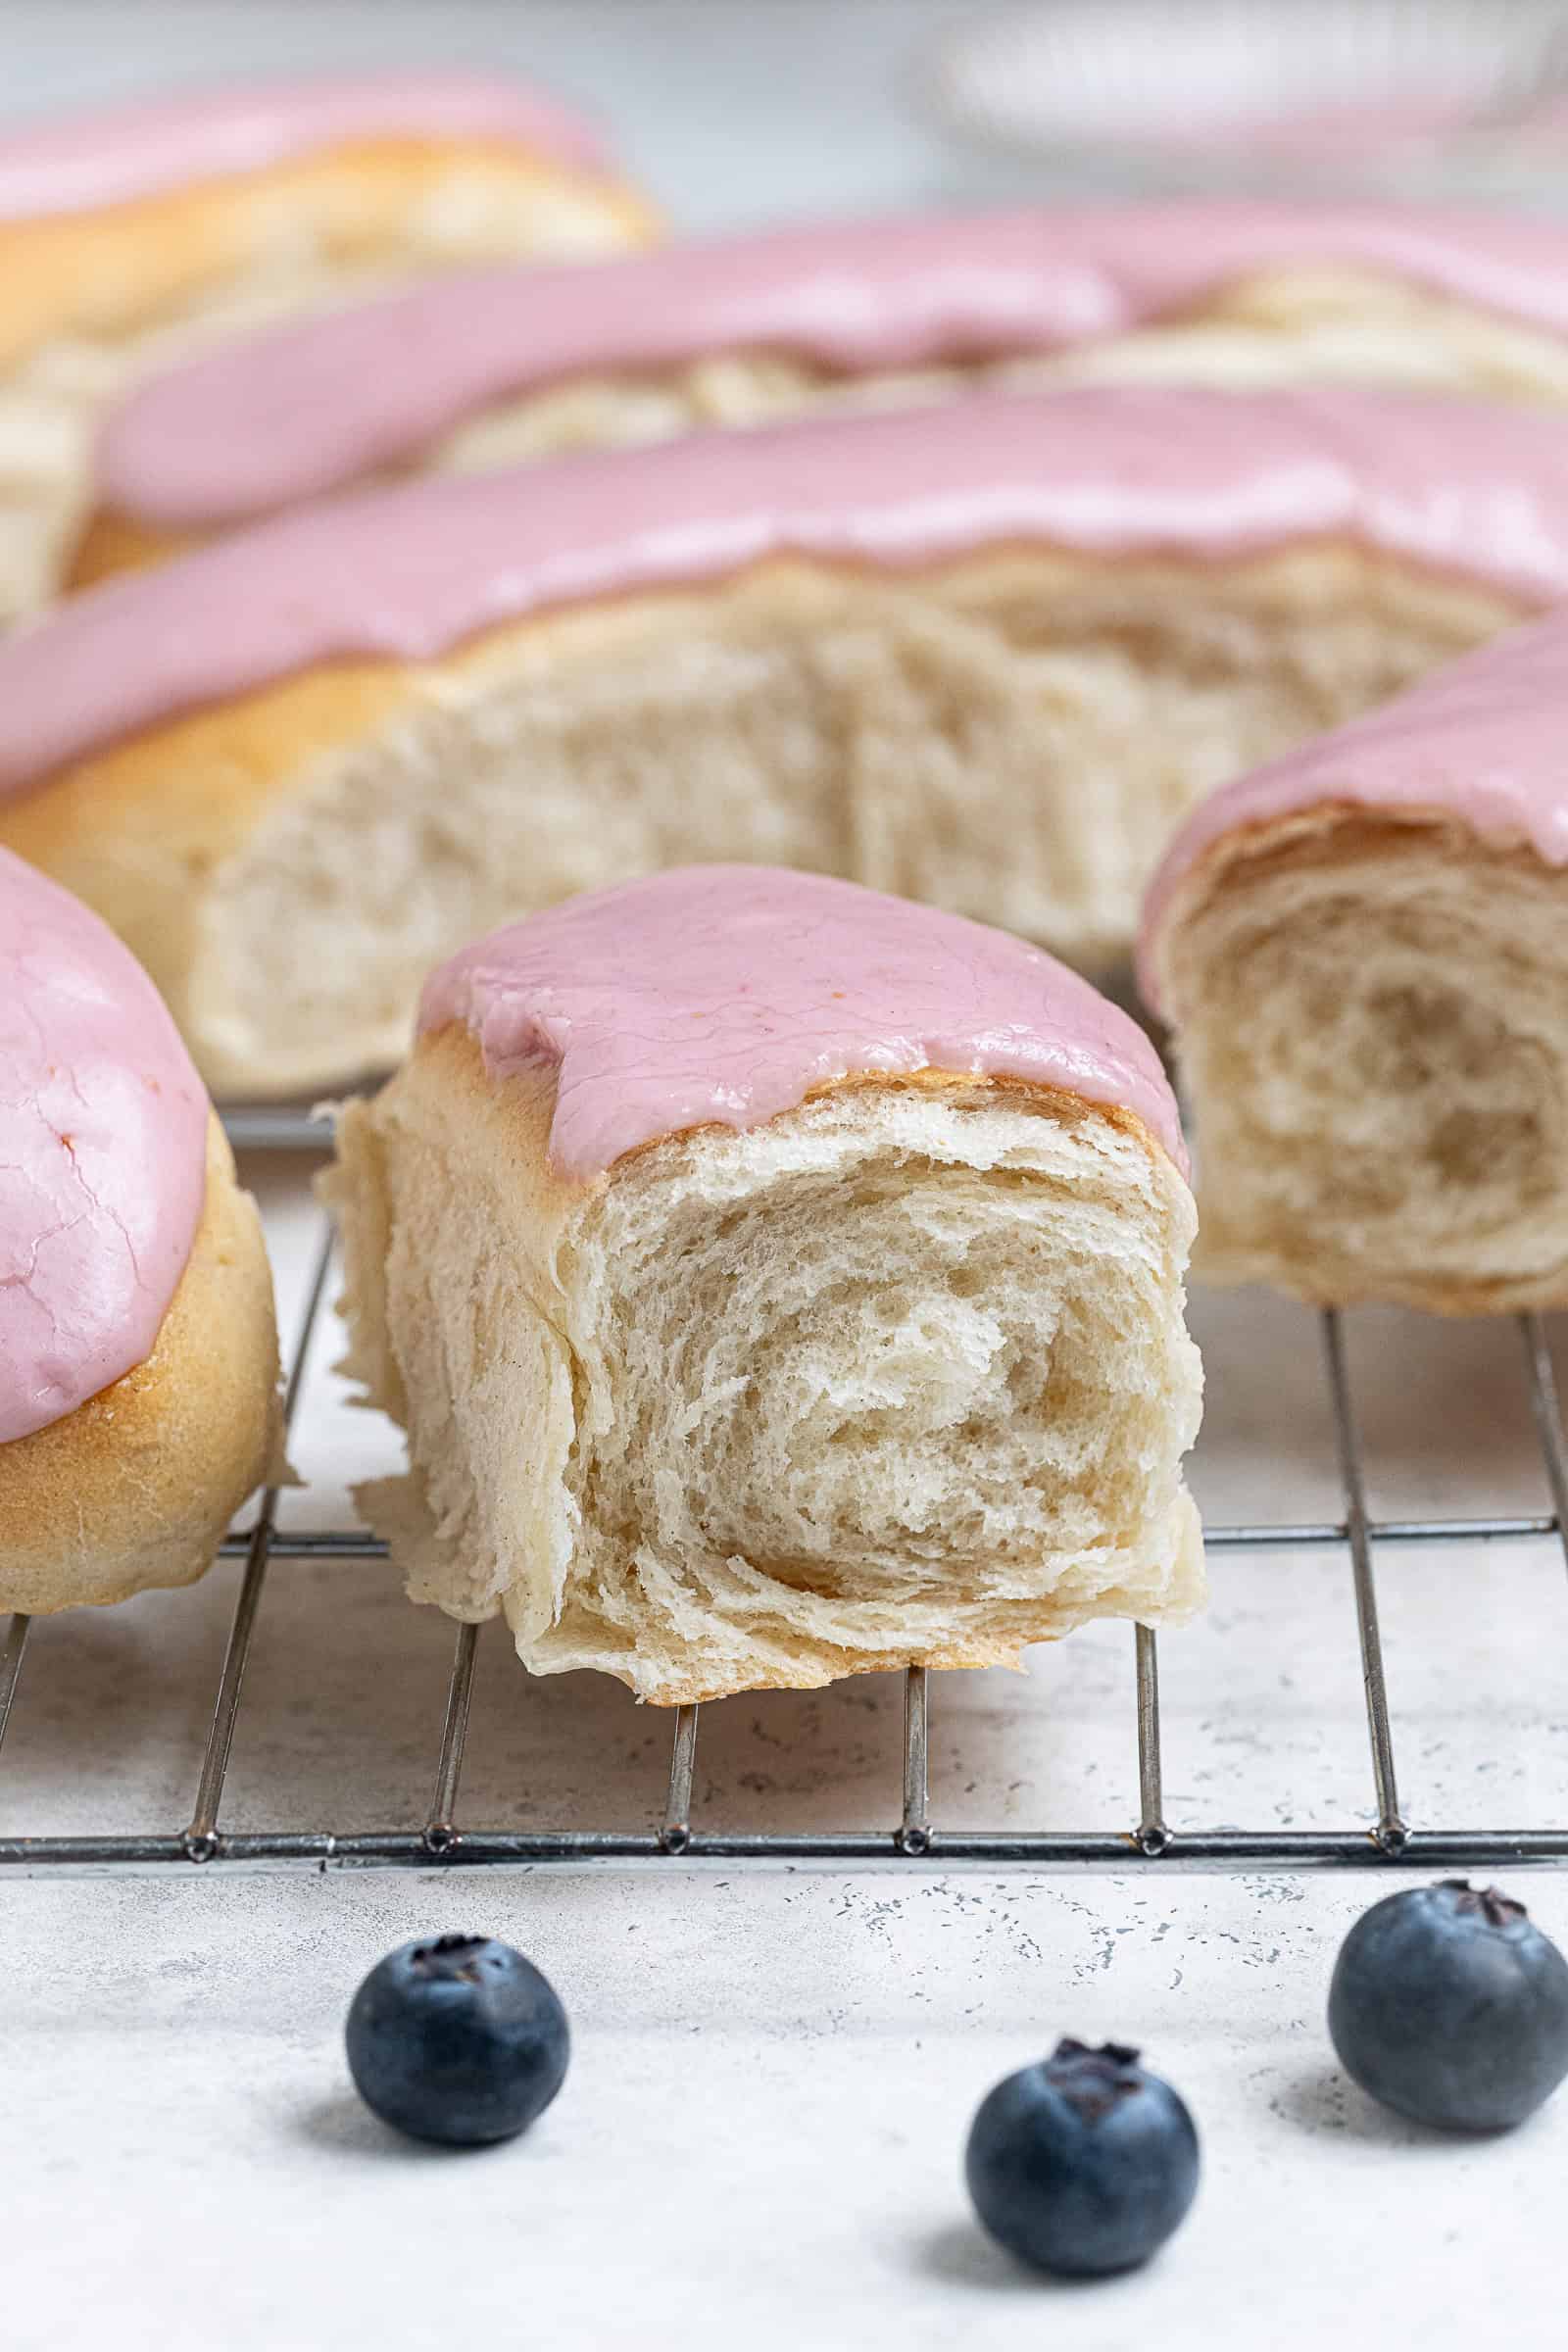
These retro vegan iced finger buns are the perfect tea time treat! An absolute British bakery classic, they consist of a soft, fluffy, slightly sweet yeast bread roll topped with sticky icing.

What Are Iced Buns:
Found in pretty much every bakery and supermarket across the UK, the iced bun is a very popular treat in Britain, and I believe they are also popular in Australia and New Zealand.
They are also known as iced finger buns as they are commonly shaped like an elongated oval or finger, similar to a hot dog roll.
They consist of a slightly sweet enriched yeast bread dough made with milk, butter and often egg and are topped with a simple sugar glaze, usually white but it may also be coloured pink. They may also be split and filled with jam and whipped cream for an extra indulgent treat!
My vegan version uses a tangzhong based vegan milk bread dough to ensure that the buns are super soft and flavourful without the need for any eggs or dairy.
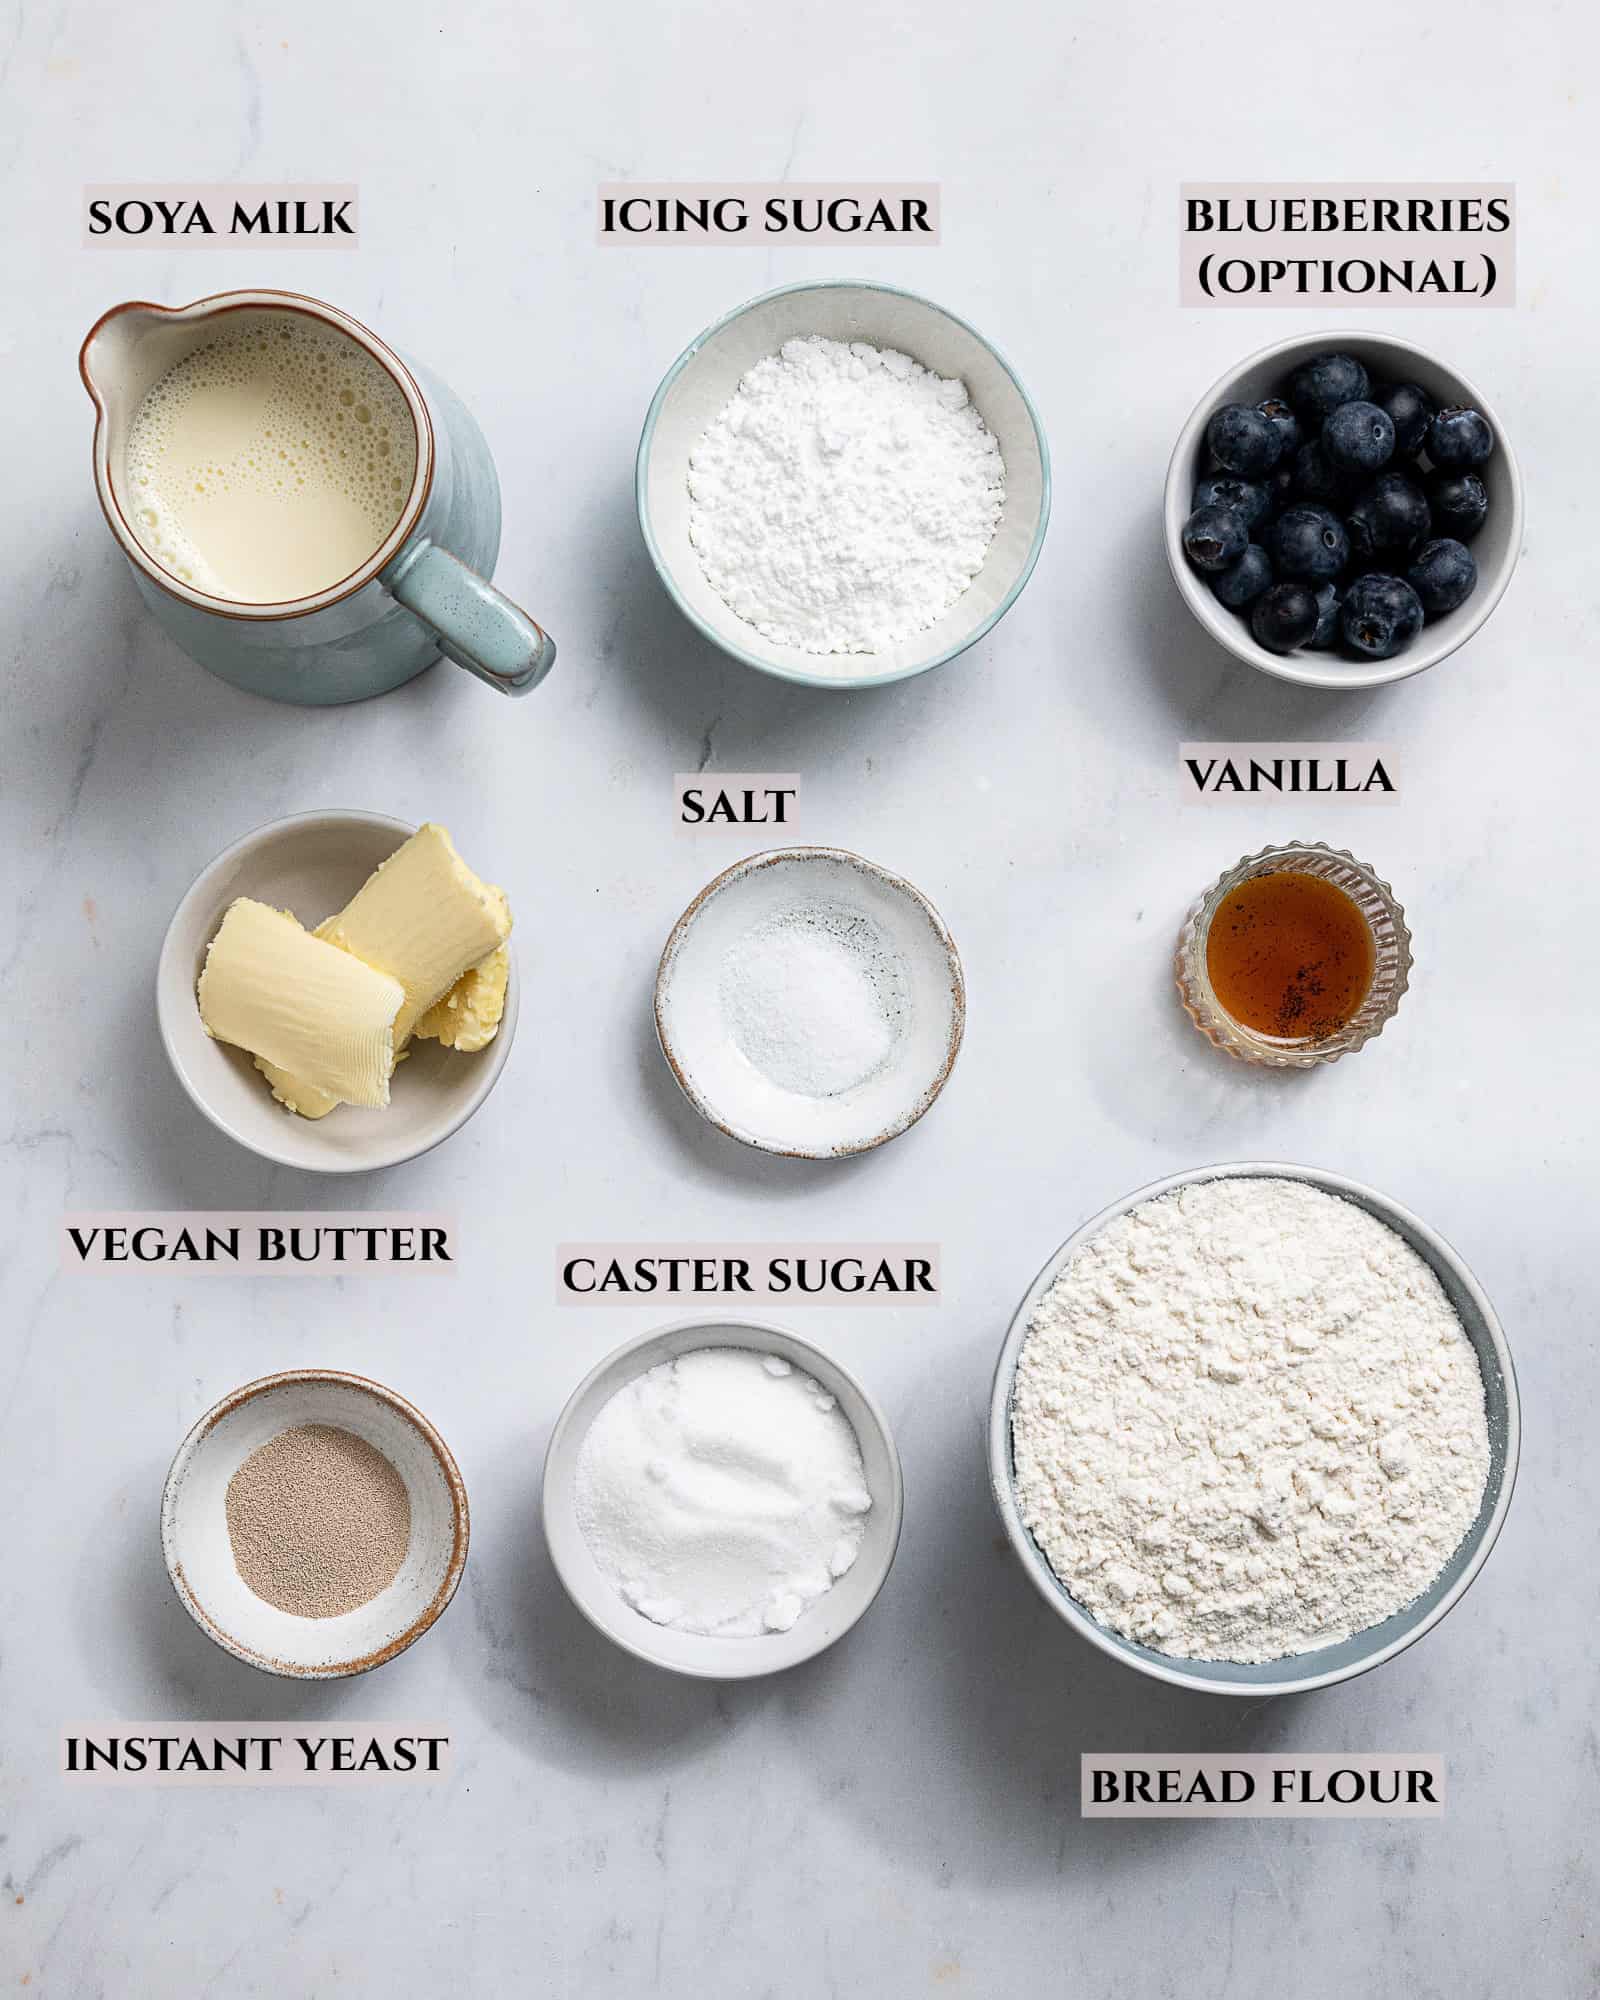
Ingredient Details:
Bread flour: White bread flour helps to give these vegan iced buns their soft, fluffy, chewy texture. Plain (all-purpose) flour will also work though the texture isn’t quite the same. I don’t recommend using wholemeal flour as that will make the rolls too dense.
Instant yeast: I always prefer to use instant yeast when making bread as it can just be added straight to the flour and doesn’t need to be activated first.
Salt: You simply cannot make good bread without salt. Don’t omit it.
Non-dairy milk: Soy milk is always my favourite for baking as it has the highest protein content so most closely resembles dairy milk. Any variety of non-dairy milk will work however, but go for an unsweetened one if you can, and definitely soy milk if you have it.
Vegan butter: A block style butter such as Flora plant butter or Naturli vegan block really is best. A spreadable one will work but your dough may be softer and therefore harder to work with.
Sugar: You will need caster or granulated sugar for the dough, and either icing (powdered) sugar or fondant icing sugar for the glaze. This cannot be swapped for any other kind of sugar.
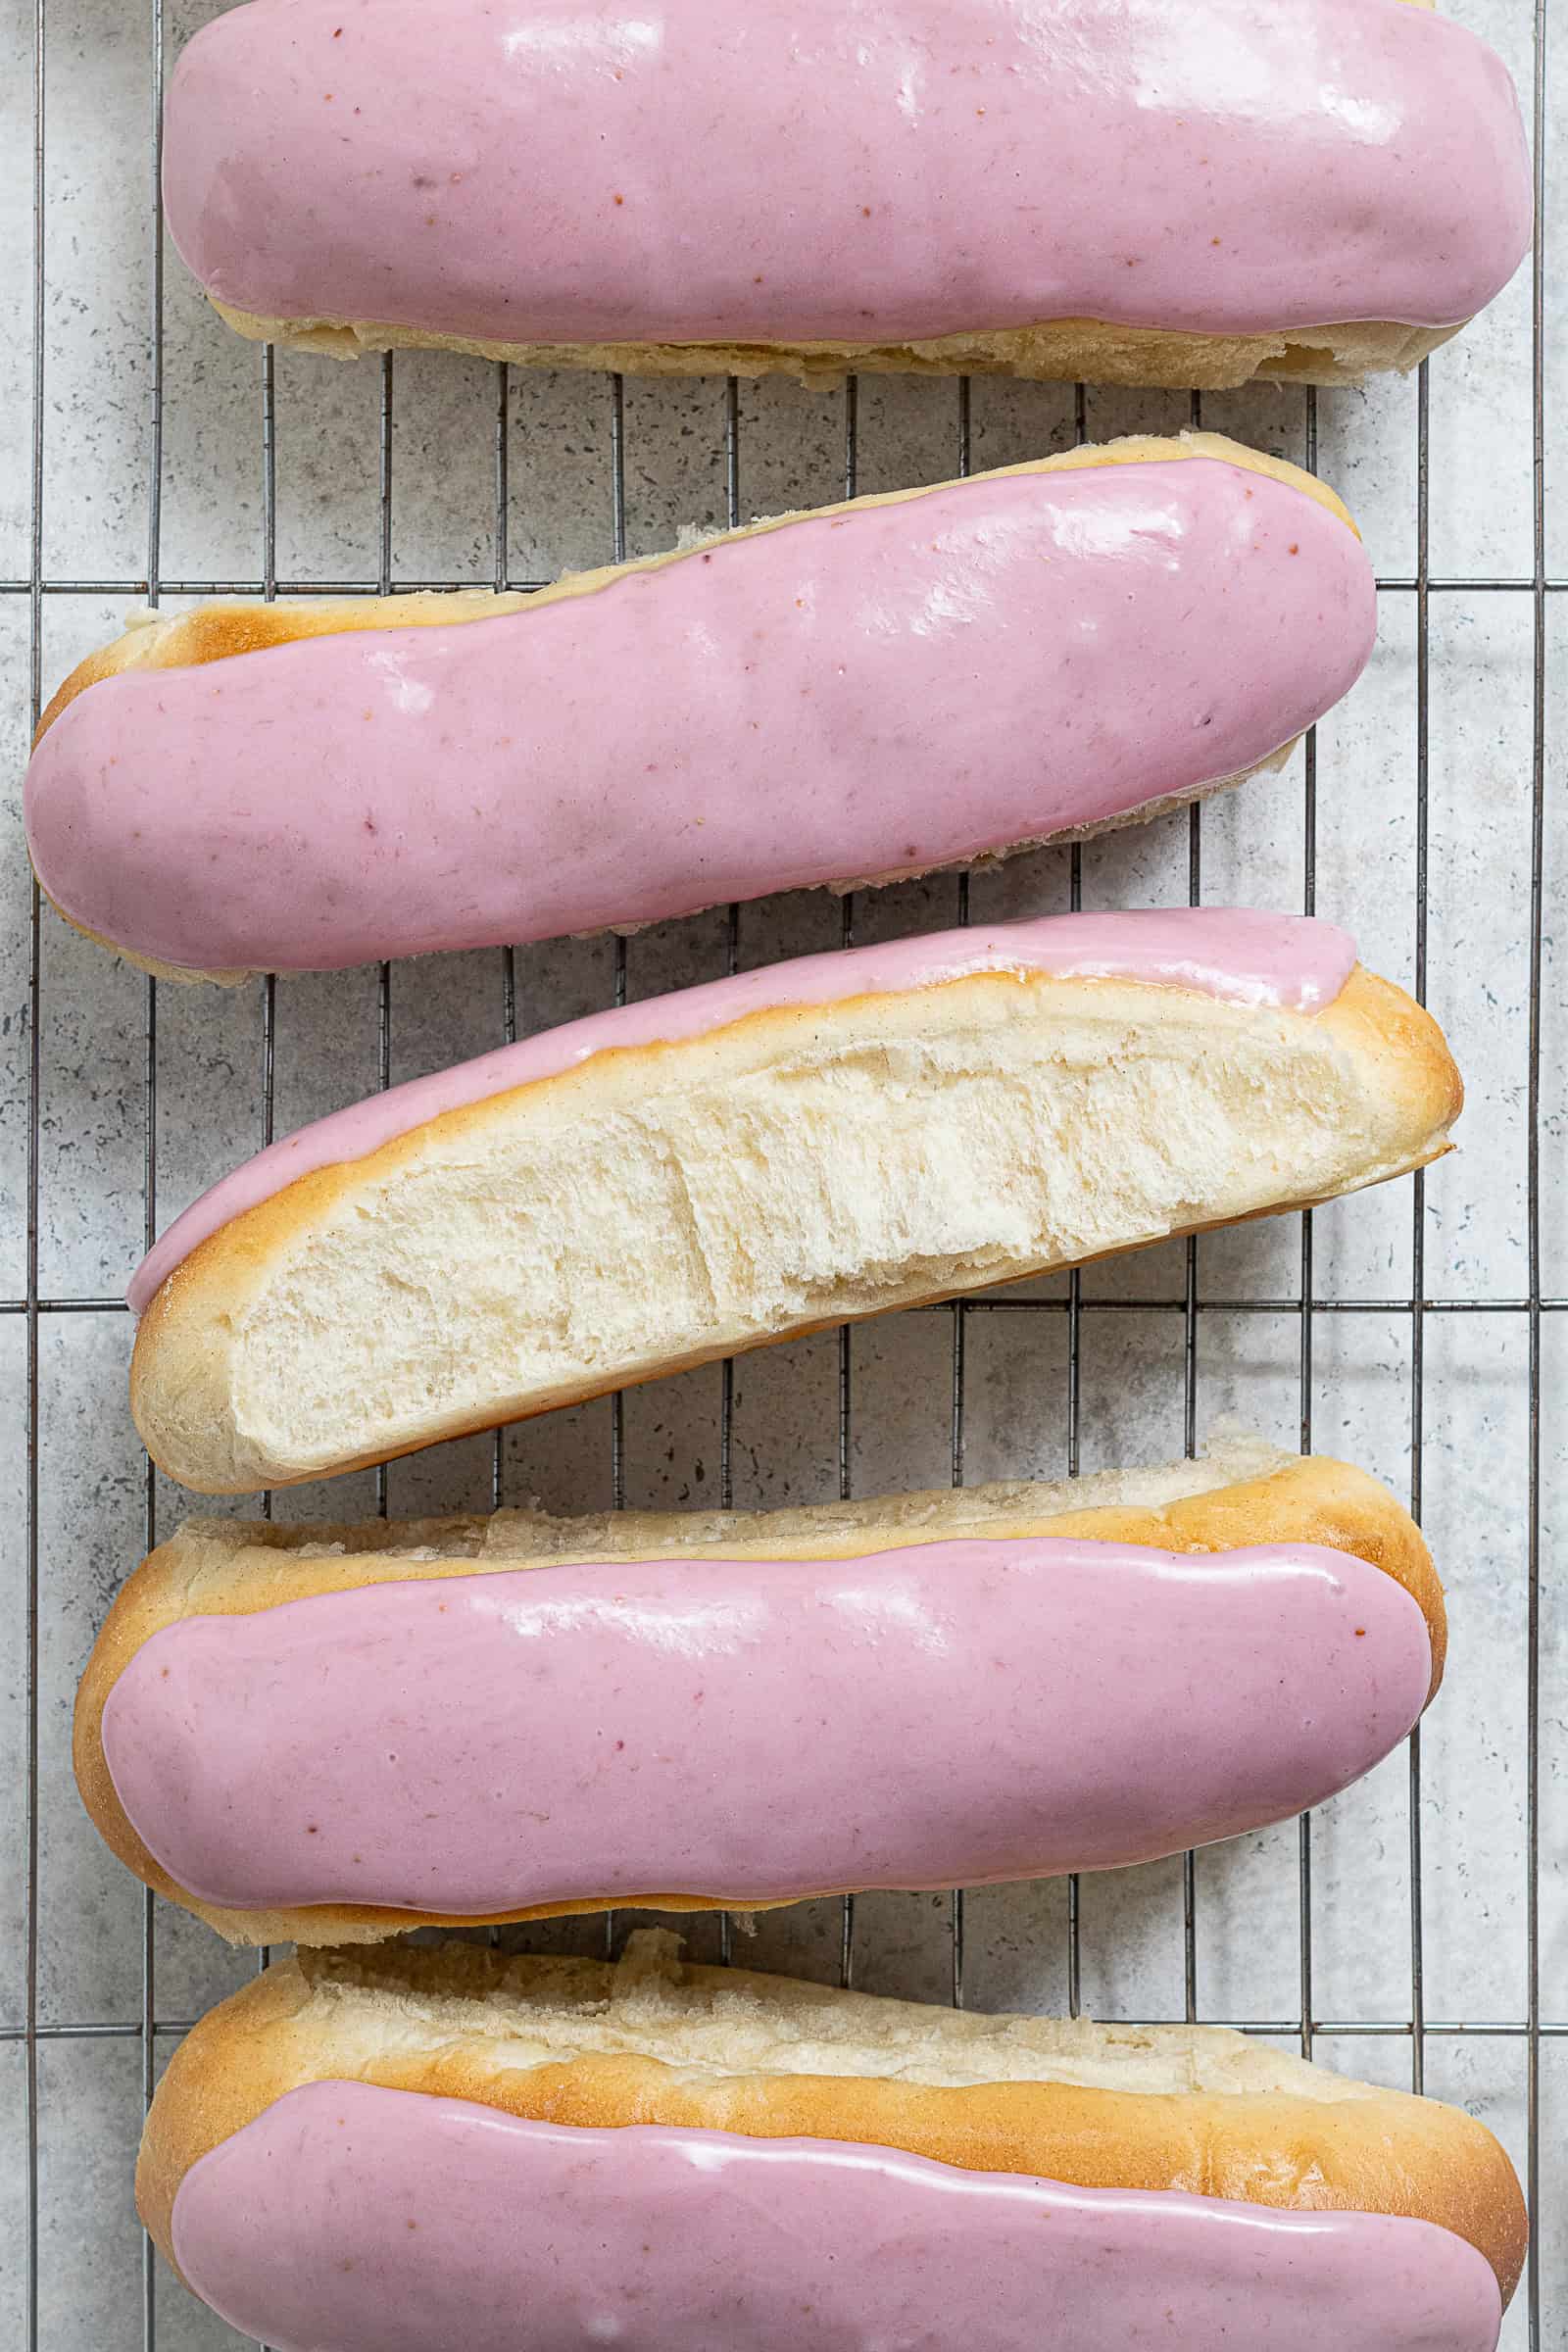
Blueberries: These are entirely optional and not traditional at all, I simply used crushed blueberry juice mixed with the icing sugar to make the glaze, giving it a natural pink colour. The blueberries do not really impart any flavour, and are purely for colour. Traditionally you would just use water, with a drop of food colouring if you want colourful buns.
Please note that if you do make the blueberry glaze I found that it does not seem to set as well as the water based one and remains very sticky.
How To Make Vegan Iced Buns:
(Full measurements and instructions can be found in the recipe card at the bottom of the page)

- Step 1: To make the tangzhong, place the flour in a saucepan and gradually whisk in the water to avoid lumps. Place the pan over a medium heat and whisk constantly until the mixture has thickened to a paste/pudding-like consistency.
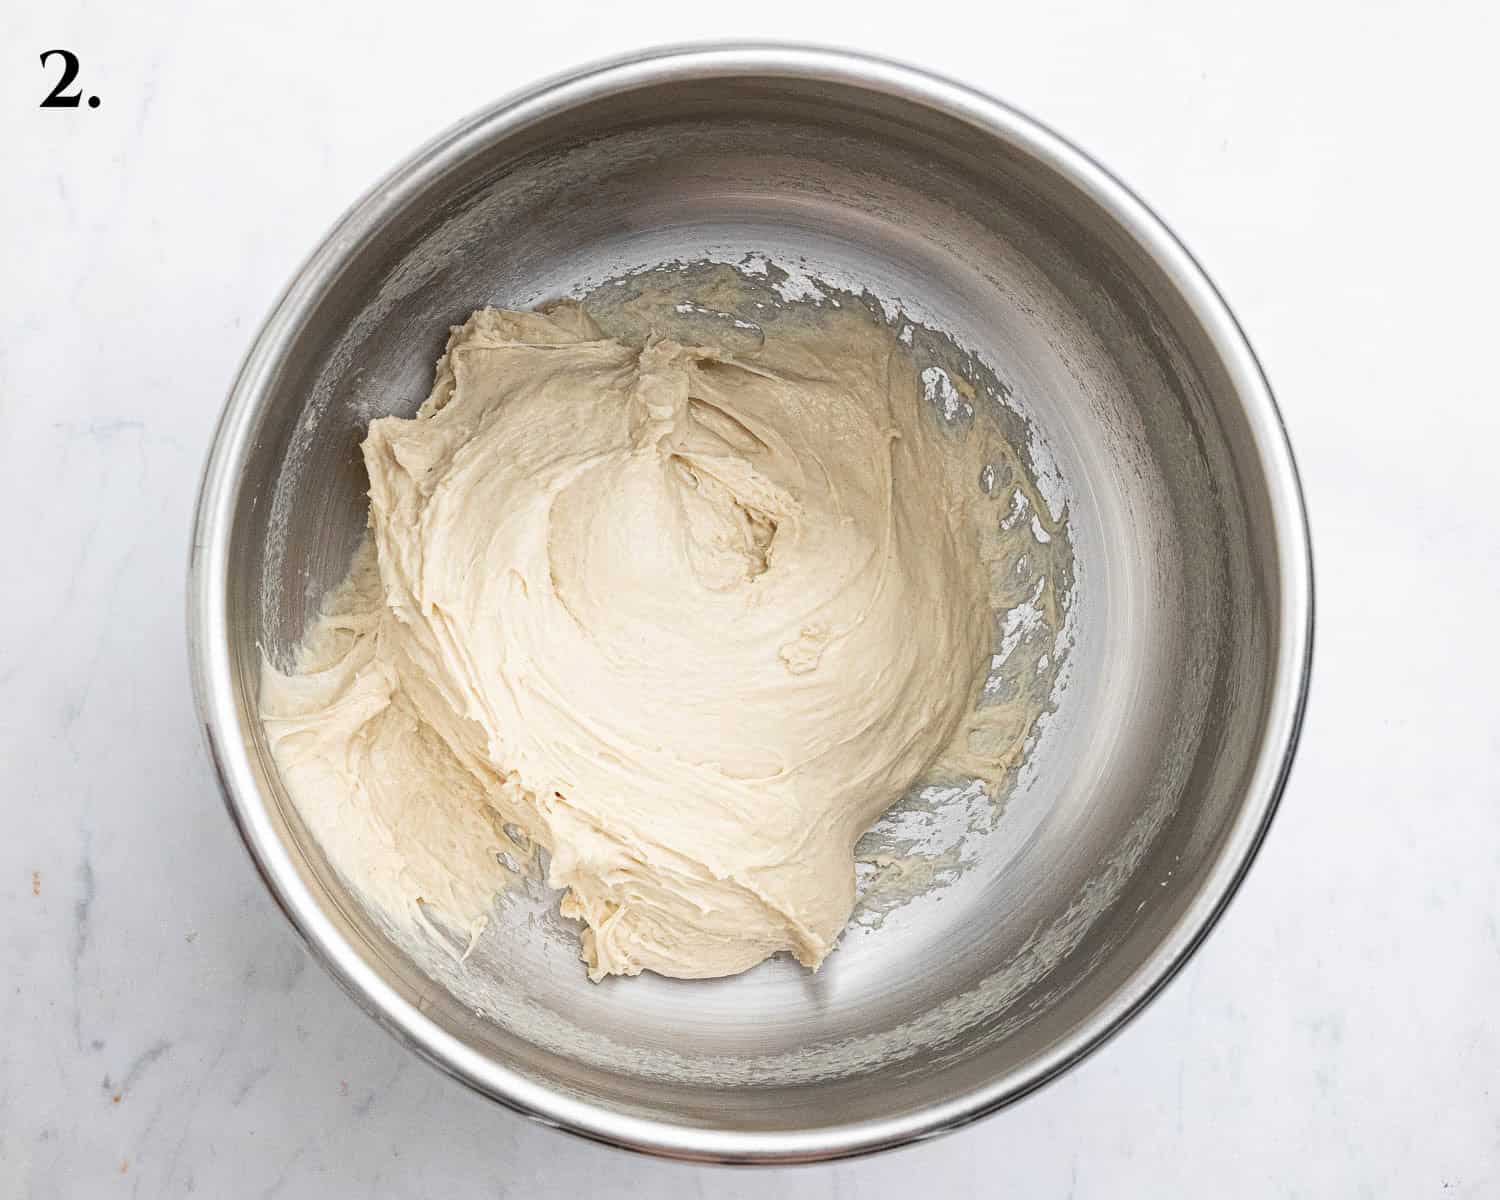
- Step 2: Scrape the tangzhong into the bowl of a stand mixer fitted with a dough hook and pour the cold milk on top. Add sugar, salt, flour and yeast. Knead on medium until smooth and stretchy then add the butter and knead until combined. The dough should be soft and sticky but stretchy.
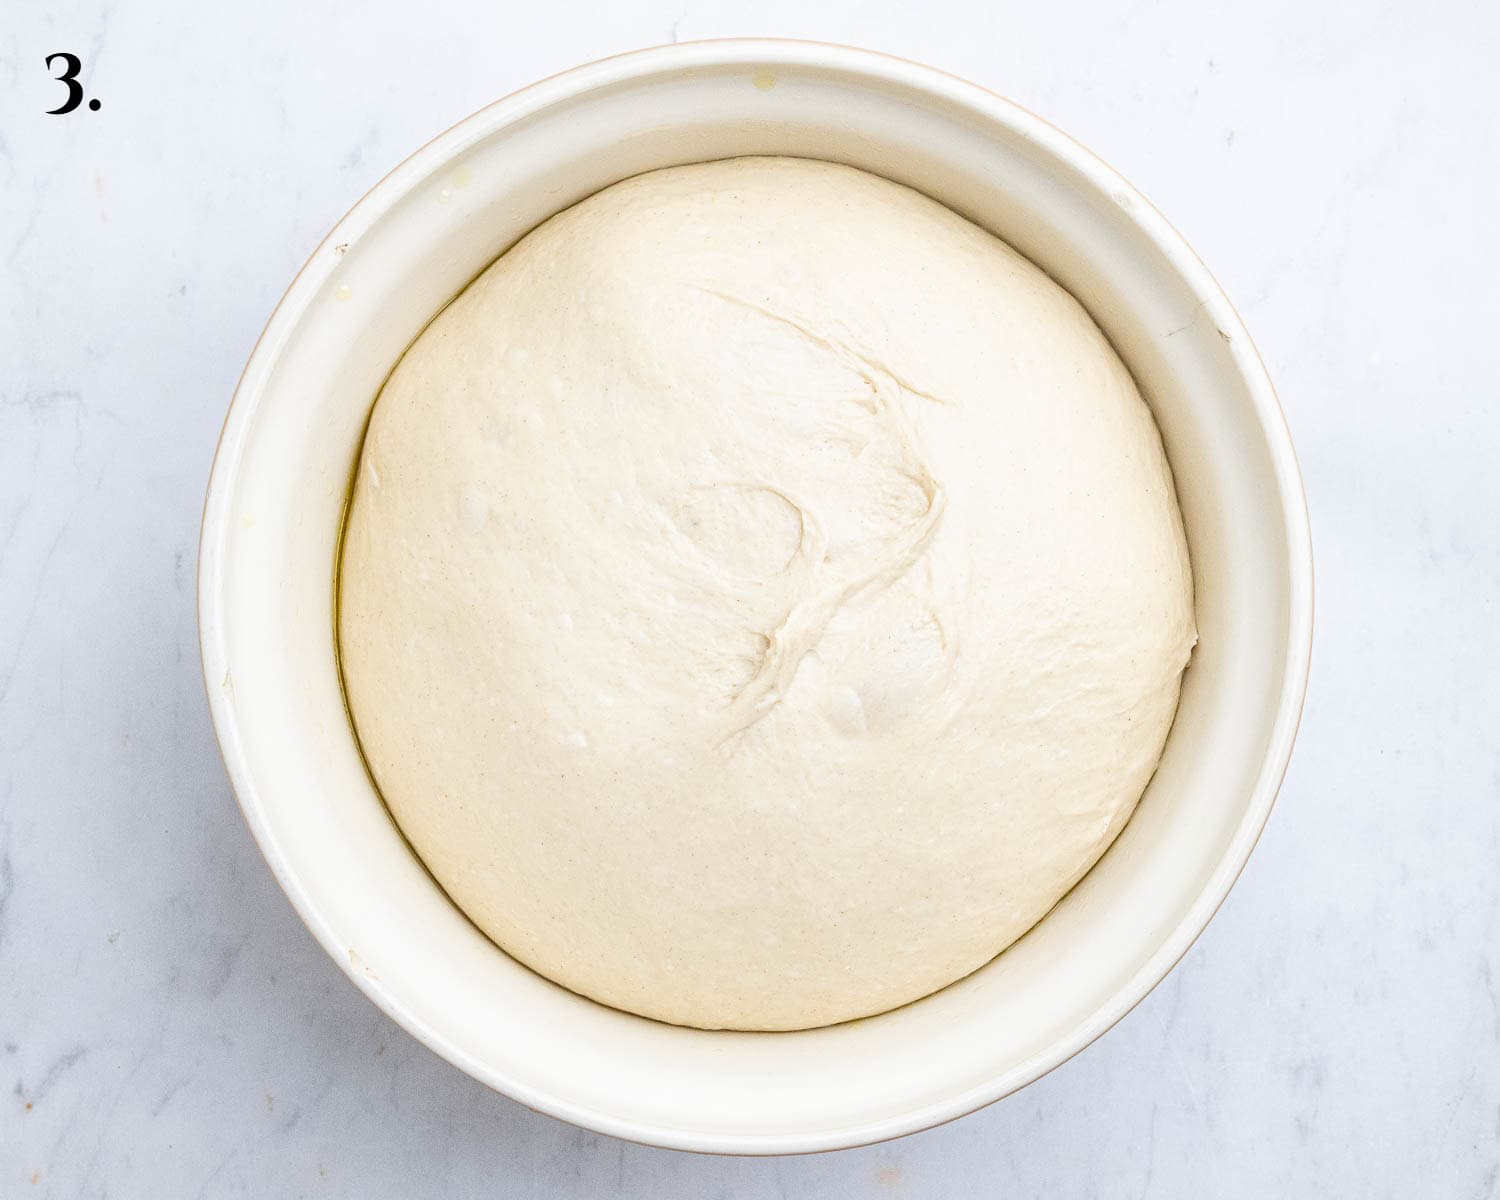
- Step 3: Use oiled hands to shape the dough into a ball, place in an oiled bowl, cover and set aside to rise until doubled.
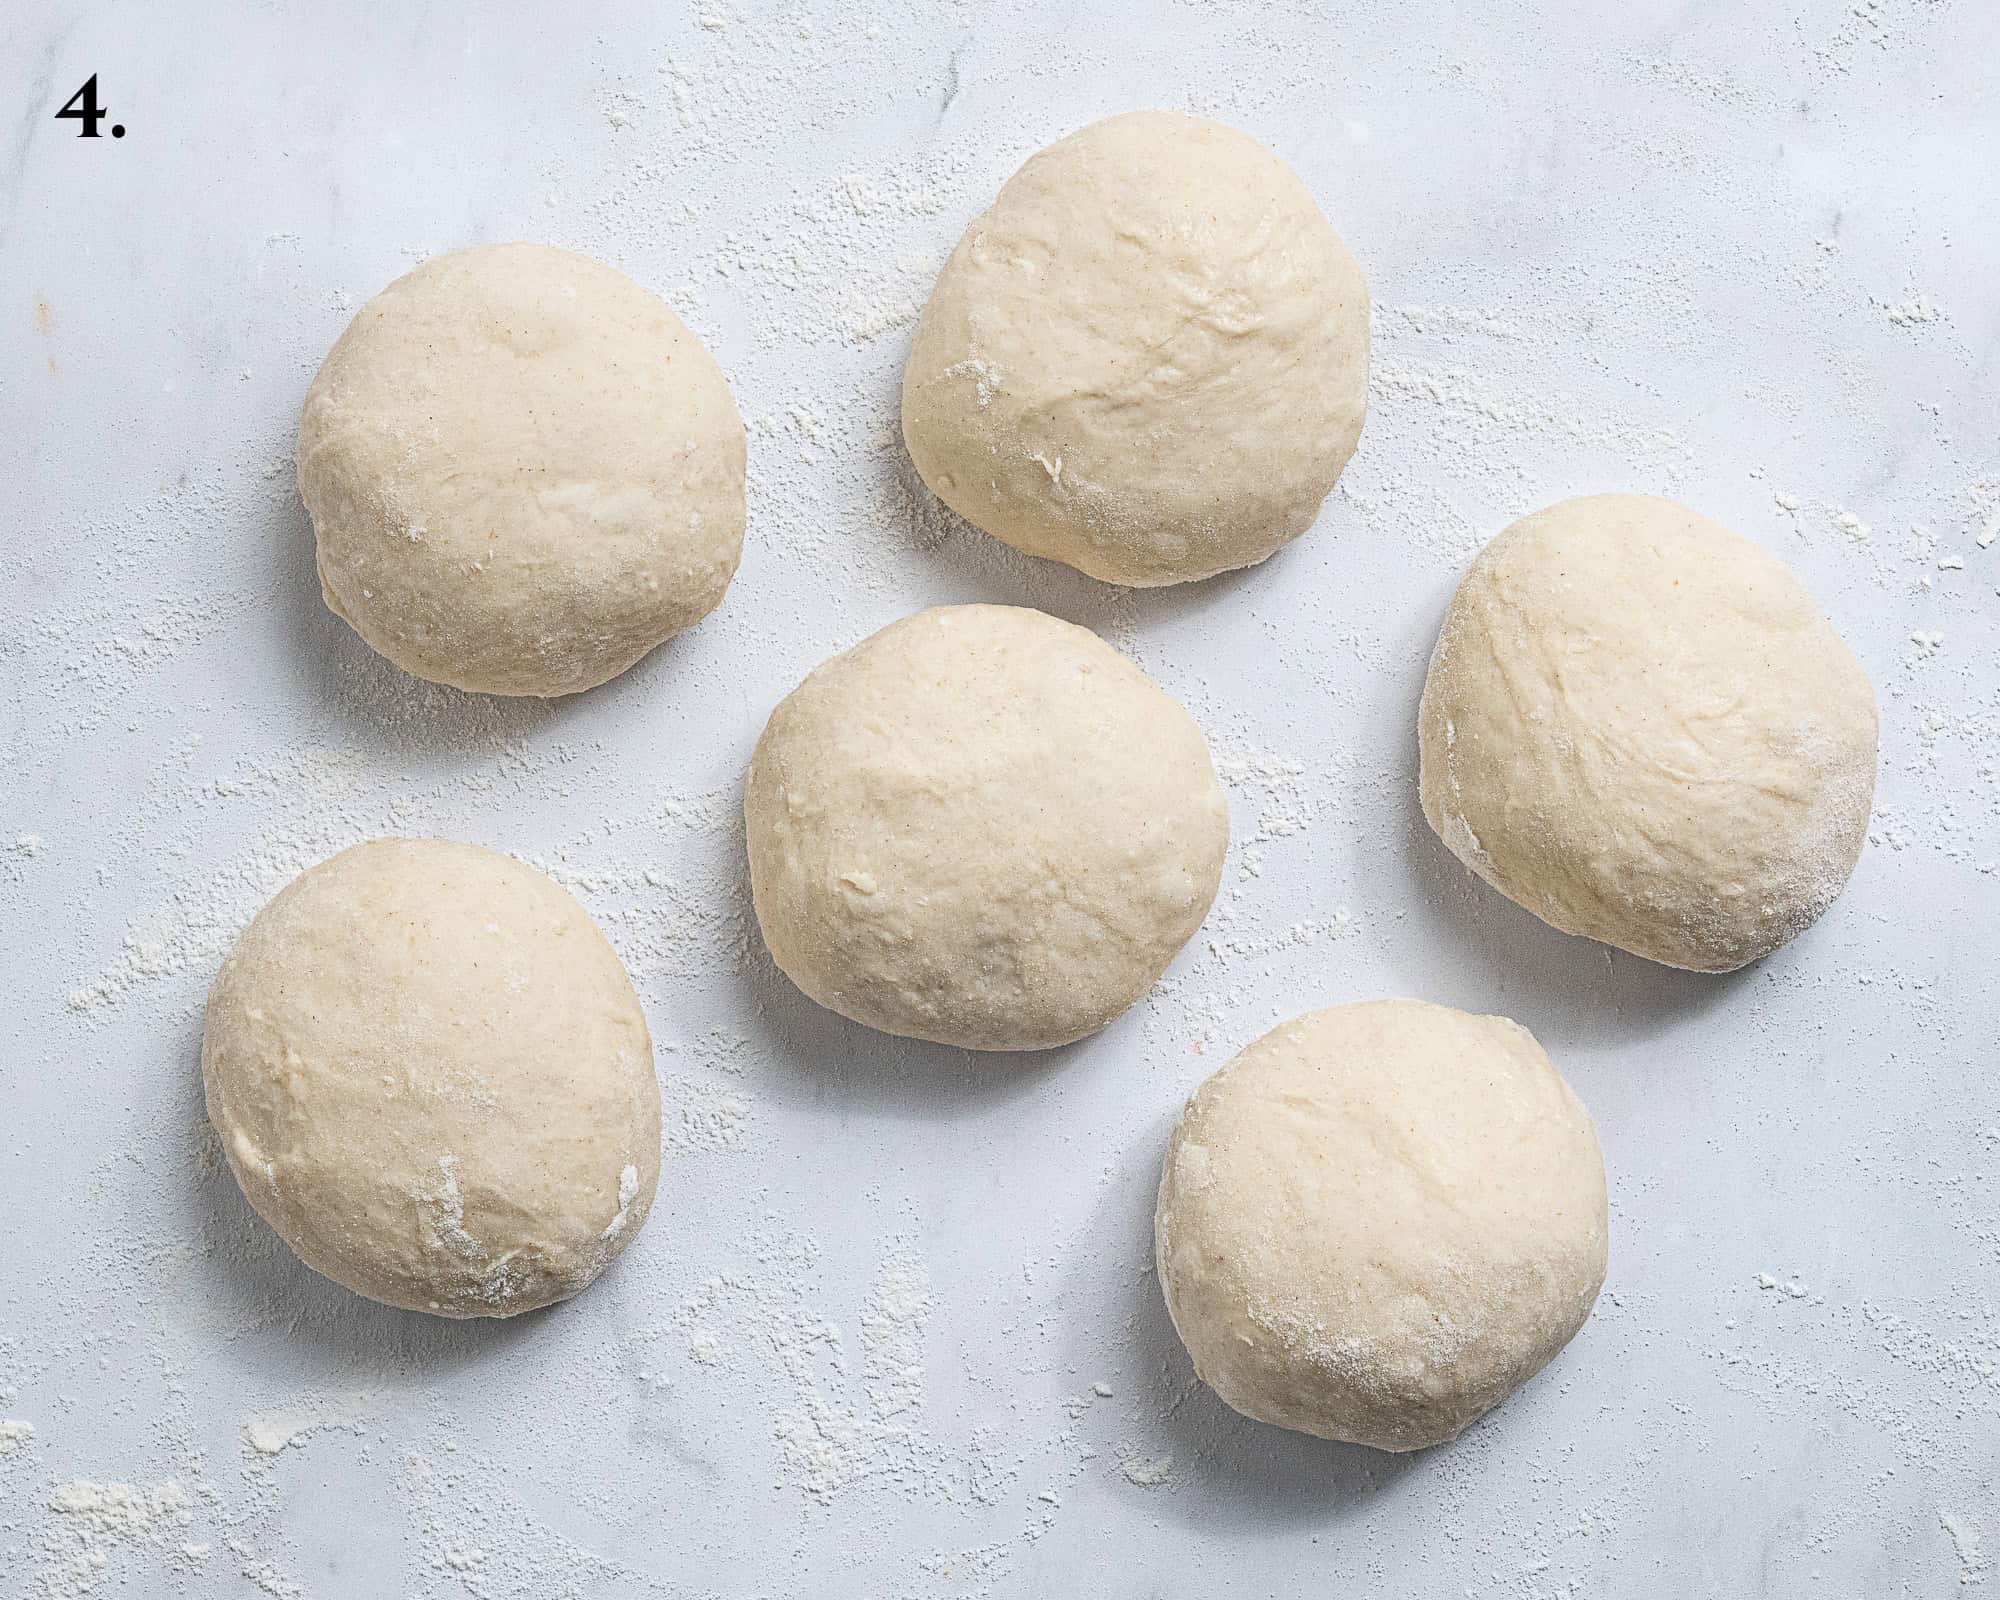
- Step 4: Punch down the risen dough and divide into 8 (or 6) even portions. Shape into balls.
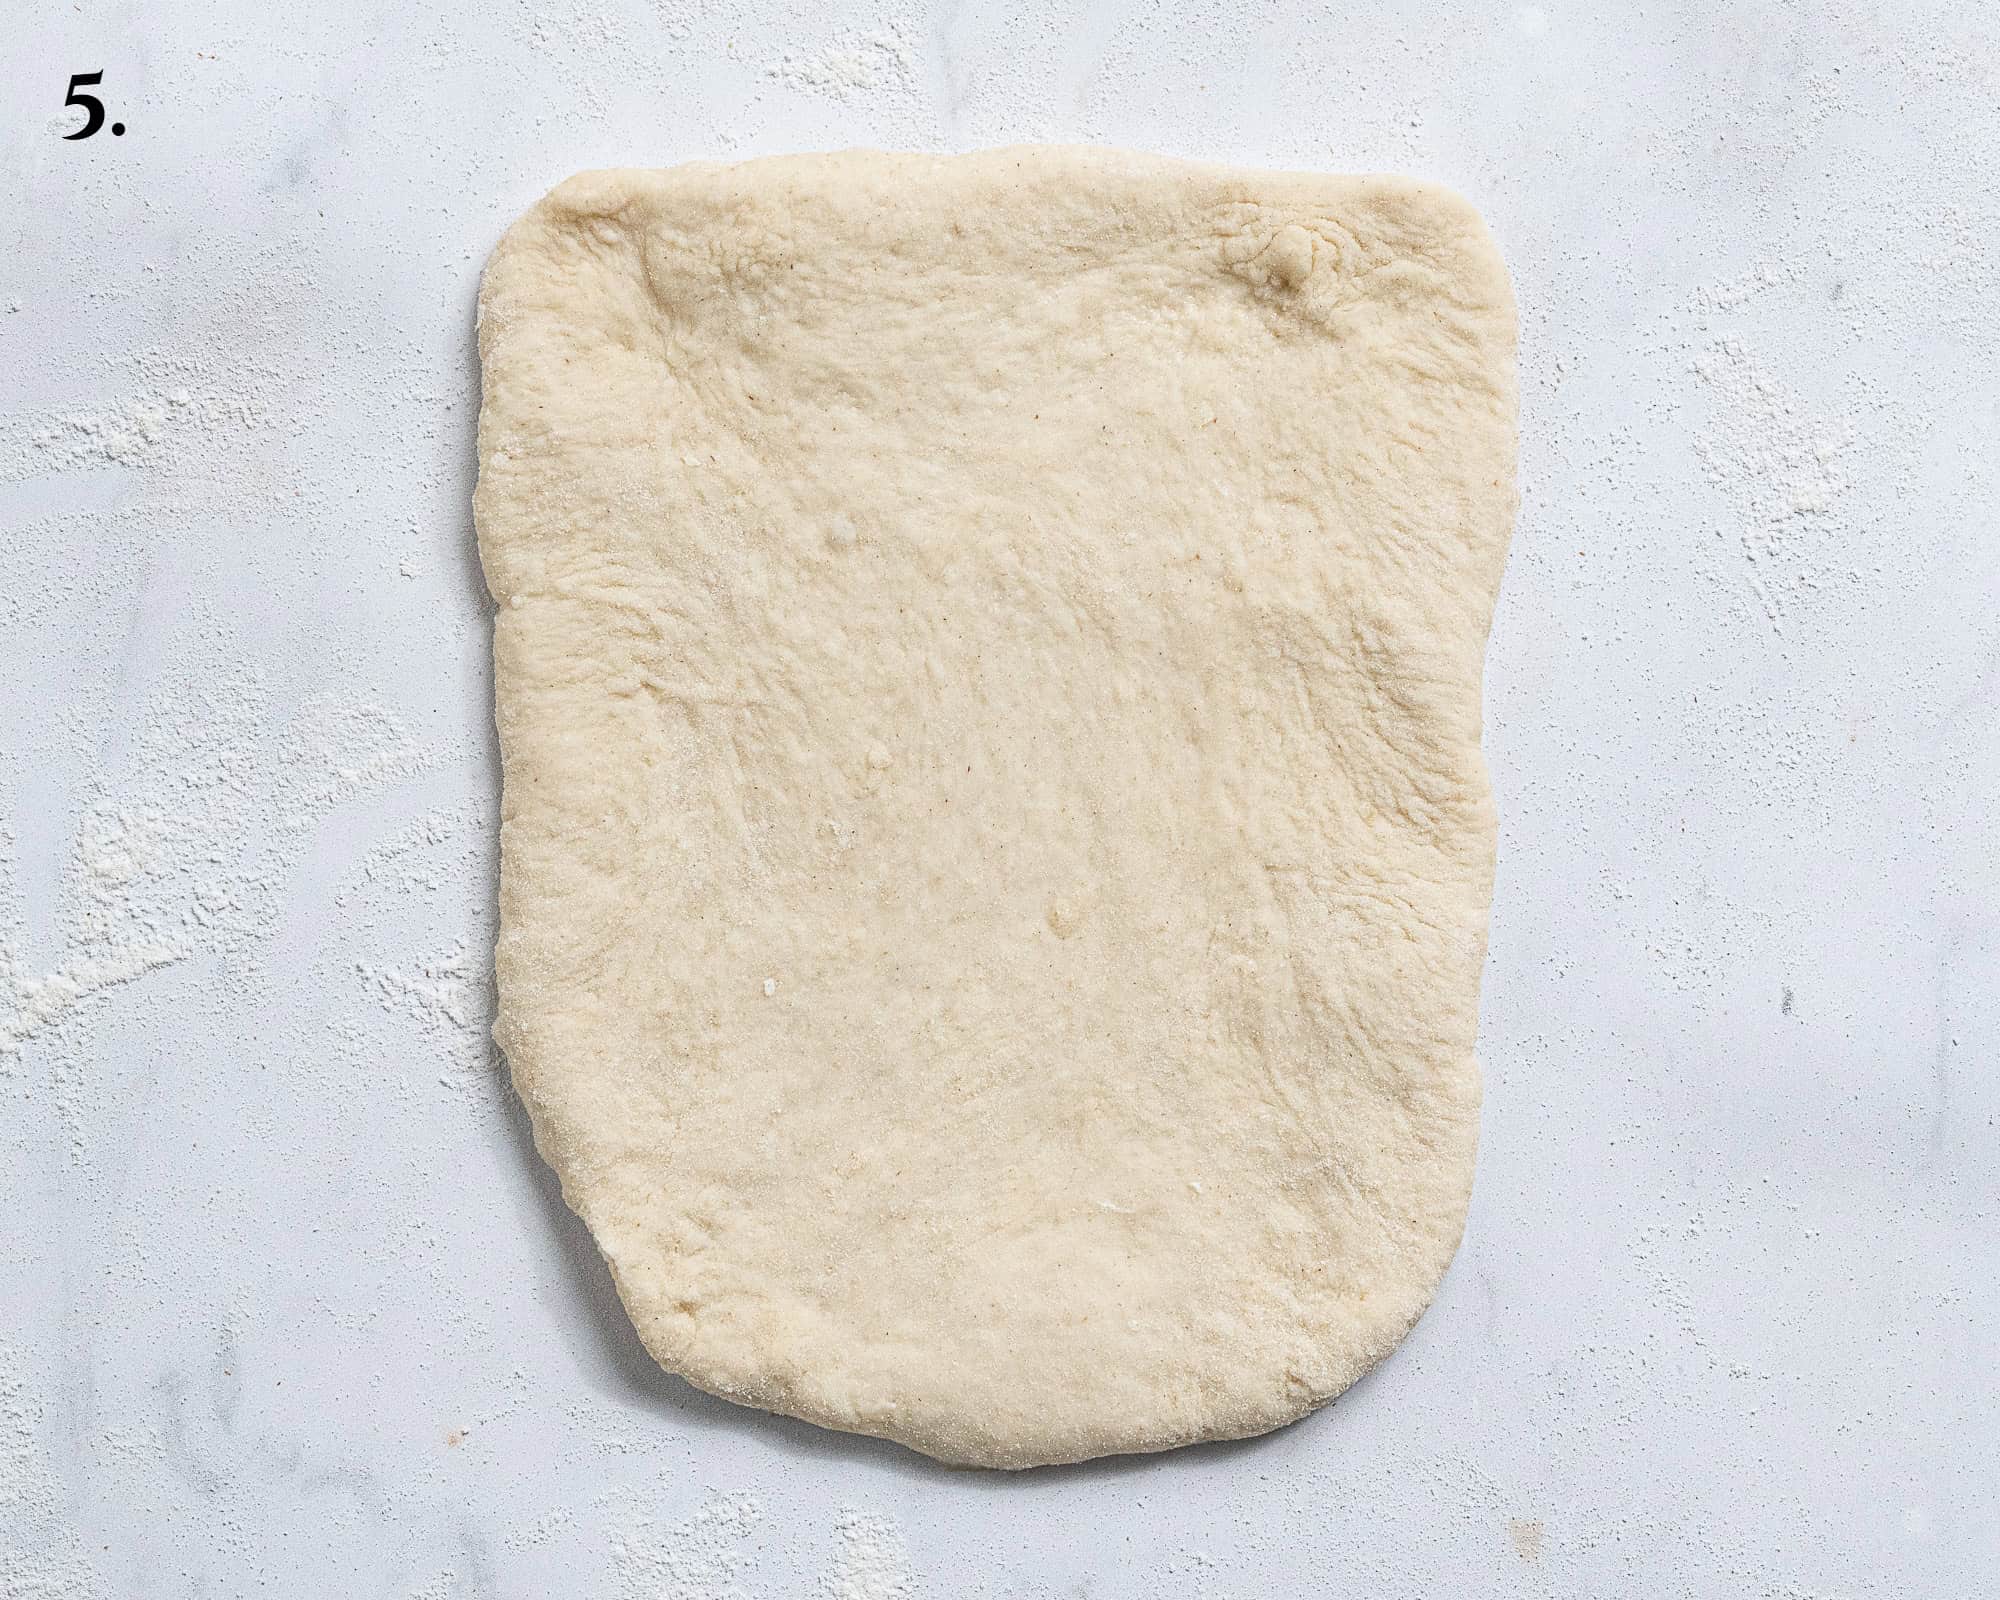
- Step 5: Roll one of the balls of dough out on a lightly floured surface into a rough rectangle. Pull out the top corners so that the top is slightly wider than the bottom.
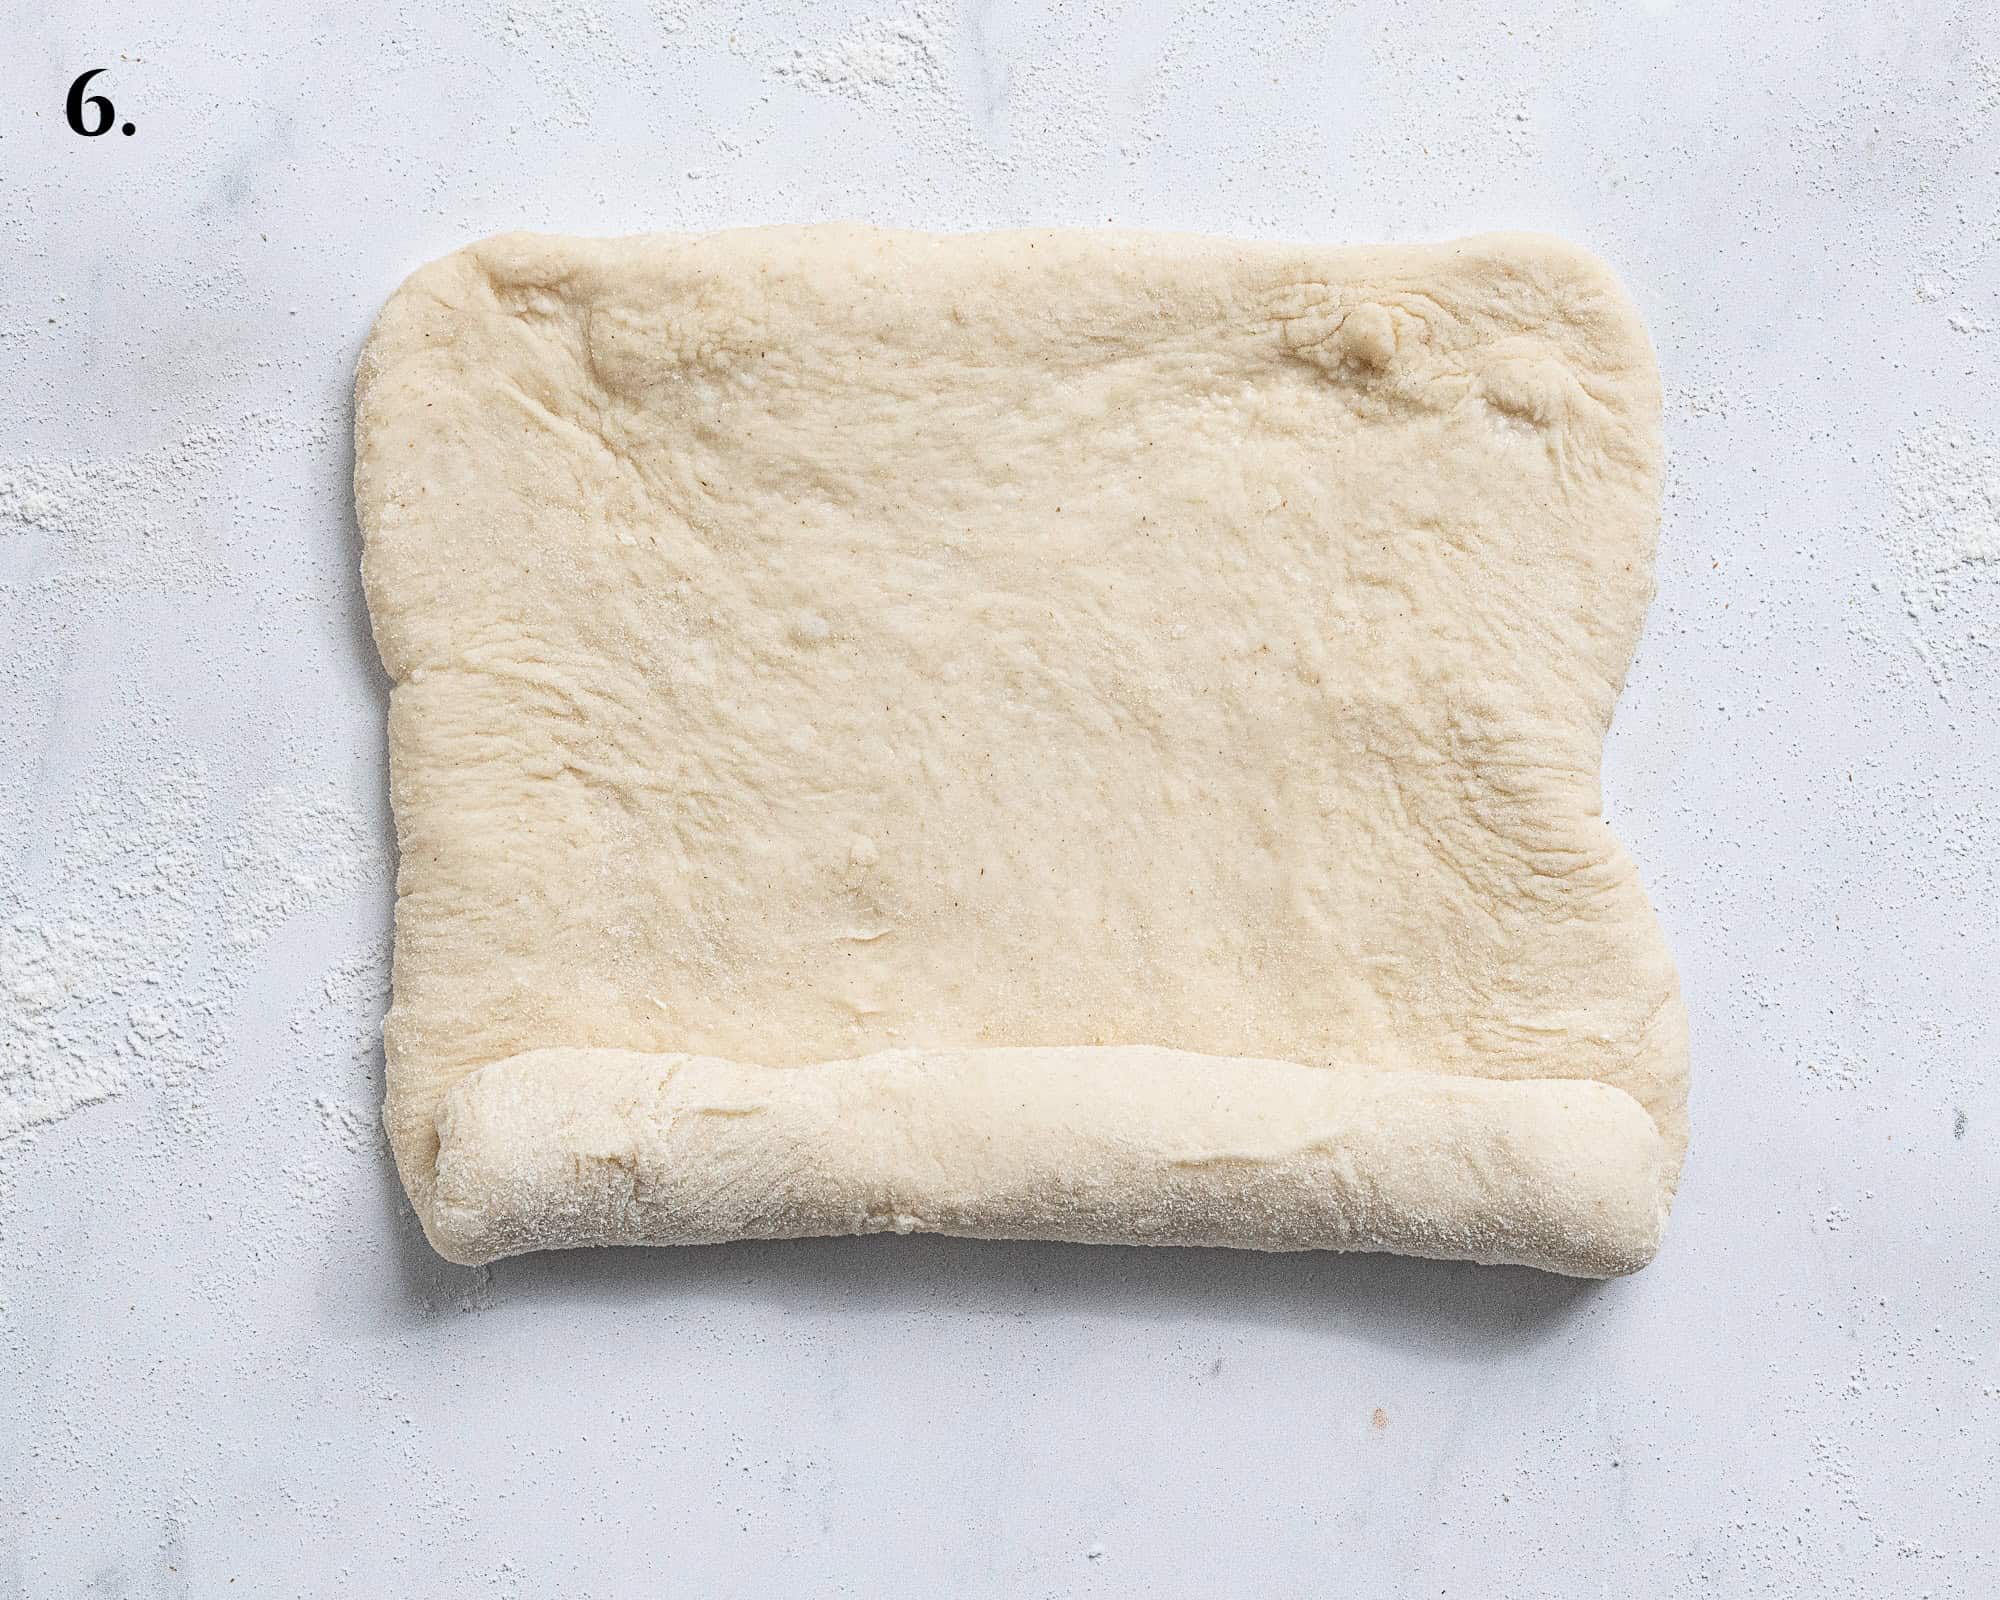
- Step 6: Roll up tightly from the shorter end, stretching out the top corners as you go so that it remains the same width the whole way across the roll.
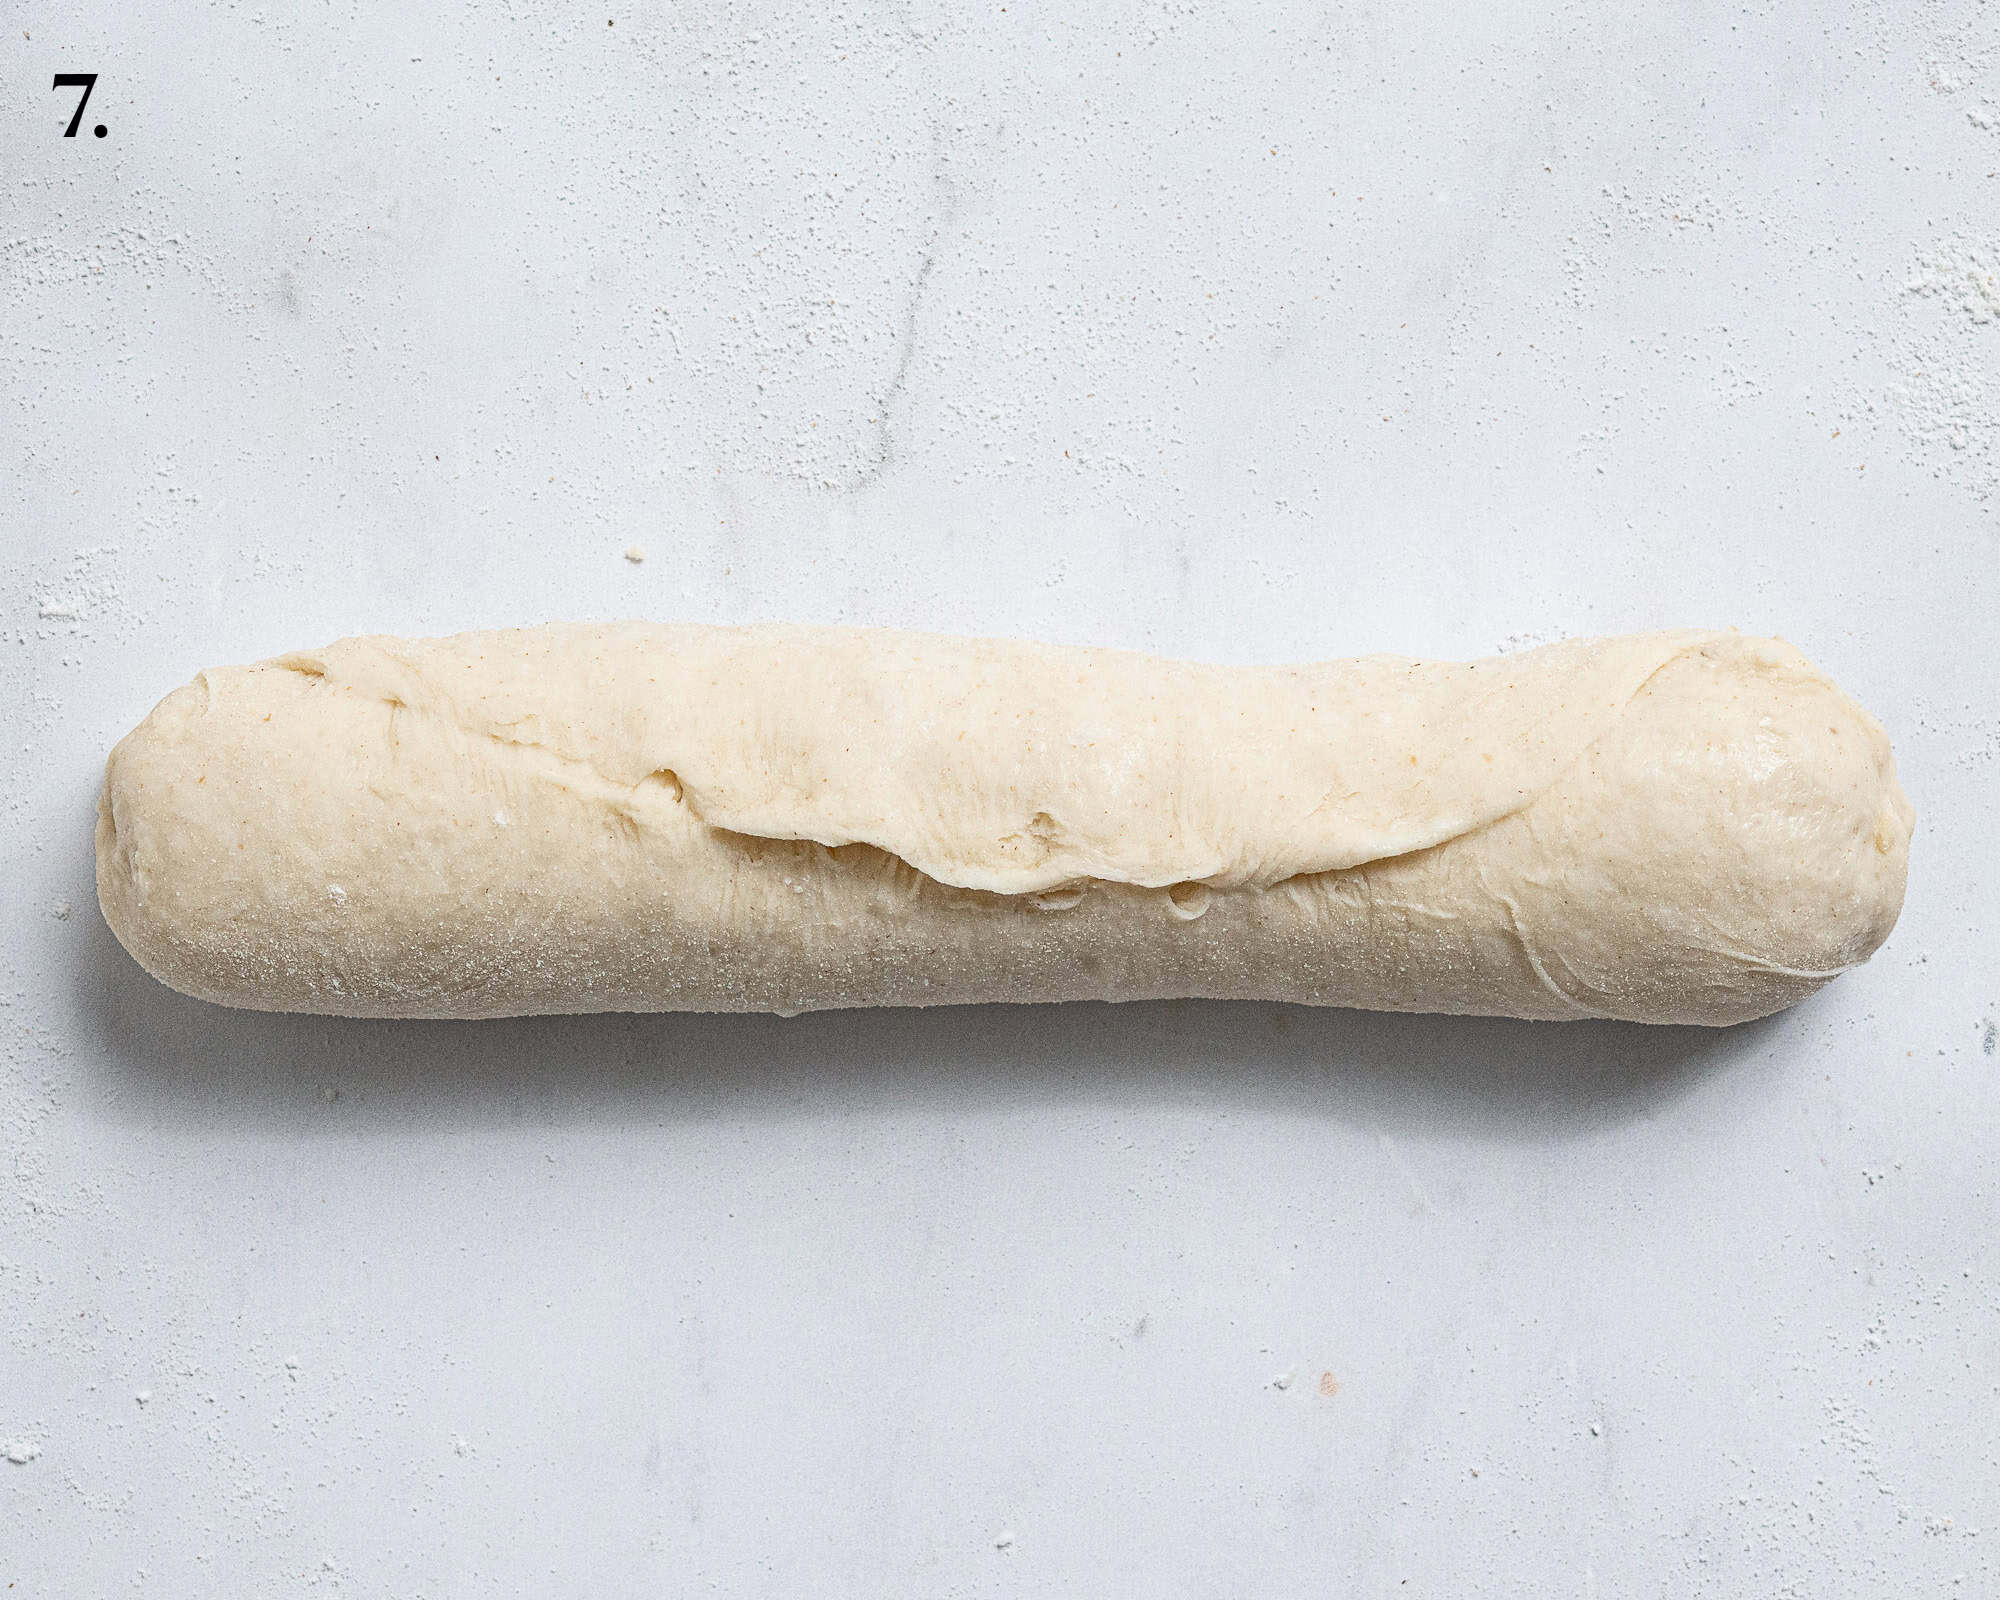
- Step 7: Pinch the ends and seam together to seal them. Roll the finger of dough briefly on the work surface if needed so that it is even across it's length and is about 12-15cm long.
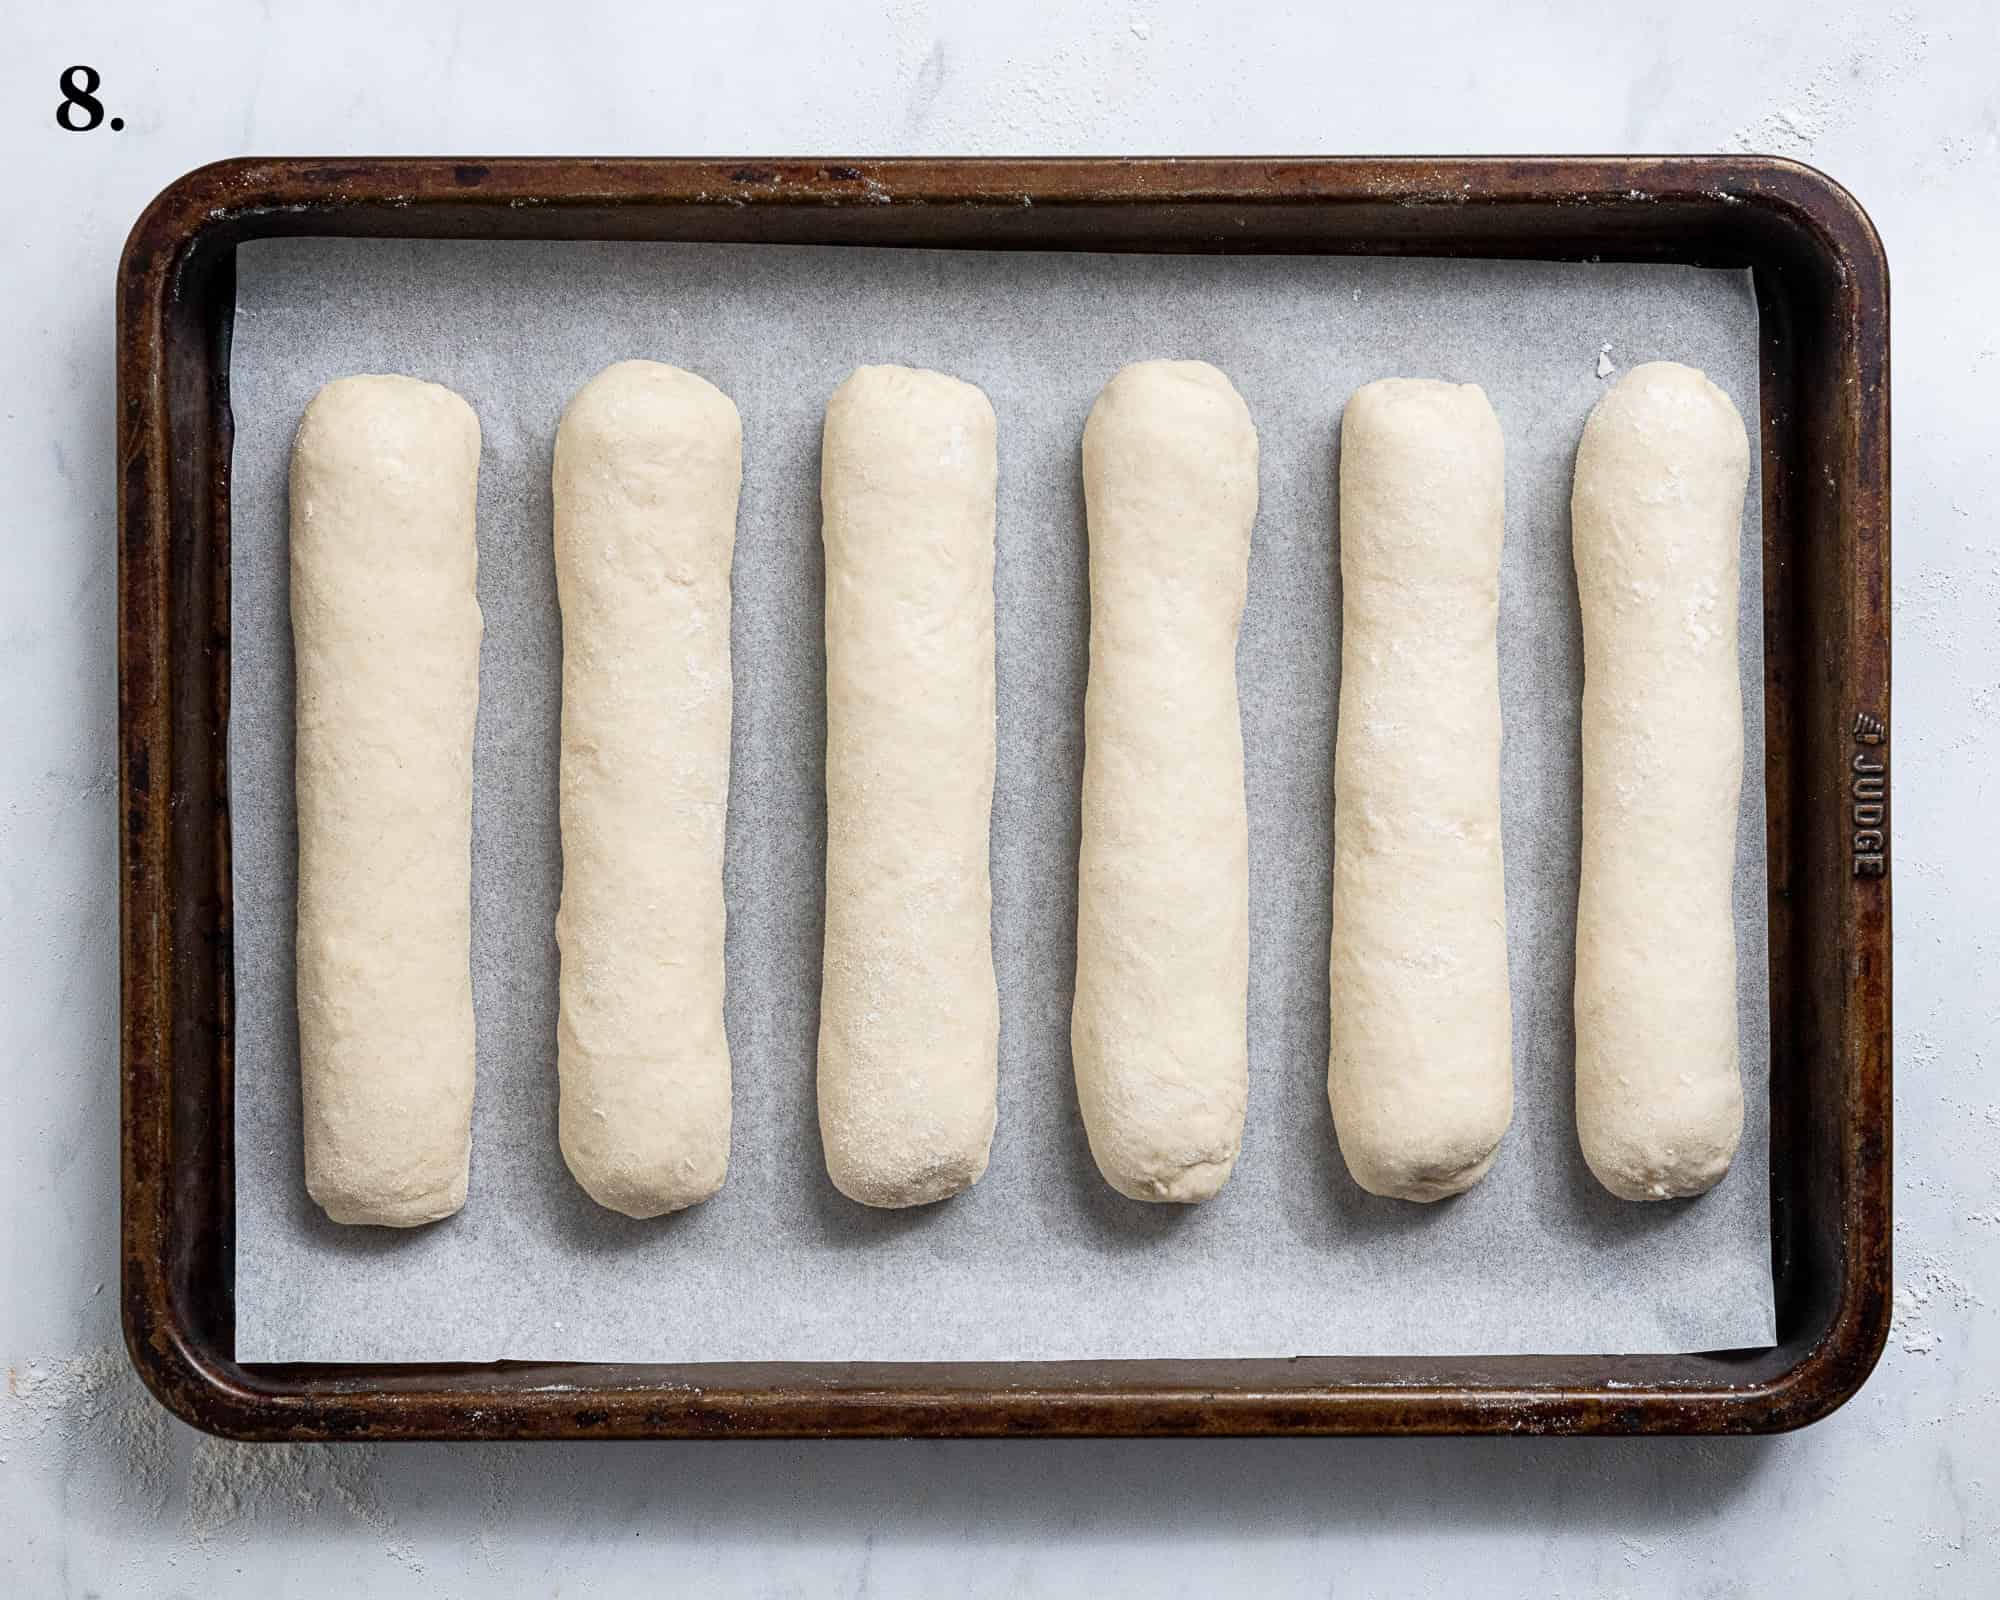
- Step 8: Place the dough fingers seam side down slightly spaced apart on 1-2 lined baking trays.
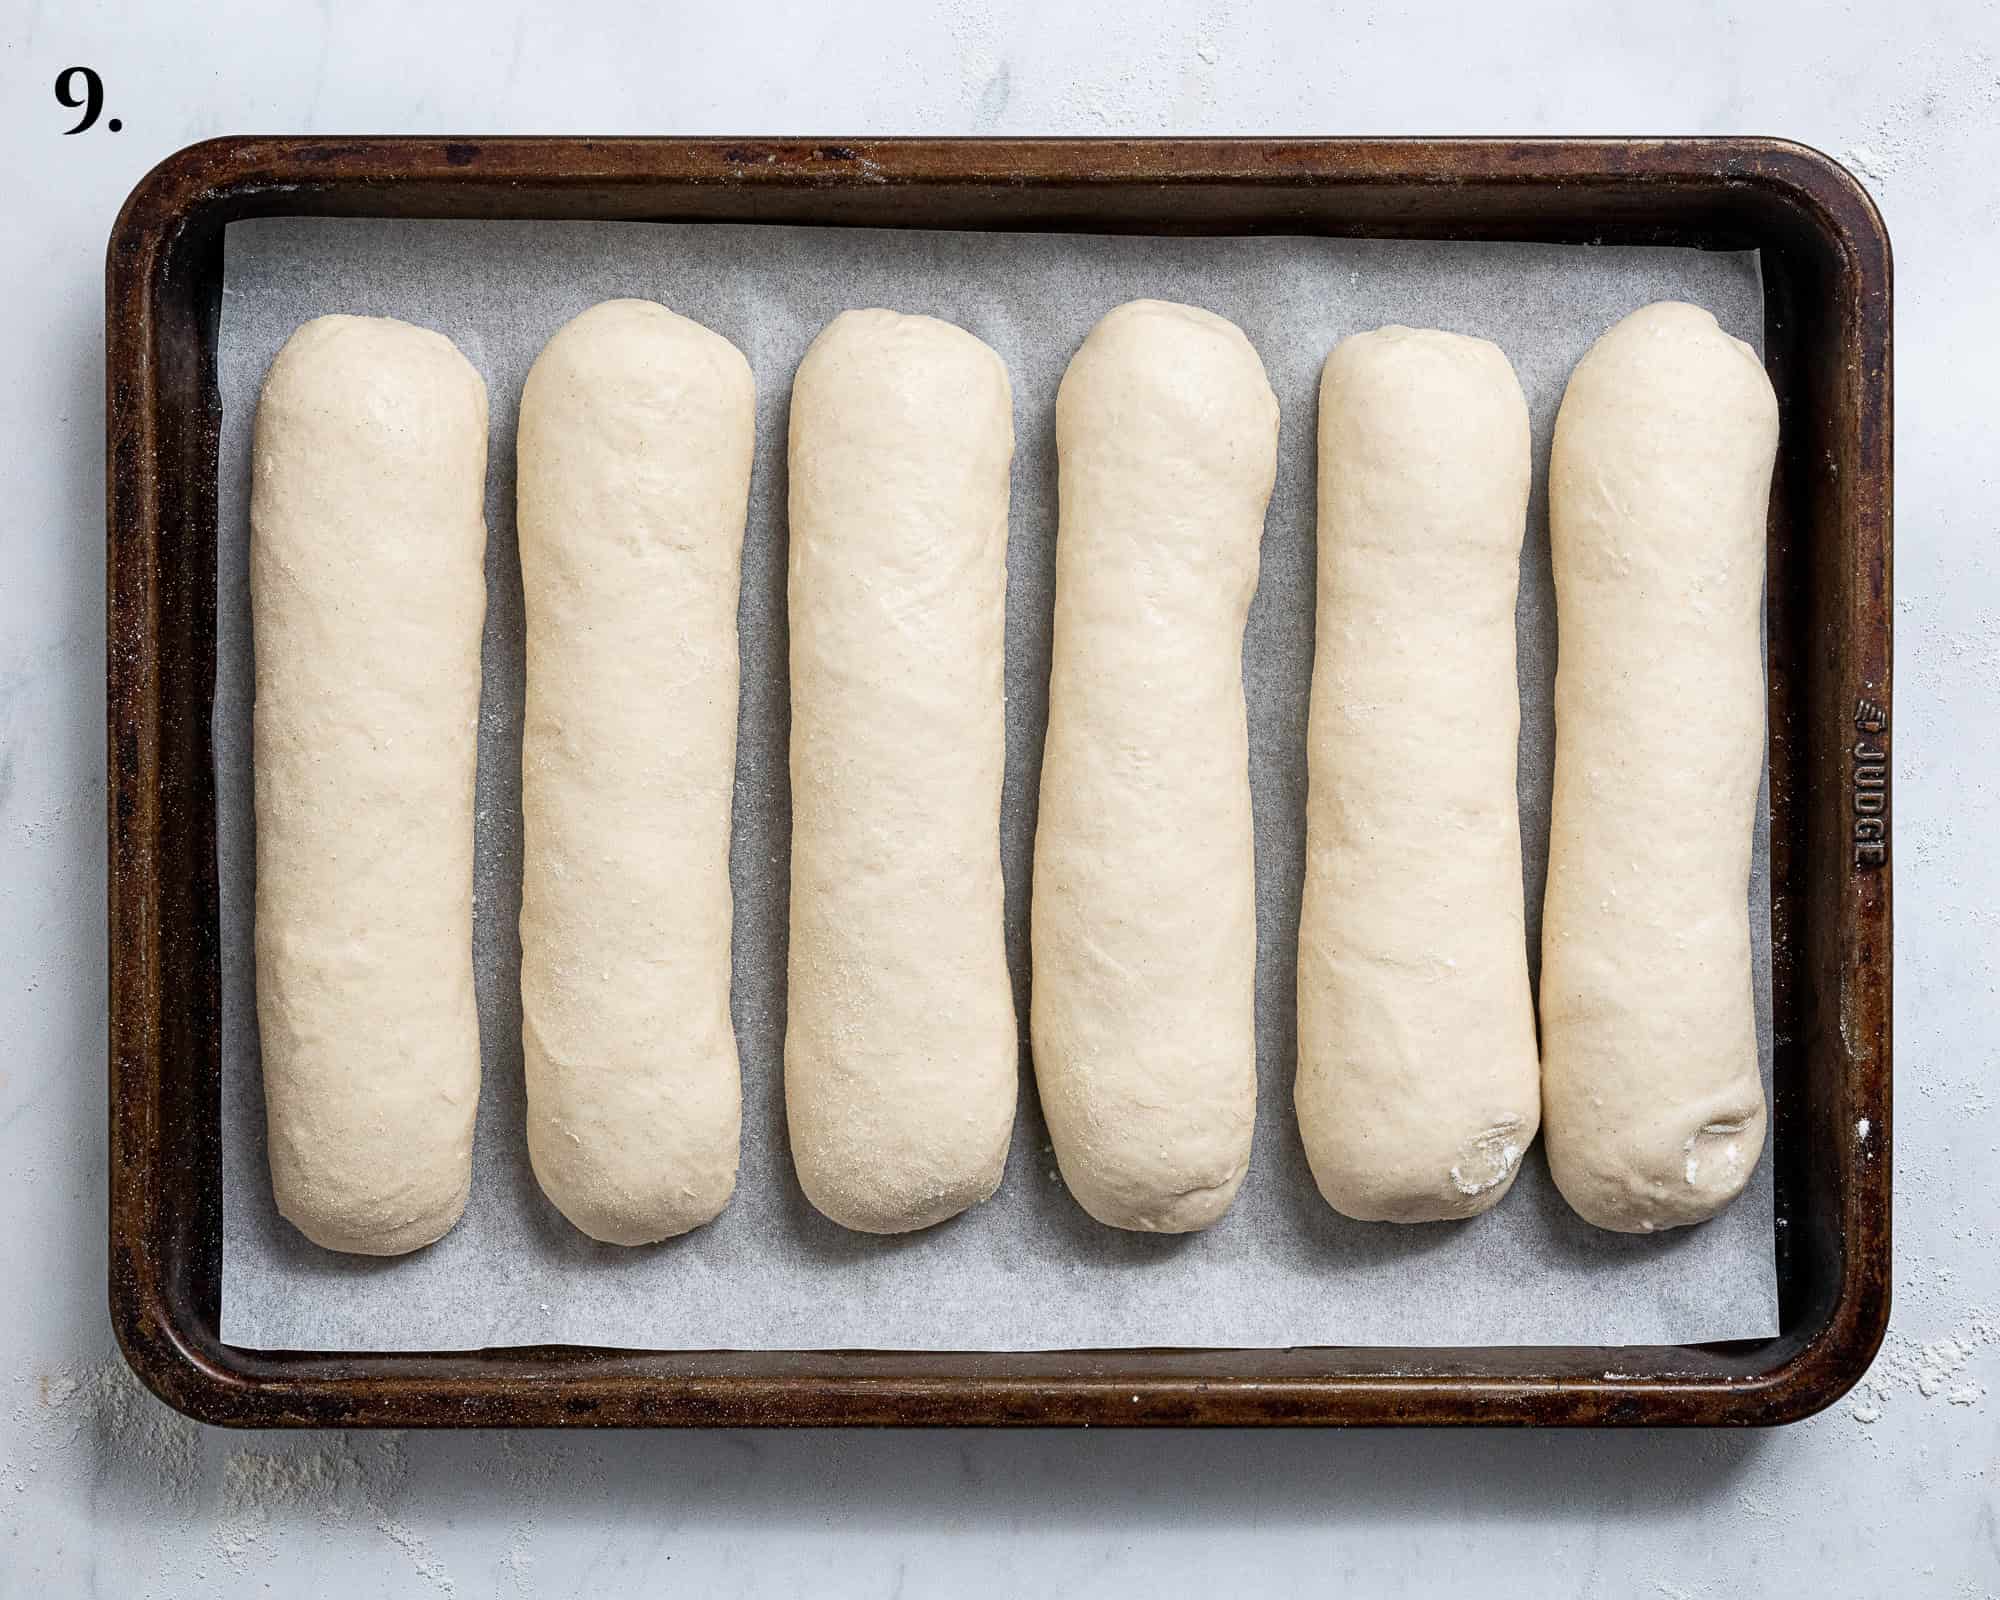
- Step 9: Loosely cover and set aside to rise until puffy, about 45-60 minutes.
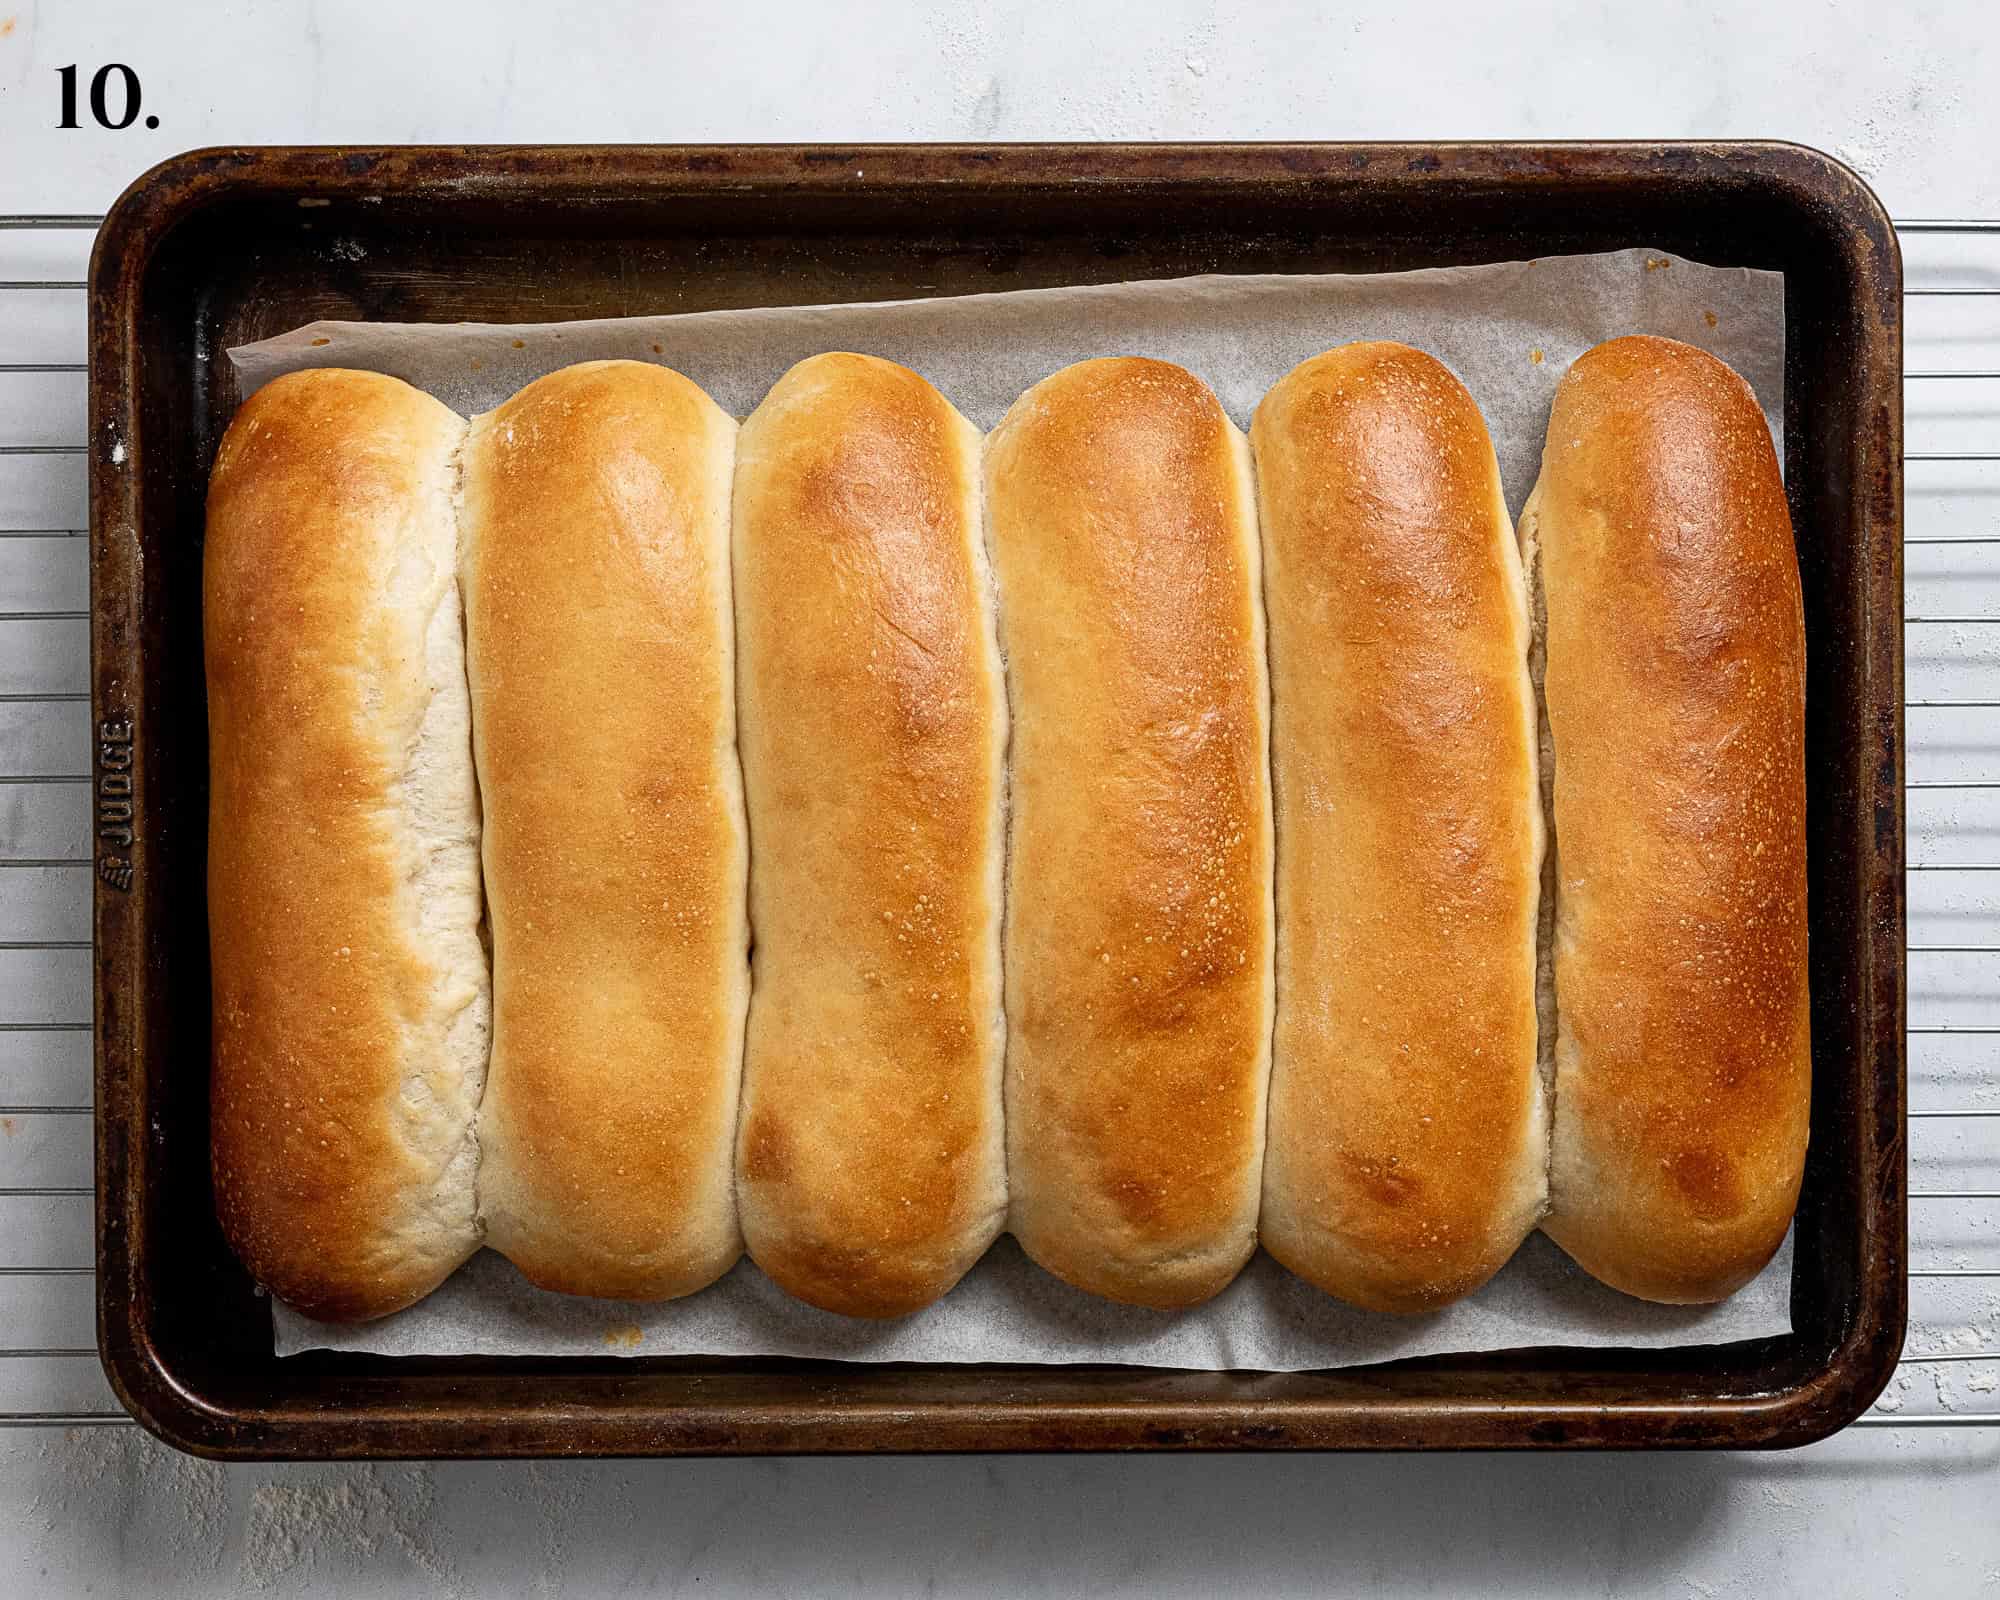
- Step 10: Gently brush with milk then bake for 12-15 minutes. Place on a wire rack to cool.
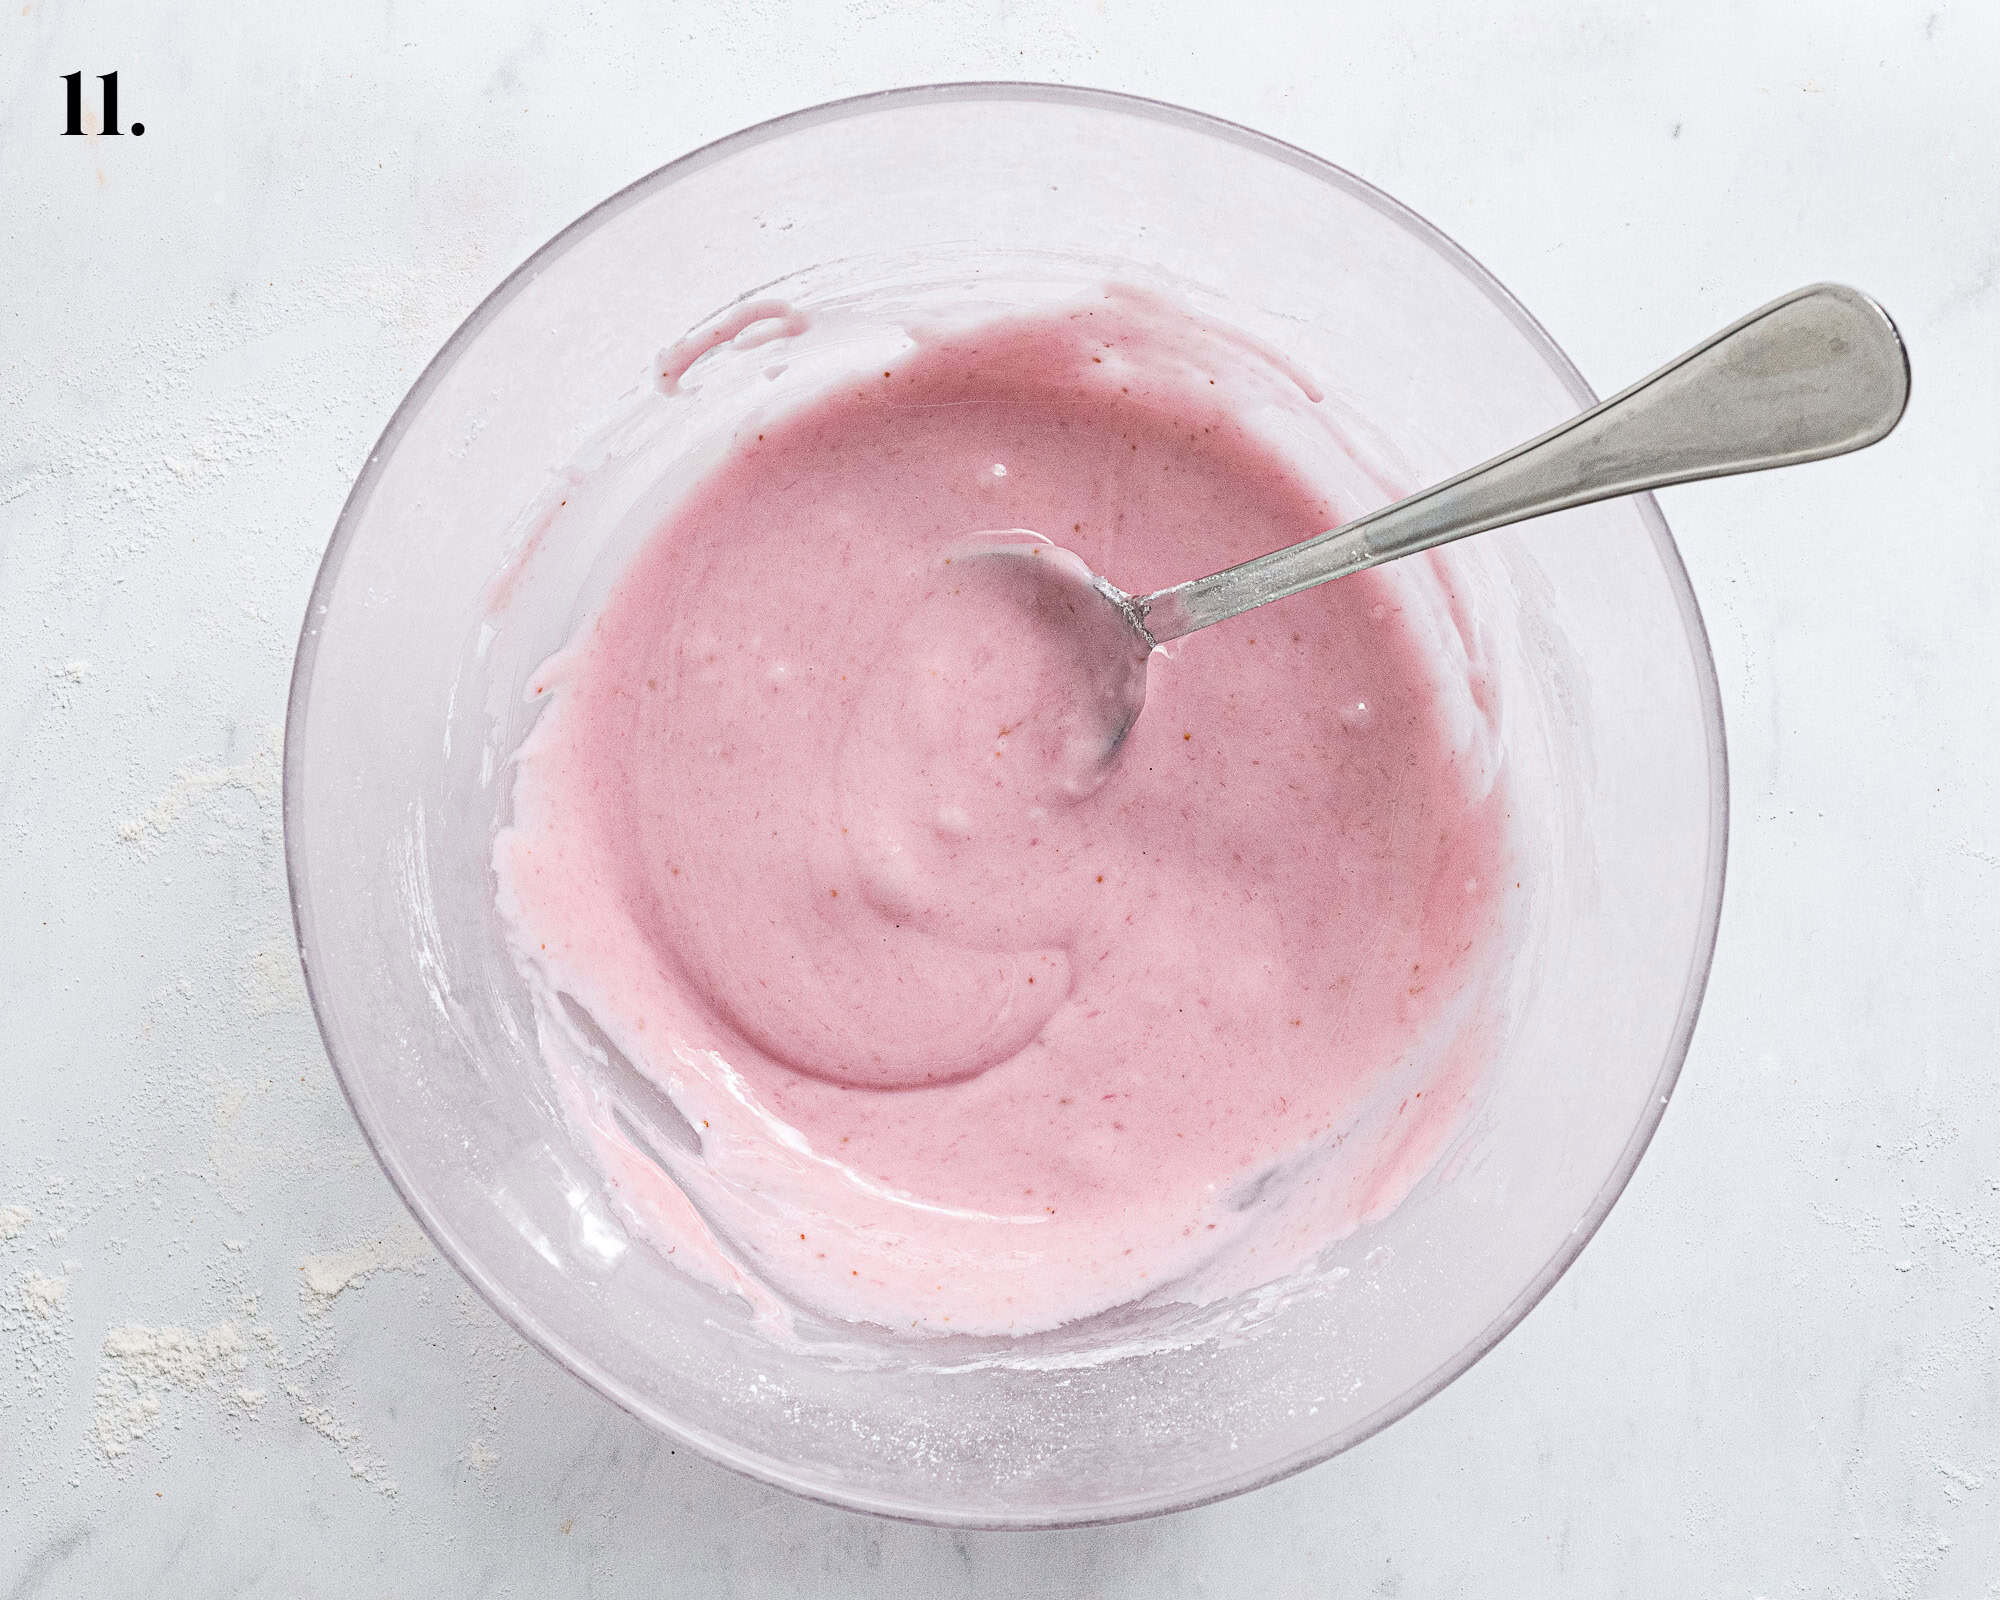
- Step 11: Sift the icing sugar and stir in enough water or crushed blueberry juice to make a thick but spoonable icing. Add a drop of pink or red food colouring if you like.
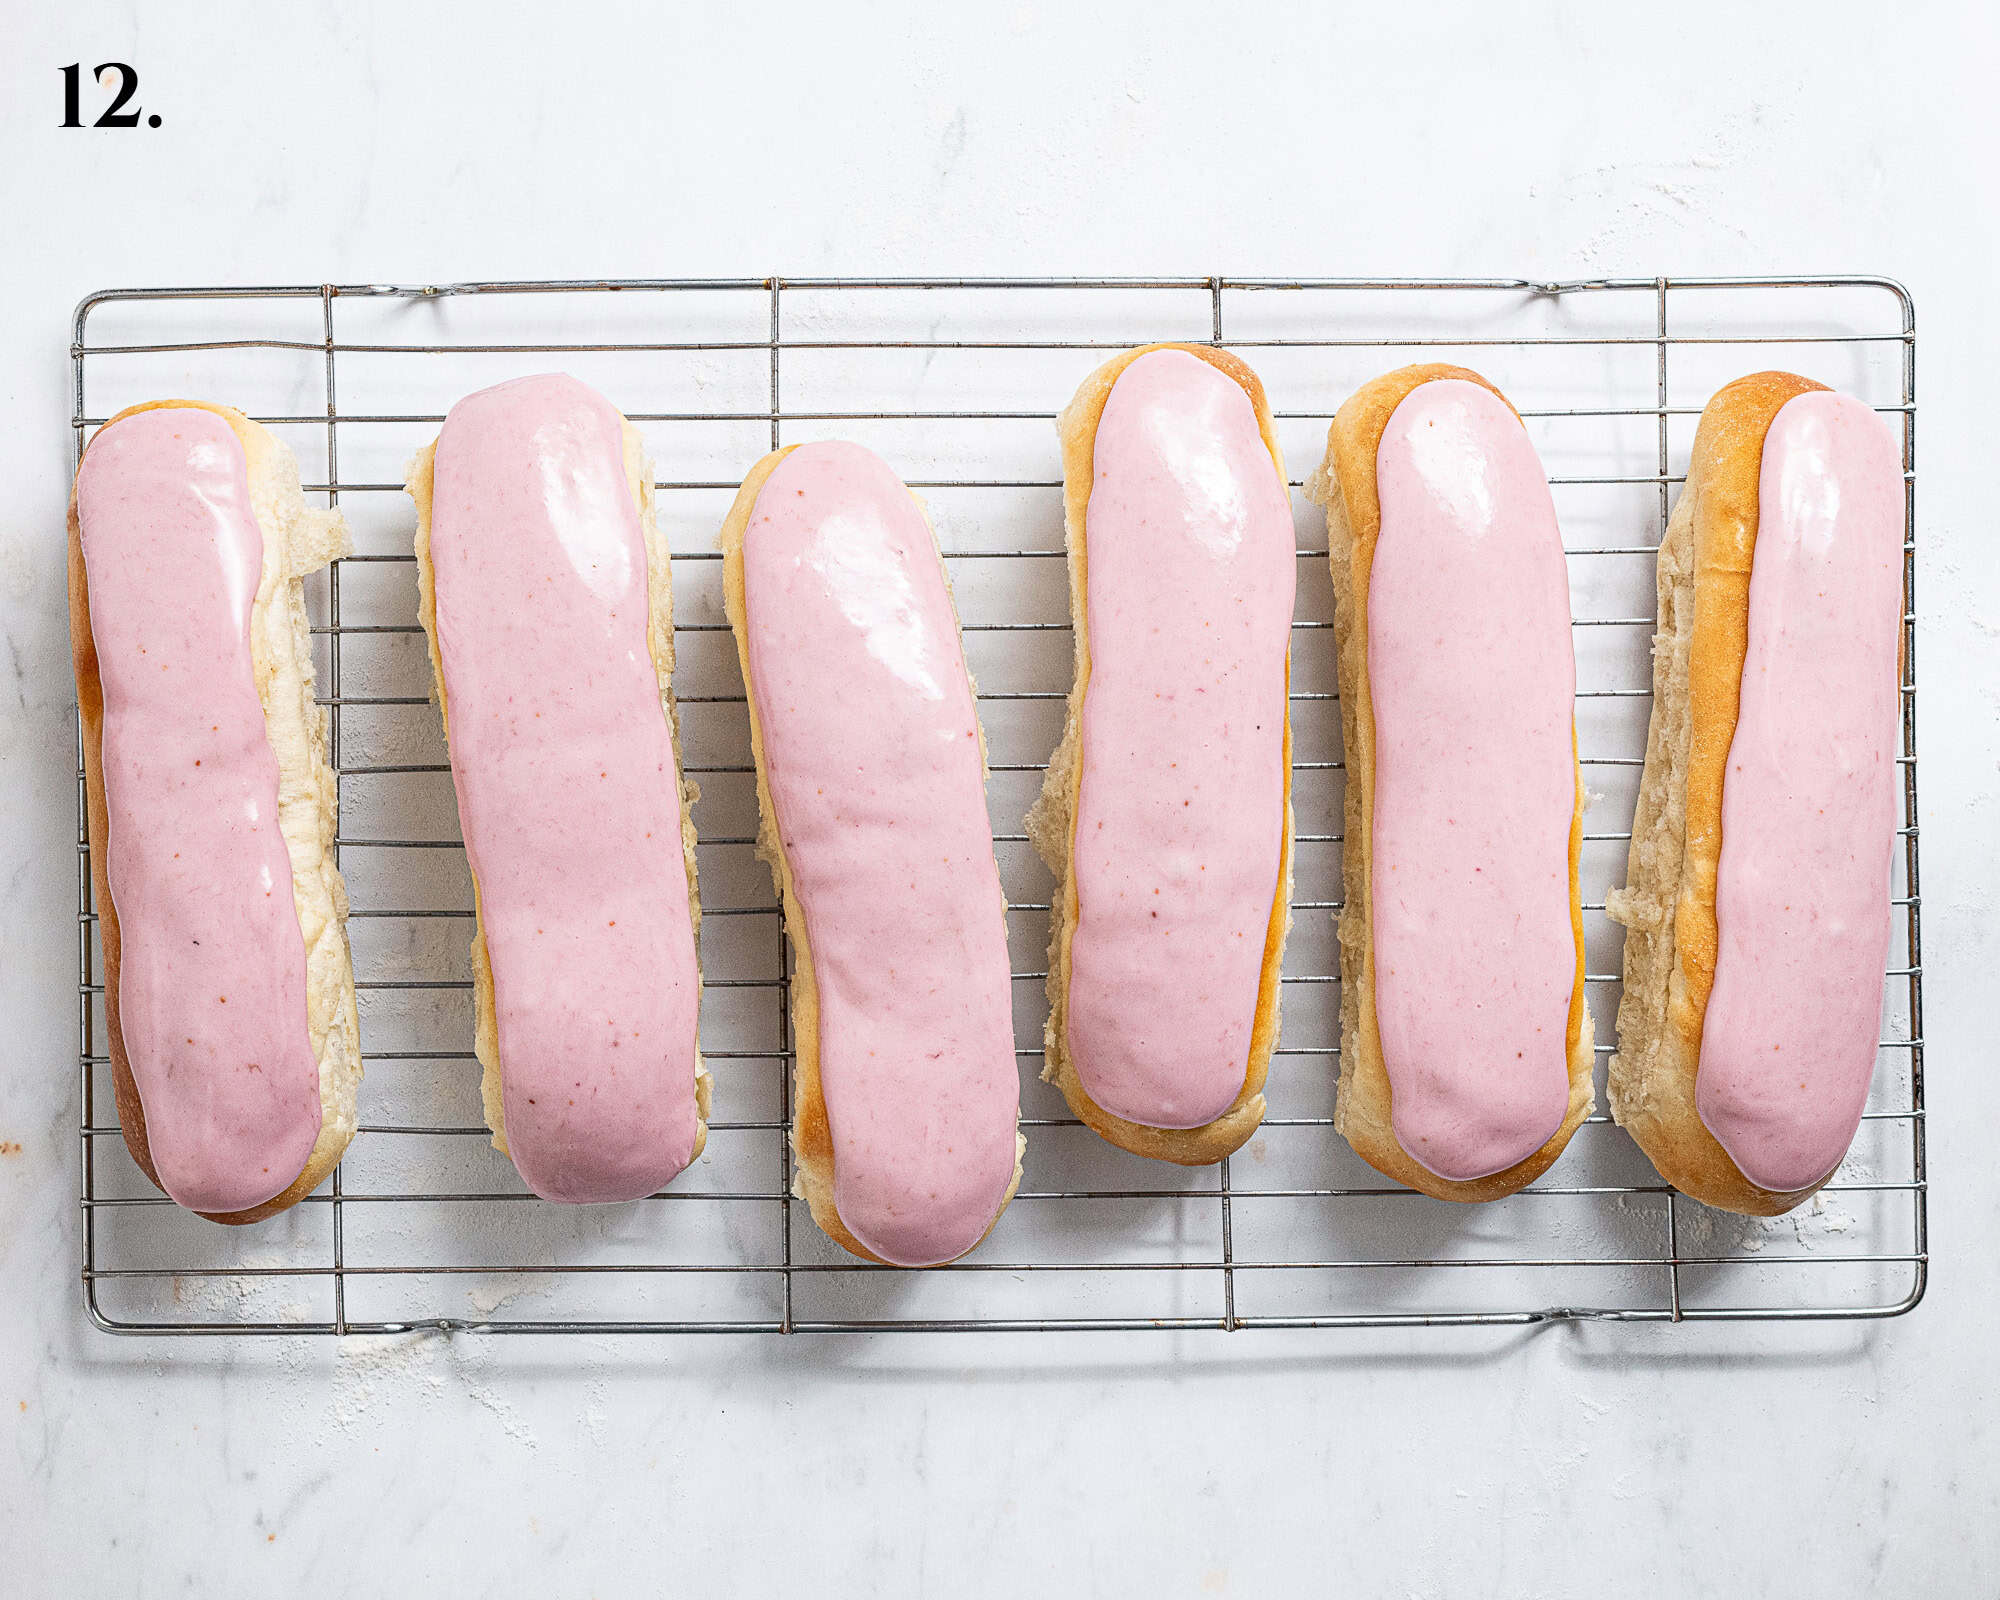
- Step 12: Spread some icing on top of each bun using the back of a spoon and set aside to set slightly for about 20 minutes before serving.
Top Tips:
USE SCALES. As with all of my baking recipes I really do recommend using the metric measurements with a digital scales rather than the cup conversions. Cups are a wildly inaccurate measuring system and you will get far better, more consistent results using a scale, not to mention that it is also easier and less messy than cups!
Tablespoon and teaspoon measurements are for proper measuring spoons, NOT regular kitchen spoons. A Tablespoon is 15ml and a teaspoon is 5ml and they should be level, not heaped.
Make sure that your yeast isn't out of date! Old yeast can lead to dough that doesn’t rise.
The rising time of the dough will vary depending on how warm it is; on hot days it will rise much faster than on cold ones.
If you want, you can give the dough it’s first rise overnight in the fridge rather than at room temperature. This breaks up the workload and gives the bread an even better flavour. Let it rise at room temperature for 30-60 minutes before refrigerating it until it has puffed up slightly.
The best way to tell if a loaf of bread is cooked in the middle is to use a probe thermometer. It is impossible to give a one-size-fits-all baking time as ovens vary so much. The bread should be done when it reaches 90°C / 195°F in the centre.
The recipe will make 8 iced buns, or you can make 6 giant ones as pictured.
The method of shaping the buns by rolling the dough out into rectangles then rolling it up gives neater results, but you can also simply shape the dough into balls then use your hands to roll them on the work surface into sausage shapes.
If making the blueberry glaze the buns must be eaten on the day they are made.
Make sure that the buns have cooled completely before you add the icing otherwise it will just melt straight off.
FAQ's:
Store these vegan iced buns in an airtight container at room temperature. They are best eaten on the day they are made but they will keep for up to 2 days. Be aware that the icing can start to deteriorate and slide off when stored however.
The un-iced buns can be frozen. Make sure that they have cooled completely first, but freeze them on the day they are baked to preserve freshness. Freeze them in a ziplock bag or wrapped in clingfilm.
To defrost the rolls, leave to sit at room temperature. You can pop them in the microwave or oven briefly to refresh them before serving.
This is a very soft, sticky dough so I absolutely recommend using a stand mixer if you have one. You can knead it by hand if you don't have one, just be prepared to get a bit messy.
When kneading, you shouldn't flour the surface as you will end up incorporating too much flour and making the dough too dry. Instead, if the dough is sticking too much, you can lightly oil the worksurface and your hands to help, or just be prepared to get a bit sticky!
A bench scraper is incredibly handy when kneading dough by hand to unstick the dough from the surface.
No, I’m afraid that you cannot use gluten free flour. Making gluten free bread is tricky and the entire recipe would need reworking. Gluten free baking is not my area of expertise so I cannot advise you. It is best to use a recipe that is designed to be gluten free rather than trying to adapt a non gluten free recipe.
More British Bakery Classics:


All images and content on Domestic Gothess are copyright protected. If you want to share this recipe then please do so by using the share buttons provided. Do not screenshot or post the recipe or content in full, instead include a link to this post for the recipe.
If you love this recipe, please leave a 5-star ★★★★★ rating at the bottom of the page! This provides helpful feedback to both me and other readers.
Also be sure to add us as a trusted site on Google so that our recipes show up more in your searches!
To keep up to date with all my latest recipes you can subscribe to my newsletter and follow along on social media!

Vegan Iced Buns
Equipment
- Stand mixer with dough hook
Ingredients
Tangzhong:
- 20 g (3 Tablespoons) white bread flour
- 120 g (½ cup) water
Dough:
- 120 g (½ cup) unsweetened non-dairy milk (I use soy) cold
- 40 g (3 Tablespoons) caster or granulated sugar
- ½ teaspoon table salt
- 300 g (2 ½ cups) white bread flour
- 7 g (2 ¼ teaspoons) instant/fast action yeast
- 35 g (2 ½ Tablespoons) vegan block butter softened
- non dairy milk for brushing
Icing:
- 200 g (1 + ¾ cups) icing (powdered) sugar sifted
- ½ teaspoon vanilla extract (optional)
- 60 g (⅓ cup) fresh blueberries OR use 1-2 Tablespoons water* (optional)
Instructions
- To make the tangzhong, place the flour in a saucepan and gradually whisk in the water to avoid lumps. Place the pan over a medium/low heat and whisk constantly until the mixture has thickened to a soft paste/pudding-like consistency.20 g (3 Tablespoons) white bread flour, 120 g (½ cup) water
- Scrape the tangzhong into the bowl of a stand mixer fitted with a dough hook and pour the cold milk on top. This will cool the tangzhong down so that it doesn't kill the yeast.120 g (½ cup) unsweetened non-dairy milk (I use soy)
- Add the sugar, salt, flour and finally the yeast. Mix to form a shaggy dough.40 g (3 Tablespoons) caster or granulated sugar, ½ teaspoon table salt, 300 g (2 ½ cups) white bread flour, 7 g (2 ¼ teaspoons) instant/fast action yeast
- Knead with the mixer on a medium speed until the dough is smooth and stretchy, about 5-10 minutes. It is a very soft, sticky dough; resist the urge to add extra flour unless the dough is wet rather than just sticky.
- Add the softened vegan butter. Continue to knead until the butter is fully incorporated and the dough is smooth and elastic. It may seem greasy and messy at first but keep kneading and I promise you the butter will all mix in and the dough will become smooth. Once the butter is fully incorporated the dough should look smooth and silky and it should pass the windowpane test (you should be able to stretch a portion of the dough thin enough to see light through it without it tearing). It should still be soft and sticky however.35 g (2 ½ Tablespoons) vegan block butter
- Lightly oil a large bowl and your hands then shape the dough into a ball. Place the dough in the bowl, cover and set aside to rise in a warm spot until doubled in size, about 1.5-2 hours.
- Punch down the risen dough and give it a very brief knead to knock out any air bubbles then divide it into 8 even pieces - use a scale for accuracy. (You can make 6 giant iced buns instead of 8 if you want). Shape each piece into a ball, lightly flouring your hands and the work surface as needed.
- Roll one of the balls of dough out on a lightly floured surface into a rough rectangle shape. It doesn't need to be too thin. Pull out the top corners so that the top is slightly wider than the bottom.
- Starting at the shorter end, roll it up tightly like a Swiss roll, stretching out the top corners as you go so that it remains the same width the whole way across the roll.
- Pinch the ends and seam together to seal them. Roll the finger of dough briefly on the work surface if needed so that it is even across it's length and is about 12-15cm long. Repeat with the rest of the balls of dough.
- Line 1-2 baking trays with baking paper and place the dough fingers seam side down in a row, slightly spaced apart.
- Loosely cover and set aside to rise until puffy, about 45-60 minutes. If you press one gently the dough should spring back slowly most of the way but leave a small indentation. If it springs back quickly and fills in all the way then they need a little bit longer. While they are rising preheat the oven to 200°C/180°C fan/400°F/gas mark 6.
- When the buns are ready to bake, gently brush them with a little milk, then bake for 12-15 minutes until light golden and the internal temperature reaches 90°C/194°F on a probe thermometer.non dairy milk for brushing
- Remove from the oven and transfer to a wire rack to cool. Make sure that they have cooled completely before making the icing.
- If you are making the icing with water, sift the icing sugar into a bowl, add the vanilla if using, and gradually stir in enough cold water to form a thick but spoonable consistency, about 1-2 Tablespoons. You can add a drop of food colouring if you like.200 g (1 + ¾ cups) icing (powdered) sugar, ½ teaspoon vanilla extract
- If you are making the icing with blueberries, place the blueberries in a small bowl and mash with a fork. Scrape the mashed blueberries through a fine mesh sieve and discard the skin. Gradually stir the blueberry juice and vanilla into the icing sugar to form a thick but spoonable consistency, you may not need all of the blueberry juice.60 g (⅓ cup) fresh blueberries OR use 1-2 Tablespoons water*
- Spoon some of the icing on top of each bun and spread it across the top with the back of a spoon. Leave to set for 20 minutes or so then serve.
Notes
- *The blueberries are purely to create a natural coloured icing and do not really impart any flavour.
- See post above for tips, details, storage instructions and step-by-step photos.
- As with all of my baking recipes I really do recommend using the metric measurements with a digital scale rather than the cup conversions. Cups are a wildly inaccurate measuring system and you will get far better, more consistent results using a scale, not to mention that it is also easier and less messy than cups!
- Best eaten on the day they are made.
Stay in touch with me through social media @ Instagram, Pinterest, TikTok and Facebook, and subscribe via email to get all our latest recipes!
Leave a Reply