

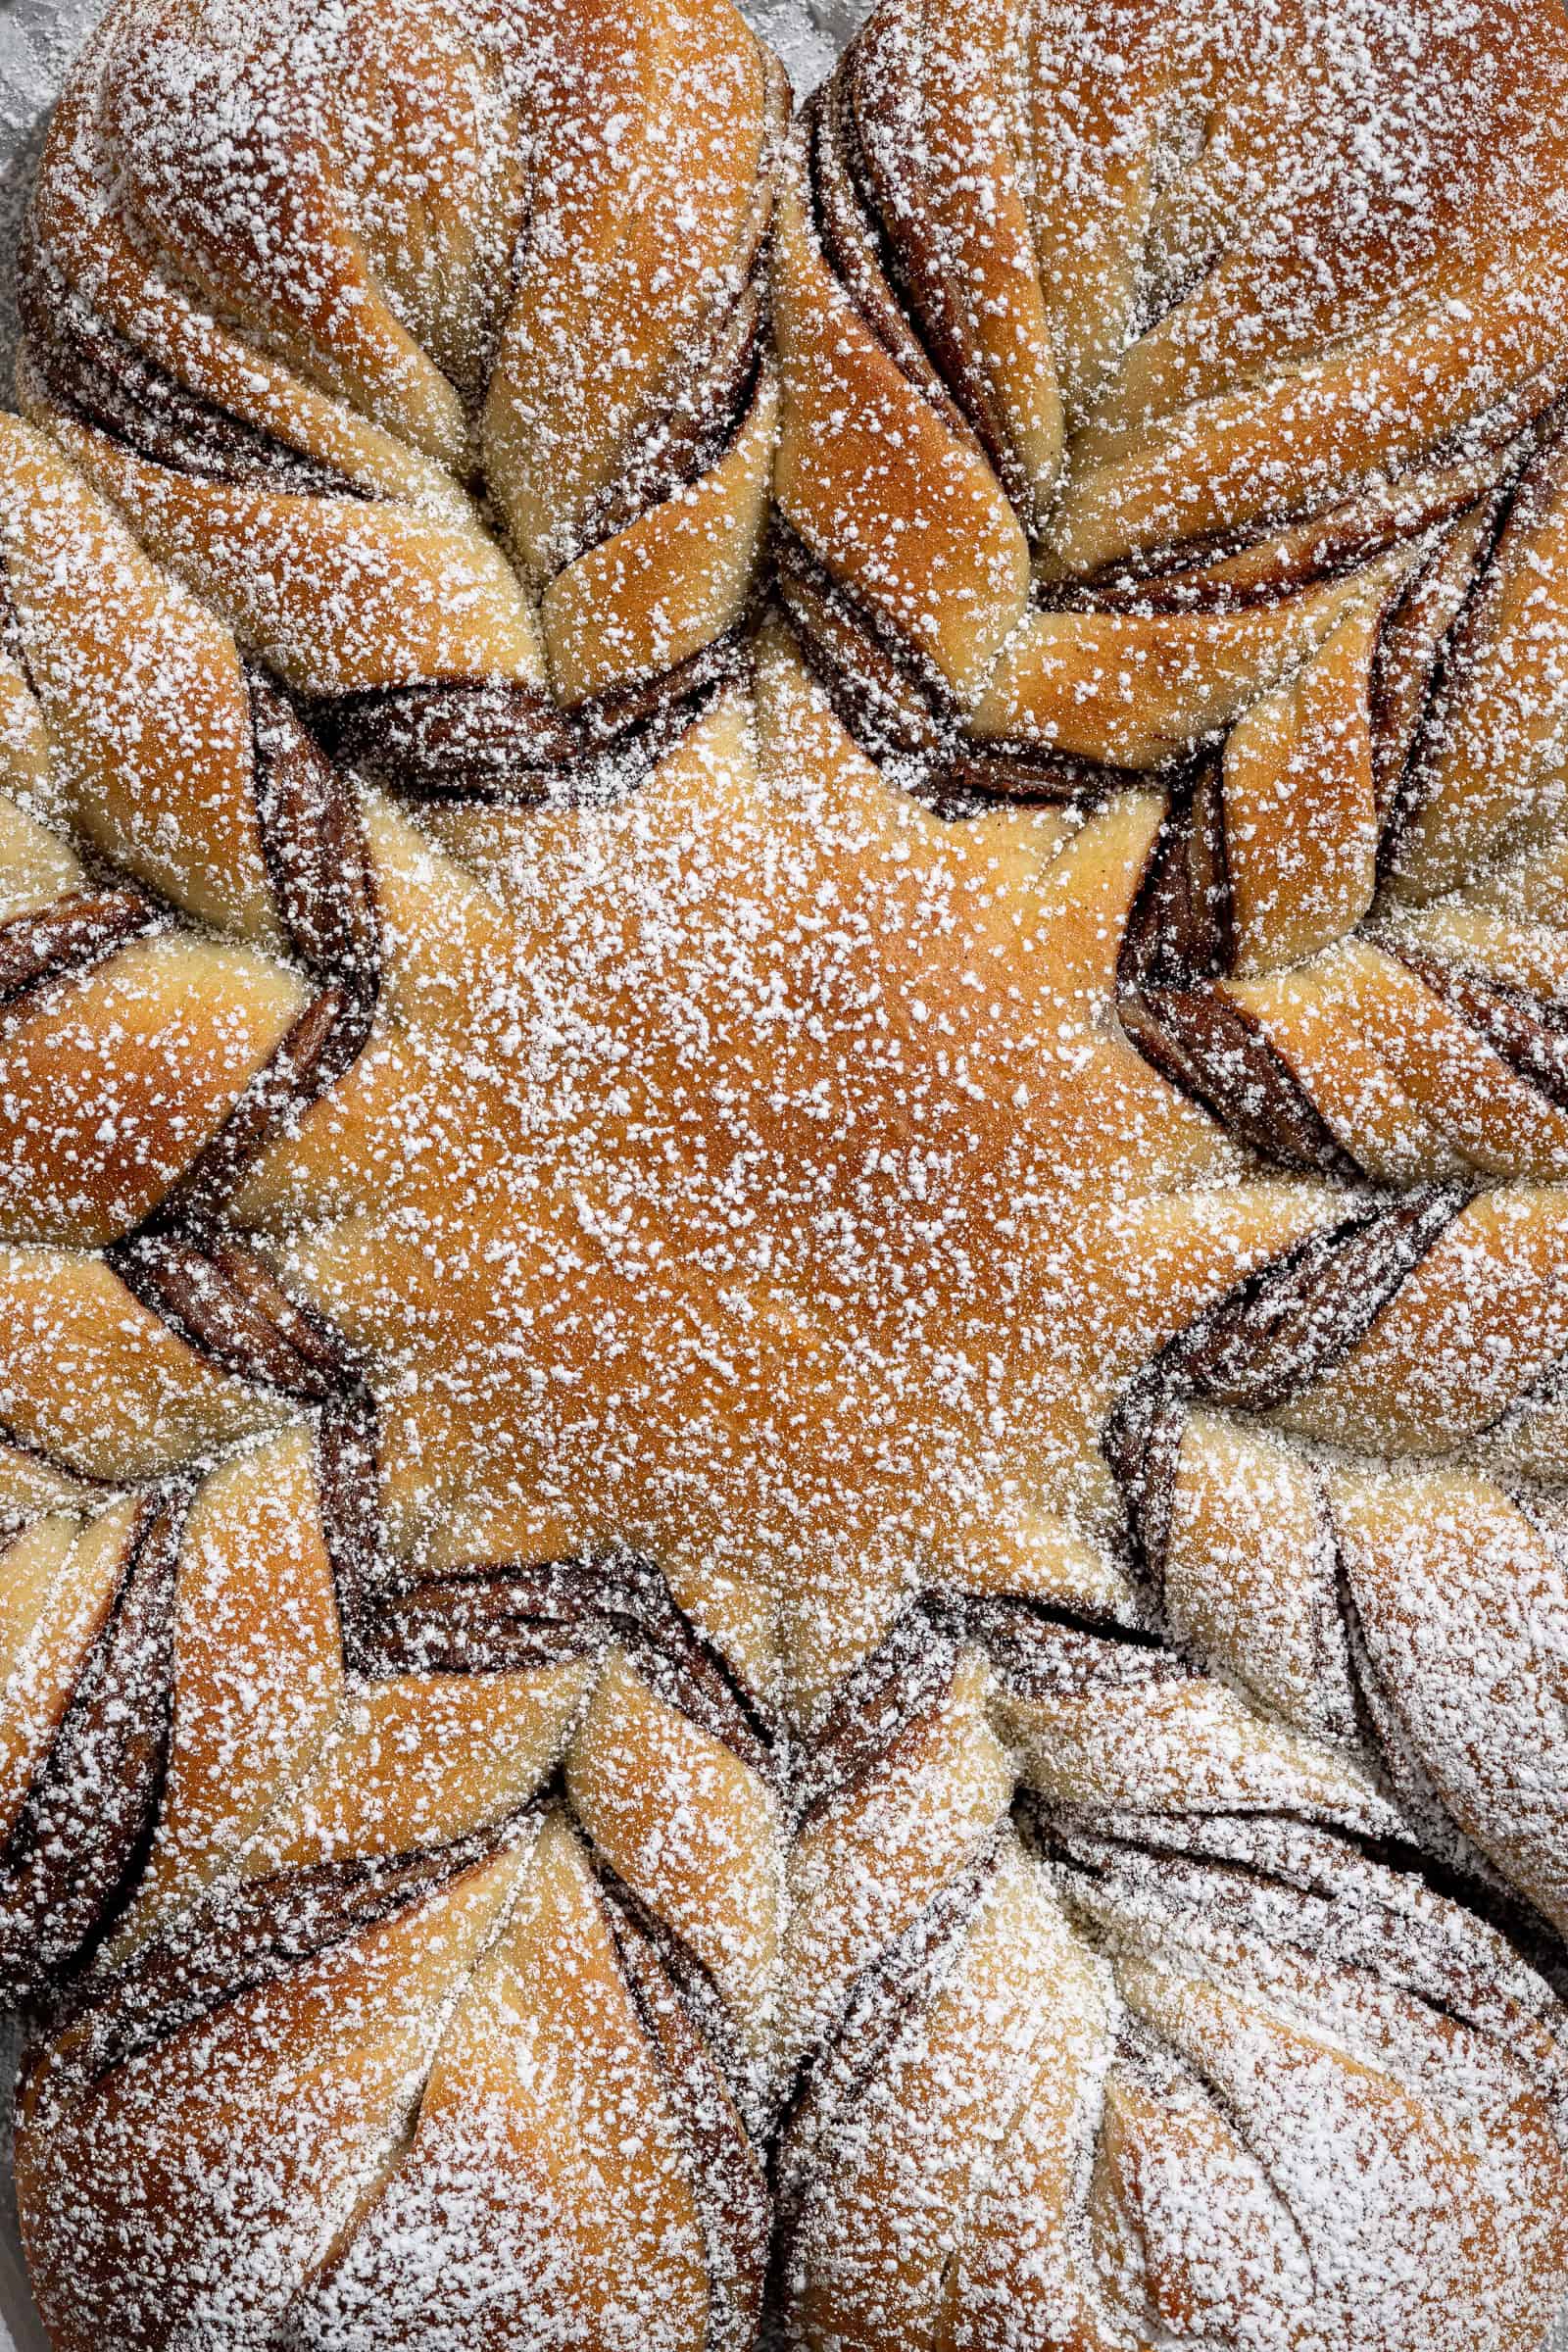
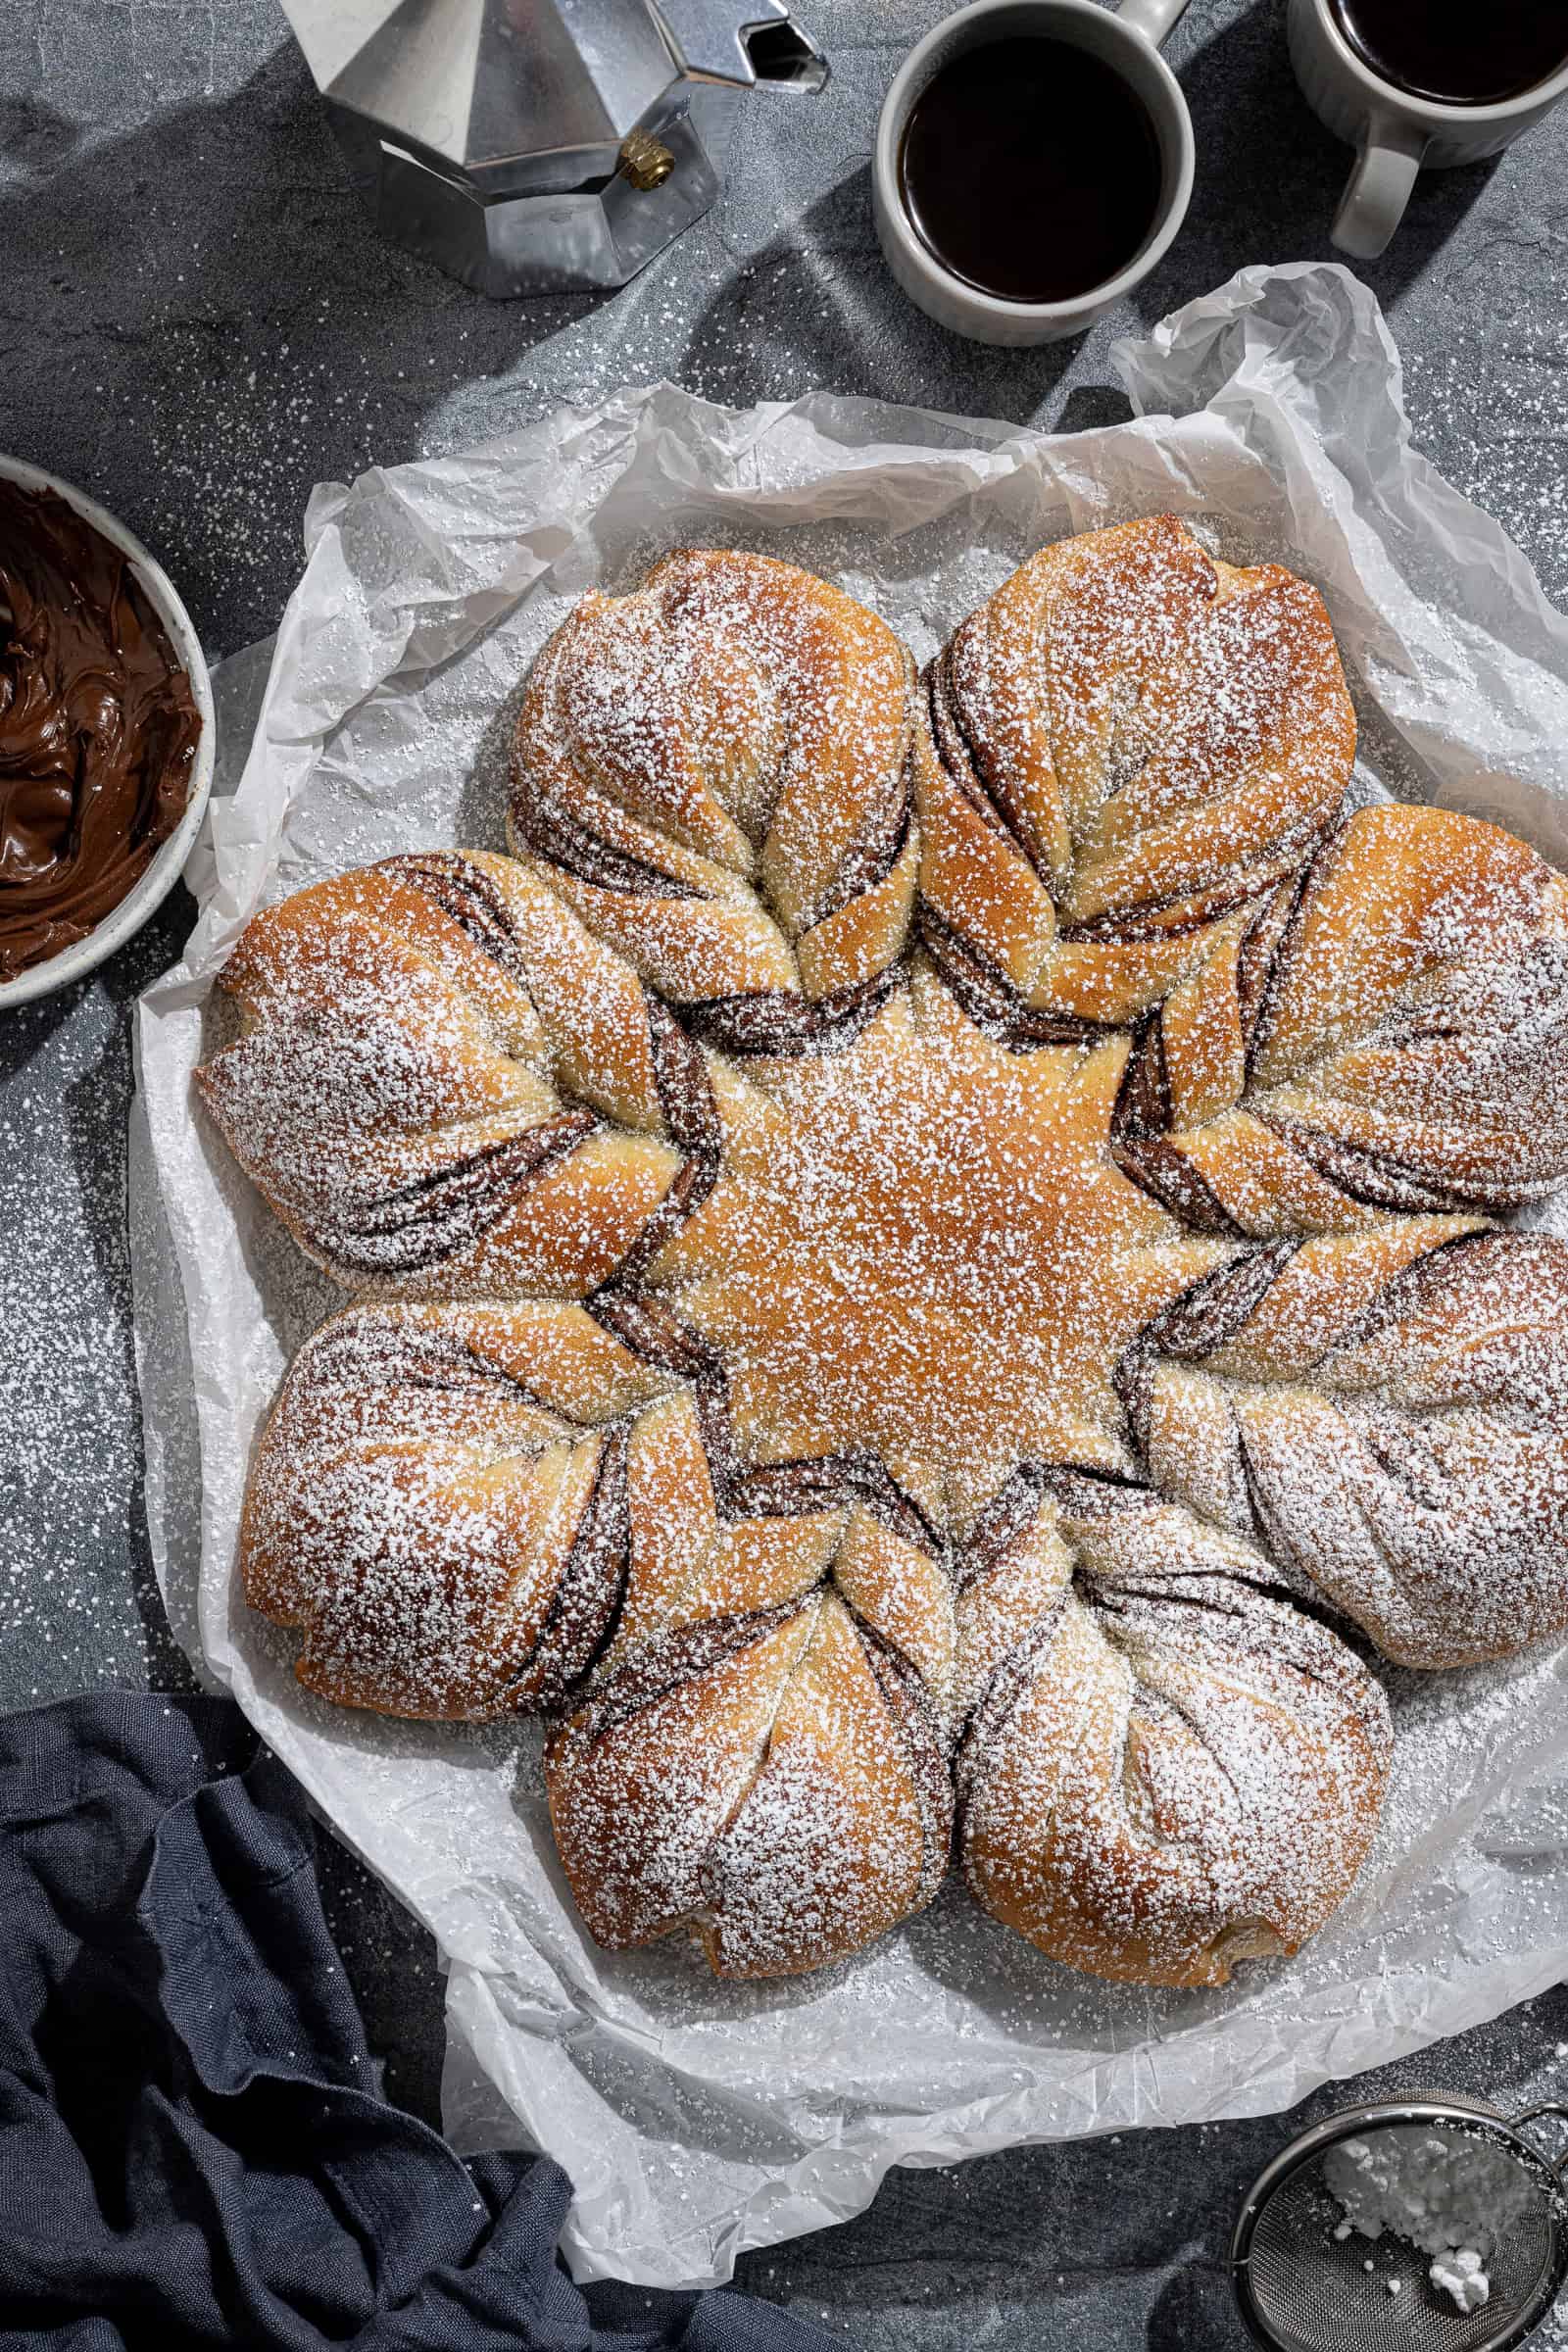
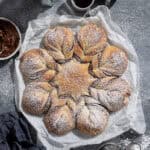
This impressive, pull-apart vegan chocolate star bread with vegan Nutella filling is a show-stopping festive breakfast, brunch or dessert option. A chocolatey version of my vegan cinnamon star bread, it features soft, fluffy, yeasted dough filled with layers of chocolate hazelnut spread, shaped into a beautiful star.
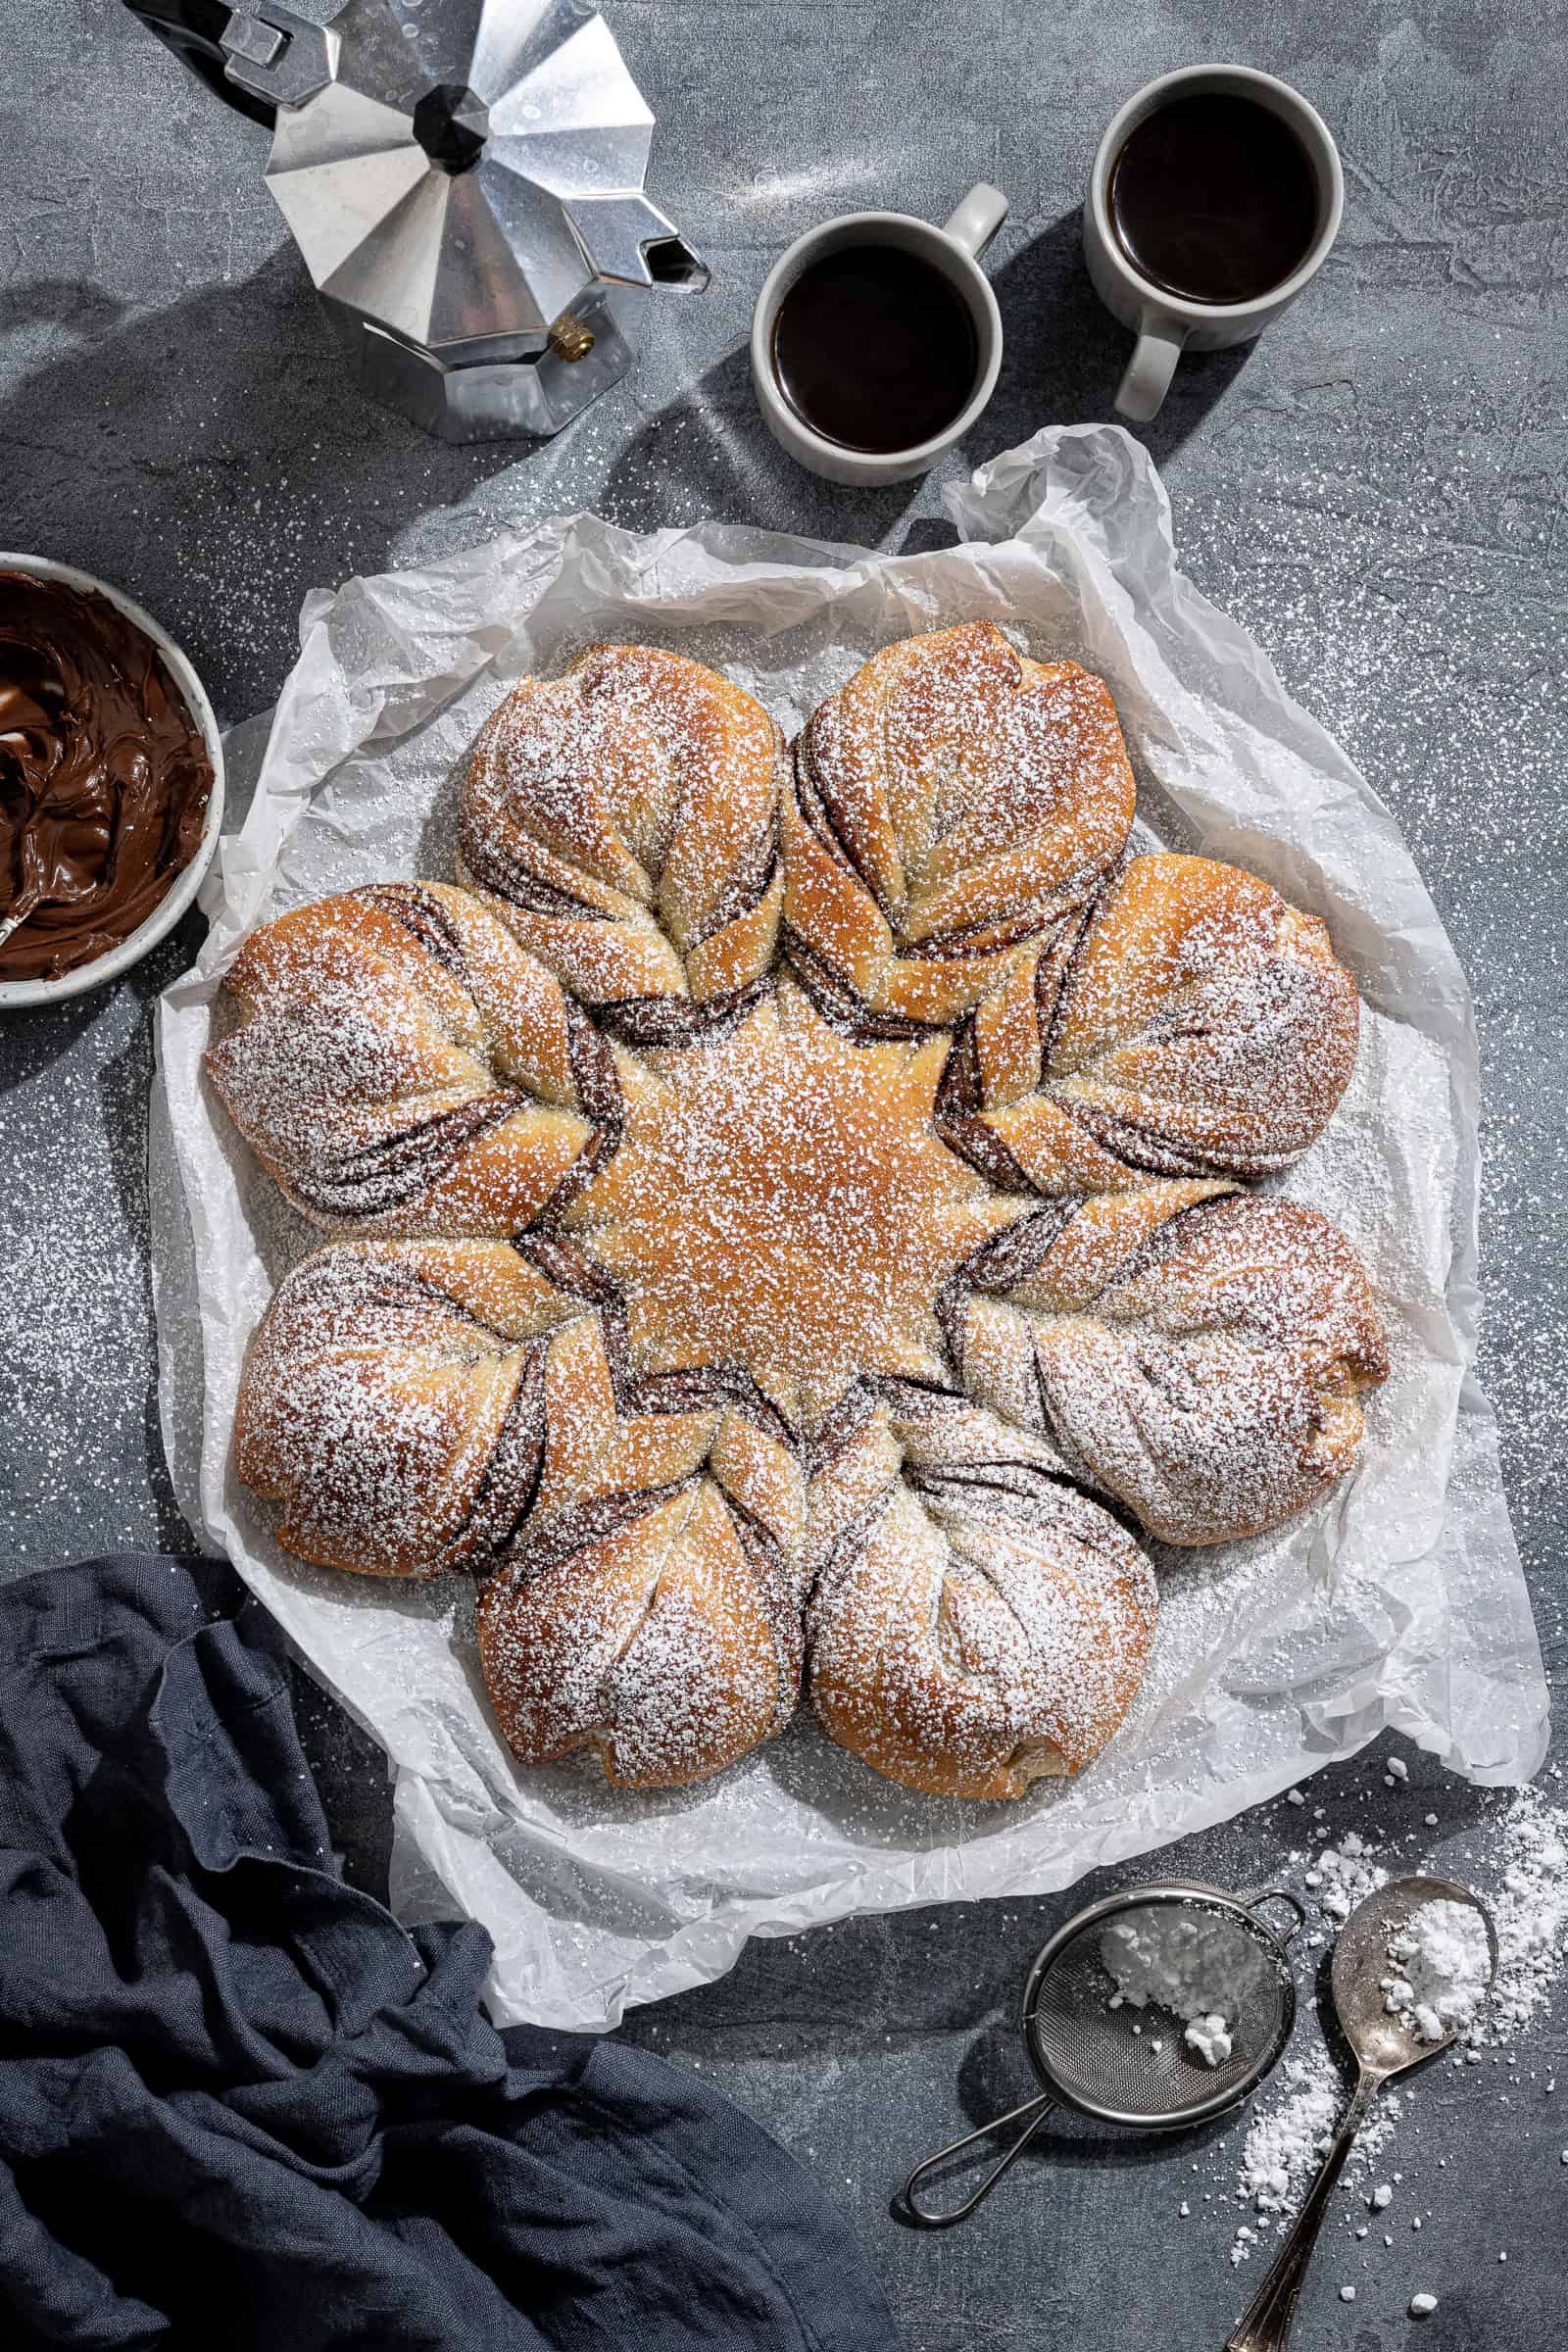
Vegan chocolate star bread is a decorative alternative to chocolate babka or chocolate rolls for when you really want to impress people, and is perfect for festive breakfasts, Christmas or Easter brunch or an indulgent dessert. Like its cinnamon sibling, this vegan Nutella snowflake bread looks far more complicated than it is: four thin layers of dough are spread with chocolate hazelnut spread, stacked, then cut and twisted into a beautiful eight-pointed star. Using a ready-made spread makes it even easier, as there's no filling to make. Add a snowy dusting of icing sugar to make it look truly festive!
If you've already made my vegan cinnamon star bread, you'll know the method - this version uses the same soft, buttery dough, but swaps the cinnamon sugar for vegan Nutella, so every twist is swirled with delicious chocolate hazelnut.
Ingredient notes
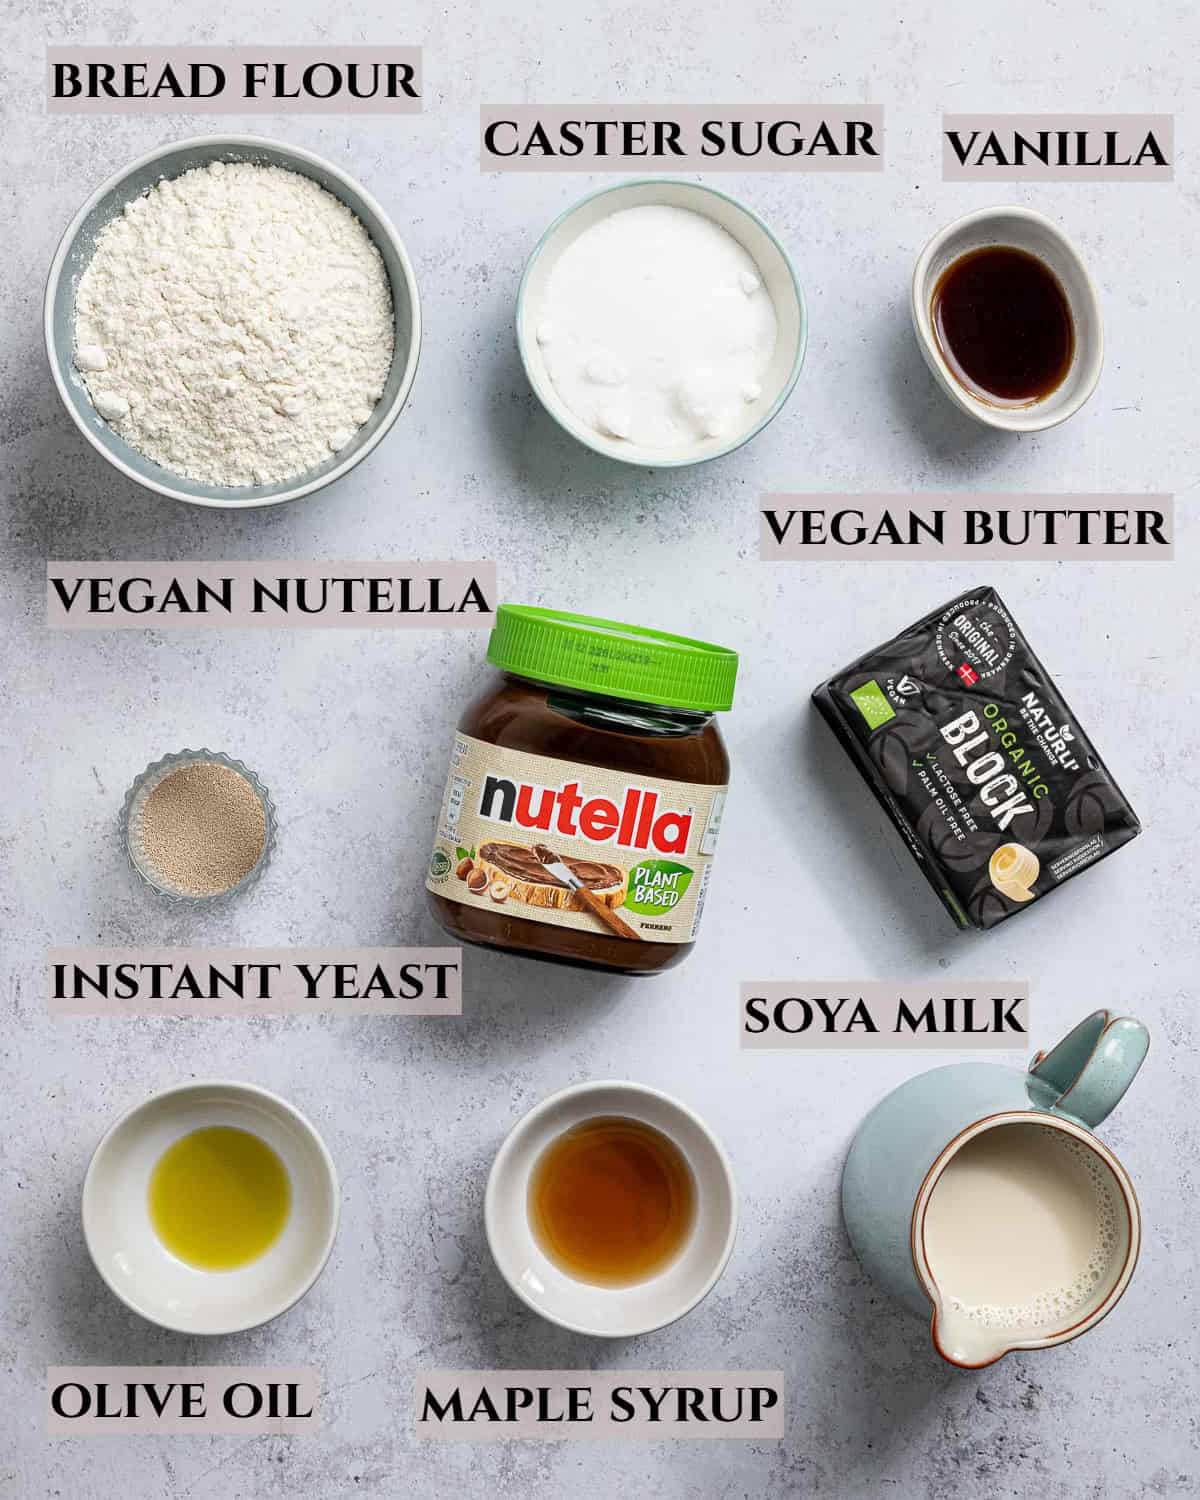
- Flour: Strong white bread flour gives the best chewy, pull-apart texture. Plain/all-purpose flour will work but the texture isn't quite the same. I don't recommend wholemeal, as it makes the bread heavy.
- Yeast: I use instant yeast, which can be stirred straight into the flour. Make sure it's in date!
- Salt: Don't skip it - it's important for both flavour and gluten structure.
- Milk: Soy milk has the most protein and gives the best result, but any unsweetened non-dairy milk will do.
- Sugar: Caster or granulated sugar sweetens the dough. Plus optional icing (powdered) sugar for a beautiful snowy dusting once the bread is baked.
- Butter: Use a block-style vegan butter rather than a spread. Spreads contain more water and make the dough softer and harder to handle.
- Vegan Nutella: I used the plant-based version of Nutella, but any vegan chocolate hazelnut spread will work. Always check the label, as regular Nutella and most chocolate spreads contain milk. If it's very thick, warm it slightly so it spreads easily without tearing the dough.
- Maple syrup and olive oil: For glazing the bread before baking instead of an egg wash I use a mix of milk, maple syrup and olive oil. You can use just milk instead if you want but the finish will be slightly duller.
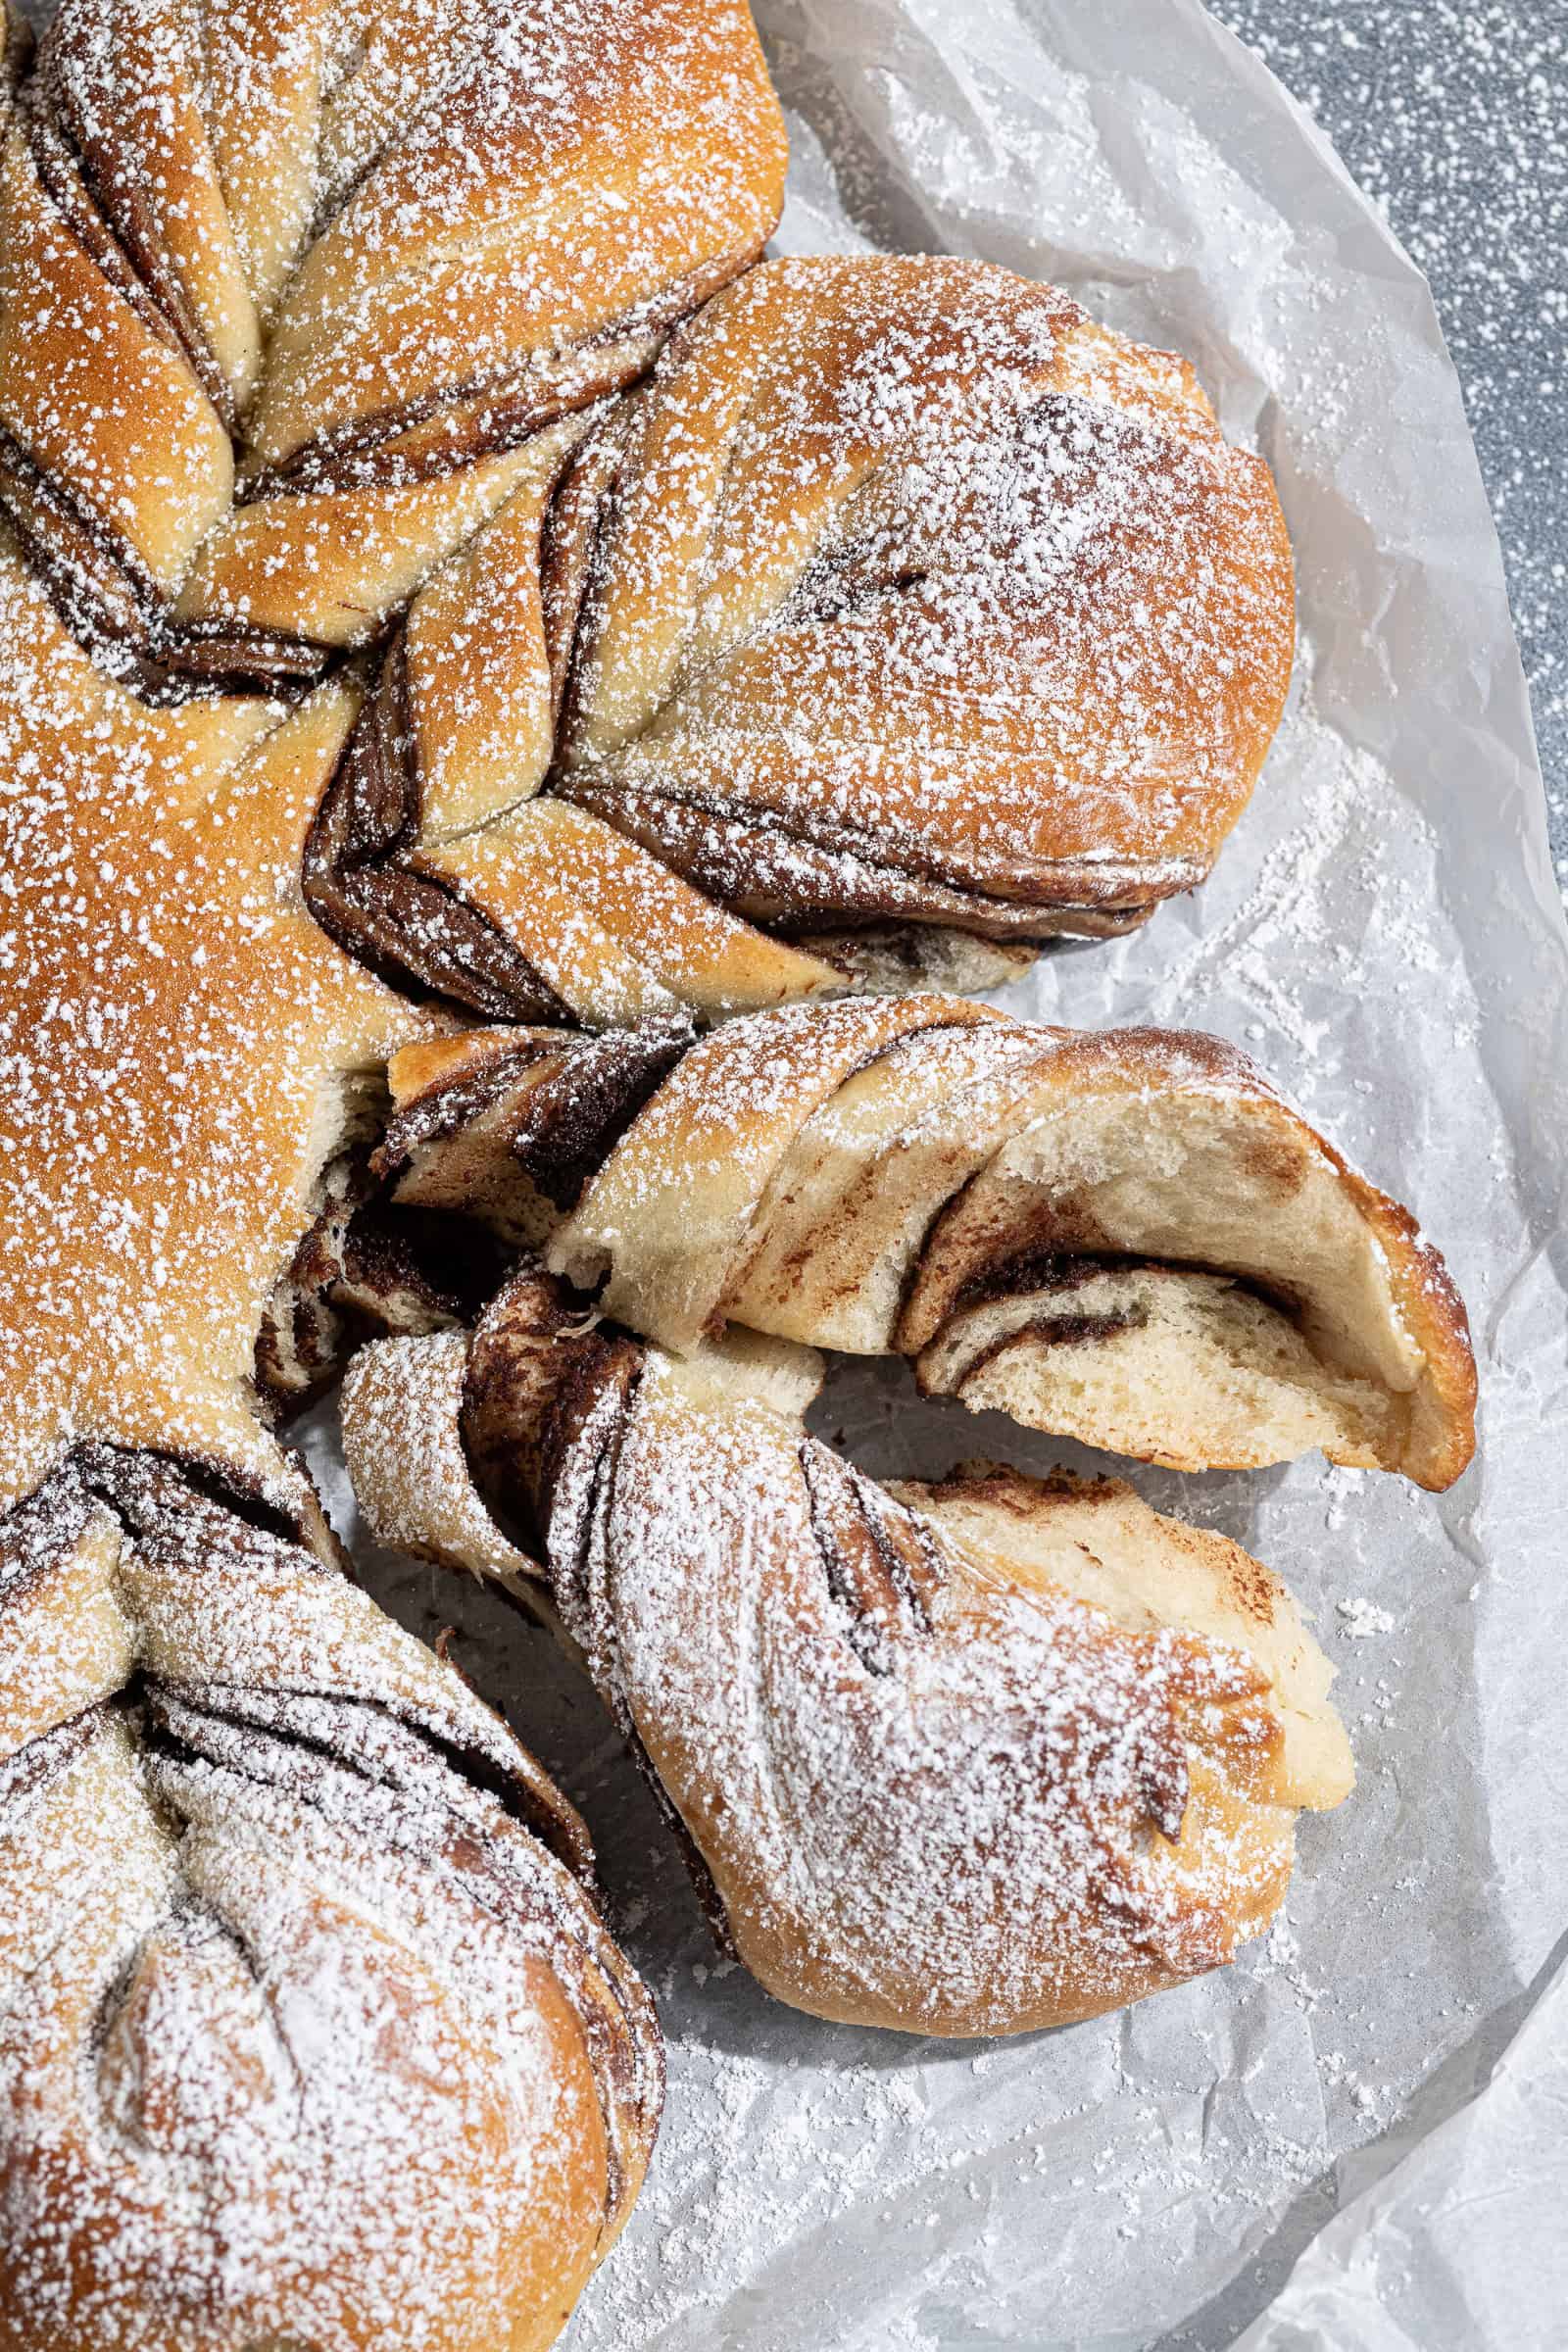
How to make vegan chocolate star bread
(Full measurements and instructions can be found in the recipe card at the bottom of the page)

- Step 1: To make the dough, mix the bread flour, yeast, salt and sugar in a large bowl. Add the milk and vanilla and mix to form a shaggy dough.
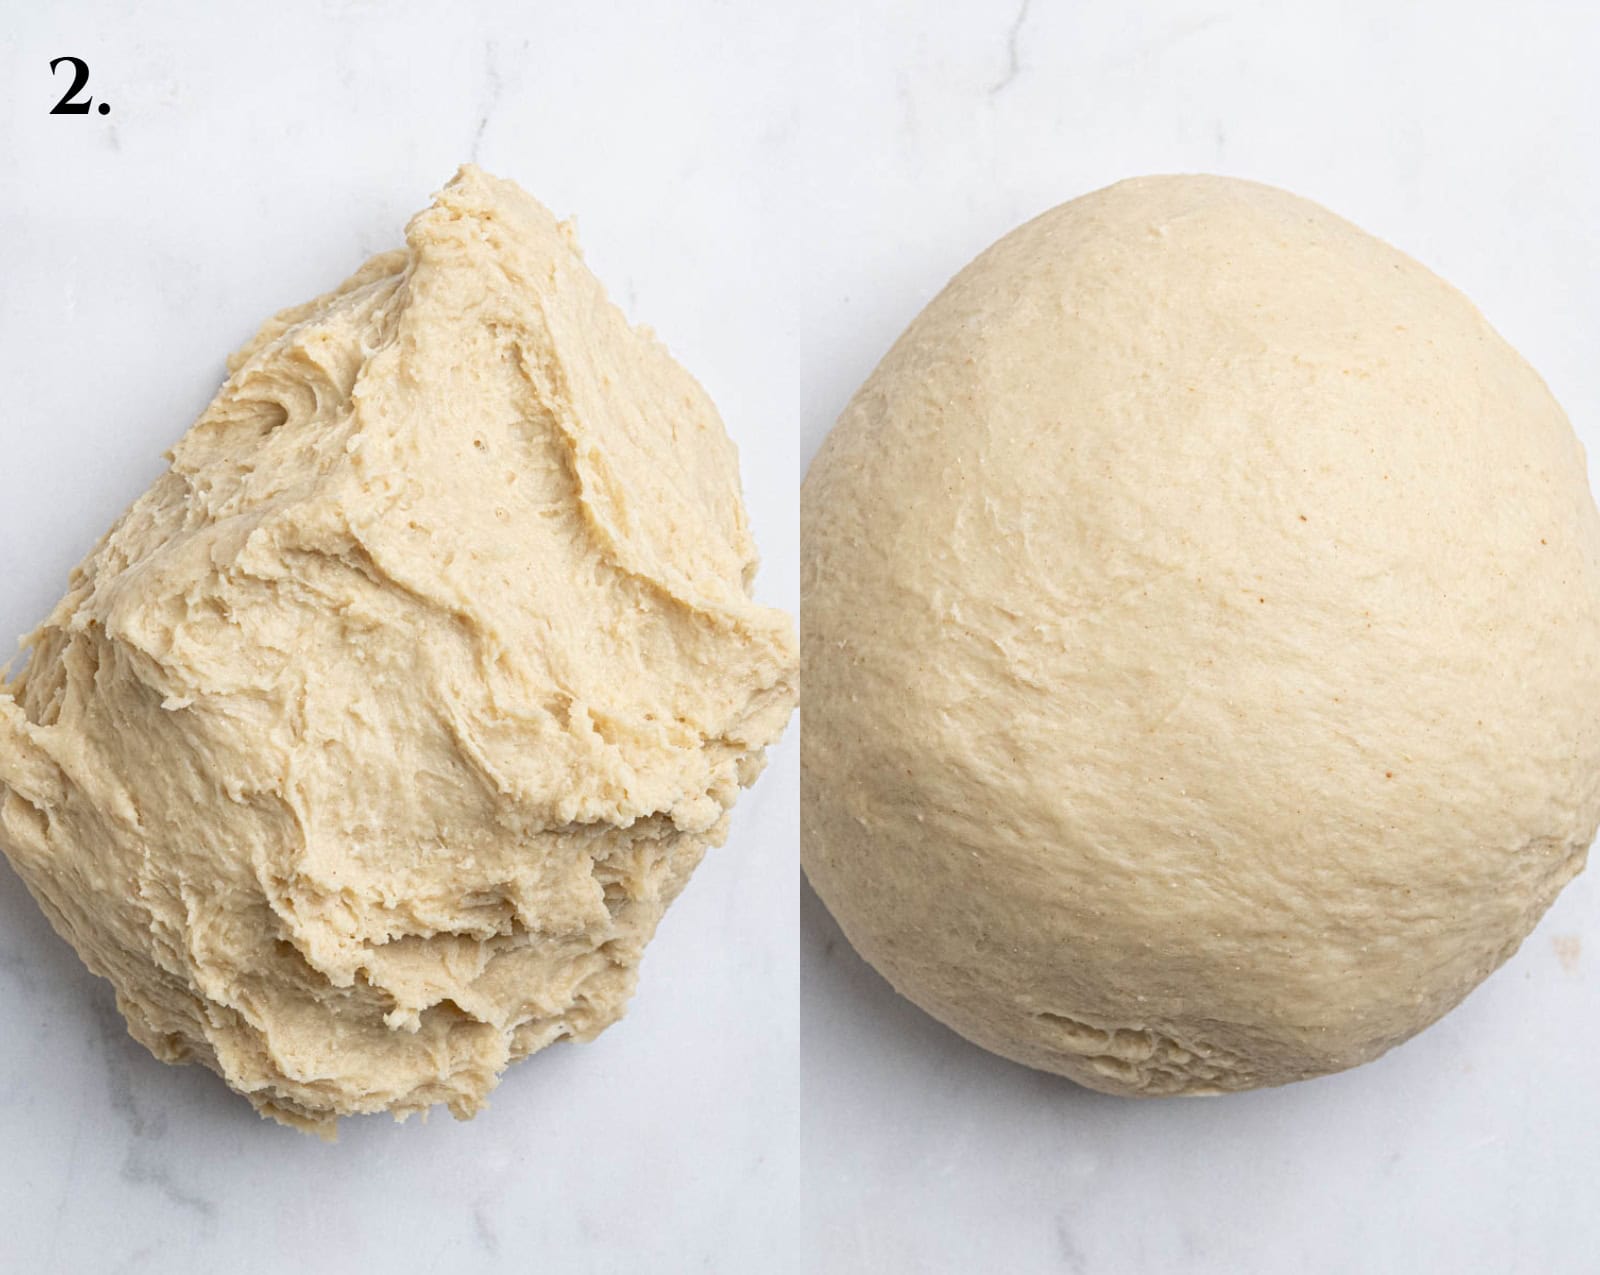
- Step 2: Knead for 5-10 minutes until smooth and elastic.The dough will be sticky at first.
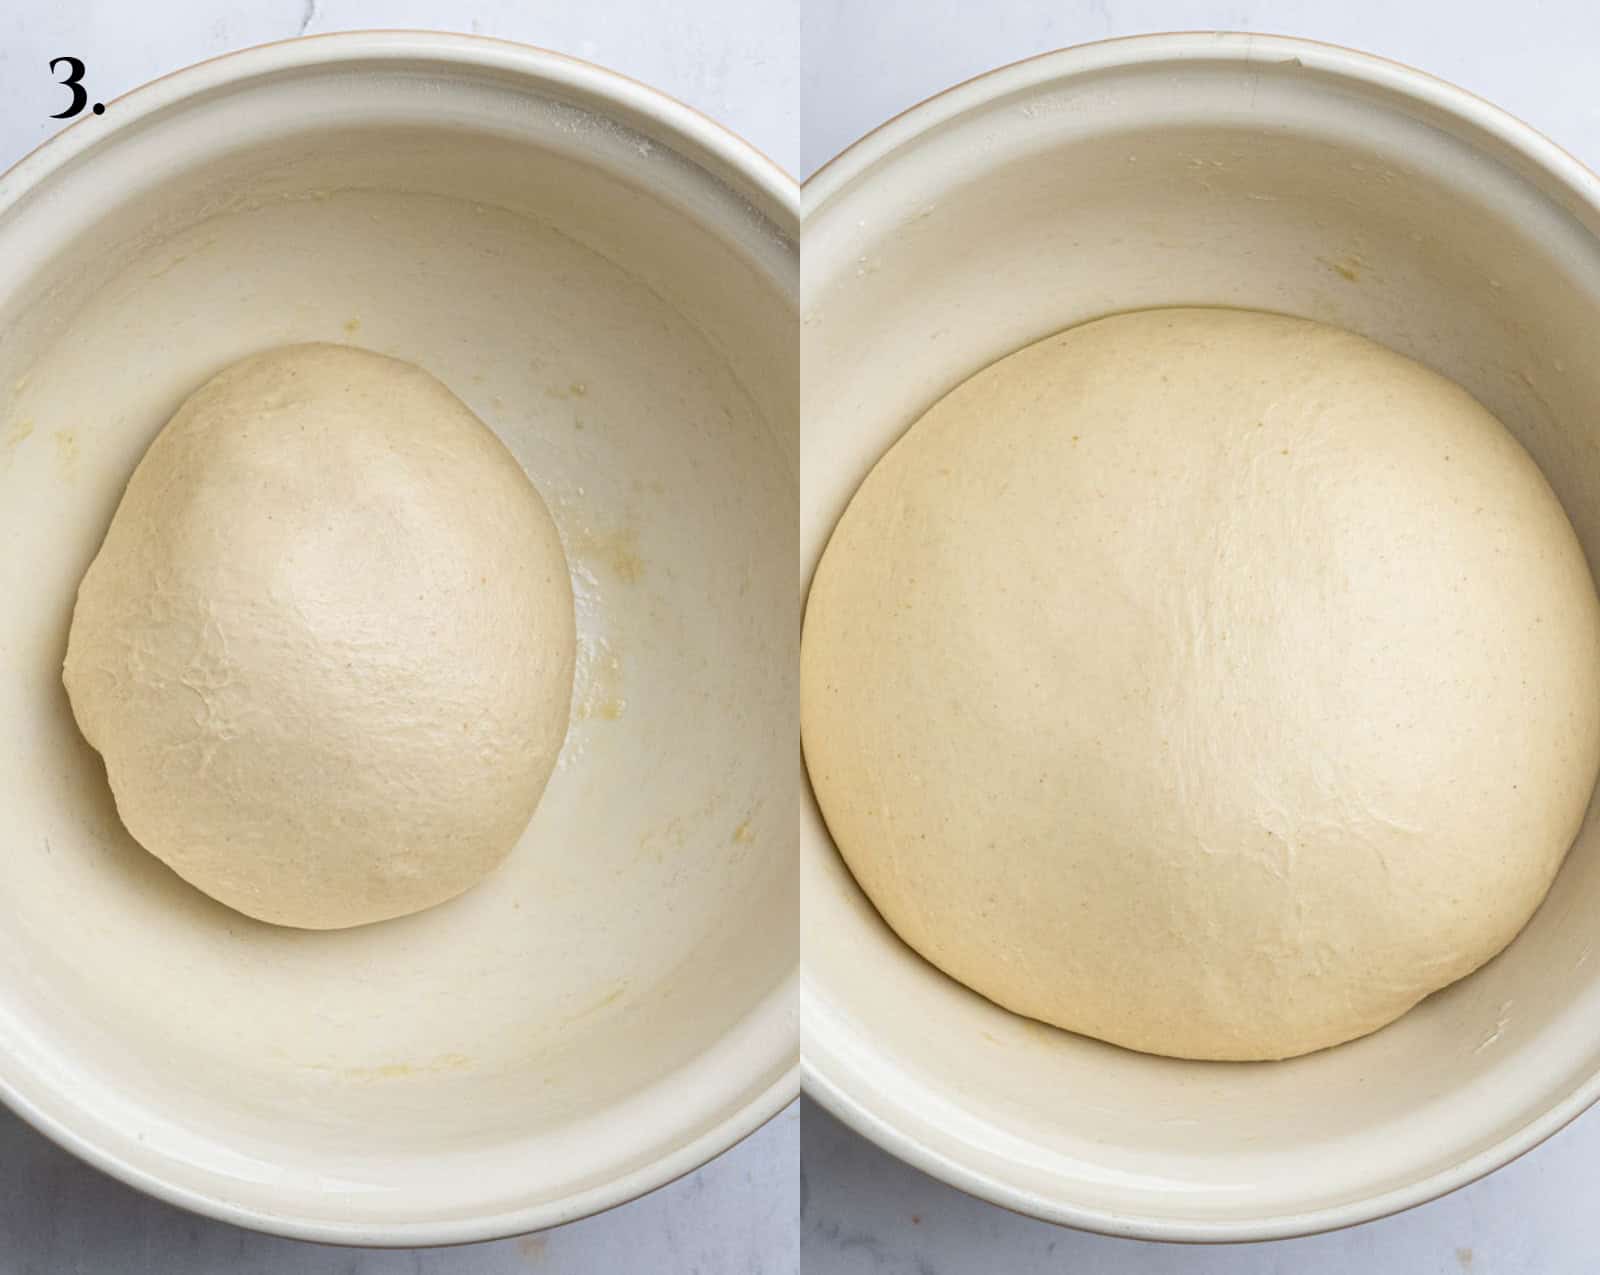
- Step 3: Knead in the butter then place in an oiled bowl, cover and let rise until doubled.
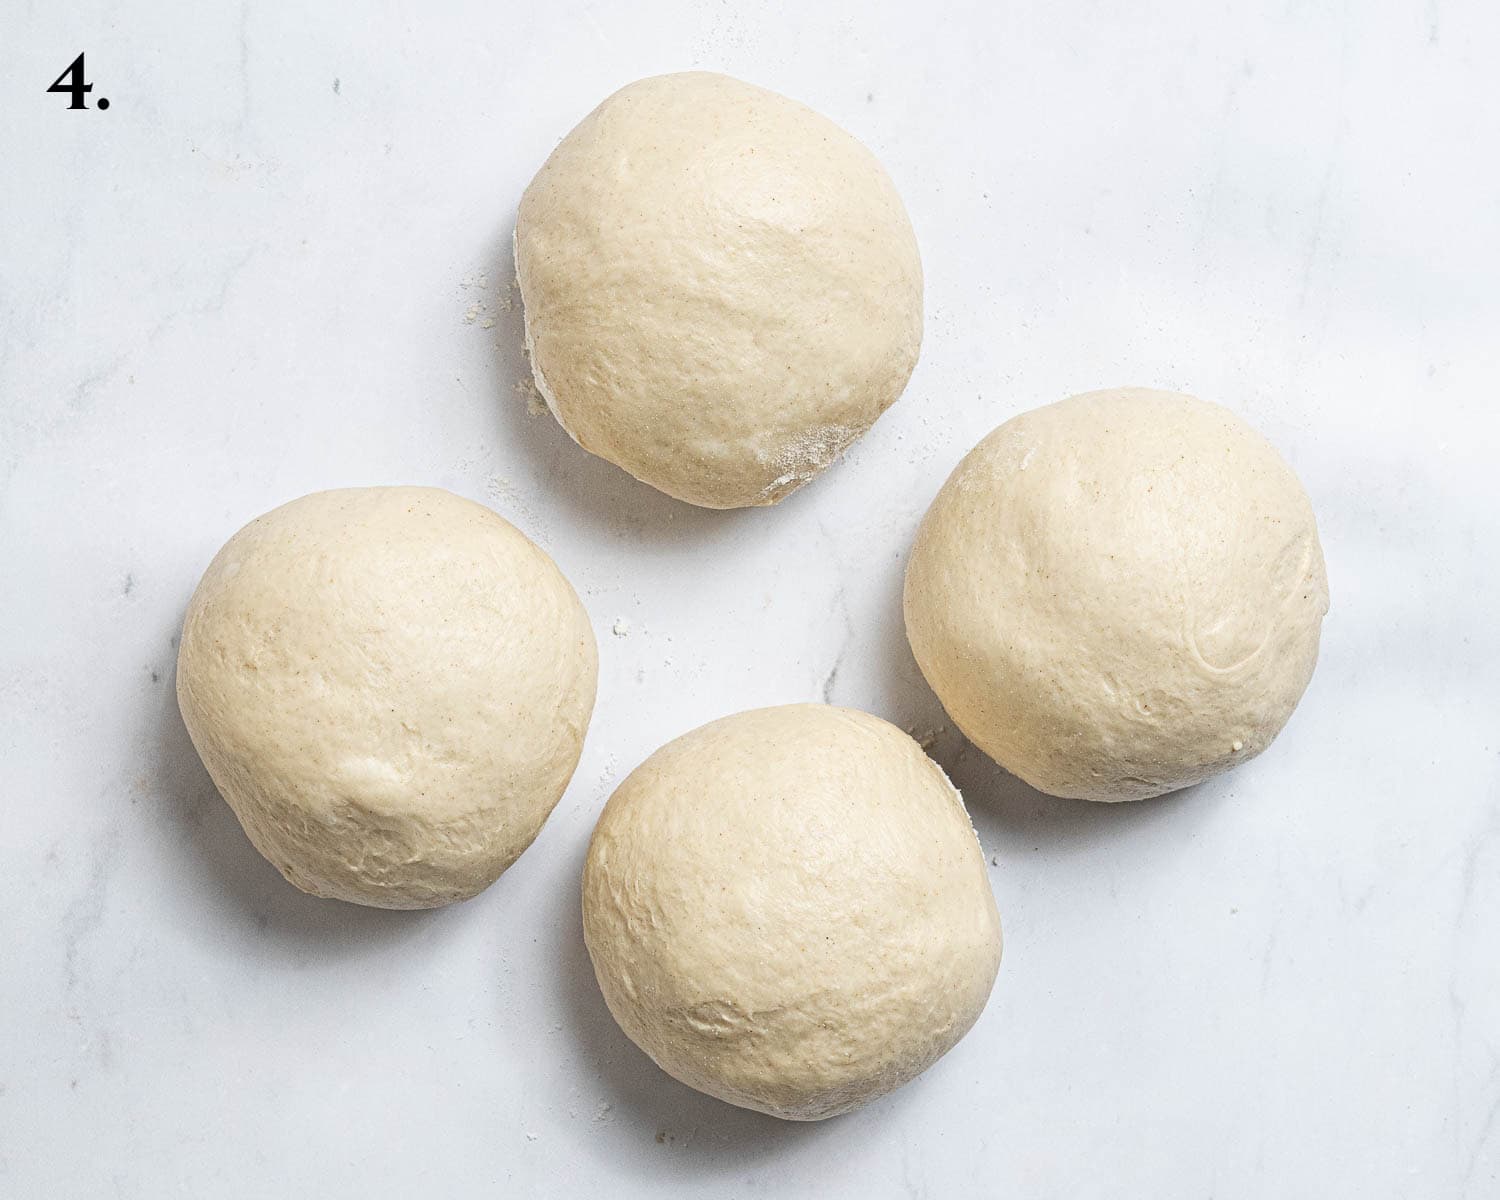
- Step 4: Divide. Punch down the risen dough, divide it into 4 even pieces and shape each one into a ball.
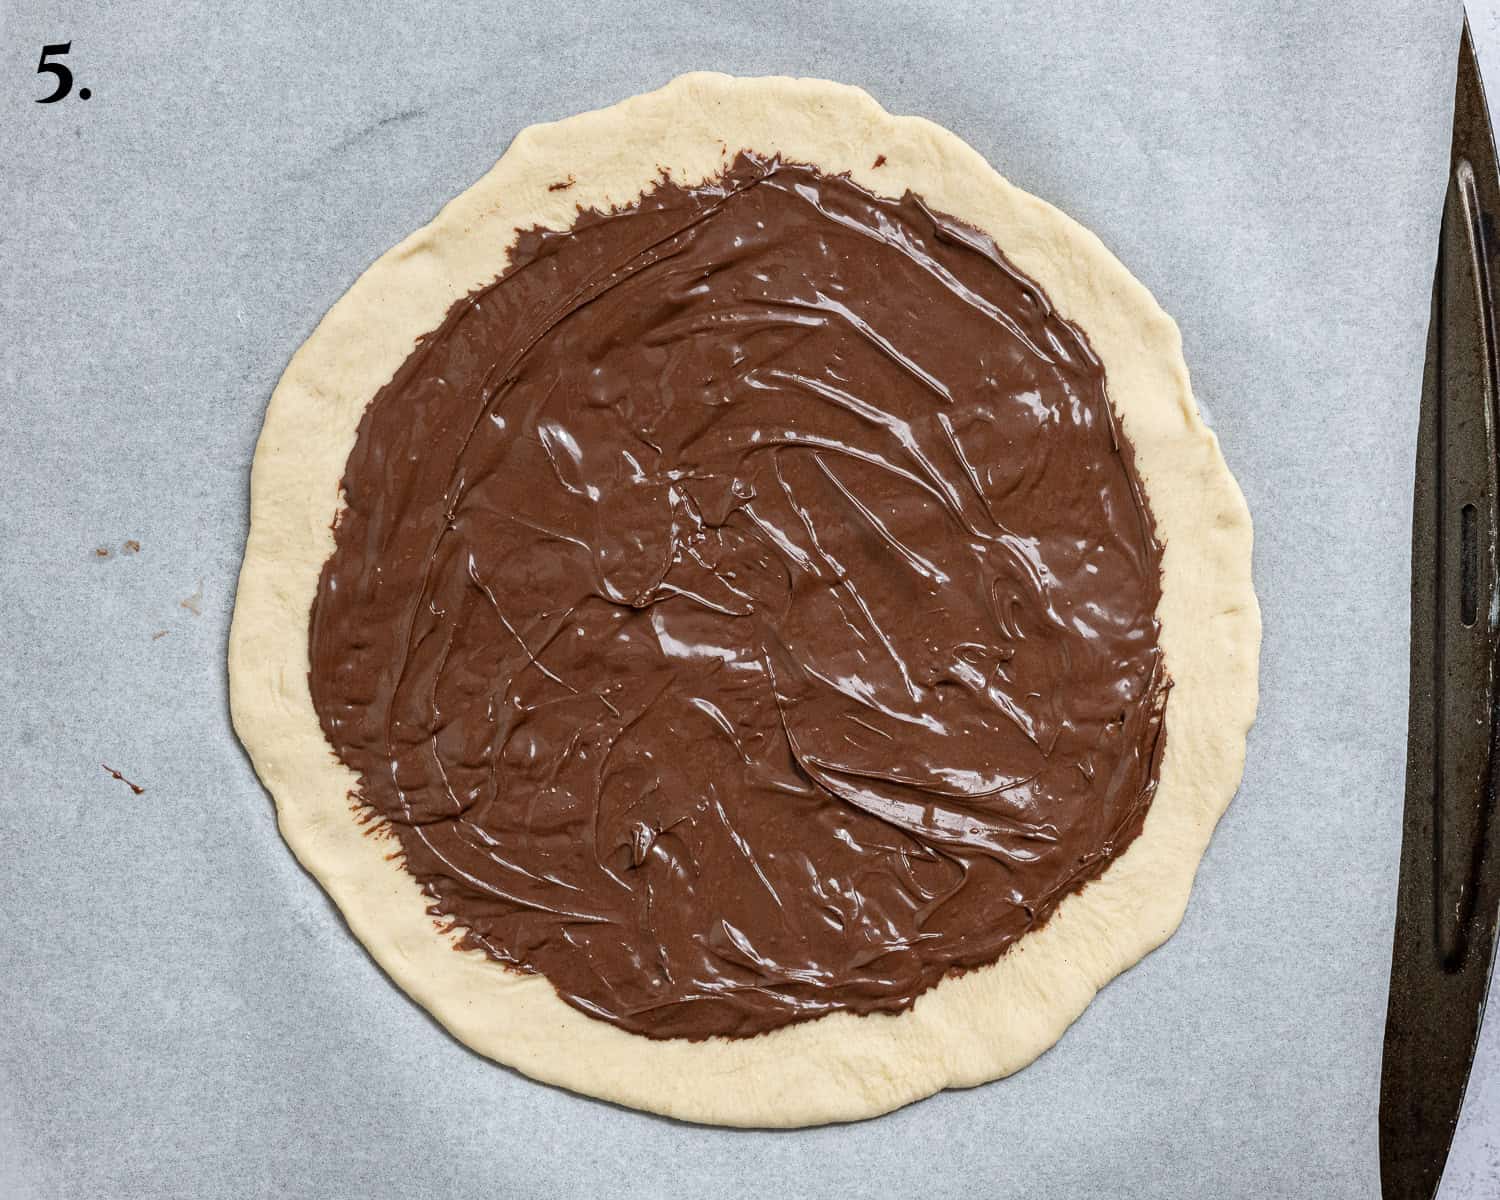
- Step 5: Roll one of the balls of dough out into a 25cm circle. Transfer it to a lined baking tray. Spread a third of the Nutella evenly over the top, leaving a small border.
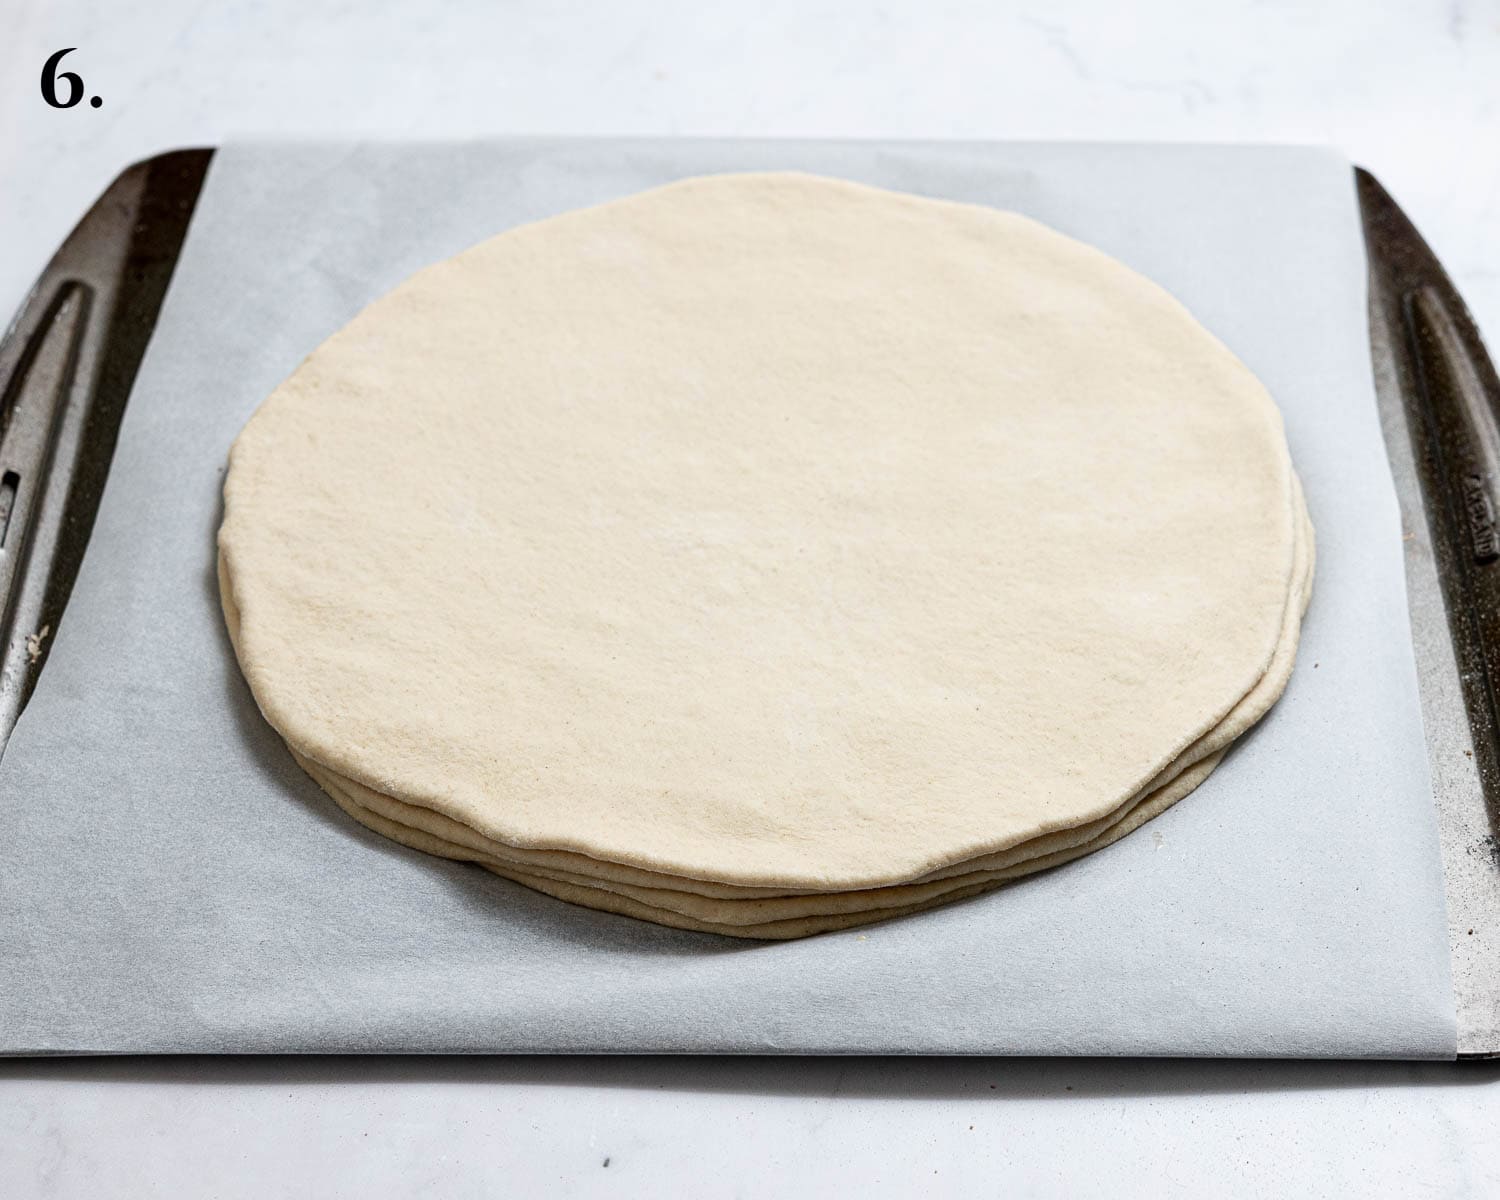
- Step 6: Roll out the next piece to the same size, lay it on top and spread with another third of the Nutella. Repeat with the third piece and the remaining Nutella, then top with the final circle of dough (no filling on top).
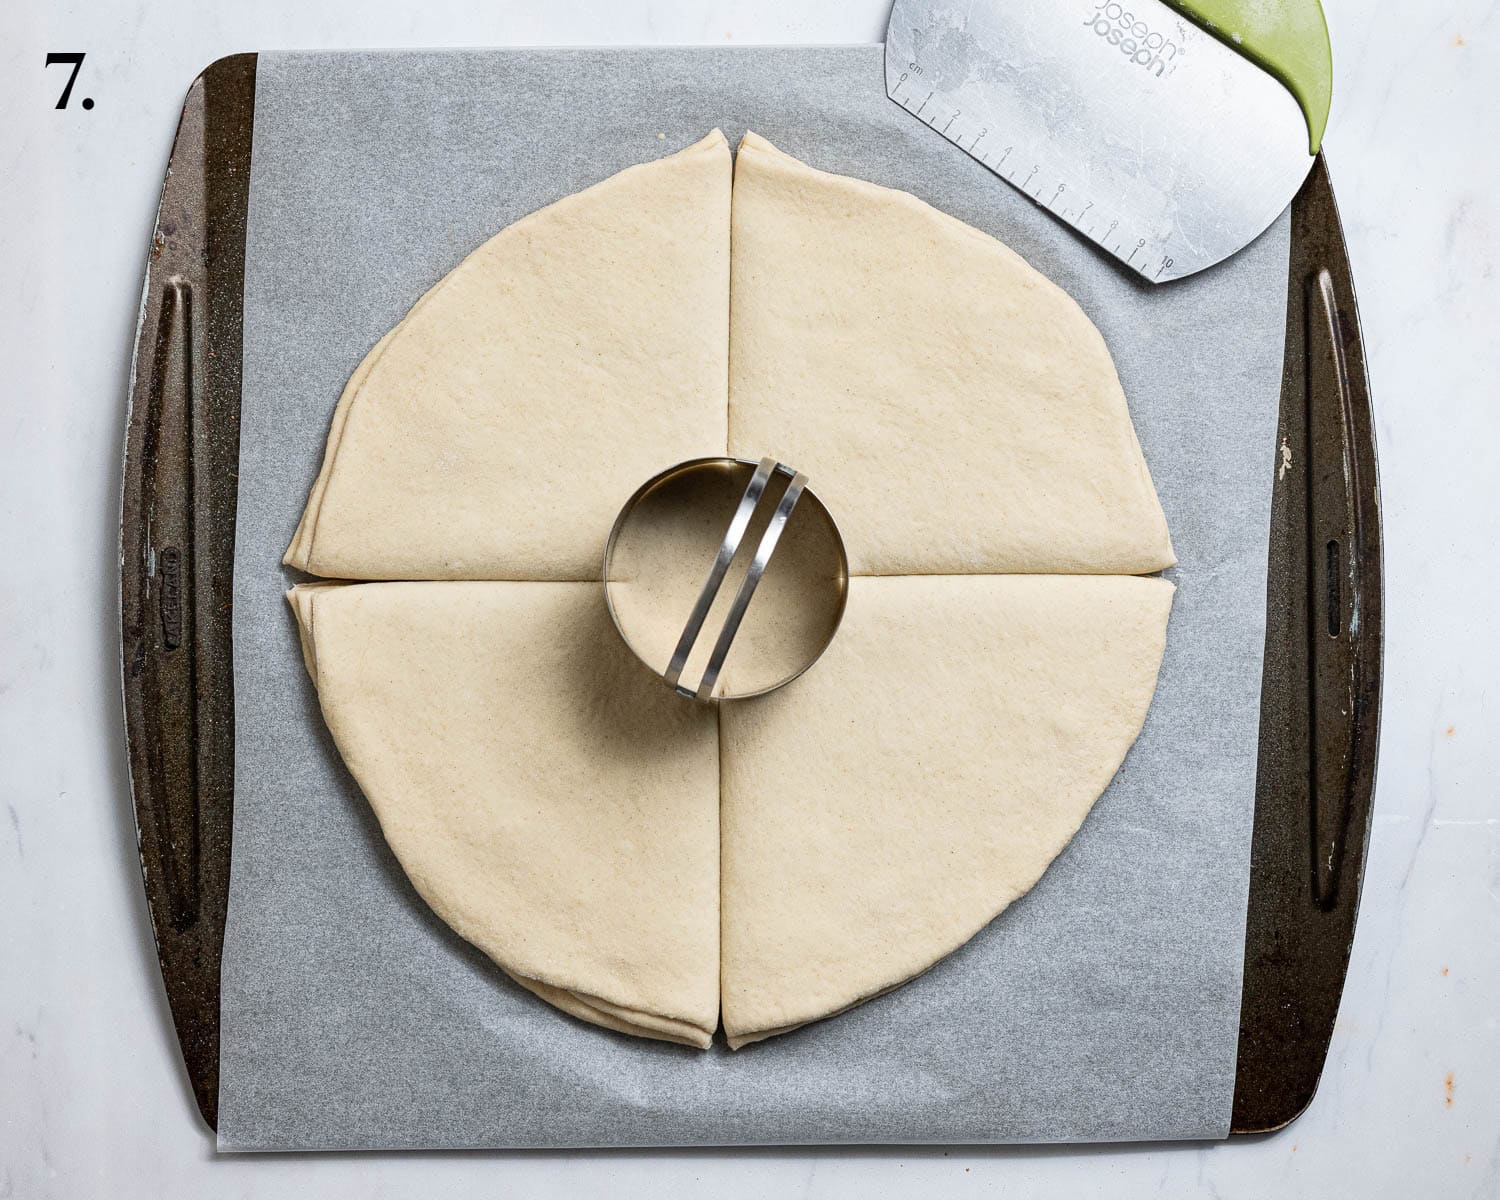
- Step 7: Place a 3 in round cookie cutter or ramekin in the centre of the dough. Using a dough cutter or very sharp knife, cut the circle into quarters starting at the edge of the dough and stopping at the edge of the cutter.
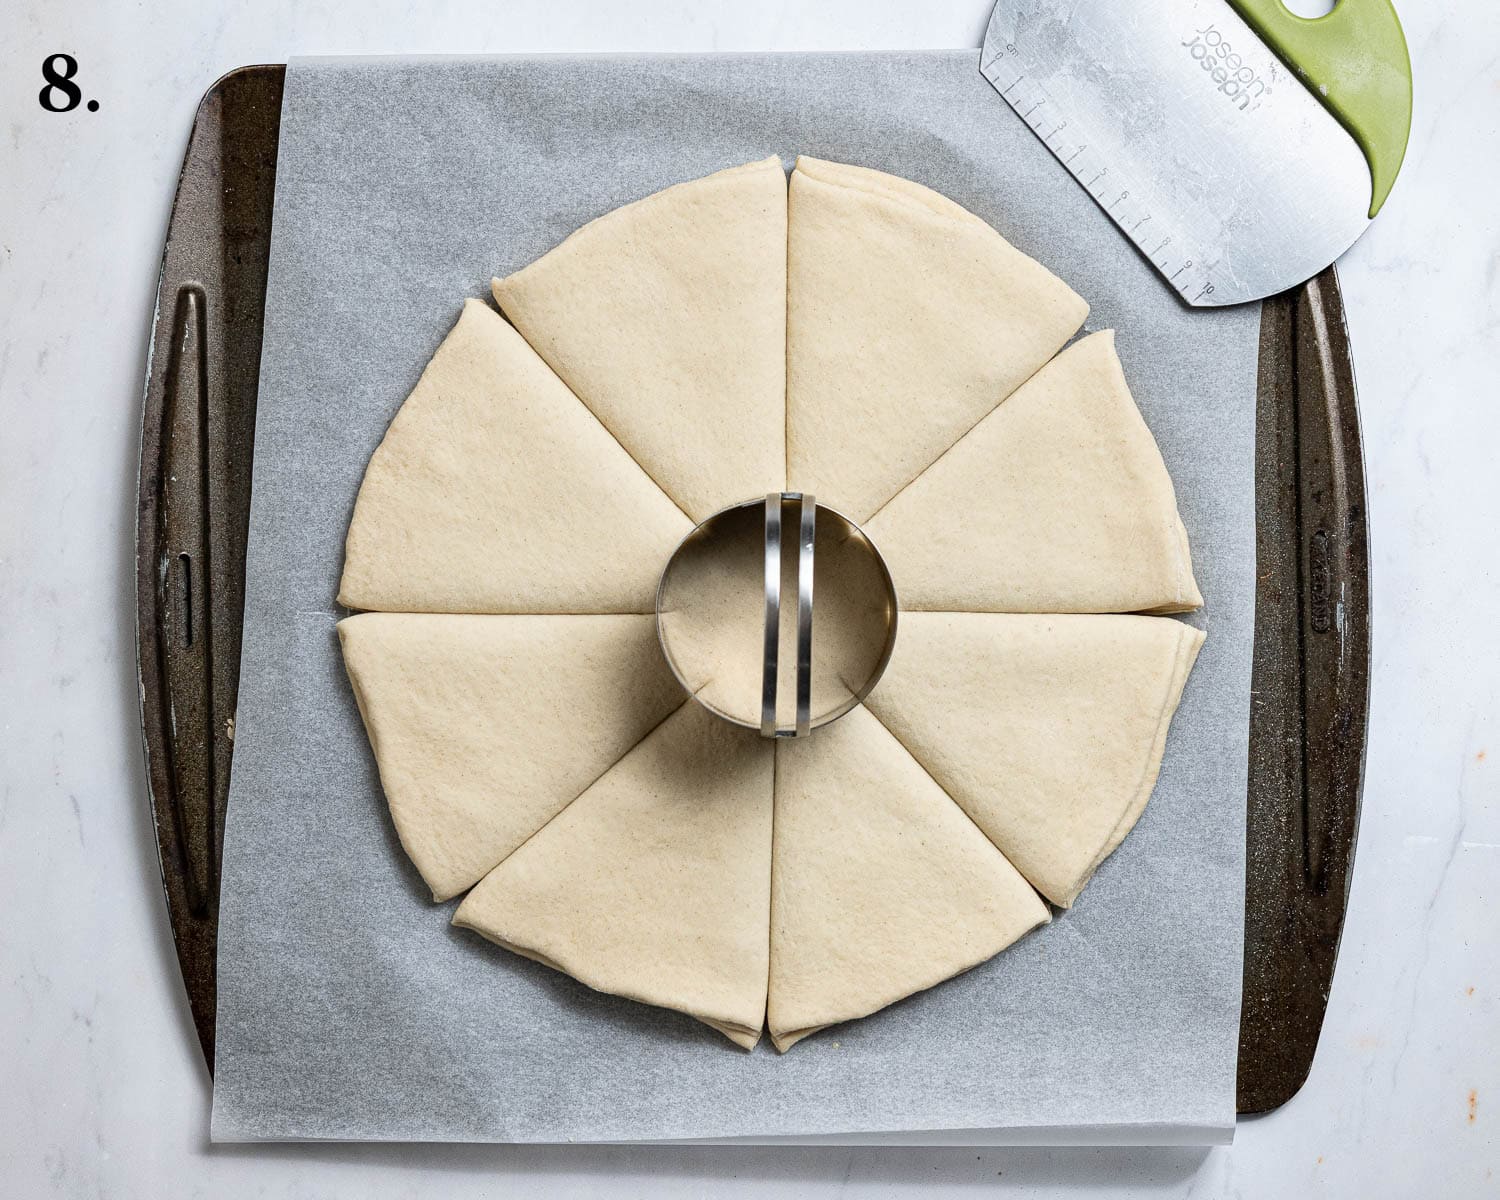
- Step 8: Cut each quarter in half to make 8 sections.
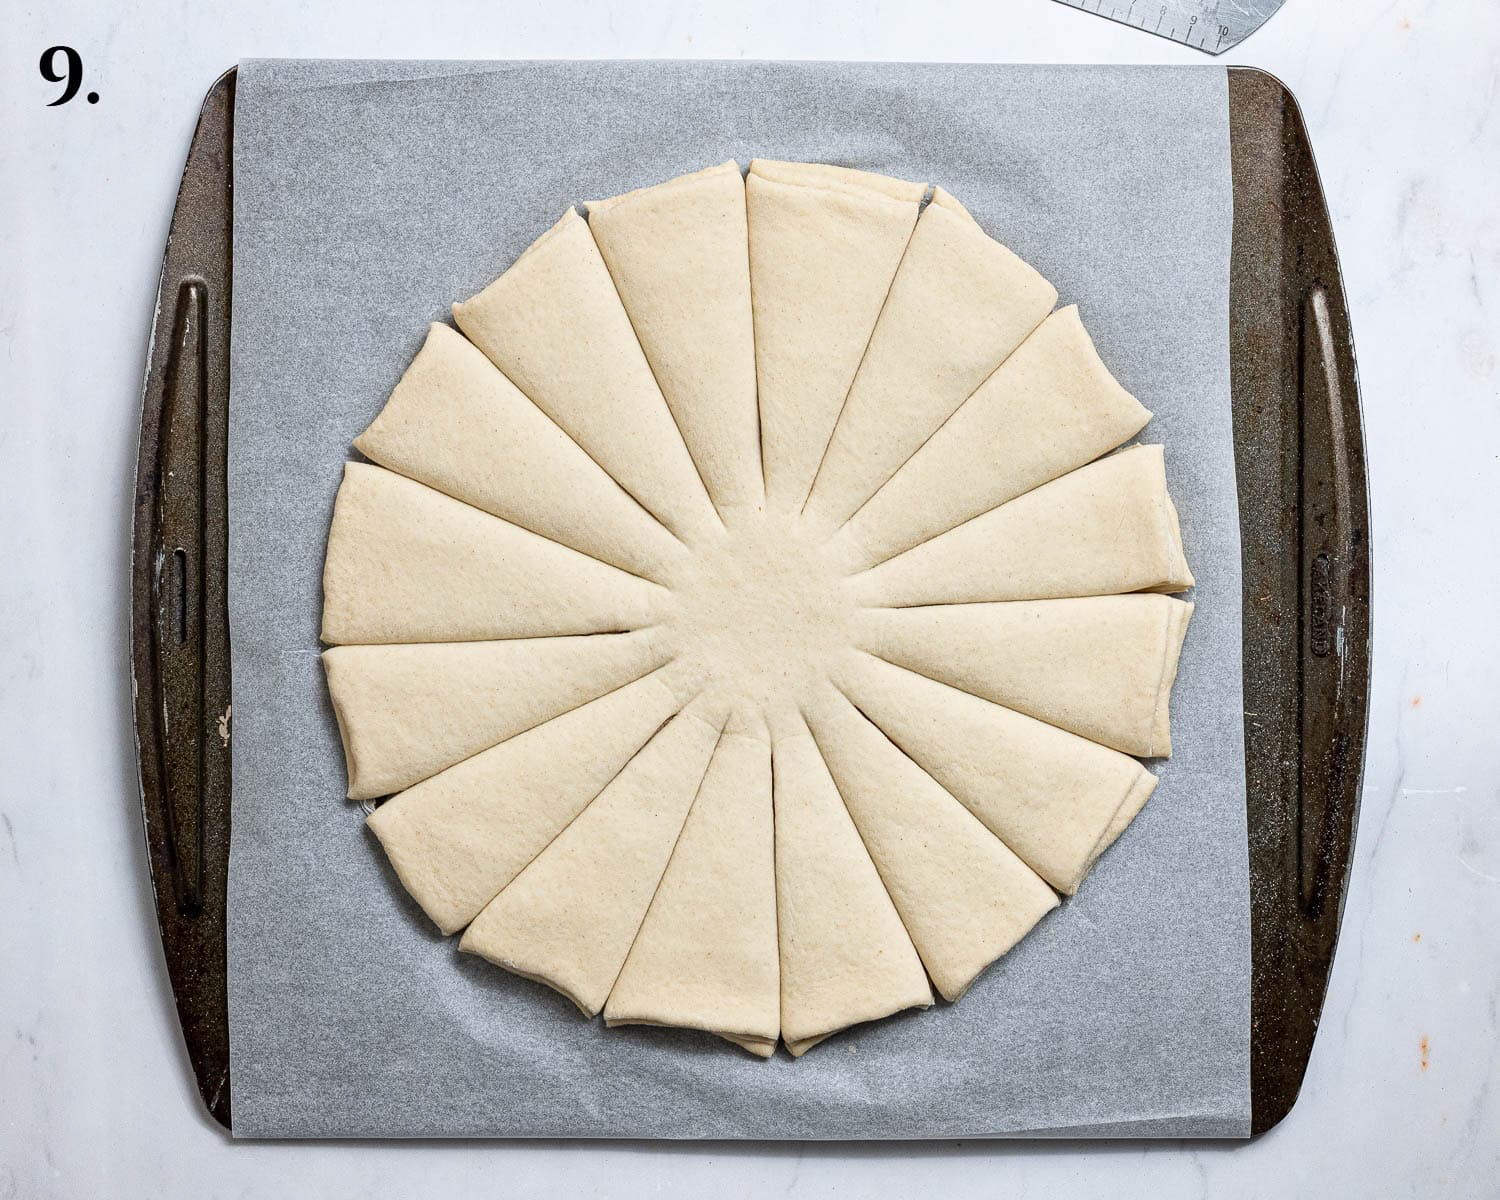
- Step 9: Cut each section in half again to end up with 16 sections.
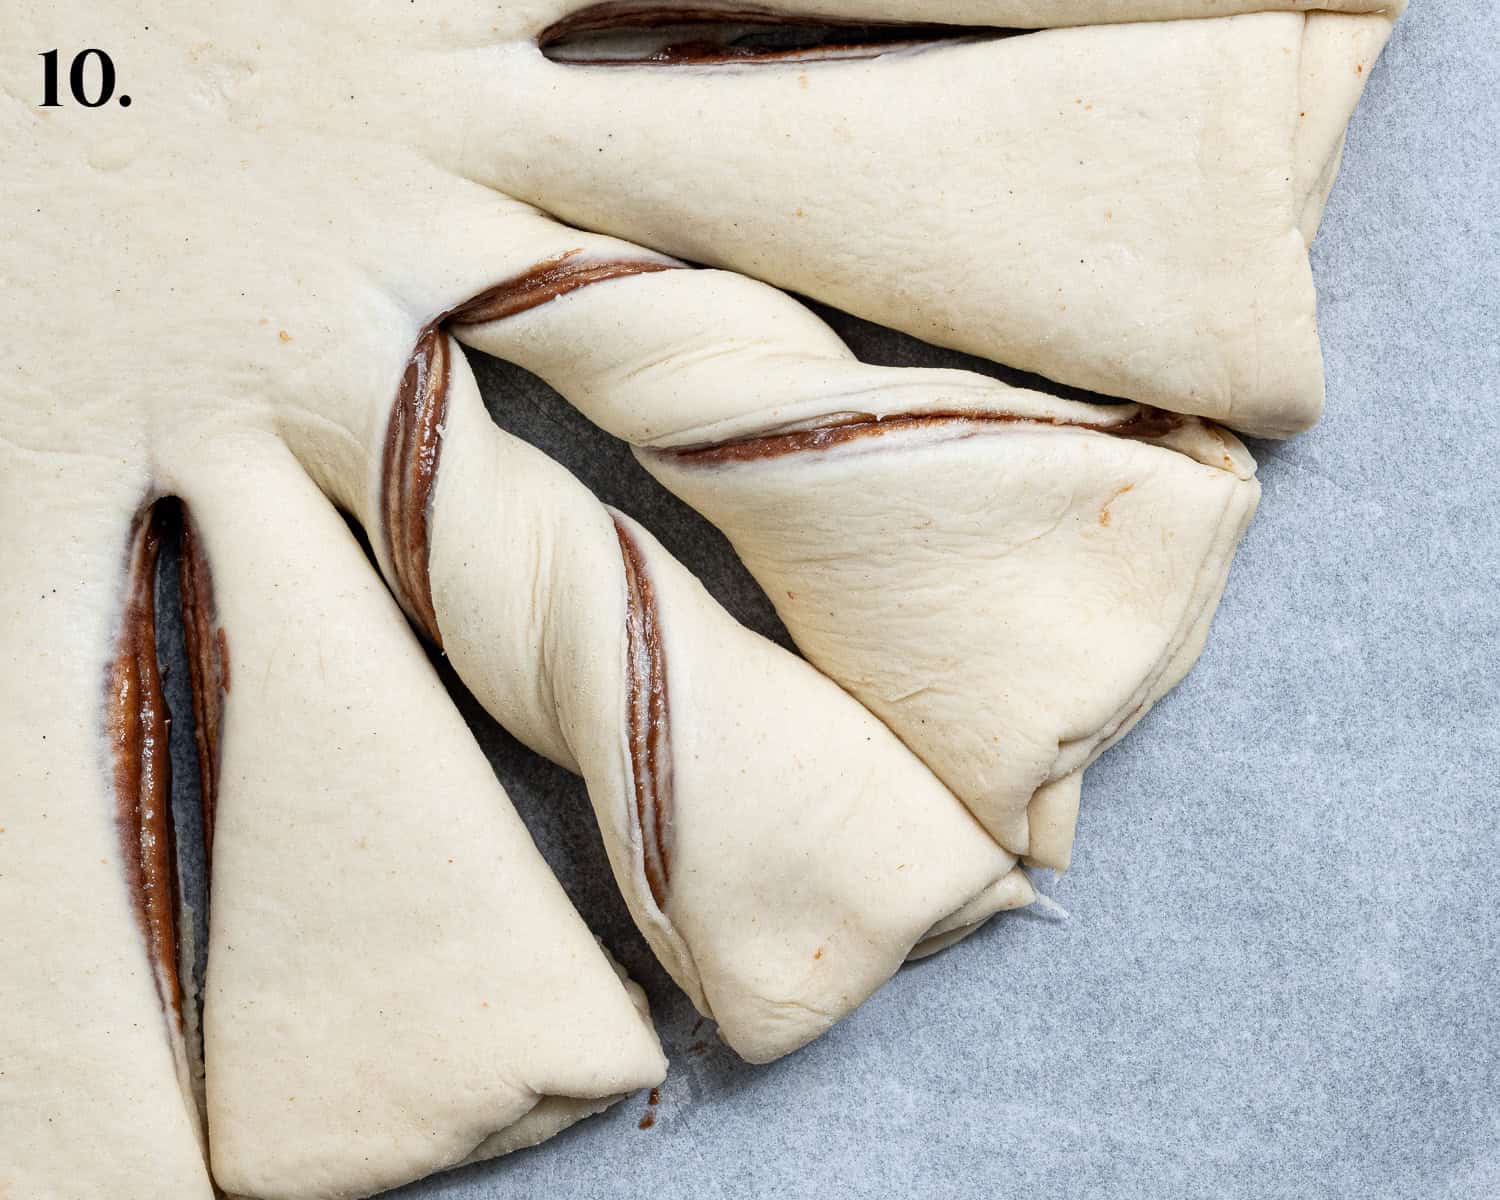
- Step 10: Pick up two adjacent dough strips, one in each hand, and twist them away from each other twice.
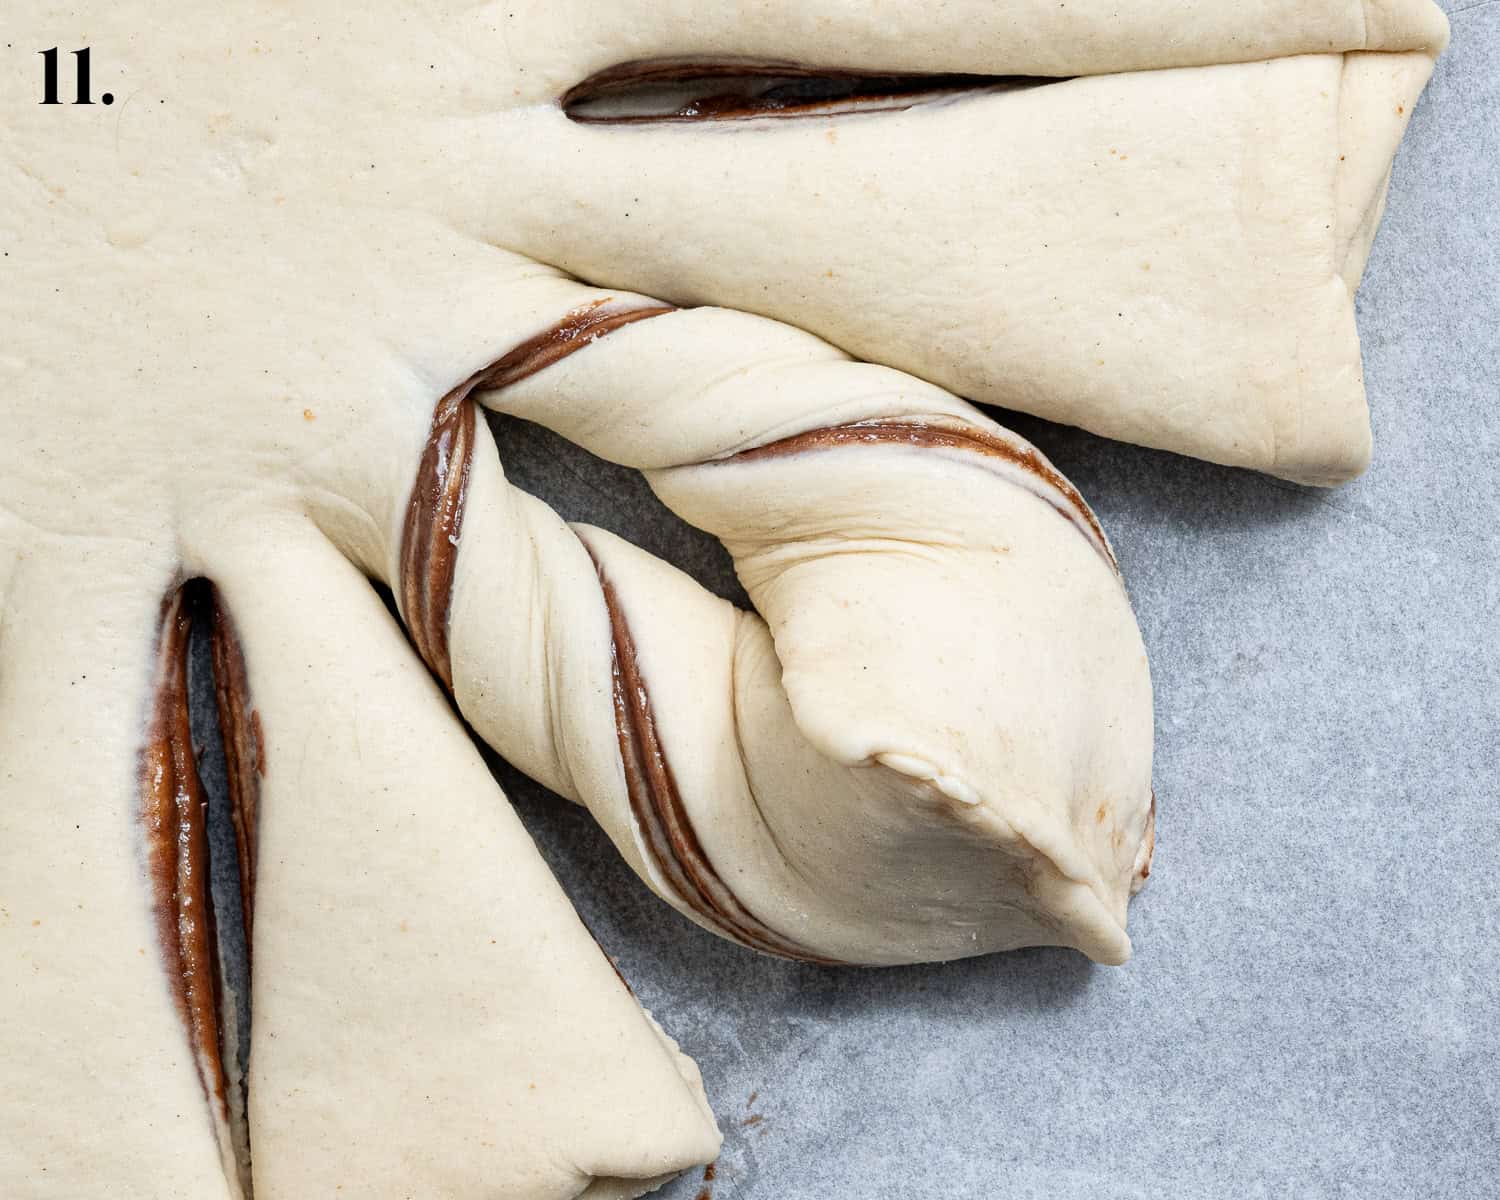
- Step 11: Do a third half twist so that the flat ends are facing each other, then pinch the ends together firmly into a point.
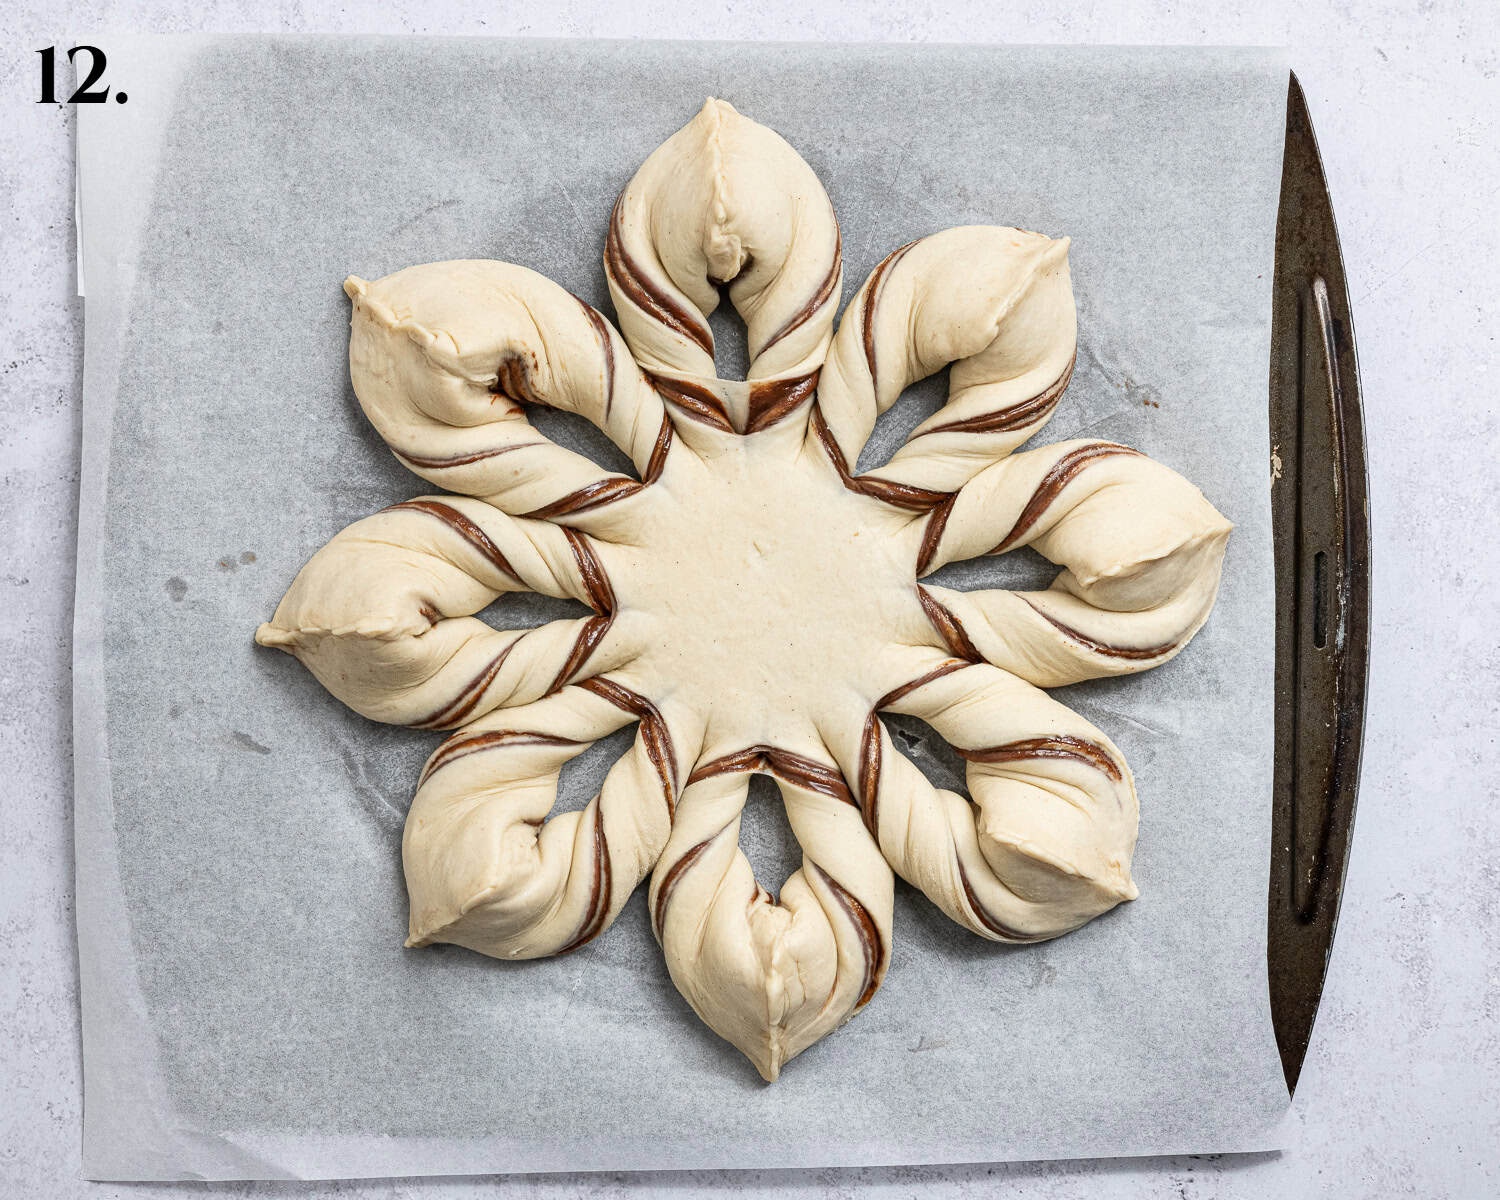
- Step 12: Repeat with the remaining strips of dough.
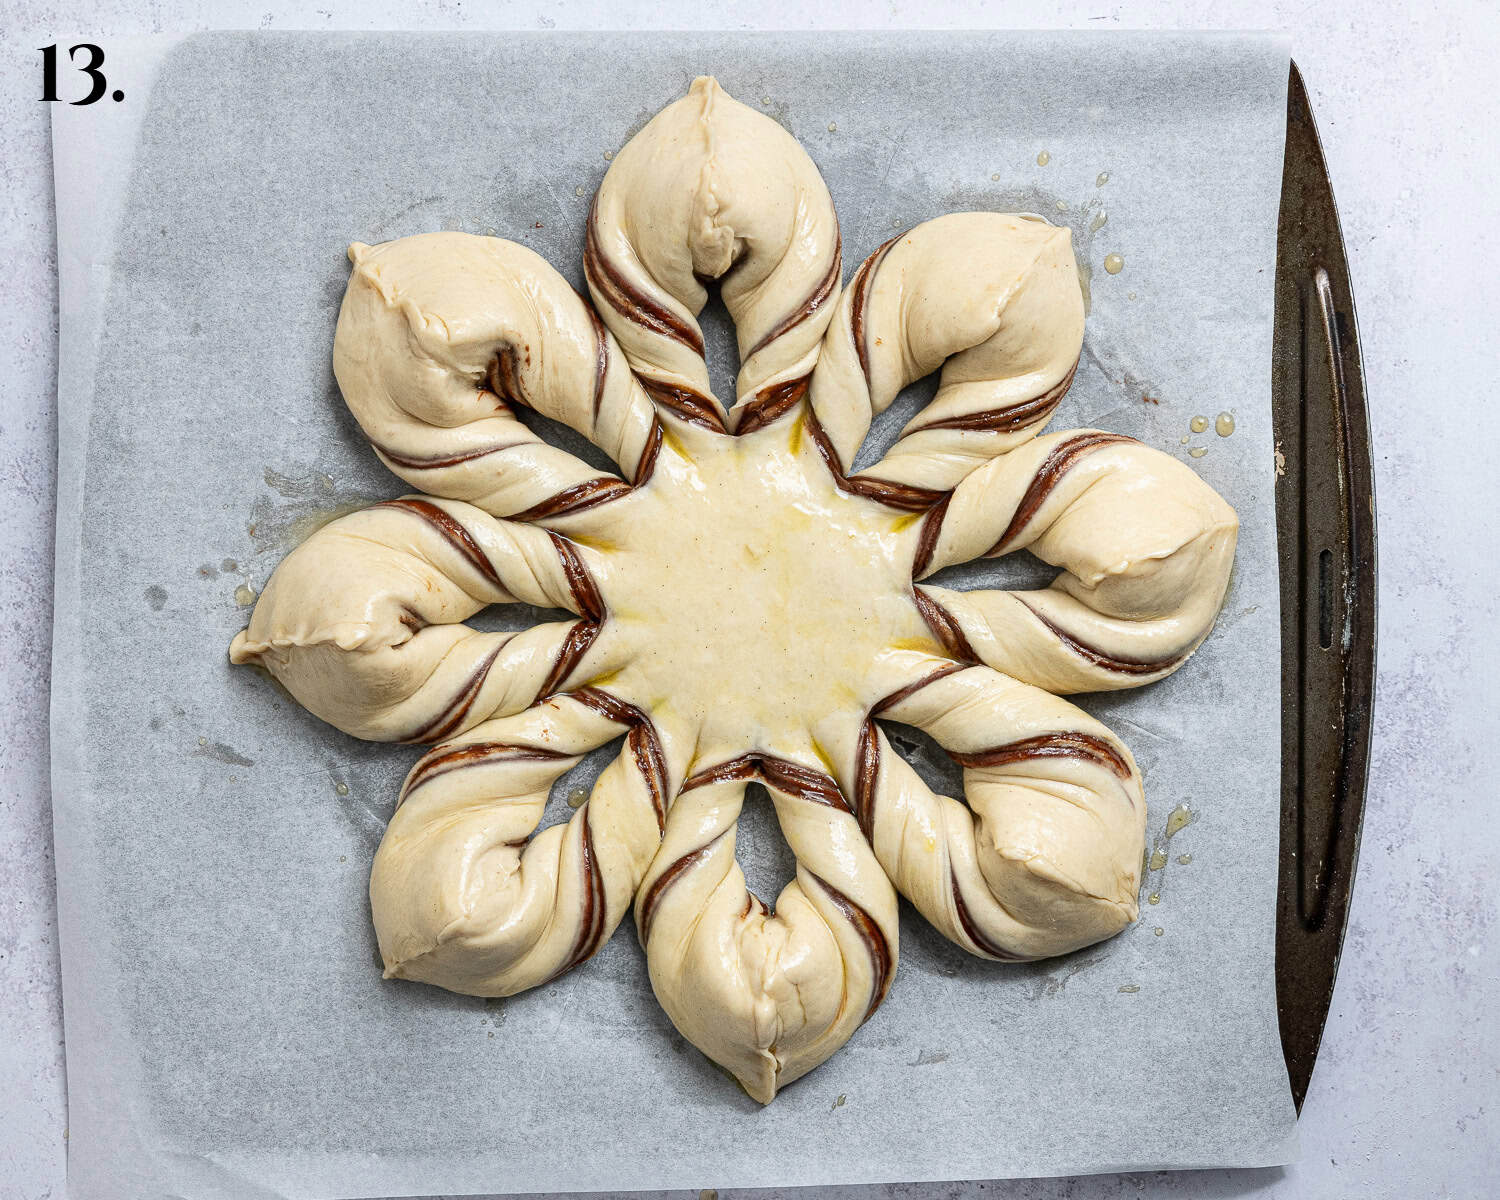
- Step 13: Loosely cover and set aside to rise until slightly puffy. Gently brush with the glaze.
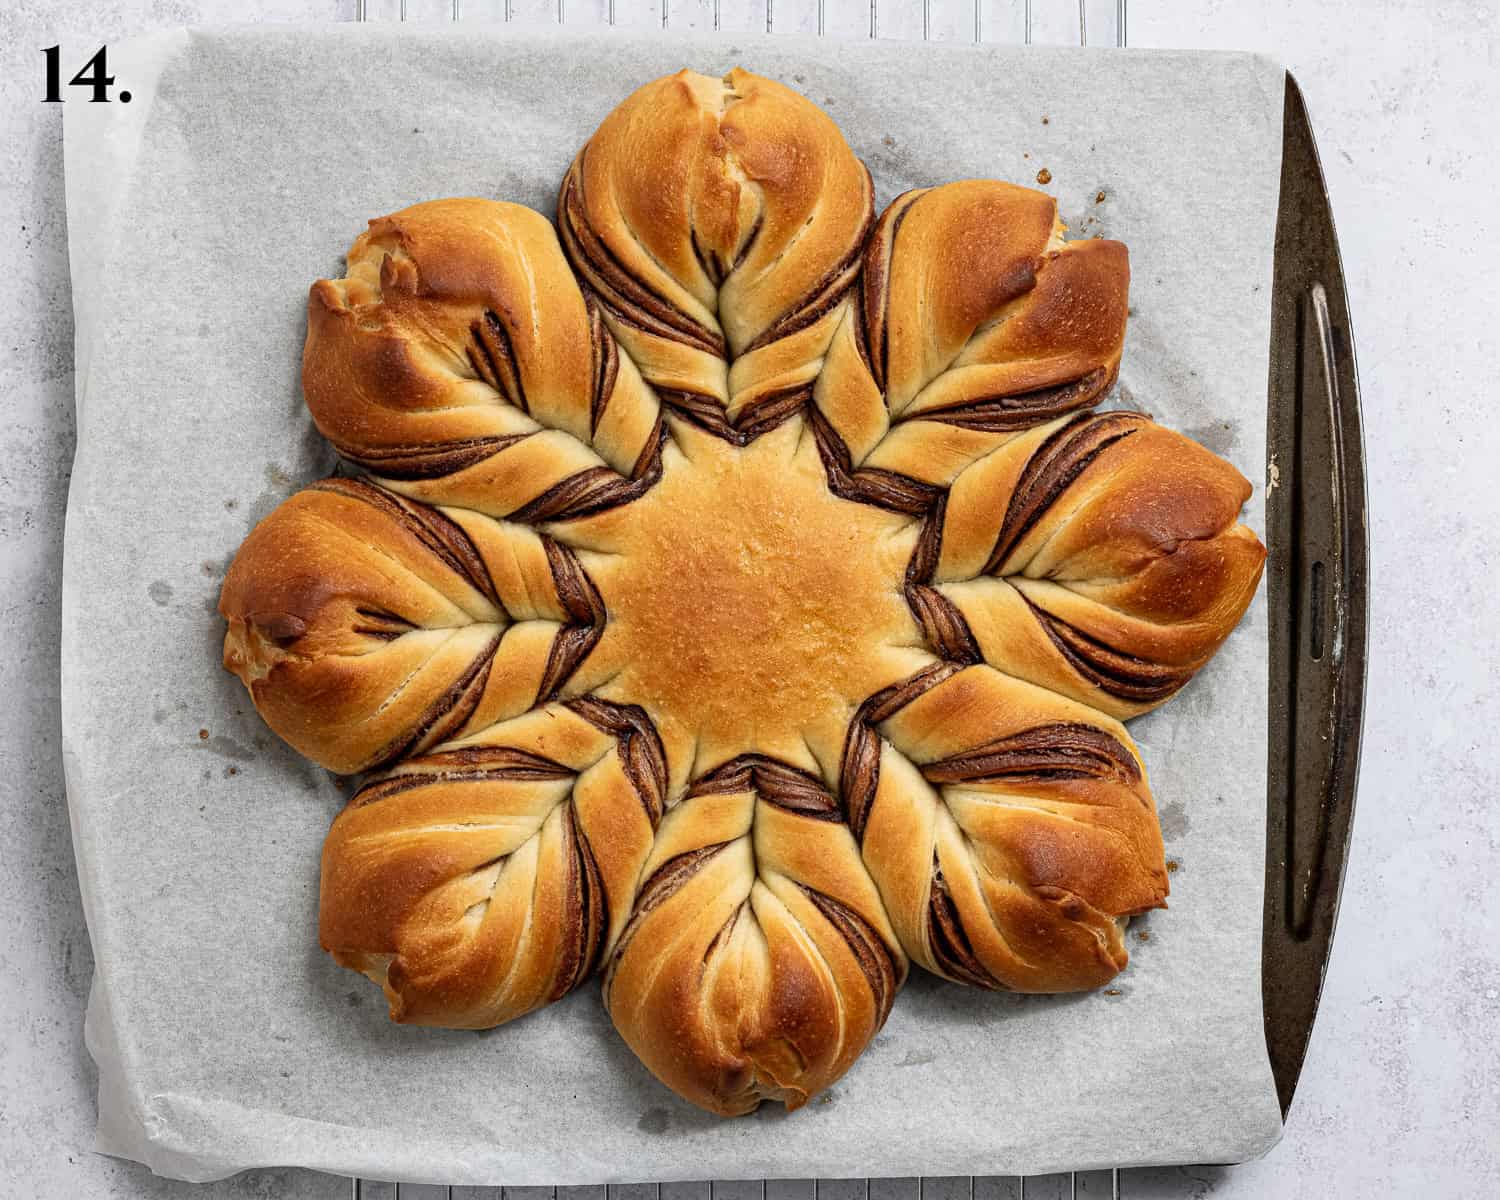
- Step 14: Bake for 22-25 minutes until golden and the centre reaches 90°C on a probe thermometer.
Top tips
- Weigh your ingredients. Digital scales are far more accurate than cups, especially for dry ingredients like flour.
- Use proper measuring spoons and level them off.
- Try to roll the pieces of dough out into as even a circle as you can, and keep them all the same size. You can stretch the dough a little as you stack the layers to even them out, and trim off any overhanging bits.
- Warm the Nutella up so that you can spread it without tearing the dough. If you accidentally warmed it too much and it's runny, let it cool for a few minutes.
- Check your yeast is in date. Old yeast is the most common reason for a flat bake.
- Rising times vary. A warm kitchen speeds things up and a cool one slows them down. You can also do the first rise overnight in the fridge for a deeper flavour.
- Shape it on the tray. Once the star is formed it's very hard to move without losing its shape.
- Be decisive. Once you place one of the dough layers on top of the Nutella it is hard to adjust it without making a mess so do your best to get it right first time.
- Use a bench scraper for clean cuts. A pizza wheel or sharp knife also works.
- Don't over-prove the second rise, or the twists lose their definition.
- Use a probe thermometer. It's the most reliable way to tell when bread is done. It should reach 90°C / 195°F in the middle of the loaf.
Making it ahead for breakfast
To serve this for breakfast or brunch, do the first rise overnight in the fridge. Make the dough the evening before, allow it to rise in a covered, oiled bowl at room temperature for 30-60 minutes until it has started to rise but has not yet doubled, then refrigerate for 8-16 hours. It will rise slowly and should be roughly doubled by the morning.
Take it straight from the fridge, then divide, roll, fill and shape the star while the dough is still cold. Chilled dough is firmer and actually easier to roll and shape neatly. Then cover the shaped star loosely and leave it at room temperature for the second rise. Because the dough starts cold, this will likely take longer than usual, often 45 minutes to 1½ hours, so go by how it looks: it's ready when it looks slightly puffy. You can place it somewhere warm such as near a radiator to speed up the rise.
Preheat the oven towards the end, then glaze and bake as normal. Allow about 2-2½ hours from fridge to table. Don't be tempted to shape the star the night before and leave the second rise in the fridge instead. It's much harder to control, and you risk it over-proving which would mean it loses the definition of its shape and may collapse in the oven leading to overly dense bread.
Variations
- Hazelnut crunch: Sprinkle a few finely chopped toasted hazelnuts over each layer of Nutella.
- Hazelnut chocolate orange: Stir the finely grated zest of an orange into the Nutella before spreading.
- Spiced chocolate: Stir 2 teaspoons cinnamon and a pinch of ground cardamom into the Nutella for a festive twist.
- Other spreads: Swap the Nutella for any vegan chocolate spread, or try Biscoff spread for a caramelised biscuit version.
FAQs
It's best on the day it's baked, but will keep for 2-3 days in an airtight container at cool room temperature. Warm it briefly in the microwave or a low oven to refresh it before serving.
I don't recommend making it ahead to freeze, but leftovers can be wrapped well and frozen for up to 3 months. Thaw at room temperature, then reheat.
This is a soft, sticky dough so it is easiest made in a stand mixer. You absolutely can knead it by hand if you don't have one, just be prepared to get a bit messy.
When kneading, you shouldn't flour the surface as you will end up incorporating too much flour and making the dough too dry. Instead, if the dough is sticking too much, you can lightly oil the work surface and your hands to help, or just be prepared to get a bit sticky!
A bench scraper is incredibly handy when kneading dough by hand to unstick the dough from the surface.
Yes - any vegan chocolate or chocolate hazelnut spread will work. Just check the label carefully, as most regular chocolate spreads contain milk powder. Thicker spreads may need warming slightly so they don't tear the dough.
Yes, if you would rather make your own chocolate filling instead of using a pre-made spread then you can use the filling recipe from my chocolate swirl buns.
No, I'm afraid that you cannot use gluten free flour. Making gluten free bread is tricky and the entire recipe would need reworking. Gluten free baking is not my area of expertise so I cannot advise you. It is best to use a recipe that is designed to be gluten free rather than trying to adapt a non gluten free recipe.


All images and content on Domestic Gothess are copyright protected. If you want to share this recipe then please do so by using the share buttons provided. Do not screenshot or post the recipe or content in full, instead include a link to this post for the recipe.
If you love this recipe, please leave a 5-star ★★★★★ rating at the bottom of the page! This provides helpful feedback to both me and other readers.
Also be sure to add us as a trusted site on Google so that our recipes show up more in your searches!
To keep up to date with all my latest recipes you can subscribe to my newsletter and follow along on social media!
Vegan Chocolate Star Bread
Ingredients
Dough
- 400 g (3⅓ cups white bread flour
- 8 g (2¼ teaspoons) instant yeast
- 45 g (¼ cup) caster or granulated sugar
- 1 teaspoon fine table salt
- 260 g (1 cup + 4 teaspoons) unsweetened non-dairy milk (soya preferred) lukewarm
- 1 tablespoon vanilla extract
- 60 g (¼ cup) vegan block butter softened
Filling
- 225 g (¾ cup) vegan Nutella or another vegan chocolate hazelnut spread
Glaze
- ½ Tablespoon non-dairy milk
- ½ Tablespoon maple syrup
- 1 teaspoon olive oil
To finish
- Icing sugar for dusting
Instructions
- To make the dough, place the bread flour in a large bowl or the bowl of a stand mixer fitted with a dough hook, add the yeast to one side and the salt and sugar to the other, stir to combine.400 g (3⅓ cups white bread flour, 8 g (2¼ teaspoons) instant yeast, 45 g (¼ cup) caster or granulated sugar, 1 teaspoon fine table salt
- Add the lukewarm milk and the vanilla and mix to form a shaggy dough. Knead with the mixer or turn out onto an un-floured surface and knead for 5-10 minutes until smooth and elastic. The dough will be sticky at first but resist the temptation to add extra flour, it will become smooth after a minute or two of kneading (you may need to scrape it off the surface with a dough scraper).260 g (1 cup + 4 teaspoons) unsweetened non-dairy milk (soya preferred), 1 tablespoon vanilla extract
- Add the softened vegan butter. Continue to knead until the butter is fully incorporated and the dough is smooth and elastic. It may seem greasy and messy at first but keep kneading and I promise you the butter will all mix in and the dough will become smooth.60 g (¼ cup) vegan block butter
- Once the butter is fully incorporated the dough should look smooth and silky and it should pull away from the work surface or sides of the bowl cleanly. It should still be soft and slightly sticky however.
- Place the dough in a lightly oiled bowl, cover and set aside to rise in a warm spot until doubled in size, about 1-2 hours.
- Punch down the risen dough, divide it into 4 even pieces (use a scale) and shape each one into a neat ball. Cover and set aside to rest for 15 minutes.
- Roll one of the balls of dough out on a lightly floured surface into a 25cm/10 in circle. Try and keep it as circular as possible. Briefly microwave the Nutella so that it is runny enough to spread easily. Line a baking sheet with baking paper.225 g (¾ cup) vegan Nutella
- Transfer the circle of dough to the lined baking sheet and evenly spread over ⅓rd of the Nutella (75g/¼ cup), leaving a 2cm border around the edge.
- Roll out another 25cm circle of dough and place it on top of the first one, Spread with another third of the Nutella. Repeat again with a third layer of dough and the remaining Nutella. Roll out the last piece of dough and place it on top.
- Place a 7 cm/3 inch round cookie cutter or ramekin in the centre of the dough circle. Press down enough to leave a circular imprint. You can then remove the round marker. (you can leave it in place if you prefer).
- Use a bench scraper/dough cutter to cut the circle into quarters - press straight down through the dough to cut through and use the circular imprint in the middle as a stopping point. (You can also cut with a pizza wheel or sharp knife).
- Cut each quarter in half to create 8 sections, then cut each of these in half again so that you end up with 16 triangles connected at the centre.
- Pick up two adjacent dough strips, one in each hand, and twist them away from each other twice. Do a third half twist so that the flat ends are facing each other, then pinch the ends together firmly into a point. Repeat with the remaining strips of dough; you should end up with an 8 pointed star.
- Loosely cover with plastic wrap or a tea towel and let rise until puffy, about 20 to 45 minutes depending on the temperature. You don't want to let it double in size, just become slightly puffy. If you poke it with a finger it should spring back slowly and maybe leave a small indentation, if it springs back quickly and fills in completely then it needs a little longer.
- Meanwhile, preheat the oven to 180°C/160°C fan/350°F/gas mark 4. Mix together the milk, maple syrup and oil to make the glaze.½ Tablespoon non-dairy milk, ½ Tablespoon maple syrup, 1 teaspoon olive oil
- Gently brush the dough with the glaze, avoiding the exposed Nutella. Bake for 22-25 minutes until nicely browned and the temperature in the centre registers at least 90°C/194°F on a probe thermometer.
- Allow to cool on the tray for 15 minutes before dusting with icing sugar and serving warm.Icing sugar
Video
Notes
- See post above for tips, details, make ahead and storage instructions and step-by-step photos. If you have a question about the recipe I may have already answered it above!
- Weigh your ingredients. Digital scales are far more accurate than cups,
- Shape it on the tray. Once the star is formed it's very hard to move without losing its shape.
- Be decisive. Once you place one of the dough layers on top of the Nutella it is hard to adjust it without making a mess so do your best to get it right first time.
If you tried this recipe let me know how it went! Rate it, leave a comment or tag @domestic_gothess on Instagram and hashtag it #domesticgothess

Leave a Reply