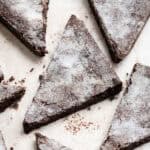
Vegan Chocolate Concrete
This retro school dinners vegan chocolate concrete cake is so easy to make with just four ingredients It is an old school days pudding with a delicious chocolate flavour and a texture that is crunchy around the edges and slightly softer in the middle. Serve it with custard or chocolate custard for the ultimate nostalgic treat!
Servings 8 people
Equipment
- 20 cm/8 in square cake tin
Ingredients
- 250 g (2 cups) plain (all-purpose) flour
- 60 g (⅔ cup) cocoa powder
- 175 g (¾ cup + 2 Tablespoons) caster or granulated sugar plus extra for sprinkling
- 135 g (10 Tablespoons) vegan block butter melted and cooled slightly
Instructions
- Preheat the oven to 180℃/160℃ fan/350℉/gas mark 6. Line a 20 cm/8 in square cake tin with baking paper.
- Stir the flour, cocoa powder and sugar together in a bowl, make sure it is well combined and free from lumps.250 g (2 cups) plain (all-purpose) flour, 60 g (⅔ cup) cocoa powder, 175 g (¾ cup + 2 Tablespoons) caster or granulated sugar
- Add the melted butter and stir until well combined, it will be quite a dry mixture but make sure that all of the dry ingredients are moistened.135 g (10 Tablespoons) vegan block butter
- Tip the mixture into the prepared tin and spread it out in an even layer. Use your hands, the back of a spoon or the base of a glass to pack the crumbs down very firmly and evenly. Make sure that you really press it down firmly otherwise the concrete will be overly crumbly.
- Lightly brush or sprinkle the surface with a little water then bake the concrete for about 25 minutes* until dry to the touch. It will still be a little soft but will firm up as it cools.
- As soon as you take it out of the oven, sprinkle generously with sugar. Allow to cool in the tin for 5-10 minutes, then use a sharp knife to cut it into triangles or squares while it is still warm. Allow to cool on a wire rack before serving.
Notes
- See post above for tips, details and step-by-step photos.
- For the best results make sure that you follow the recipe closely. As always, I highly recommend weighing your ingredients using the gram measurements (with a digital scale), rather than the cup conversions. Cup measurements are simply not accurate enough for baking and I cannot guarantee the best results if you use them. A gram is always a gram, but a cup won’t always measure out the same amount.
- *If you want a softer textured chocolate concrete, bake it for only 20 minutes, and if you want an extra crunchy texture, bake for 30 minutes.