

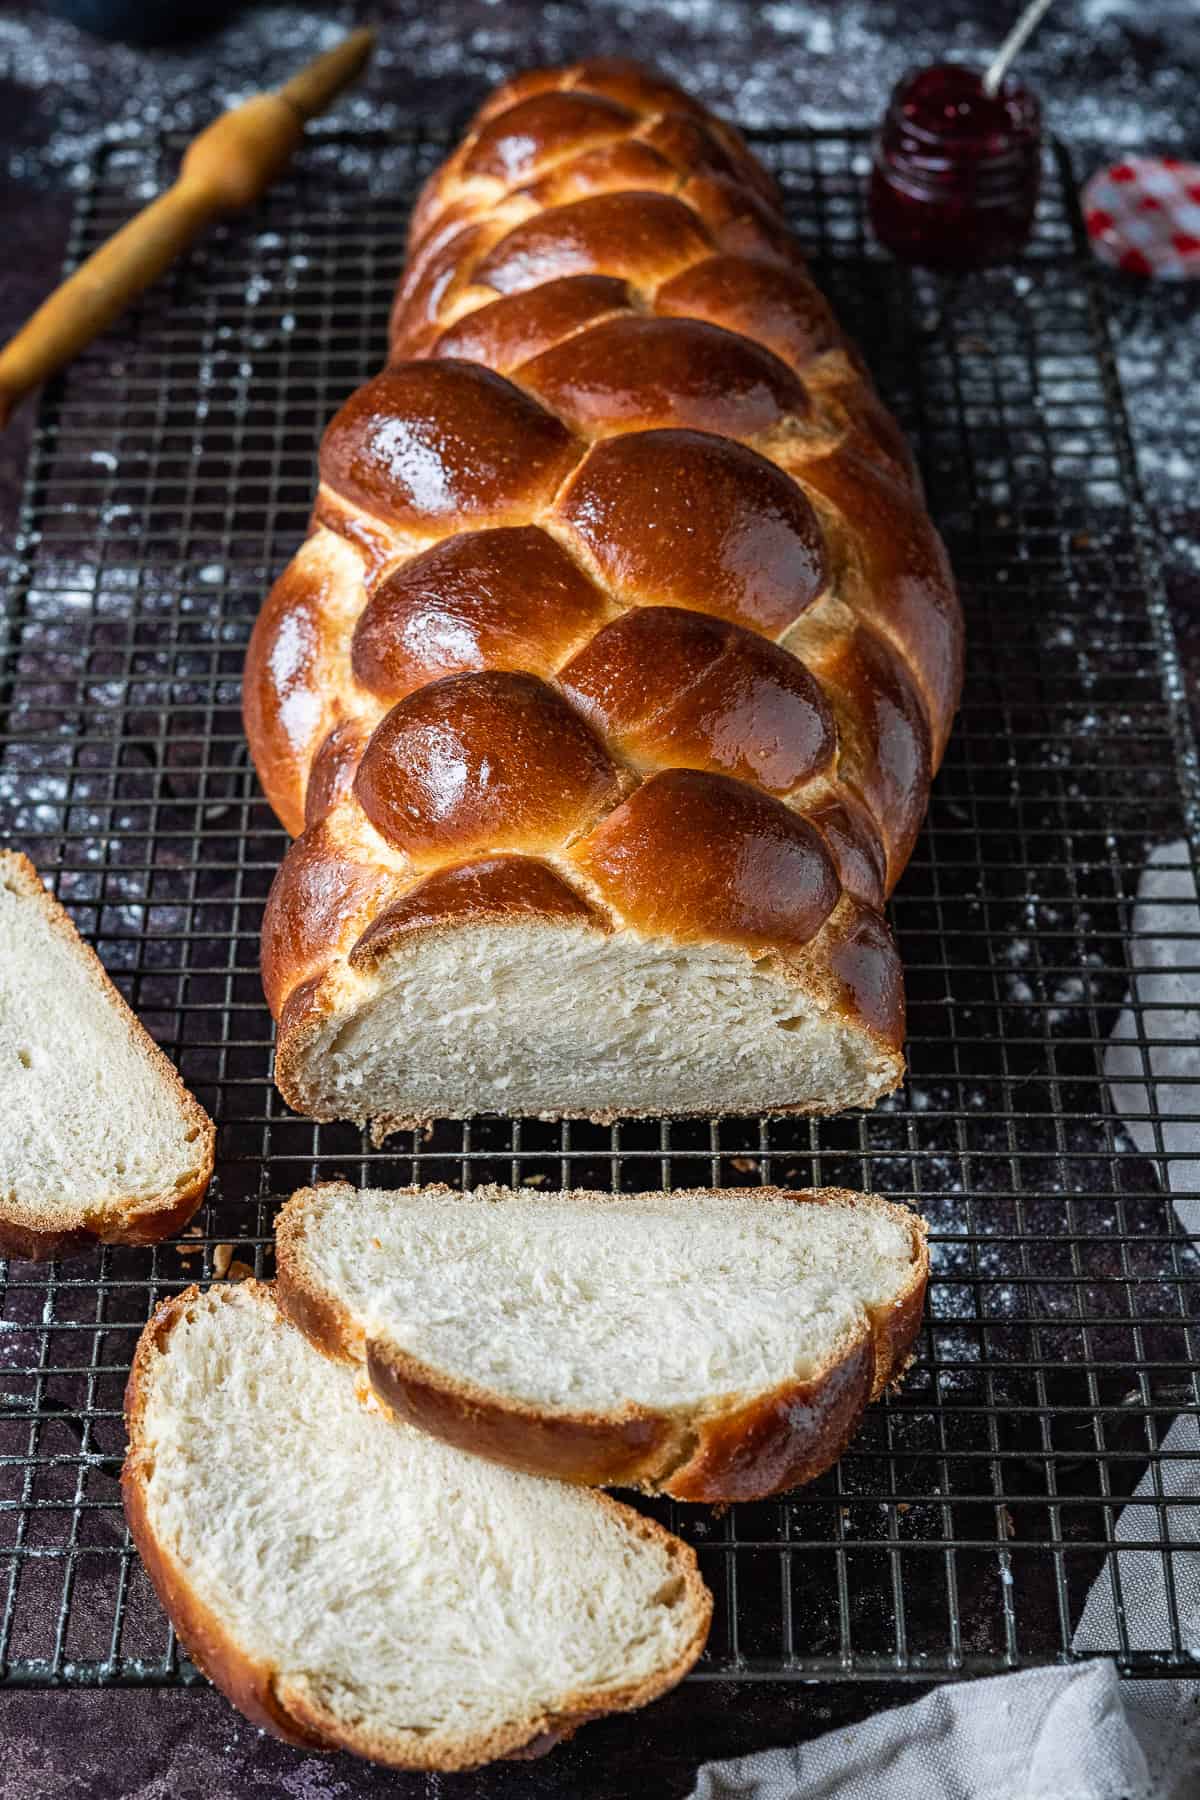
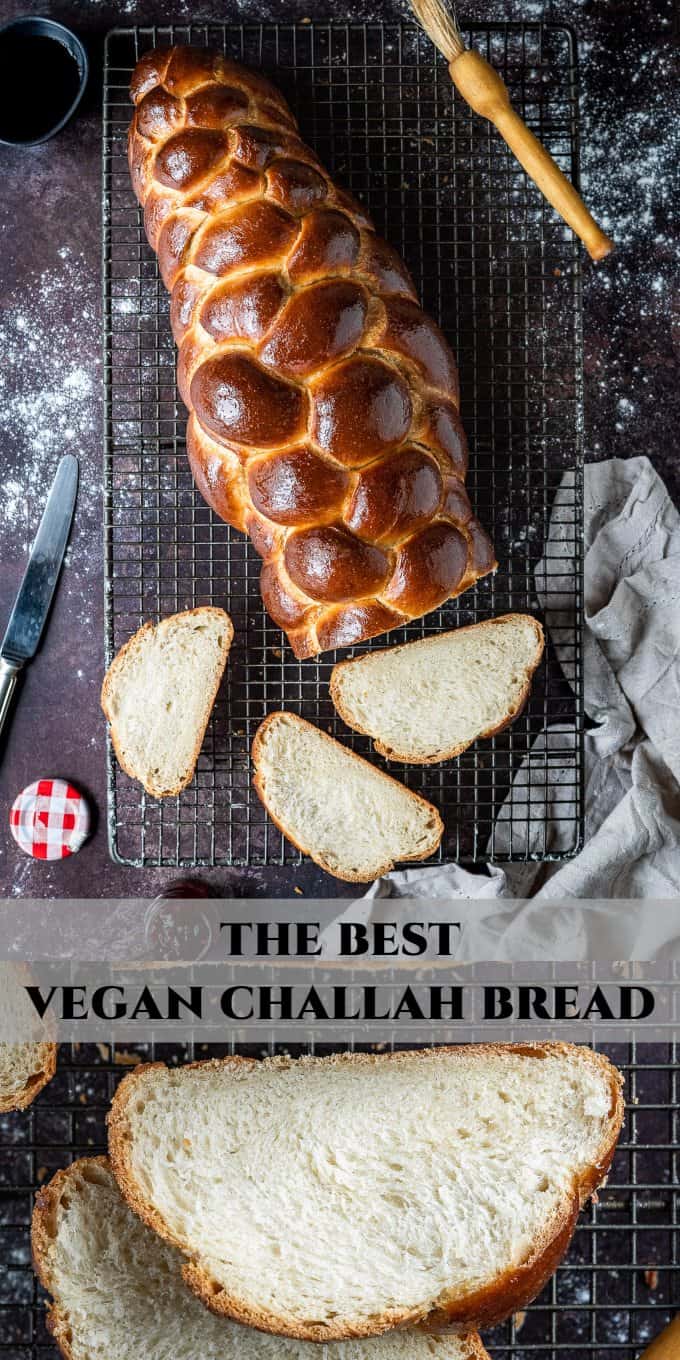
Vegan challah bread - this vegan water challah is made without eggs but is still wonderfully soft, fluffy and flavourful. It is easy to make and you can shape it as you like or follow my step-by-step instructions to make a beautiful six strand braid.

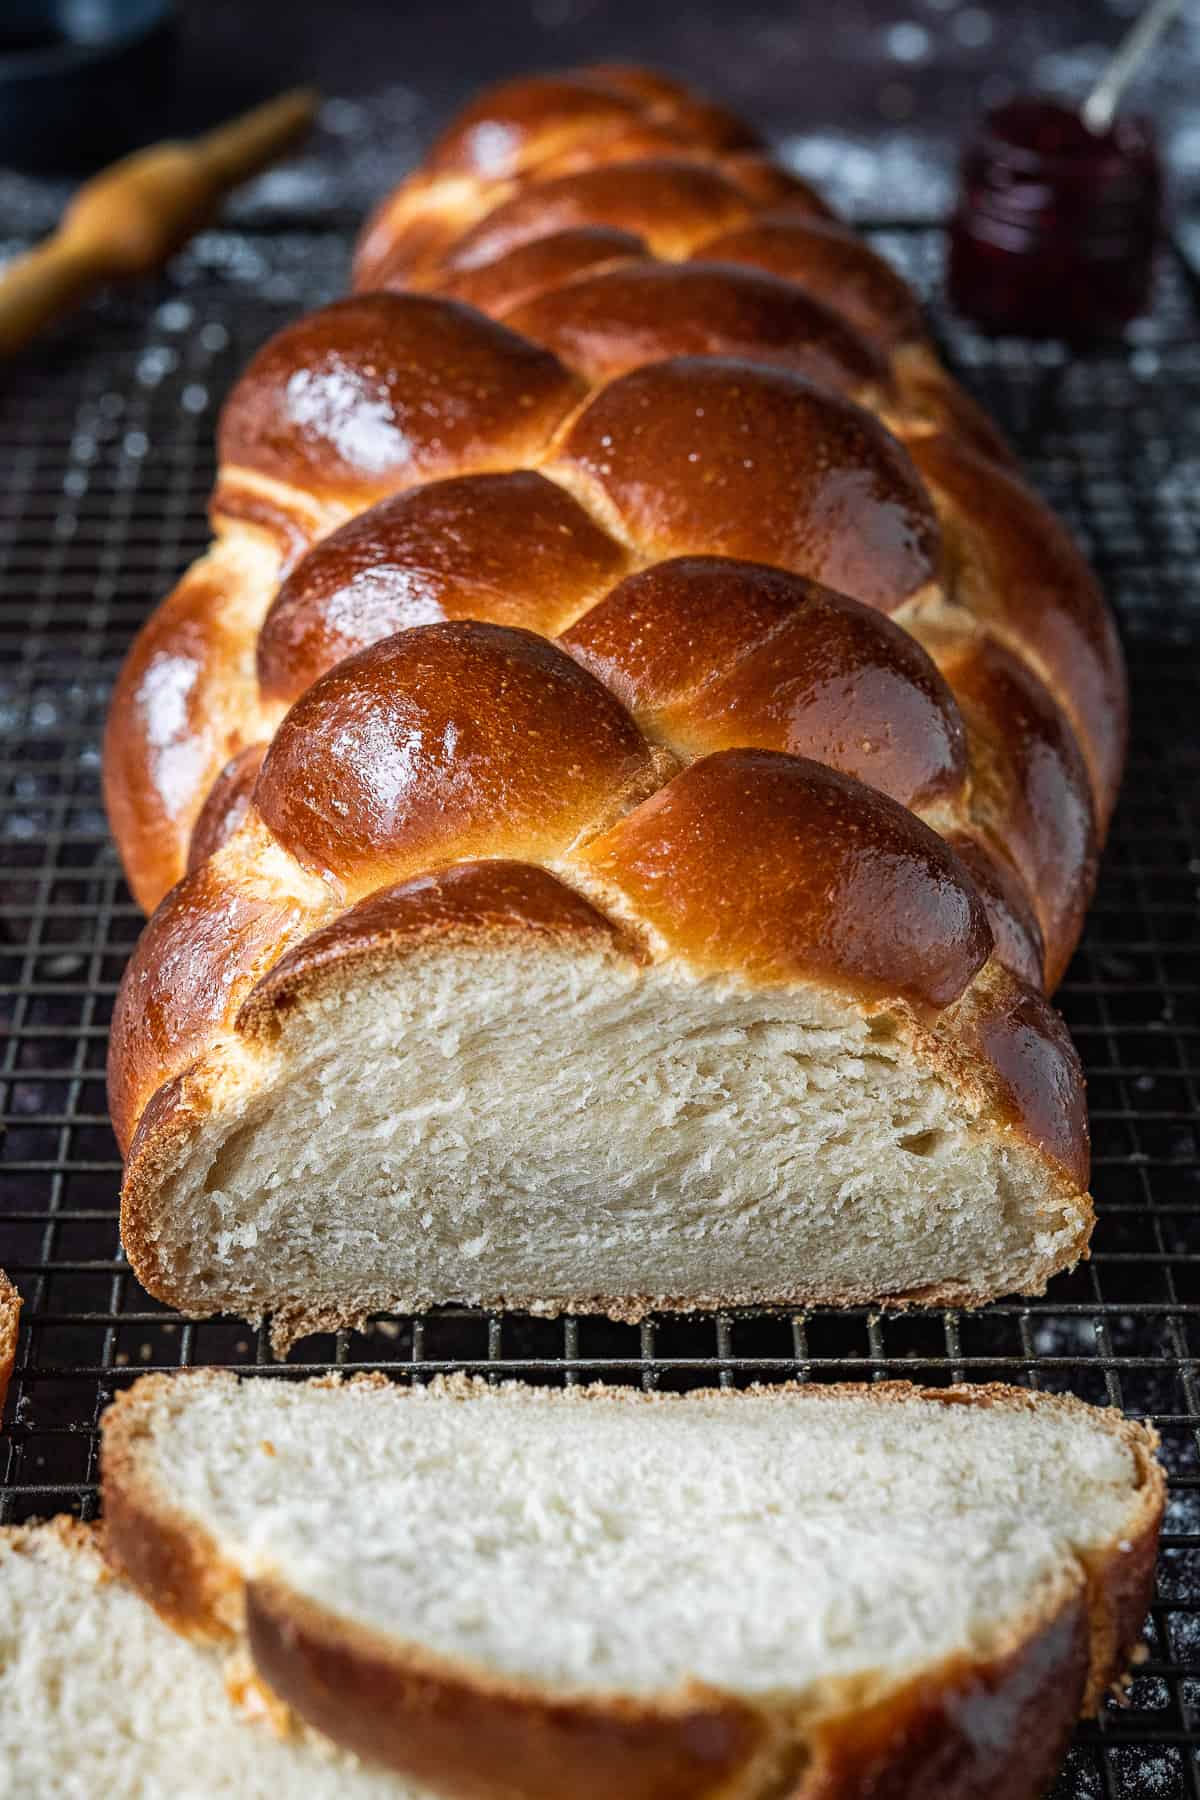
This vegan challah bread is a perfectly soft, fluffy, slightly sweet white bread in an impressive six strand braid.
It is the kind of bread that is so good you can just eat it on it's own, but it is also wonderful as a side, dipped in soup or toasted and spread with butter and jam.
It may look like it is complicated to make but it is actually very simple. It does take some time and is best completed over two days; but it is mostly hands-off time and the effort is so worth it!

What Is Challah Bread?:
Challah bread is a traditional Jewish bread that is often baked for the Sabbath and holidays. It is usually enriched with eggs and oil and shaped into an intricate braid.
While egg challah may be the more commonly known variety; water challah, which does not contain any egg, is actually also a thing and is naturally vegan as challah does not contain dairy anyway (although water challah is often still glazed with egg).
It is especially popular in Israel, while egg challah is the more common variety in the US.
This vegan eggless challah is a water challah so there is no need to use any kind of egg replacer. It is a beautifully soft, fluffy, flavourful, slightly sweet bread.
Note that I am not Jewish, and cannot claim to be an expert on the subject of challah; but I think (hope) that my recipe is a good one. We certainly can't stop eating it and it has become a regular bake in my house.
How To Make Vegan Challah Bread:
(For ingredients and full instructions see the recipe card below)
You can make this vegan challah bread all in one day provided you start early enough in the morning; but I prefer to make it over two days.
Place white bread flour or plain flour in a large bowl, or in the bowl of a stand mixer fitted with a dough hook. Add the yeast to one side and the sugar and salt to the other. Mix to combine.
Add the oil and most of the water and stir to form a rough dough, adding the rest of the water as needed to bring it together.
Knead the dough for about 10 minutes by hand on an unfloured surface, or for about 5 minutes in a stand mixer.

While I do often leave the kneading to my stand mixer when it comes to bread, for challah I actually prefer to knead it by hand as I find it is easier to get a feel for when the dough is the right texture.
After a bit of kneading the dough should become silky smooth and supple and should pull away from the worktop or sides of the bowl cleanly. It should be slightly tacky to the touch but not sticky. If it is too sticky then knead in more flour, a spoonful at a time until it reaches the desired texture.
Place the dough in a large lightly oiled bowl and cover (I use a shower cap). At this point you have two choices; if you are baking the bread in the same day, let the dough rise in a warm place until doubled in size, about 2 - 2 ½ hours.
If you are baking the bread the following day, let the dough rise at room temperature for 1 hour then place the bowl in the fridge to finish rising overnight.

The following morning, or once the dough has doubled in size, punch it down to knock out most of the air.
How To Shape Challah:
There are many ways to shape challah - 3, 4, 5, 6, 7, 8 and 9 strand braids as well as various round designs, rolls etc etc.
There are a lot of tutorials on YouTube for different designs so have a look around and find one that you like, or follow my instructions below for how to shape a six strand challah braid.
This recipe will make one large loaf, or two smaller ones.
Divide the dough into six even pieces, you want them to be as equal as possible, I use a scale to make sure they are all the same weight. If you are making two smaller loaves rather than one big one, divide the dough in half first, then each half into six.

Roll one of the pieces of dough out into a thin square, it doesn't need to be exactly square shaped. If the dough is sticking you can lightly oil the worksurface and rolling pin.
Starting at whichever side is shortest, roll the dough up tightly into a sausage. Roll over the sausage with your hands, starting from the middle and working outwards, to form a long, thin strand.
Increase the pressure from your hands at the ends to taper them. You want the ends to be pointy and the strand to be thicker in the middle.

Repeat with the rest of the portions of dough, making sure that all of the strands are the same length.
On a lightly floured surface, arrange the six strands parallel to each other. At one end, gather the tips of the strands together and pinch them tightly so they stick together.
To make a six strand braid you just have to follow four repeating moves. First, take the second from the right strand and move it over to the far left.
Then, take the far right strand and move it over two strands to the middle (spread the strands apart if needed to make room). (The middle is in the centre of the four strands, not including the strand you just moved to the far left.)
Then, take the second from the left strand and move it over to the far right, then move the far left strand over two to the middle.

Repeat these four moves - second right to far left, far right to middle, second left to far right, far left to middle. Carry on going until you have braided the whole loaf then pinch the end together and tuck any stray bits underneath.

If the loaf is too long and thin, you can use your hands to lift and compact it a bit to make it shorter and fatter.
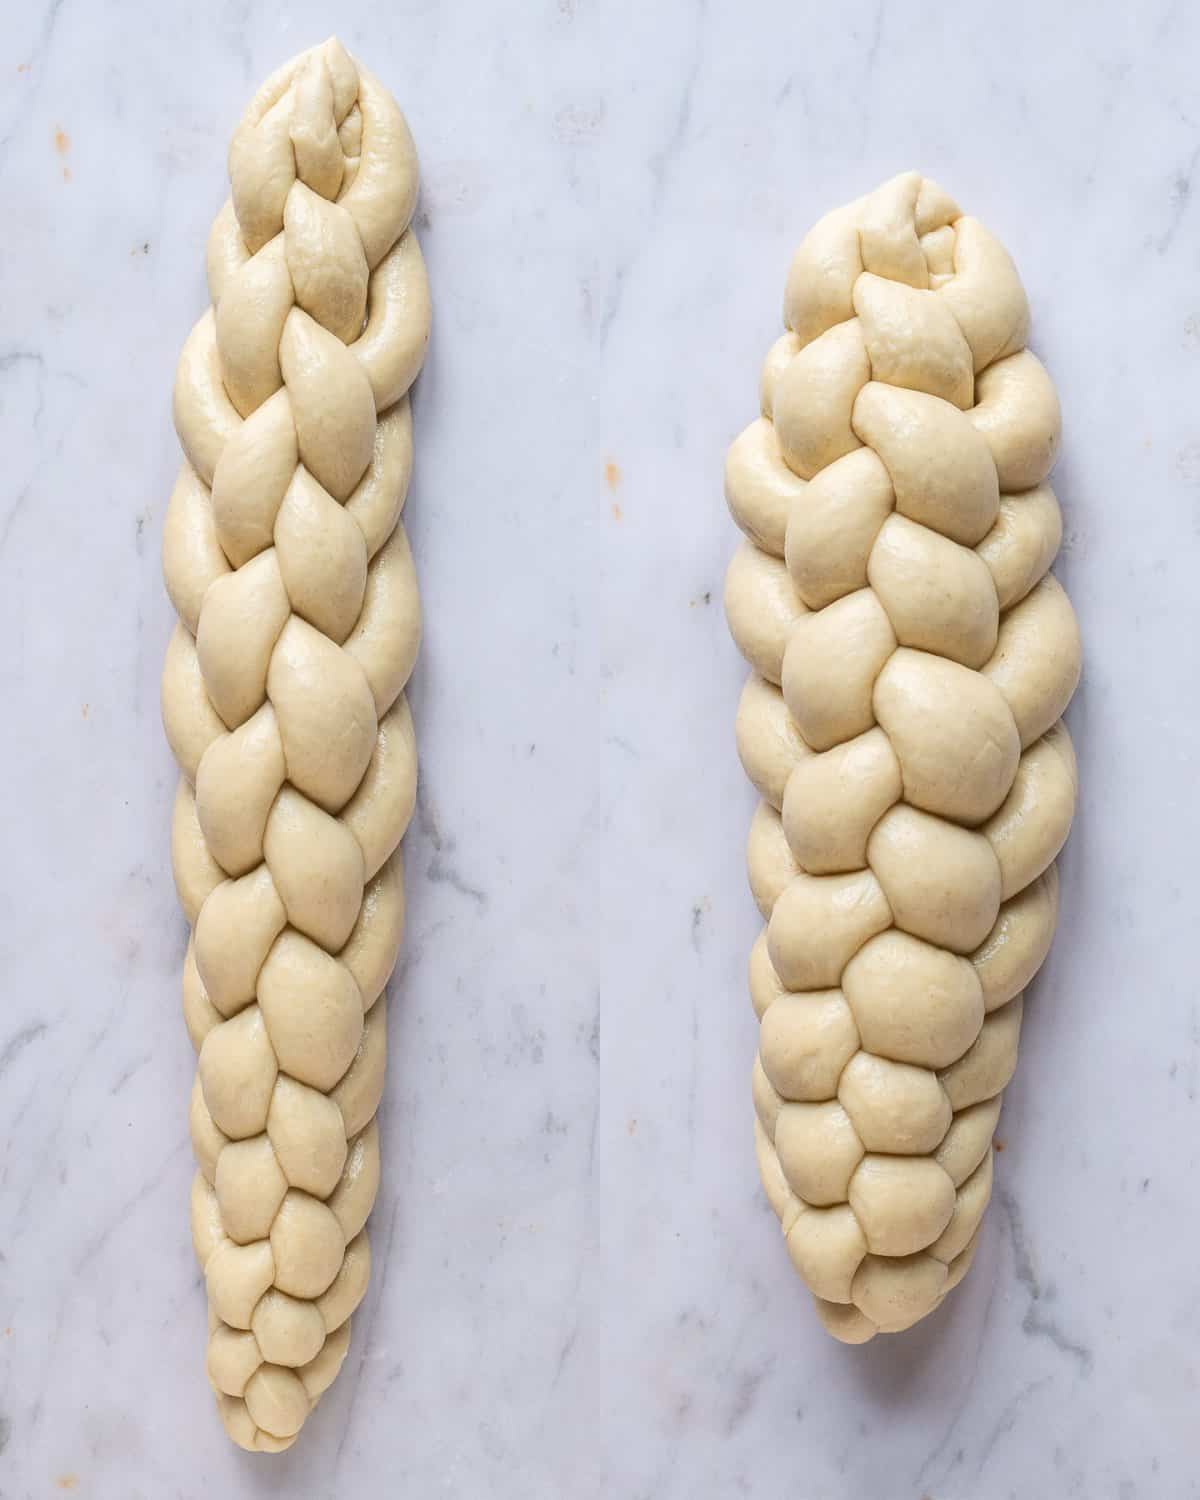
Place the loaf on a baking sheet lined with baking parchment and repeat the steps above if you are making two loaves.
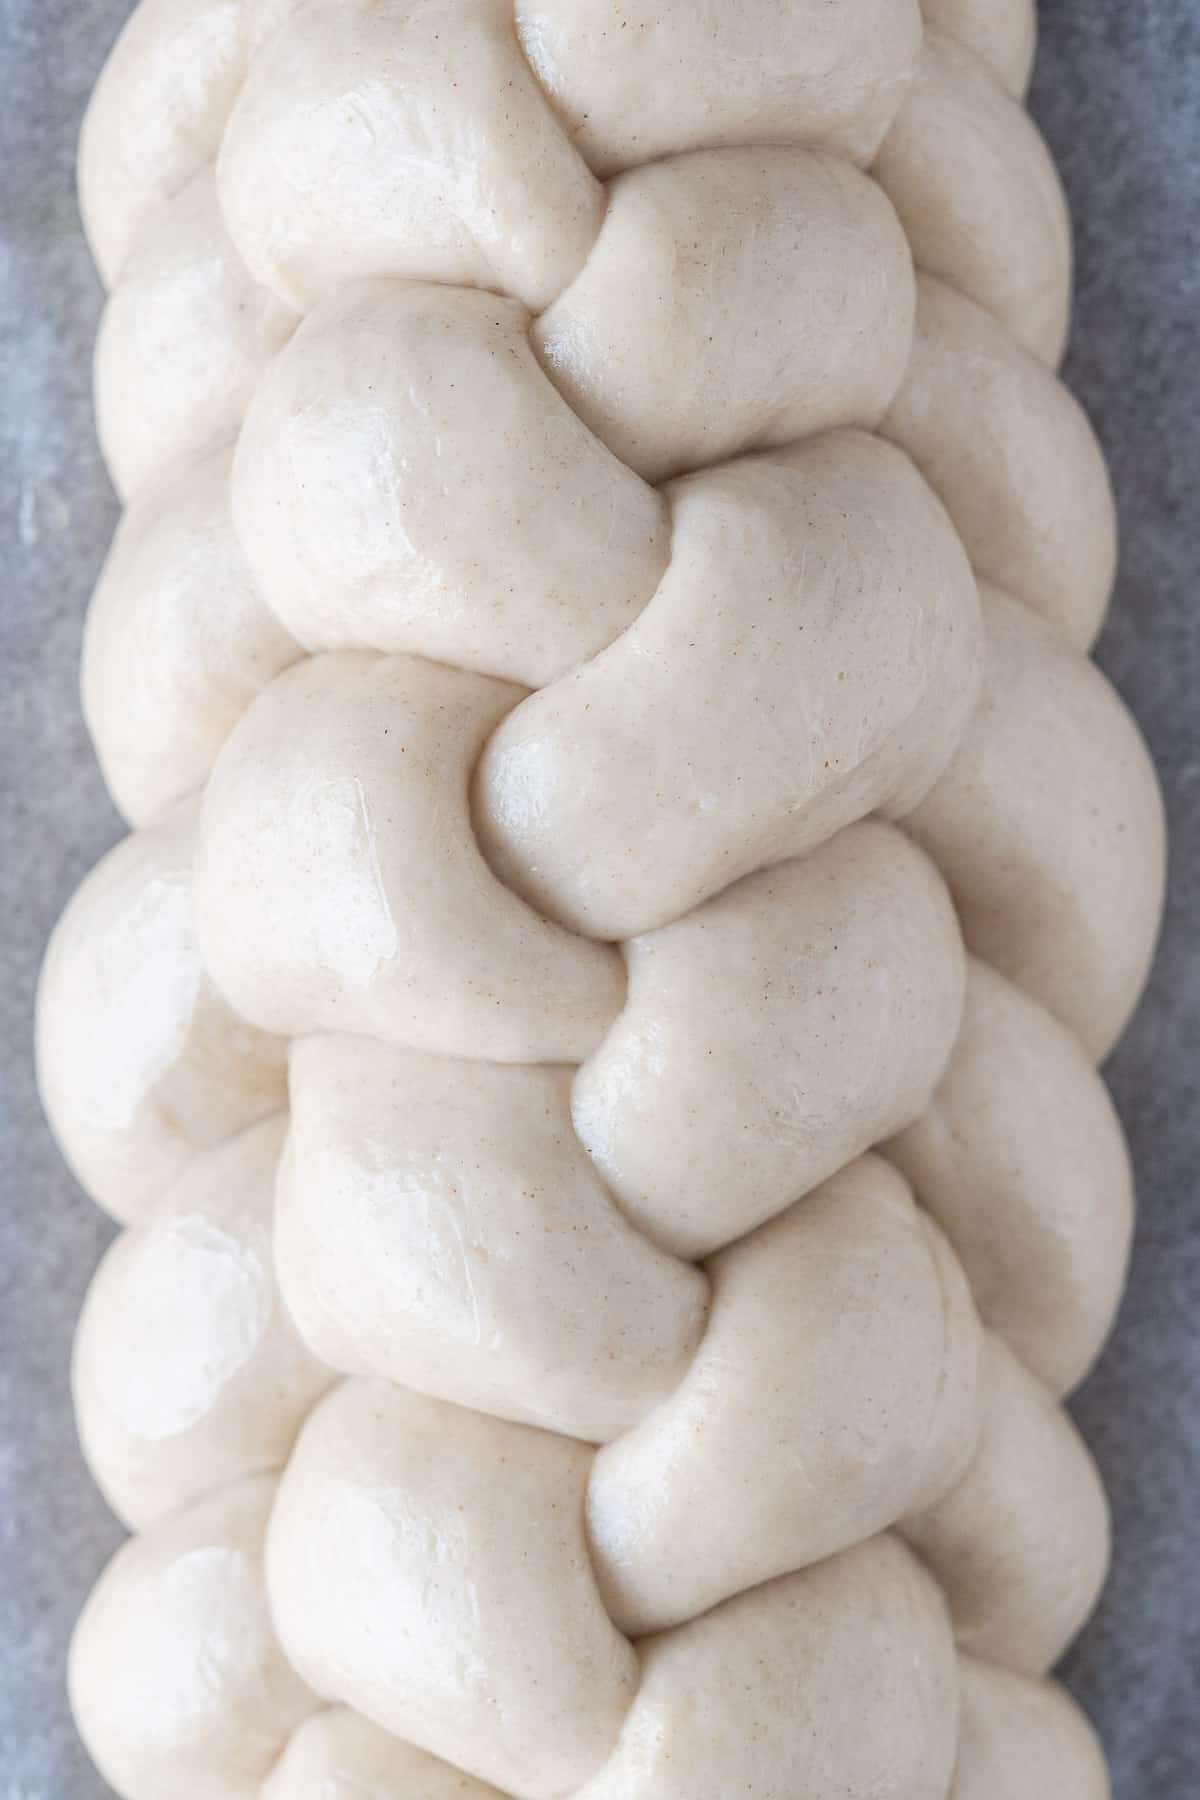
Loosely cover the loaf(ves) and set aside in a warm place to rise until they are about doubled in size, 1 - 3 ½ hours depending on how warm it is.
The bread is ready to bake when when it has visibly almost doubled in size and if you gently poke it with a finger it springs back slowly most of the way but leaves a small indentation. If it springs back quickly and fills in completely then it isn’t ready yet.

When the challah is ready to bake, gently brush it all over with some maple glaze. Bake for 20 minutes then brush with more glaze (if you want to sprinkle it with sesame or poppy seeds do it now) and return to the oven for 15 minutes for a large loaf, or 10 minutes for two smaller ones.

Challah Is A Slow Riser:
Because the dough is enriched with oil and sugar, it can take quite a long time to rise and for the best textured bread you shouldn't rush it and bake the bread before it is fully risen.
The first rise will take 1 ½ - 3 hours depending on how warm it is, and 1 - 3 ½ hours for the second rise depending on whether you refrigerated the dough and how warm the room is. For this reason , if you want to make the bread all in one day then you need to make sure that you start it early enough in the morning.
I prefer to make it over two days and give the dough it's first rise overnight in the fridge, though I found that it was best if I let it rise for 1 hour at room temperature first before refrigerating the dough.
Judging when the challah is ready to bake is something of an art; it is ready when it has visibly almost doubled in size and if you gently poke it with a finger it springs back slowly most of the way but leaves a small indentation. If it springs back quickly and fills in completely then it isn't ready yet.
If the bread is a little underprooved it will still be delicious, but more dense and not quite as fluffy as a properly proved loaf. With practice it gets easier to tell when a loaf is ready to bake.
How To Speed Up The Rising Time:
If your room temperature is cold and you want to speed up the rising time a bit then you can heat the oven up on it's lowest temperture then switch it off and open the door for 30 seconds to let some of the heat out.
Hold your hand in there for a few seconds to make sure it isn't too hot. It should feel warm but not uncomfortable to hold your hand in.
Place the covered dough in the oven and shut the door. If it is a really cold day then you may need to warm the oven up again after a while but I usually find that once is enough.
Top Tips:
For the best results make sure that you follow the recipe closely. As always, I highly recommend using the gram measurements (with a digital scale), rather than the cup conversions. Cup measurements are simply not accurate enough for baking and I cannot guarantee the best results if you use them.
You can reduce the amount of sugar if you want a more savoury challah (keep a tablespoon or two to feed the yeast). The dough may rise more quickly with less sugar so keep an eye on it.
For the oil I generally use either olive or sunflower, but vegetable or canola would be fine too. I don't recommend using coconut oil here as it is solid at room temperature and therefore may make the bread feel more dense.
You can use either bread flour or plain flour. Bread flour will give the vegan challah a slightly more chewy texture but both are good. You can also use a combination of the two.
The recipe will make one large challah, or two smaller ones. Totally up to you.
I glaze the challah with a maple syrup and water or milk mixture which gives it a lovely shine, especially if you glaze it twice - once before it goes in the oven and again after it has been baking for 20 minutes.
The glaze does become a bit sticky after a few hours at room temperature so if you prefer you can brush the bread with milk or aquafaba instead; it won't be shiny in this case however.
The best way to tell if a loaf of bread is cooked in the middle is to use a probe thermometer. It is impossible to give a one-size-fits-all baking time as ovens vary so much.

What Kind Of Yeast?:
I always use fast action yeast which is also known as instant or easy yeast as it doesn't need to be activated first, you just add it straight to the flour.
If you only have active dried yeast then you can still use it, but you will need to mix it with some of the warm water and a pinch of the sugar first. Let it sit for 10-20 minutes until it has become bubbly then proceed with the rest of the recipe as written.
Can I Freeze Vegan Challah?:
Yes! You can freeze this vegan challah either whole or in slices. Place it in a ziplock bag and freeze for up to three months. Ideally it should be frozen on the day it is baked to preserve freshness (allow it to cool completely first).
You can toast slices of it straight from the freezer; or if you have frozen a whole loaf then allow it to defrost at room temperture then refresh in a low oven for 5-10 minutes to restore it to it's former glory.
I like to bake the recipe as two smaller loaves rather than one big one; eat one of the loaves and freeze the other for another day.
How To Store Vegan Challah:
As with most home-made bread, this vegan challah is best eaten on the day it is baked. It is still good the next day however and for 2-3 days after that it makes great toast or French toast.
Store it in an airtight container or bread bin at room temperature. It should not be placed in the fridge as that can make it go stale faster.
More Vegan Bread Recipes:
Vegan wholemeal maple cinnamon rolls
If you tried this recipe why not tag @domestic_gothess on Instagram and hashtag it #domesticgothess
*All images and content on Domestic Gothess are copyright protected. If you want to share this recipe then please do so by using the share buttons provided. Do not screenshot or post the recipe or content in full.*
Vegan Challah Bread
Ingredients
- 485 g (4 cups) white bread flour or plain (all-purpose) flour plus extra as needed
- 10 g (2 ½ tsp) fast action/instant yeast*
- 75 g (¼ cup + 2 Tbsp) caster (superfine) sugar**
- 1 ½ teaspoon salt
- 90 ml (6 Tbsp) oil (olive, sunflower, vegetable or canola)
- 260 ml (1 cup + 1 tablespoon + 1 tsp) warm water
Glaze:
- 1 tablespoon maple syrup
- 1 tablespoon water or non-dairy milk
Instructions
- Ideally you should start the day before you want to bake the bread. Or fairly early in the morning if you want to make it all in one day.
- Place the flour in a large bowl, or in the bowl of a stand mixer fitted with a dough hook. Add the yeast to one side and the sugar and salt to the other. Mix to combine.
- Add the oil and most of the water and stir to form a rough dough, adding the rest of the water as needed to bring it together.
- Knead the dough for about 10 minutes by hand on an unfloured surface, or for about 5 minutes in a stand mixer.
- After a bit of kneading the dough should become silky smooth and supple and should pull away from the worktop or sides of the bowl cleanly. It should be slightly tacky to the touch but not sticky. If it is too sticky then knead in more flour, a spoonful at a time until it reaches the desired texture.
- Place the dough in a large lightly oiled bowl and cover (I use a shower cap). At this point you have two choices; if you are baking the bread in the same day, let the dough rise in a warm place until doubled in size, about 2 - 2 ½ hours.
- If you are baking the bread the following day, let the dough rise at room temperature for 1 hour then place the bowl in the fridge to finish rising overnight.
- The following morning, or once the dough has doubled in size, punch it down. Now it is time to shape your challah; you can either find a tutorial for a shape you like, or follow my instructions (and step-by-step photos above) to make a six strand challah. You can make one large loaf or two smaller ones.
- To make a six strand challah, divide the dough into six even pieces. You want them to be as even as possible, I use a scale to make sure they are all the same weight. If you are making two smaller loaves rather than one big one, divide the dough in half first, then each half into six.
- Roll one of the pieces of dough out into a thin square, it doesn't need to be exactly square shaped. If the dough is sticking you can lightly oil the worksurface and rolling pin.
- Starting at whichever side is shortest, roll the dough up tightly into a sausage. Roll over the sausage with your hands, starting from the middle and working outwards, to form a long, thin strand. Increase the pressure from your hands at the ends to taper them. You want the ends to be pointy and the strand to be thicker in the middle.
- Repeat with the rest of the portions of dough, making sure that all of the strands are the same length.
- On a lightly floured surface, arrange the six strands parallel to each other. At one end, gather the tips of the strands together and pinch them tightly so they stick together.
- To make a six strand braid you just have to follow four repeating moves. First, take the second from the right strand and move it over to the far left. Then, take the far right strand and move it over two strands to the middle (spread the strands apart if needed to make room). (The middle is in the centre of the four strands, not including the strand you just moved to the far left.)
- Then, take the second from the left strand and move it over to the far right, then move the far left strand over two to the middle.
- Repeat these four moves - second right to far left, far right to middle, second left to far right, far left to middle. Carry on going until you have braided the whole loaf then pinch the end together and tuck any stray bits underneath.
- If the loaf is too long and thin, you can use your hands to lift and compact it a bit to make it shorter and fatter.
- Place the loaf on a baking sheet lined with baking parchment and repeat the steps above if you are making two loaves.
- Loosely cover the loaf(ves) and set aside in a warm place to rise until they are about doubled in size, 1 - 3 ½ hours depending on how warm it is. The bread is ready to bake when when it has visibly almost doubled in size and if you gently poke it with a finger it springs back slowly most of the way but leaves a small indentation. If it springs back quickly and fills in completely then it isn’t ready yet.
- While the challah are rising make the glaze - mix together the maple syrup and water or milk in a small bowl and set aside. Preheat the oven to 180°C/350°F/gas mark 4.
- When the challah is ready to bake, gently brush it all over with some of the glaze. Bake for 20 minutes then brush with more glaze (if you want to sprinkle it with sesame or poppy seeds do it now) and return to the oven for 15 minutes for a large loaf, or 10 minutes for two smaller ones.
- The best way to tell when a loaf of bread is cooked through is to use a probe thermometer, it should reach 94°C/201°F when poked into the middle of the loaf.
- Slide the baked challah onto a wire rack and leave to cool before slicing.
Notes
- For the best results make sure that you follow the recipe closely. As always, I highly recommend using the gram measurements (with a digital scale), rather than the cup conversions. Cup measurements are simply not accurate enough for baking and I cannot guarantee the best results if you use them.
- *If you only have active dried yeast then you can still use it, but you will need to mix it with some of the warm water and a pinch of the sugar first. Let it sit for 10-20 minutes until it has become bubbly then proceed with the rest of the recipe as written.
- **You can reduce the amount of sugar if you want a more savoury challah (keep a tablespoon or two to feed the yeast). The dough may rise more quickly with less sugar so keep an eye on it.
- The glaze does become a bit sticky after a few hours at room temperature so if you prefer you can brush the bread with milk or aquafaba instead; it won’t be shiny in this case however.

Chris
I made this today, substituting the oil for applesauce and it turned out great! I just have to stop eating it so I have some left for others.
Scott
Amazing recipe. Loved it. Mazel Tov! And it’s my belief that food belongs to everyone and anyone can make anything. Congrats
Megan
I have a sourdough starter. How much would you say I could use for this recipe?
hannahhossack
Hi Megan, I'm afraid that I don't have a lot of experience with sourdough so I can't really say.
Varsha
Hey!
When I substitute the instant yeast for the active dry yeast, do I use the same amount? Or should I reduce the amount?
hannahhossack
Hi Varsha, I would just use the same amount but the active dry might take a bit longer to rise.
Sabrina
Hi! Thank you for this recipe. I made it and mine came out pretty dense. Not flaky like yours looks! Do you have a suggestion of what I could do better? Thank you!!
hannahhossack
Hi Sabrina, unfortunately without being there when you made it it is impossible for me to tell what went wrong, there are many reasons why bread can turn out dense - if the yeast was old, the water was too hot, you added a bit too much flour, didn't knead the dough enough, over kneaded the dough, underprooved it or overprooved it etc.
Blimey
Hi I just came across this recipe, I've been baking Challah for yrs. (Can't wait to try this 1 though)
I have my two GO to recipes. & maybe a 3ed after a I try this 1. )
Anyway to check if they R done I Tap the bottom of them & they should sound HOLLOW.
Avigail
Fantastic. My first attempt at baking a challah. I shaped it into a round form for Rosh Hashana and the three of us devoted it the same night. While it was my first attempt baking a challah, I have eaten many many over decades and can confidently say that this recipe holds up with the best. The texture is simply superb and this was using bread flour! Looking forward to seeing how much fluffier it gets using all purpose. The maple glaze was also delicious.
Jen
Would this recipe work with white whole wheat flour? I usually avoid white flour.
hannahhossack
Hi Jen, we don't have that in the UK but after some Googling it seems like it is probably the equivalent of our regular wholemeal flour. I don't think that the recipe would work well using only wholemeal flour, it is likely to be dense and not rise as much. Challah is supposed to be light and fluffy and you are unlikely to be able to achieve the right texture using only wholemeal. I never make 100% wholemeal bread as it is more difficult to make a good loaf and the recipe would likely need reworking completely. I would recommend subbing 50% of the white flour for wholemeal for the best of both worlds.
Jen
Thank you for your quick reply. I'll probably try that. Your recipes look wonderful. I plan to make your vegan palak paneer soon and maybe your vegan chocolate banana bread later today.
Lynn
I don't have a KitchenAid or any kind of stand mixer. Could this be made by hand with mixing and kneading?
Hannah
Hi Lynn, yes, the recipe includes instructions for making it by hand.
Usha
Wonderful bread! Very fun to make and rises well. Great instructions, thank you!
Rama
Amazing recipe! First time ever trying challah and absolutely loved it!
Just a couple of quick doubts :
1. Can I replace oil with butter to get a richer tasting bread?
2. Can I bake it in a loaf pan?
Thanks in advance
hannahhossack
Hi Rama, I think both of those should be fine. The baking time may be different however.
Maya
This was fantastic! I thought wouldn't turn out good bc it was drier than I'm used to, but I was so wrong (and the fact that it was a bit drier made it wayyyy easier to braid). Thanks for the recipe!
Maya Reese
3rd time I made this. My god, it is good. I was making it with whole wheat before which was why it was drier. It was really good then, but with AP flour it's divine.
Rose
I'm very excited to try this recipe! Do you have any suggestions for alternative flours that would make it gluten free?
hannahhossack
Hi Rose, I'm afraid that I don't think that it would work well gluten free.
Kristen
This is one of my favorite bread recipes. My boyfriend requests that I make it all the time! Sometimes I replace the sugar with agave nectar for more of a honey challah bread flavor, but honestly it's great how it is. Thank you!
Liam
You may not be Jewish, but I'M Jewish, and since the beginning of the pandemic, have been experimenting with vegan challah recipes with some major fails and a lot of "meh" loaves along the way. Though I may not be an expert on how challah is made, I'm an expert on how it should taste, and I've finally found a vegan recipe that tastes pretty much exactly how challah SHOULD taste. Thank you so much for this recipe! I've been using it every Friday since I discovered it a few weeks ago. I have a loaf in the oven right now, and can't wait to pull it out and tear into it with some wine over Shabbas Zoom with my family. Thanks again!
A recipe note: I've been using turbinado sugar rather than caster sugar since it's what I have on hand and it's worked perfectly, so my guess is as long as the proportion is the same, the type of sugar you use doesn't make a huge difference.
Tova
I am looking for a new Shabbat challah recipe but I’m not sure what measurements to use for 5 pounds !! Can you please help me figure out the measurements for the sugar, oil and water etc if i use 5 pounds of flour every week ?? Thank you so much and i am sooo excited to try this
Hannah
Hi Tova, I've worked that out to be 45g yeast, 350g sugar, 7 tsp salt, 420ml oil and 1215ml of water.
Tova
Thank you so much !!
deb
amazing recipe, thanks so much. hard to not eat the whole bread in one sitting
Laura
Hi, can I use fresh yeast instead of dried? How much should I use?
Hannah
Hi Laura, I haven't tried using fresh yeast but it should be fine. I would try 34 grams.
Lindsay
Hey! Just wondering if you’ve tried the 34g of fresh yeast Hannah recommended yet and how it went. I’ve always used about 25g, but have wondered what might happen with more. Also… since you’re the only one I’ve found who’s also using fresh yeast, how much water do you normally use- er, you know, the ratio I guess. I’ve seriously always guessed
Thanks, Laura☺️
Paz Jiménez
Hello my dear Hannah!, I have a question, this is my first challah so I want to double check the procedure since I'm planning to make the two days process. This is so far what I understand: once the dough is ready I wait 1 hour before put into the fridge (first day), and the next day I should form the braid with the 6 strands, and then, wait again for the dough to rise and double its size?, basically my doubt is: there are two waitings for the dough to rise, one hour they first day, then fridge, and another waiting of 2-3 hrs or until the braid double its size?, please correct me if I got it wrong.
Hannah
Hi Paz, that's correct! It needs two rising periods.
Anat
I’ve been baking challah for years but wanted to try a new recipe. This challah is just perfect. Thank you for sharing
Rachel
This really is the BEST challah recipe, vegan or not. I'm a Jewish new-ish vegan, so yes, I do remember what egg challah tastes like. It tastes *exactly* as it should, and I adore the subtle sweetness of the glaze. Today I'm making it again, in a round shape for Rosh Hashana.
If anyone is looking for an easy round braid instructional:
https://pjlibrary.org/beyond-books/pjblog/august-2018/how-to-braid-a-round-challah-for-rosh-hashanah
Michele Minsuk
I am not a super experienced challah baker, but this recipe came out perfect, by far the best I have tried. The only weird thing is it took way longer to bake than the recipe suggested. However, I waited until 201F, and it was perfect. Will definitely make this many times.
Mia
I’ve made this recipe twice, generally really like it. It’s delicious and tastes very authentic! Both times I’ve made it, it hasn’t risen. I thought it was a problem with my yeast, but I tried a brand new package the second time, and the problem persisted. I let it rise for over 24 hours and it barely rose. Any advice on how to correct this next time? (Because I love this recipe!)
Hannah
Hi Mia, to be honest I can't think of any other reason why it wouldn't be rising. It is a slow riser but it certainly shouldn't take that long! Without being there when you make it it is impossible for me to tell what may be going wrong I'm afraid.
Katy
Hi Mia - have you been careful with the temp of your warm water? I swear by using a thermometer to make sure it’s between 100 and 100 degrees, as I’ve had similar issues previously with other recipes not rising correctly - either because the water was too hot and killed the yeast or too cold and didn’t start it properly. Ever since I’ve been testing the temp, I haven’t had any issues. Good luck!
Katy
100-110*
Mara Cook
Thank you so much for your wonderful challah recipe! I've been trying to find a good way to make vegan challah that still has some of that traditional taste, and yours is it! Thank you for doing what you do. I'm excited to try your other recipes - they look so good!