

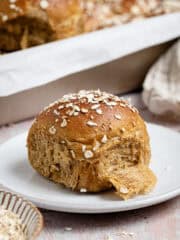
Vegan brioche - this vegan version of the classic French bread is made with aquafaba instead of eggs. It is wonderfully soft, fluffy, rich and full of flavour. Includes options to make it with either vegan butter or olive oil.

This vegan brioche is dangerously good! If I bake a loaf it doesn't last two days in my house; and there are only two of us to devour it!
The soft, rich, tender bread is just utterly irresistable; it is so good that I will happily just eat it plain, though my favourite way to have it is slathered with raspberry jam.
It takes a bit of time to make as it needs an overnight rise in the fridge but most of it is hands off time and the results are so worth the effort!
What Is Brioche?:
Brioche is a highly enriched bread originating from France, often containing 250g butter and five or six eggs per loaf. It is considered a viennoiserie (like croissants) because it is so rich in butter and eggs, making almost akin to pastry.
The large quantity of eggs and butter give it a soft, rich and tender crumb which is truly irresistable, but not vegan friendly in the slightest!
My eggless brioche recipe uses the magical ingredient that is aquafaba (the liquid drained from a tin of chickpeas) to replace the eggs. It works perfectly to create that soft, tender crumb while also keeping the bread nice and light.
Instead of butter I've given you two options; both of which work wonderfully:
1. A vegan block butter/margarine. It must be the kind that comes in a solid foil-wrapped stick, NOT the spreadable kind in a tub. I use Naturli Vegan Block but Stork block, Tormor block or Vitalite block will all work. (Use Earth Balance Buttery Sticks or similar in the US).
2. Olive oil. If you can't get hold of a block margarine, or prefer not to use one, then a mild flavoured olive oil works really well. Don't use extra virgin as the flavour will be too strong.
I actually couldn't taste the difference between the two different loaves though the butter version seemed to rise very slightly higher.
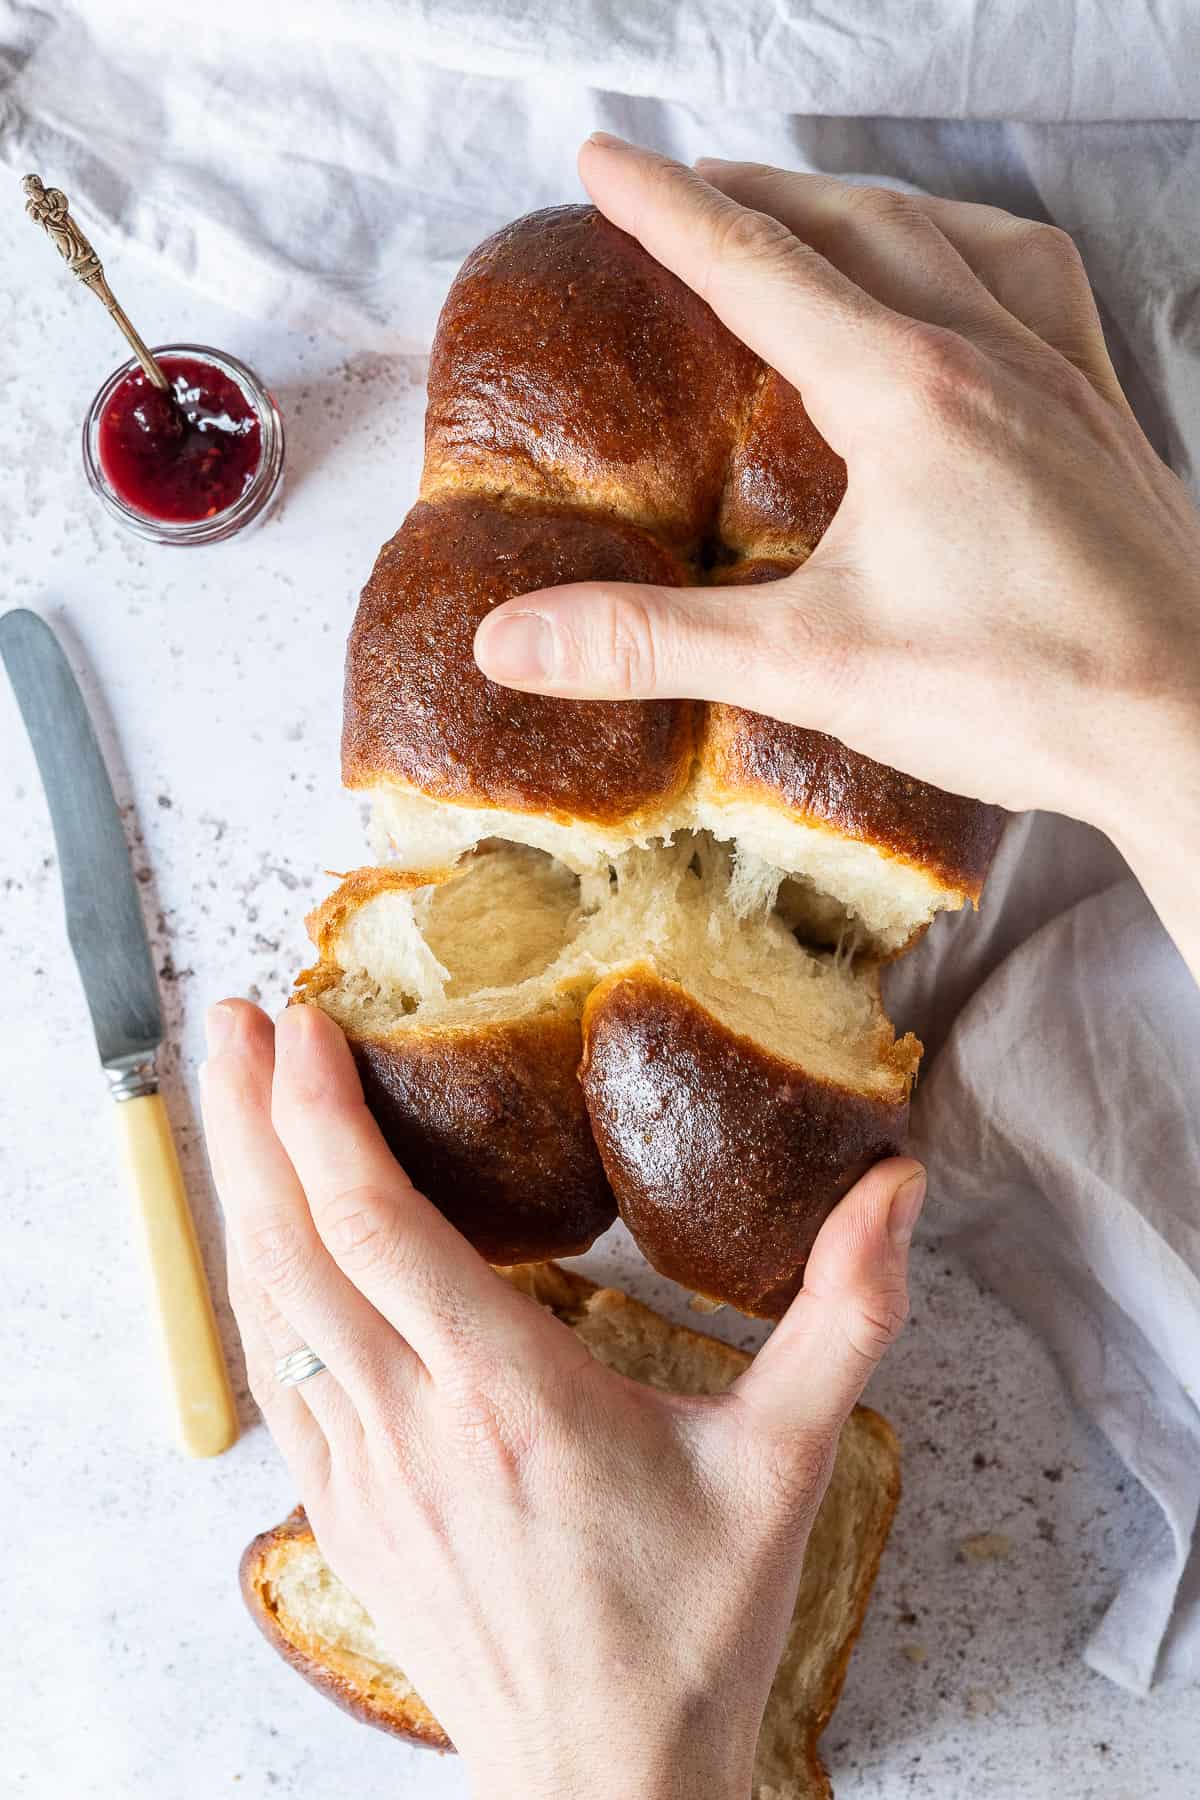
Both are addictively good so either option is great! (The loaf in the pictures is the olive oil version but they look very similar).
How To Make Vegan Brioche:
(For ingredients and full instructions see the recipe card below)
You need to start the day before you want to bake the brioche as it needs an overnight rise in the fridge.
Place bread flour and plain flour in the bowl of a stand mixer fitted with a dough hook. Add instant yeast to one side of the bowl and the salt and sugar to the other (yeast doesn't like to come into direct contact with salt) and mix to combine.
Add aquafaba, non-dairy milk and vanilla extract and stir to form a rough dough then place the mixer on a medium speed and knead the dough until it is smooth and elastic. You can also knead the dough by hand on an unfloured surface instead.

Add the softened vegan butter or olive oil and mix until it is fully combined and the dough is smooth again, it will be quite soft and sticky.
I actually find it easier to mix the fat in by hand rather than with the mixer (in a bowl, not on a surface if you are using olive oil). It will take a while to fully mix it all in, there will be a bit of an 'oh my god' moment and it will look like it is not going to work but trust me, keep going and it will get there!
Once the fat is fully mixed in, keep kneading until the dough pulls away from the sides of the bowl cleanly, it will still be quite soft and sticky however.

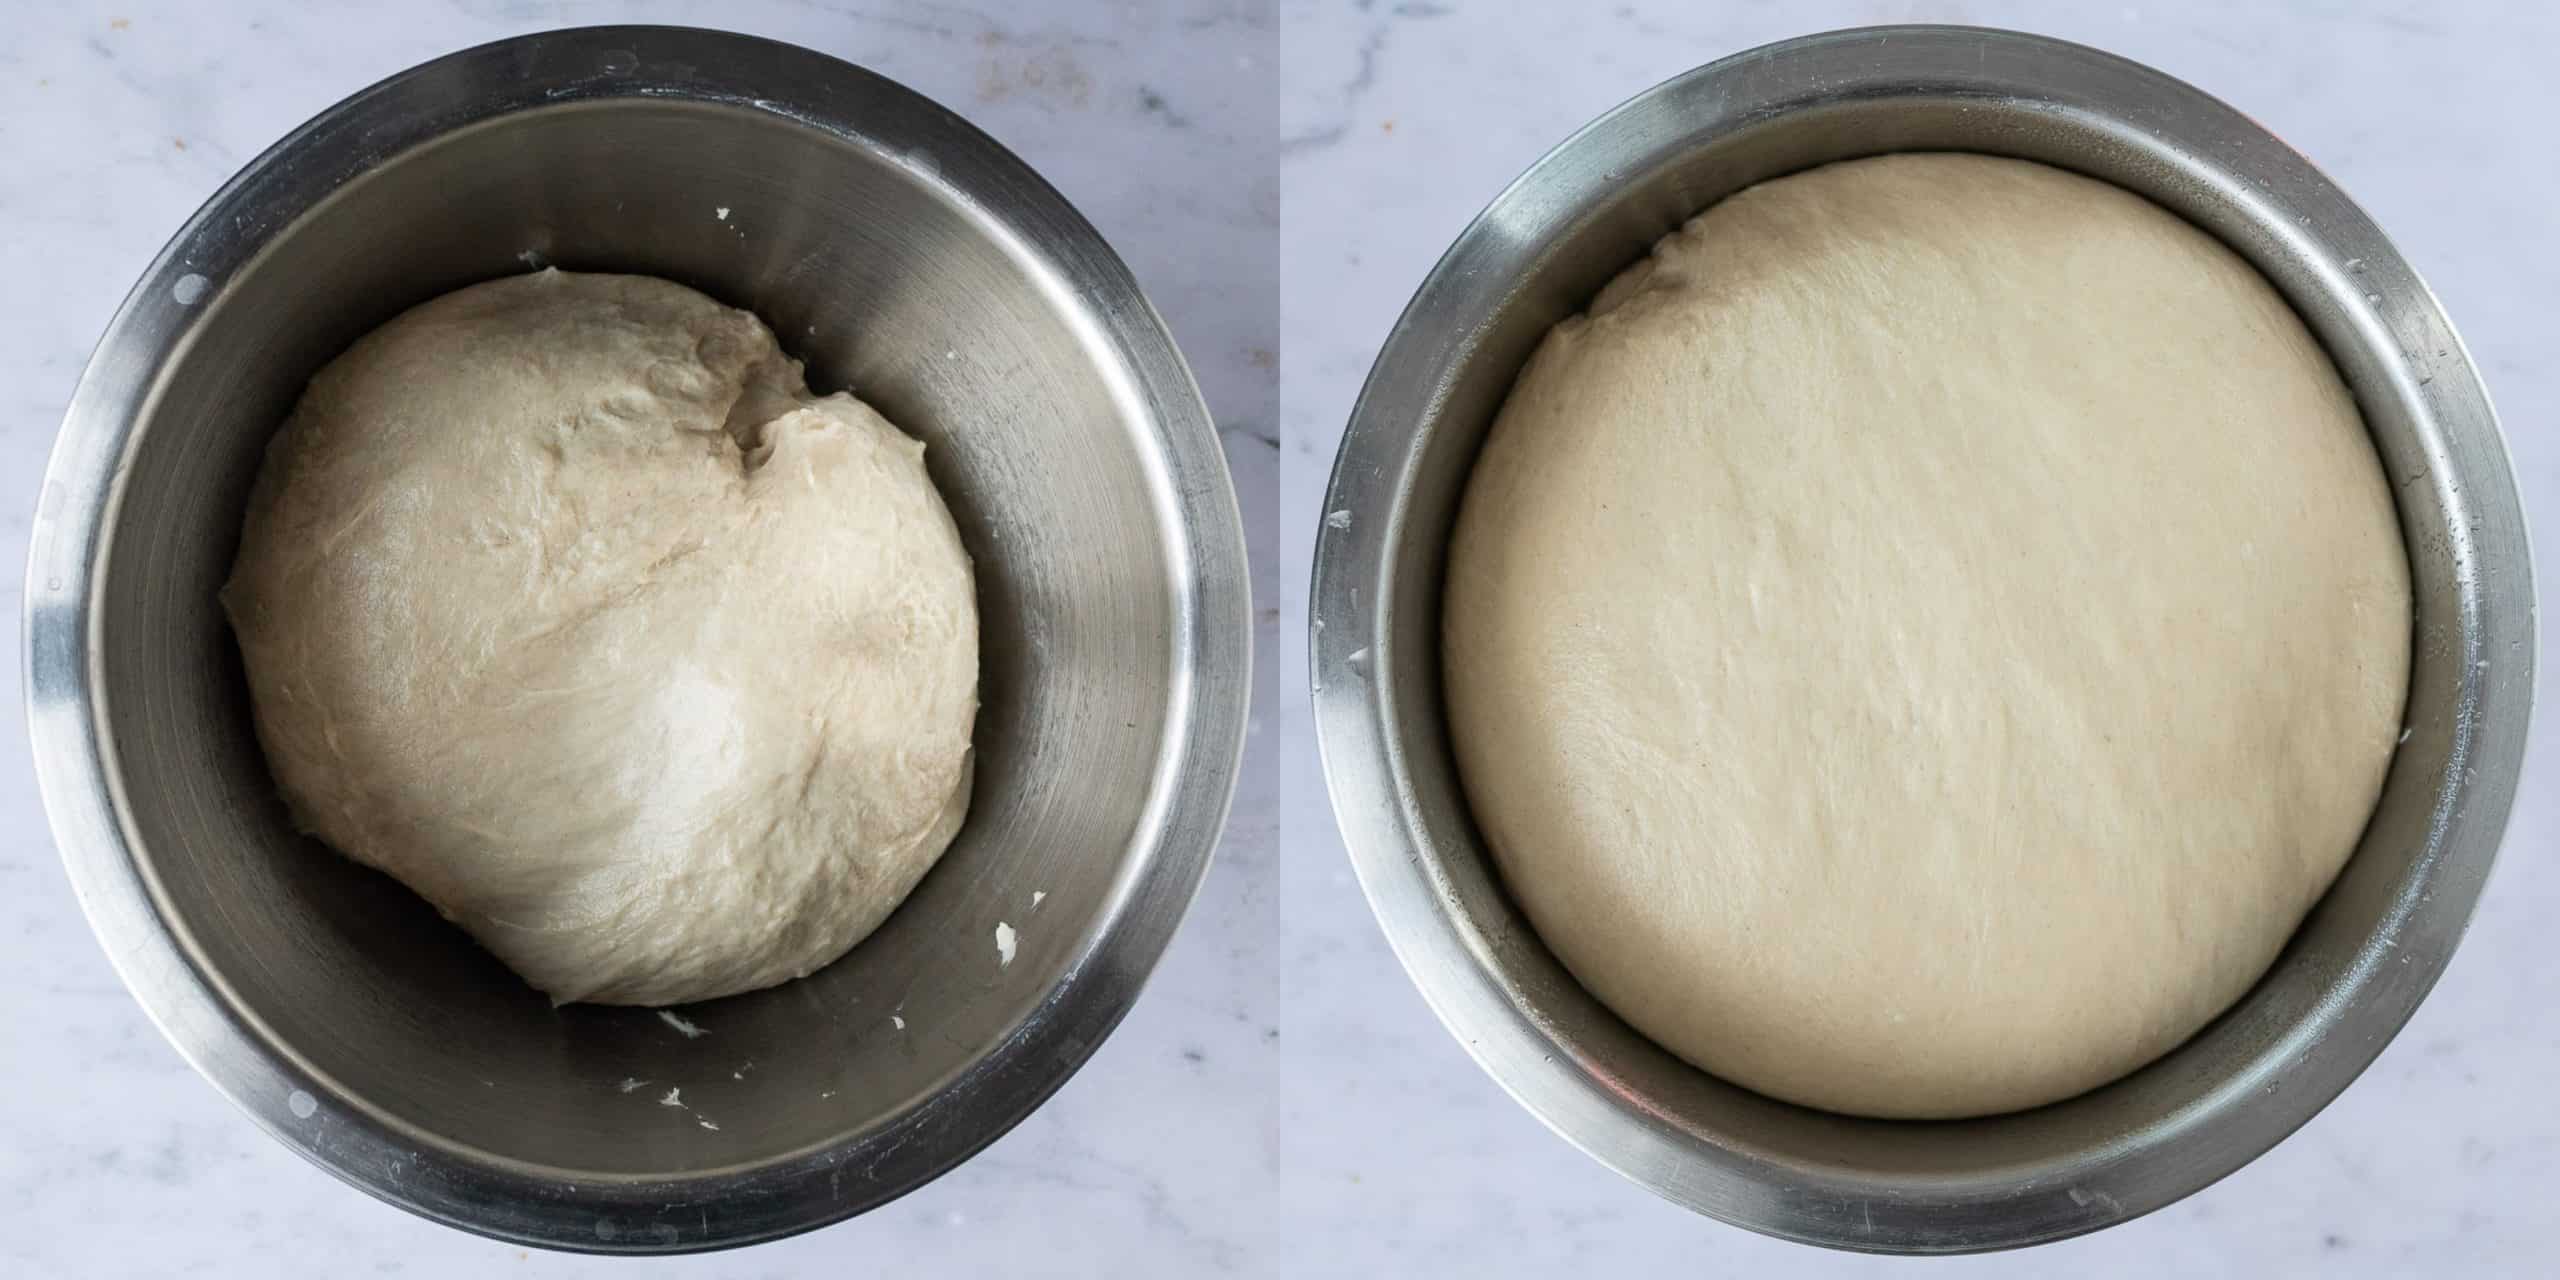
Place the dough in a bowl, cover it and place it in the fridge to rise overnight.
The next day the dough should have at least doubled in size.
How To Shape The Loaf:
Line a 2 - 2 ½ lb loaf tin with baking parchment. My loaf tin measures 11.5 x 21.5 cm / 4.5 x 8.5 in. You ideally don't want it to be any smaller than this; a 13 x 23cm / 9 x 5 in one would also be fine.
Punch down the dough then you have a couple of options for shaping it. You can simply shape it into a loaf and place it in the lined tin; or to make a loaf as pictured that you can pull apart, divide the dough into either 6 or 8 even pieces (I prefer 8).
Shape each piece into a smooth ball. To do this, pull the edges of the piece of dough in towards the middle and pinch them together. flip the ball over onto a lightly floured surface and cup your hand around it.
Gently roll the ball on the work surface to form a smooth ball. Repeat with the rest of the dough portions.

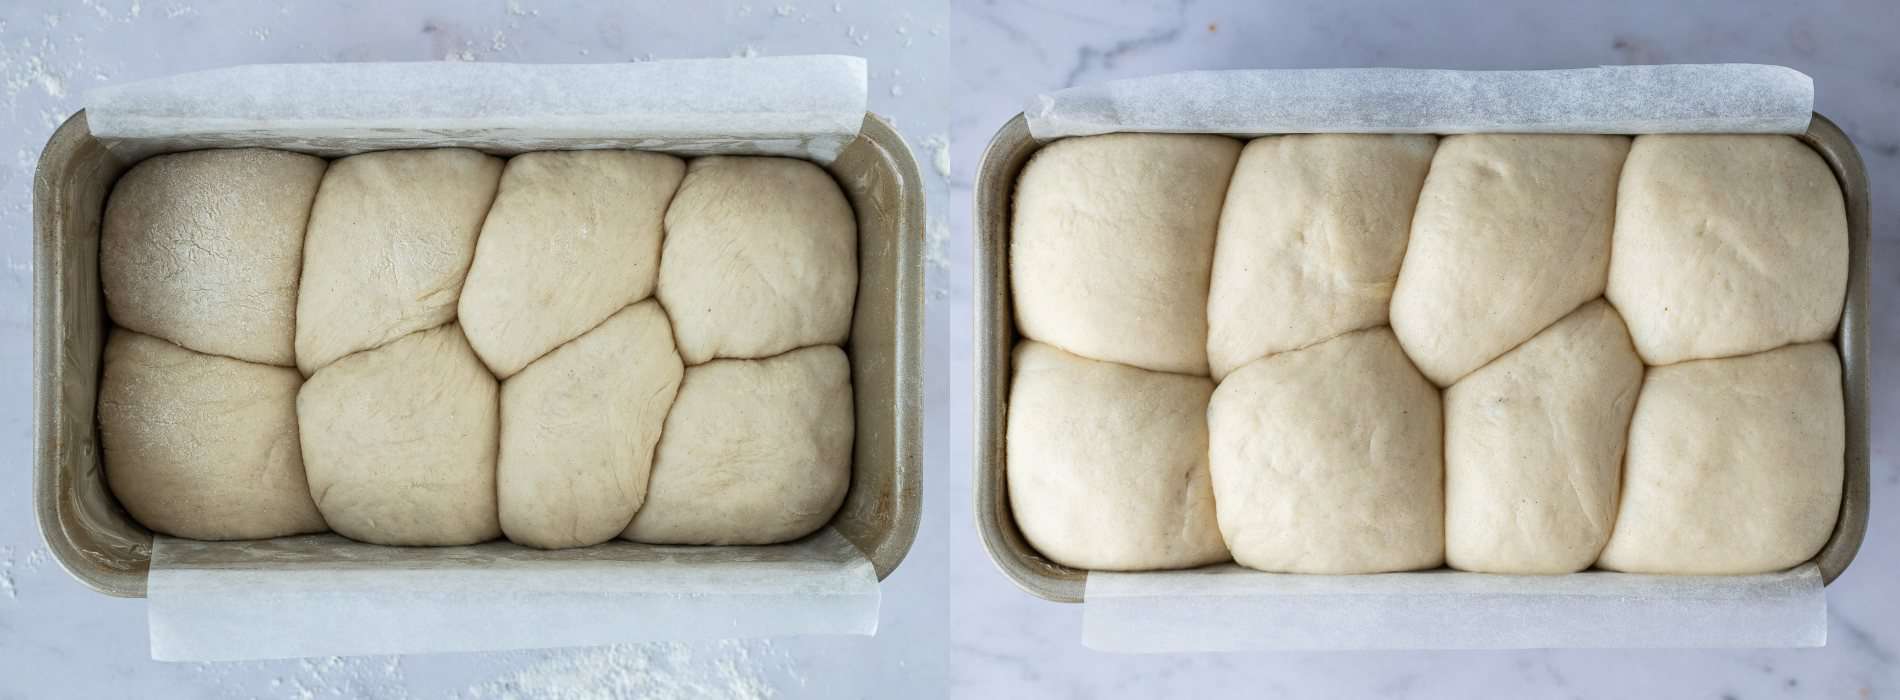
Arrange the balls in two rows in your loaf tin. You will probably have to squish them together to fit them in.
Loosely cover the tin and set aside to rise until doubled in size.
Because the dough is so heavily enriched this can take some time, about 1 - 2.5 hours depending on how warm it is. On a warm day one of my loaves took 1 hour, and on a chillier day it took 2 hours 10 minutes, so just keep an eye on it.
It is ready when it is puffy and if you gently poke it with a finger it springs back slowly.
If it springs back quickly then it needs longer; and if it deflates then it is over-proved and you will need to punch it down, reshape it and let it rise again. (You can only do this once. Over-prove it twice and you will have to throw the dough away and start again from scratch.).
When the loaf is nearly ready, preheat the oven to 180°C/350°F/gas mark 4 and prepare the glaze. Simply whisk together non-dairy milk, maple syrup and oil in a small bowl.

When the loaf is ready, gently brush it with some of the glaze, try not to let it drip down the sides as that can cause it to stick to the tin and hinder the oven spring.
Bake the vegan brioche for 20 minutes then brush it with more of the glaze, this gives it a lovely shiny, soft crust.
Turn the oven down to 160°C/320°F/gas mark 3 and bake for a further 25-30 minutes until the internal temperature reaches 94°C/201°F on a probe thermometer.
If you don't have a thermometer then a skewer inserted into the centre should come out clean. If it starts to darken too much on top before it is ready then you can loosely cover it with tin foil.
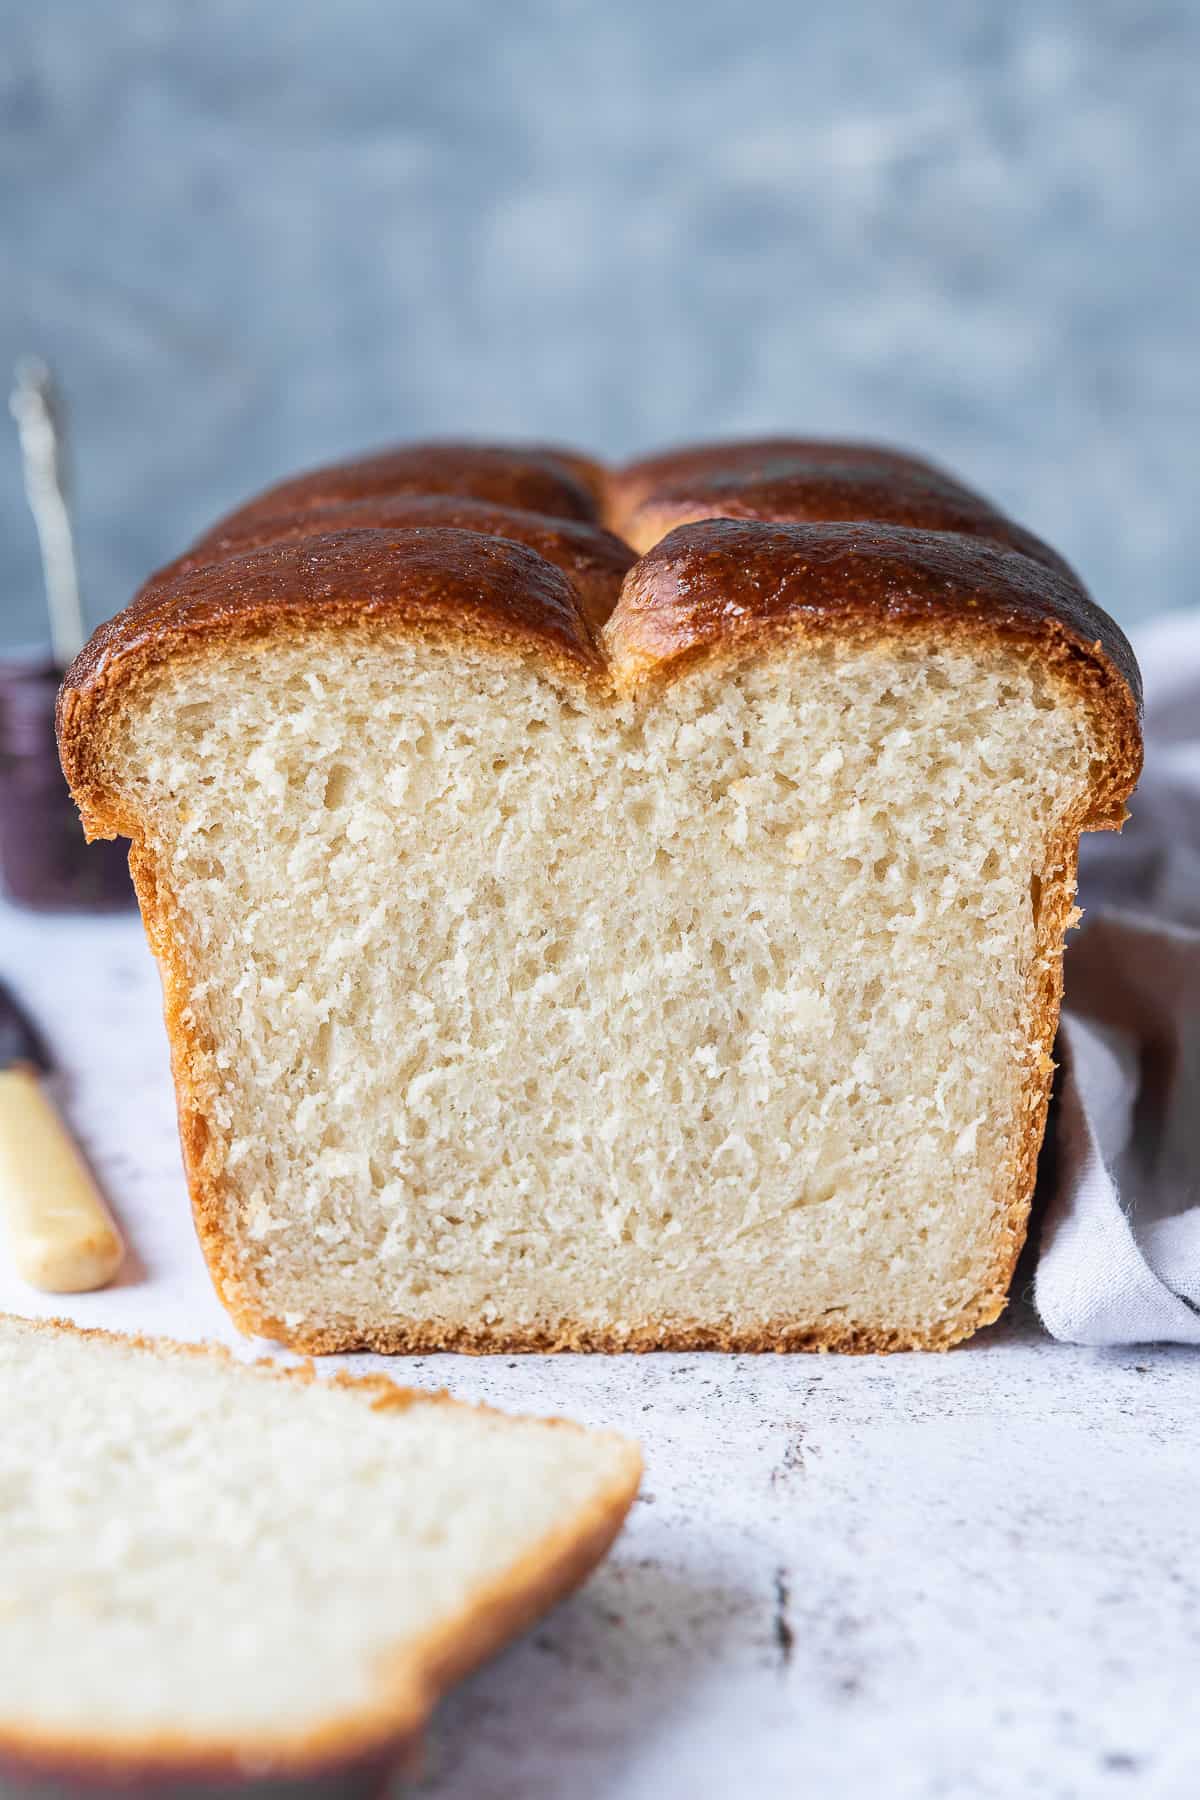
Once the loaf is ready, let it cool in the tin for 15 minutes then turn it out onto a wire rack and let it cool completely before slicing.
Don't leave it to cool in the tin for too long as the steam will make it soggy. Once cool store in an airtight container.

Can I Make Brioche Bread Rolls?:
I haven't tested this recipe as bread rolls but I see no reason why it wouldn't work. However, as it is a very soft dough, particularly the olive oil version, I don't think that it will work as free form rolls as the dough is too slack to hold it's shape.
Instead, I recommend baking pull-apart rolls in a 20cm/8 inch - 23cm/9 inch square cake tin (lined with baking parchment). This will ensure that the buns hold their shape and aren't too flat.
I would make 9 rolls and they may cook a little quicker than the loaf so keep an eye on them.
How Long Does Vegan Brioche Keep?:
As with most homemade bread this vegan brioche is best eaten on the day it is baked but it will keep for up to three days in an airtight container at room temperature.
After the first couple of days I think that it is best toasted (it makes amazing toast!) or at least warmed through gently to refresh it before serving.
You could also use it to make vegan French toast or bread pudding!
Can I Freeze It?:
Yes. I like to freeze this vegan brioche in individual slices then pop them in the toaster or under the grill straight from frozen as needed.

Top Tips For The Best Vegan Brioche:
For the best results make sure that you follow the recipe closely. As always, I highly recommend using the gram measurements (with a digital scale), rather than the cup conversions. Cup measurements are simply not accurate enough for baking and I cannot guarantee the best results if you use them.
Do not reduce the amount of fat. Brioche is supposed to be a very high fat bread. If you want to bake a loaf of bread that is lower in fat but still wonderfully soft and fluffy then you should make my vegan Hokkaido milk bread instead.
If you are making the butter (margarine) version then you MUST use the kind that comes in a solid stick, NOT the spreadable kind in a tub. It has too high a water content. I use Naturli Vegan Block or Stork Block. If you cannot get hold of block margarine then you should make the olive oil version instead.
This is an enriched bread dough (meaning that it contains milk, fat and sugar rather than just water). This makes it soft and delicious, but also means that it takes longer to rise. The time it takes will vary depending on how warm your kitchen is.
Giving the dough it's first rise overnight in the fridge improves the flavour and firms the soft dough up, making it easier to shape.
This vegan brioche is meant to be sweet, but if you want it a little less sweet then you can halve the amount of sugar. DO NOT omit it completely as some sugar is needed for the texture and to help with the rise.
To get aquafaba, just use the liquid drained from a can of chickpeas. The liquid from one tin should be sufficient for this recipe - 120ml/1/2 cup. If there is slightly less that that in the tin then you can just top it up to the 120ml/1/2 cup line with milk or water.
I don't know what you could use instead of the aquafaba. I haven't tested anything else and can't think of anything that would work in the same way. Sorry.
Unsweetened soy milk is the best kind of milk to use here. You can use another non-dairy milk but soy really is best as it is the most similar to dairy milk. It has a high protein and fat content and soy also contains lecithin which helps create a better crumb structure.
I use part bread flour and part plain white flour for the best texture but you can use all bread flour or all plain if that is all you have.
The best way to tell if a loaf of bread is cooked in the middle is to use a probe thermometer. It is impossible to give a one-size-fits-all baking time as ovens vary so much.
More Vegan Bread Recipes:
Vegan wholemeal maple cinnamon rolls
If you tried this recipe why not tag @domestic_gothess on Instagram and hashtag it #domesticgothess
*All images and content on Domestic Gothess are copyright protected. If you want to share this recipe then please do so by using the share buttons provided. Do not screenshot or post the recipe or content in full.*
Vegan Brioche
Ingredients
Dough:
- 300 g (2 ½ cups) white bread flour
- 200 g (1 ⅔ cups) plain (all-purpose) flour
- 10 g (3 tsp) fast action/instant yeast
- 50 g (¼ cup) caster/granulated sugar
- 1 teaspoon salt
- 120 ml (½ cup) aquafaba (from 1 tin of chickpeas)*
- 200 ml (½ + ⅓ cup) unsweetened non-dairy milk (soy is best)**
- 1 tablespoon vanilla extract
- 200 g (7 oz / ½ + ⅓ cup) vegan block butter (NOT the spreadable kind. I use Naturli Vegan Block) OR 160ml (⅔ cup) mild olive oil (softened if using butter)
Glaze:
- 1 tablespoon non-dairy milk
- 1 tablespoon maple syrup
- ½ teaspoon sunflower/vegetable oil
Instructions
- Start the day before you want to bake the bread. Place the bread flour and plain flour in the bowl of a stand mixer fitted with a dough hook. Add the yeast to one side of the bowl and the salt and sugar to the other and mix to combine.
- Add the aquafaba, milk and vanilla extract and stir to form a rough dough then place the mixer on a medium speed and knead the dough until it is smooth and elastic. You can also knead the dough by hand on an unfloured surface instead.
- Add the softened butter or olive oil and mix until it is fully combined and the dough is smooth again, it will be quite soft and sticky. I actually find it easier to mix the fat in by hand rather than with the mixer (in a bowl, not on a surface if you are using olive oil). It will take a while to fully mix it all in and it will look like it is not going to work but trust me, keep going!
- Once the fat is fully mixed in, keep kneading until the dough pulls away from the sides of the bowl cleanly, it will still be quite soft and sticky however. Place the dough in a bowl, cover it and place it in the fridge to rise overnight.
- The next day the dough should have at least doubled in size. Line a 2 - 2 ½ lb loaf tin with baking parchment. My loaf tin measures 11.5 x 21.5 cm / 4.5 x 8.5 in. You don't want it to be any smaller than this; a 13 x 23cm / 9 x 5 in one would also be fine.
- Punch down the dough then you have a couple of options for shaping it. You can simply shape it into a loaf and place it in the lined tin; or to make a loaf as pictured that you can pull apart, divide the dough into either 6 or 8 even pieces (I prefer 8).
- Shape each piece into a smooth ball. To do this, pull the edges of the piece of dough in towards the middle and pinch them together. flip the ball over onto a lightly floured surface and cup your hand around it. Gently roll the ball on the work surface to form a smooth ball. Repeat with the rest of the dough portions.
- Arrange the balls in two rows in your loaf tin. You will probably have to squish them together to fit them in.
- Loosely cover the tin and set aside to rise until doubled in size. Because the dough is so heavily enriched this can take some time, about 1 - 2.5 hours depending on how warm it is. It is ready when it is puffy and if you gently poke it with a finger it springs back slowly. If it springs back quickly then it needs longer; and if it deflates then it is over-proved and you will need to punch it down, reshape it and let it rise again.
- When the loaf is nearly ready, preheat the oven to 180°C/350°F/gas mark 4 and prepare the glaze. Simply whisk together the milk, maple syrup and oil in a small bowl.
- When the loaf is ready, gently brush it with some of the glaze, try not to let it drip down the sides as that can cause it to stick to the tin and hinder the oven spring.
- Bake the brioche for 20 minutes then brush it with more of the glaze, turn the oven down to 160°C/320°F/gas mark 3 and bake for a further 25-30 minutes until the internal temperature reaches 94°C/201°F on a probe thermometer. If you don't have a thermometer then a skewer inserted into the centre should come out clean. If it starts to darken too much on top before it is ready then you can loosely cover it with tin foil.
- Once the loaf is ready, let it cool in the tin for 15 minutes then turn it out onto a wire rack and let it cool completely before slicing. Once cool store in an airtight container.
Notes
- For the best results make sure that you follow the recipe closely. As always, I highly recommend using the gram measurements (with a digital scale), rather than the cup conversions. Cup measurements are simply not accurate enough for baking and I cannot guarantee the best results if you use them.
- Do not reduce the amount of fat. Brioche is supposed to be a very high fat bread. If you want to bake a loaf of bread that is lower in fat but still wonderfully soft and fluffy then you should make my vegan Hokkaido milk bread instead.
- If you are making the butter (margarine) version then you MUST use the kind that comes in a solid stick, NOT the spreadable kind in a tub. It has too high a water content. I use Naturli Vegan Block or Stork Block. If you cannot get hold of block margarine then you should make the olive oil version instead.
- This is an enriched bread dough (meaning that it contains milk, fat and sugar rather than just water). This makes it soft and delicious, but also means that it takes longer to rise. The time it takes will vary depending on how warm your kitchen is.
- Giving the dough it’s first rise overnight in the fridge improves the flavour and firms the soft dough up, making it easier to shape.
- This bread is meant to be sweet, but if you want it a little less sweet then you can halve the amount of sugar. DO NOT omit it completely as some sugar is needed for the texture and to help with the rise.
- *To get aquafaba, just use the liquid drained from a can of chickpeas. The liquid from one tin should be sufficient for this recipe – 120ml/1/2 cup. If there is slightly less that that in the tin then you can just top it up to the 120ml/1/2 cup line with milk or water.
- I don't know what you could use instead of the aquafaba. I haven't tested anything else and can't think of anything that would work in the same way. Sorry.
- **Unsweetened soy milk is the best kind of milk to use here. You can use another non-dairy milk but soy really is best as it is the most similar to dairy milk. It has a high protein and fat content and soy also contains lecithin which helps create a better crumb structure.
- I use part bread flour and part plain white flour for the best texture but you can use all bread flour or all plain if that is all you have.
- The best way to tell if a loaf of bread is cooked in the middle is to use a probe thermometer. It is impossible to give a one-size-fits-all baking time as ovens vary so much.

Emma
Your photos are amazing and as soon as i can get all the ingredients I will be trying this recipe - so inspiring! I'm really glad to have found your blog Hannah - thank you and take good care, E 🙂
hannahhossack
Thank you so much! 🙂
Liz
OMG!!!!! This recipe works wonders!!!! I finished it today and ooohhh jesus!!! I tried one chunk after I put the bread to cool on the rack and now we only have 1/3 of it left... SO GOOD WITH STRAWBERRY JAM! I wish I could attach pictures. Seriously, it’s delicious!! During the whole preparation I kept thinking I’ve messed up but the result says otherwise. BTW I made 2 loaves with that batch in a 12x22cm loaf tin. I love it so much I’ll make more as a gift for my mother-in-law and my sister on mother’s day 🙂 Thank you!!!!
Laura
Hey there, thank you this recipe looks amazing! I was wondering if I could divide the dough into 12 balls and bake in smaller tins to have mini loaves to share around or if it’s best to stick to one big one? Thanks in advance for your time!
hannahhossack
Hi Laura, yes that would be fine. Bear in mind that smaller loaves will bake more quickly however and without testing I'm not sure how long exactly they would take, so you will have to just keep an eye on them.
Monica
Do you think gluten free all purpose flower and oat milk would work for a soy free gluten free version?
Hannah
Hi Monica, oat milk will work but I'm afraid that this recipe cannot be made gluten free. Gluten free bread is difficult to do well and you can't just swap bread flour for gluten-free flour, you need to find a recipe that is designed to be gluten free. It is not my area of expertise I'm afraid.
Laura
Thank you so much for the reply! I will let you know how long they end up taking!
Lucas
Could I use canola oil instead of olive oil?
hannahhossack
Hi Lucas, I haven't tested it with anything else but I don't see why that wouldn't work.
Olivia
Can't wait to try this!!!! I would love to include chocolate chips in this... at which stage would I add these?
hannahhossack
Hi Olivia, I would add them after the dough has had it's first rise - knead them in when you punch the dough down. I hope you enjoy it!
Clara
This recipe is amazing! I've made it twice so far and it turned out perfectly both times. The first time I had to use 50% fine spelt flour which made the brioche a bit more rustic. It still tasted delicious. The second time I used 100% fine wheat flour and now it is perfect. The brioche is fluffy, light and the taste is fantastic. I had 3 French co-workers try it and they all approved 😀 Thank you so much for this recipe. It's such a wonderful weekend treat 🙂
Marie-Josee Dumont
Hello! This brioche is soooo good! Thank you for the recipe I made 2 loafs and both of them came out pretty well after they were cooked. But a few minutes after, they seemed to deflate a little bit Do you have an explanation for this? I followed the recipe but used all purpose flour only and vegan margarine sticks. TIA !
hannahhossack
Hi Marie-Josee, glad you enjoyed it! A little bit of deflation is normal, if they deflated a lot it's possible that they were slightly over-proved.
Sonam
Hey
I used normal butter ( not vegan one)
I followed the fridge proofing
And next day it was a hard block dough half risen
I forgot it has lot of butter it will surely solidify
Does it work the same with vegan butter
Was ur dough hard coz of the cold proofing
hannahhossack
Hi Sonam, yes, the dough does become firm in the fridge - this actually makes it easier to shape; but if it hasn't risen enough (your fridge may be a bit too cold!) you can let it rise for a bit longer at room temperature before shaping it. Non-vegan brioche is also made with a cold prove in the fridge. Because the dough contains so much butter it is essential to keep it cold so that the fat doesn't weep out.
Jessica
Thank you! I just started baking vegan for my girlfriend and your recipes are well thought out and easy to follow. I've looked up other vegan recipes and they just go wrong all the time. It clear to see you are experiment and do not post a recipe until you are confident that it's going to work. This bread recipe was great! Thank you for time and effort into this website!
Rachel Adams
Could you use the same Ingredients in a bread machine? I have a brioche programme on mine and wondered if it would work with your recipe or just substituting the egg for aquafaba. Obviously that would omit the overmight fridge part, so I wondered how crucial that is.
hannahhossack
Hi Rachel, unfortunately I have never used a bread machine so I can't really advise you. The overnight rise helps to firm up the dough to make it easier to shape; it is quite a soft dough otherwise.
Maria Pia
Do you think I can use gluten free flour?
hannahhossack
Hi Maria, no, I'm afraid that I don't think that it would work well gluten free.
Mika
Hi there!
Two questions 🙂 I'm new to vegan baking:
1) Can you replace instant yeast with active yeast (activated with water)? If so, is the amount the same?
2) For those that don't have mixers, is hand kneading OK?
Thank you!
hannahhossack
Hi Mika, yes you can swap the instant yeast for active dry yeast, I would activate it in the (lukewarm) milk called for in the recipe though to avoid adding excess liquid. I would maybe use a teeny bit more active dry, about 12 grams rather than 10.
It's a messy job kneading by hand but yes you absolutely can.
mine
Hello,
I'd like to try this recipe with caramelized onions so my questions is:
Should I add the onions with wet ingriedients or should I add it after it became a dough?
Many thanks,
Mine
hannahhossack
Hi, I haven't tried that before but I would add the onions after you have formed a dough.
Jennifer
For the aquafaba, do I just dump the juice in the bread mix or do I have to whip it first and then add it?
hannahhossack
Hi Jennifer, there's no need to whip it first, just add it straight from the tin.
JY
Hello!
Could I use coconut oil or avocado oil instead of olive oil?
Thank you.
Hannah
Hi, I would try avocado oil rather than coconut, coconut oil may make the brioche too dense.
JY
Should I use unsalted aquafaba or salted aquafaba?
Thank you!
Hannah
Hi, unsalted would be best but it doesn't really matter which.
Isha
For this recipe, do I need to reduce the aquafaba prior to using it? In my experience, reduced and cooled aquafaba works best but I would know how it’d work out in this recipe.
Hannah
Hi Isha, I just use it straight from the tin. You aren't whipping it so no need to reduce it.
Suzanne Gannon
Thank you so much for this recipe. I used it for the brioche in Roy Levy and Gail Mejia's "Brioche Plum Ginger Bake" recipe from "Gail’s Artisan Bakery Cookbook". It was fantastic. Rich & fluffy brioche, with a plum (and in my case, mixed with rhubarb) sauce.
H P Lincraft
this is a really great recipe, which is easy to follow and it is so delicious. i was making guaguas de pan so i added more sugar and made some other minor substitutions but it's the best bread i've ever made (vegan or otherwise) and i'm looking forward to trying some of the other bread recipes on this blog. i also braided half of it into a loaf and it was so light, soft and flavourful. everybody loved it.
Maya
Testing this recipe with apple sauce in place of the aquafaba, and it seems to have worked out great! Just to let you know:)
Briana
I don't care the explanation or history, I just want the recipe girl
Hannah
Then I have a handy jump to recipe button. Other readers find the extra details helpful. This is also my full time job and if I only posted the recipes I wouldn't earn enough from ad revenue to keep the website going; that "explanation and history" is what helps to provide you with a FREE recipe.